background image

Contents

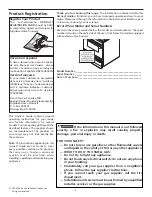
Product Registration ......................................................... 2

Versión en español ........................................................... 2

Version française .............................................................. 2

IMPORTANT SAFETY INSTRUCTIONS...............................3-4

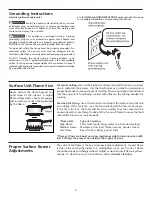
Grounding Instructions .................................................... 5

Surface Unit Flame Size .................................................... 5

Proper Surface Burner Adjustments.................................. 5

Setting Surface Controls ................................................... 6

Setting Warmer Drawer Controls (if equipped) ................ 7

Before Setting Oven Controls ........................................... 8

Control Pad Functions ...................................................... 9

Setting Clock and Minute Timer ..................................... 10

Setting Oven Controls ...............................................11-13

Self-Cleaning .............................................................14-15

General Cleaning .......................................................16-19

Changing Cooktop and/or Oven Lights .......................... 19

Installing Center Grates .................................................. 20

Customizing Your Oven Performance ............................. 21

Avoid Service Checklist ..............................................22-23

Warranty......................................................................... 24

OWNER’S GUIDE

Sealed Surface Burners

Electronic Oven Control - ES III

Self Cleaning Oven Feature

READ AND SAVE THESE INSTRUCTIONS

GAS RANGE

This Owner's Guide contains general operating instructions for your range and feature

information for several models. Your range 

will not

 have all the described features.

316135914 (0101)

Summary of Contents for FGFS68CJTA

Page 1: ...Timer 10 Setting Oven Controls 11 13 Self Cleaning 14 15 General Cleaning 16 19 Changing Cooktop and or Oven Lights 19 Installing Center Grates 20 Customizing Your Oven Performance 21 Avoid Service Checklist 22 23 Warranty 24 OWNER S GUIDE Sealed Surface Burners Electronic Oven Control ES III Self Cleaning Oven Feature READ AND SAVE THESE INSTRUCTIONS GAS RANGE This Owner s Guide contains general ...

Page 2: ...YOU SMELL GAS Do not try to light any appliance Do not touch any electrical switch do not use any phone in your building Immediately call your gas supplier from a neighbor s phone Follow the gas supplier s instructions If you cannot reach your gas supplier call the fire department Installationandservicemustbeperformedbyaqualified installer servicer or the gas supplier This Owner s Guide contains g...

Page 3: ...er be allowed to sit or stand on any part of the appliance DO NOT TOUCH SURFACE BURNERS AREAS NEAR THESE BURNERS OVEN BURNERS OR INTERIOR SURFACES OF THE OVEN Both surface and oven burners may be hot even though flames are not visible Areas near surface burners may become hot enough to cause burns During and after use do not touch or let clothing or other flammable materials touch these areas unti...

Page 4: ...bstructed The oven vent is located below the backguard Touching the surfaces in this area when the oven is operating may cause severe burns Also do not place plastic or heat sensitive items on or near the oven vent These items could melt or ignite Placement of Oven Racks Always place oven racks in desired location while oven is cool If rack must be moved while oven is hot use extreme caution Use p...

Page 5: ... chart below as a guide for determining proper flame size for various types of cooking The size and type of utensil used and the amount of food being cooked will influence the setting needed for cooking For deep fat frying use a thermometer and adjust the surface control knob accordingly If the fat is too cool the food will absorb the fat and be greasy If the fat is too hot the food will brown so ...

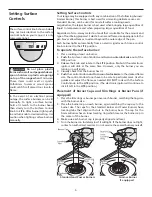
Page 6: ...ol knobs do not have to be set at a particular mark Use the guides and adjust the flame as needed DO NOT cook with the Surface Control knob in the LITE position The electronic ignitor will continue to click if left in the LITE position Placement of Burner Caps and Trim Rings or Burner Pans if equipped 1 Place the trim rings or burner pan over each burner matching the ring size with the burner size...

Page 7: ...e and are designated by HI MED and LO 1 Turn the knob to select the desired temperature setting 2 For best results preheat the drawer before adding food An empty drawer will preheat in approximately 15 minutes 3 Turn the thermostat control to OFF after use Temperature Selection Refer to the chart in the side column for recommended settings If a particular food is not listed start with the medium s...

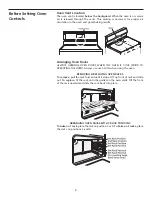
Page 8: ...ACKS WHEN THE OVEN IS COOL PRIOR TO OPERATING THE OVEN Always use oven mitts when using the oven REMOVING REPLACING OVEN RACKS To remove pull the rack forward until it stops Lift up front of rack and slide out To replace fit the rack onto the guides on the oven walls Tilt the front of the rack upward and slide the rack back into place ARRANGING OVEN RACKS WITH 5 RACK POSITIONS To bake on 1 rack pl...

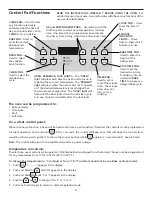
Page 9: ...cel the minute timer The minute timer does not start or stop cooking FEATURE INDICATOR LIGHTS These light to show which feature is in use CLOCK PAD Used to set the time of day The oven can be programmed to Bake normally Time bake Broil Self clean For a silent control panel When choosing a function a beep will be heard each time a pad is pushed If desired the controls can be programmed for silent o...

Page 10: ...mer count down in minutes until one minute remains Then the display will count down in seconds 4 When the set time has run out the timer will beep 3 times It will then continue to beep 3 times every 60 seconds until is pushed Note The minute timer does not start or stop cooking It serves as an extra timer in the kitchen that will beep when the set time has run out The minute timer can be used alon...

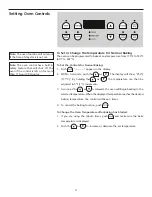
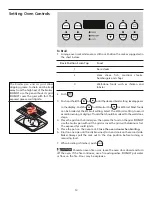
Page 11: ...the oven will begin heating to the selected temperature When the displayed temperature reaches the desired baking temperature the control will beep 3 times 4 To cancel the baking function push To Change the Oven Temperature after Baking has Started 1 If you are using the minute timer push and make sure the bake temperature is displayed 2 Push the or to increase or decrease the set temperature Note...

Page 12: ...y To Program Oven for a Delayed Start Time and to Shut Off Automatically 1 Be sure that the clock shows the correct time of day 2 Place the food in the oven 3 Push 4 Within 5 seconds push the or The display will show 350 F 177 C By holding the or the temperature can then be adjusted in 5 F 1 C increments 5 Push 0 00 will flash in the display 6 Push the or until the desired amount of baking time ap...

Page 13: ...ler pan then place the food on the grid DO NOT use the broiler pan without the grid or cover the grid with aluminum foil The exposed fat could ignite 5 Place the pan on the oven rack Close the oven door when broiling 6 Broil on one side until food is browned turn and cook on the second side Note Always pull the rack out to the stop position before turning or removing food 7 When broiling is finish...

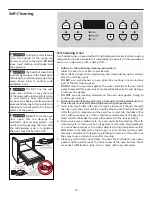
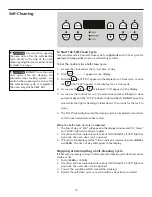
Page 14: ... racks glide easier into the rack position 4 Remove any excess spillovers in the oven cavity before starting the self cleaning cycle To clean use hot soapy water and a cloth Large spillovers can cause heavy smoke or fire when subjected to high temperatures DO NOT allow food spills with a high sugar or acid content such as milk tomatoes sauerkraut fruit juices or pie filling to remain on the surfac...

Page 15: ...ime of day or End will appear in the display window and the Clean and LOCK light will continue to glow 2 Once the oven has cooled down for about 1 HOUR and the LOCK light has gone out the oven door can be opened 3 If End is in the display and the Clean indicator remains on press CANCEL or CLEAR The time of day will appear in the display Stopping or Interrupting a Self Cleaning Cycle If it becomes ...

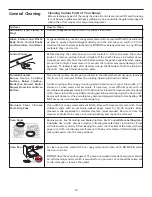
Page 16: ...cessary cover difficult spots with an ammonia soaked paper towel for 30 to 40 minutes Rinse with clean water and a damp cloth then scrub with a soap filled scouring pad Rinse and wipe dry with a clean cloth Remove all cleaners or the porcelain may become damaged during future heating DO NOT use spray oven cleaners on the range top Clean with hot soapy water and a dishcloth Rinse with clean water a...

Page 17: ...owing combinations burner cap and trim ring burner cap and burner pan or burner cap trim ring and burner pan Remove in the following order 1st burner cap 2nd trim ring and 3rd burner pan Do not operate the burners without the burner cap assembly in place To Clean the Burner Cap Burner Pan some models and Trim Ring some models Use a soap filled scouring pad or a mild abrasive cleanser to clean burn...

Page 18: ...steps The door is heavy For safe temporary storage lay the door flat with the inside of the door facing down To Remove and Replace Warmer Drawer if equipped To Remove Warmer Drawer 1 Turn power off before removing the warmer drawer 2 Open the drawer to the fully opened position 3 Locate glide lever on each side of drawer pull up on the left glide lever and push down on the right glide lever see fi...

Page 19: ...To Change the Cooktop Light some models 1 Turn power off at the main source or unplug the range 2 Remove Phillips Head screws 2 that secure the light cover and then lift the light cover off 3 Remove bulb by rolling back and up Install the new bulb by sliding down and rolling forward into place 4 Re install light cover and secure with Phillips Head screws 2 To Change the Oven Light some Self Cleani...

Page 20: ...20 Installing Center Grates if equipped Place the 4 outer grates on the rangetop first then position the 2 center grates so that the interlocking tabs fit over the outer grates as shown below ...

Page 21: ...e temperature to 550 F 287 C by pushing and holding the 3 Within 2 seconds push and hold until the special 2 digit display appears Release The display now indicates the amount of degrees offset between the original factory temperature setting and the current temperature setting If the oven control has the original factory calibration the display will read 00 4 The temperature can now be adjusted u...

Page 22: ...ogged With the burner off clean ports by using a small gauge wire or needle Moisture is present after cleaning Lightly fan the flame and allow burner to operate until flame is full Dry the burners thoroughly following instructions in the General Cleaning section Dust particles in main line Allow the burner to operate a few minutes until flame turns blue In coastal areas a slightly orange flame is ...

Page 23: ...food in the oven and space pans to allow air to circulate Allow the oven to preheat to the set temperature before placing food in the oven Try adjusting the recipe s recommended temperature or baking time If you feel the oven is too hot or cool see Customizing Your Oven Performance in this Owner s Guide Controls are not set properly Follow instructions under Oven Cleaning Self cleaning cycle was i...

Page 24: ...r limitation of incidental or consequential damages so this limitation or exclusion may not apply to you 2 Service calls which do not involve malfunction or defects in workmanship or material or for appliances not in ordinary household use The consumer shall pay for such service calls 3 Damages caused by services performed by servicers other than Electrolux Home Products North America or its autho...

Reviews: