Quick Reference Guide
QRG-03
R-02
1
Tools for Splicing Operation
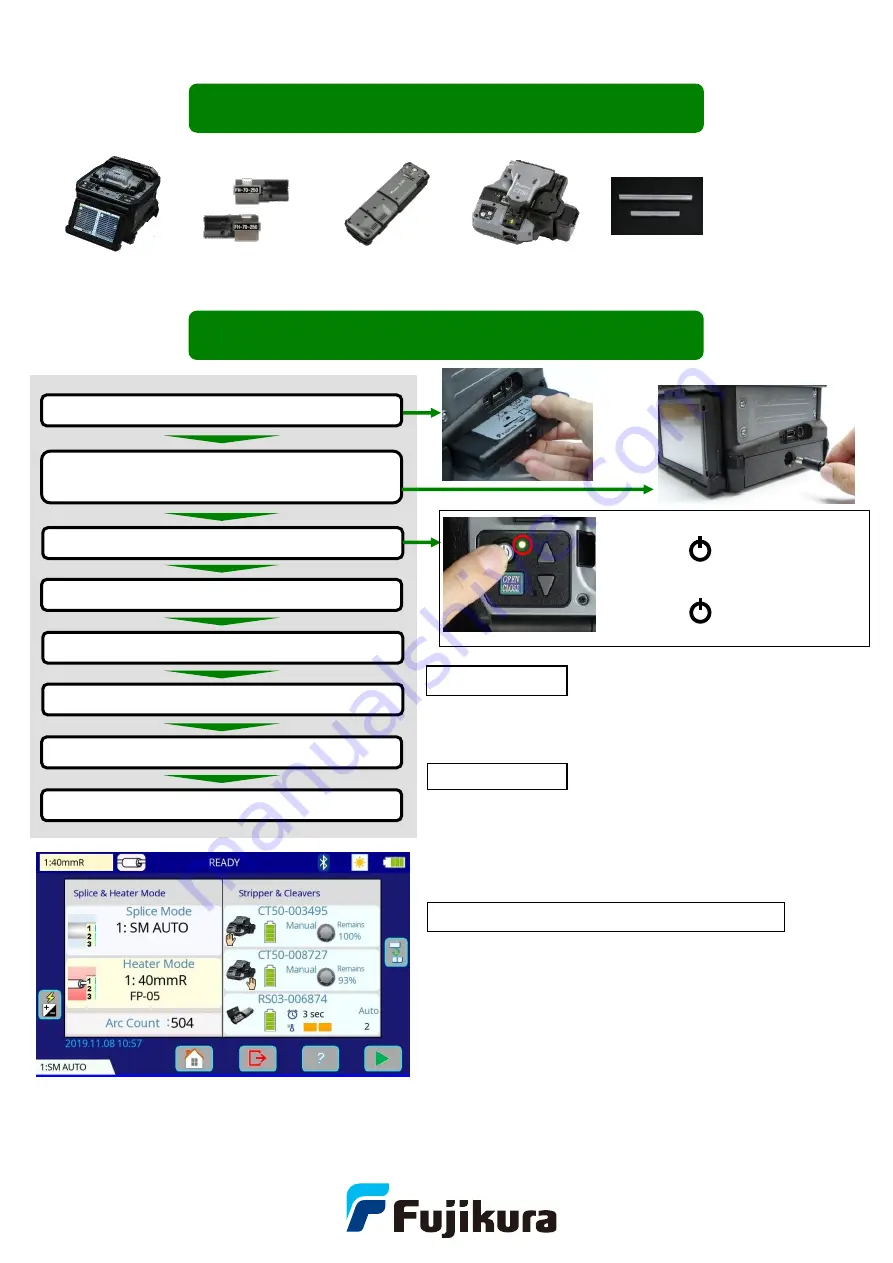
Setup & Preparation Before Splicing
Install battery pack or DC adaptor
Plug AC adaptor into the DC adaptor.
*No need when using battery pack.
Turn splicer ON.
Confirm Heater Mode
Check Wireless Communication
Clean before splicing
Setup & Preparation complete
Confirm Splice Mode
Wireless communication with accessories
Splicr can connect to the CT50 cleaver and RS02/03
ribbon stripper.
When wireless comunication is established, the splicer
monitors the conditon of these tools. If the splicer sees
that the tool has an issue, it alerts the operator with an
on-screen alarm.
After initial pairing, the devices are always paired.
Communication between splicer, cleaver and stripper
resumes automatically even after power cycling.
Refer to the
setting guide “SG-03” or instruction manual
for wireless communication function details.
LED
Turning ON
Press key until
green
LED turns on.
Turning OFF
Press key until
red
LED
turns on.
Select the adequate heater mode according to the sleeve.
The [READY] screen shows the current heater mode.
When using a protection sleeve which is not made by
Fujikura, please set parameters based on the specific
sleeve.
Heater Mode
Optical Fiber
Cleaver
Protection sleeve
Ribbon Fiber
Stripper
Mass Fusion
Splicer
Fiber Holder
Consumables for
cleaning
Cotton
Cotton swab
Alcohol
Splice Mode
Select ”
SM AUTO
” to splice standard SM fibers (ITU-T
G.652).
*Basic operations can be performed from the
touch screen after the power is turned on.


