background image

INSTALLATION INSTRUCTIONS AND USER GUIDE 
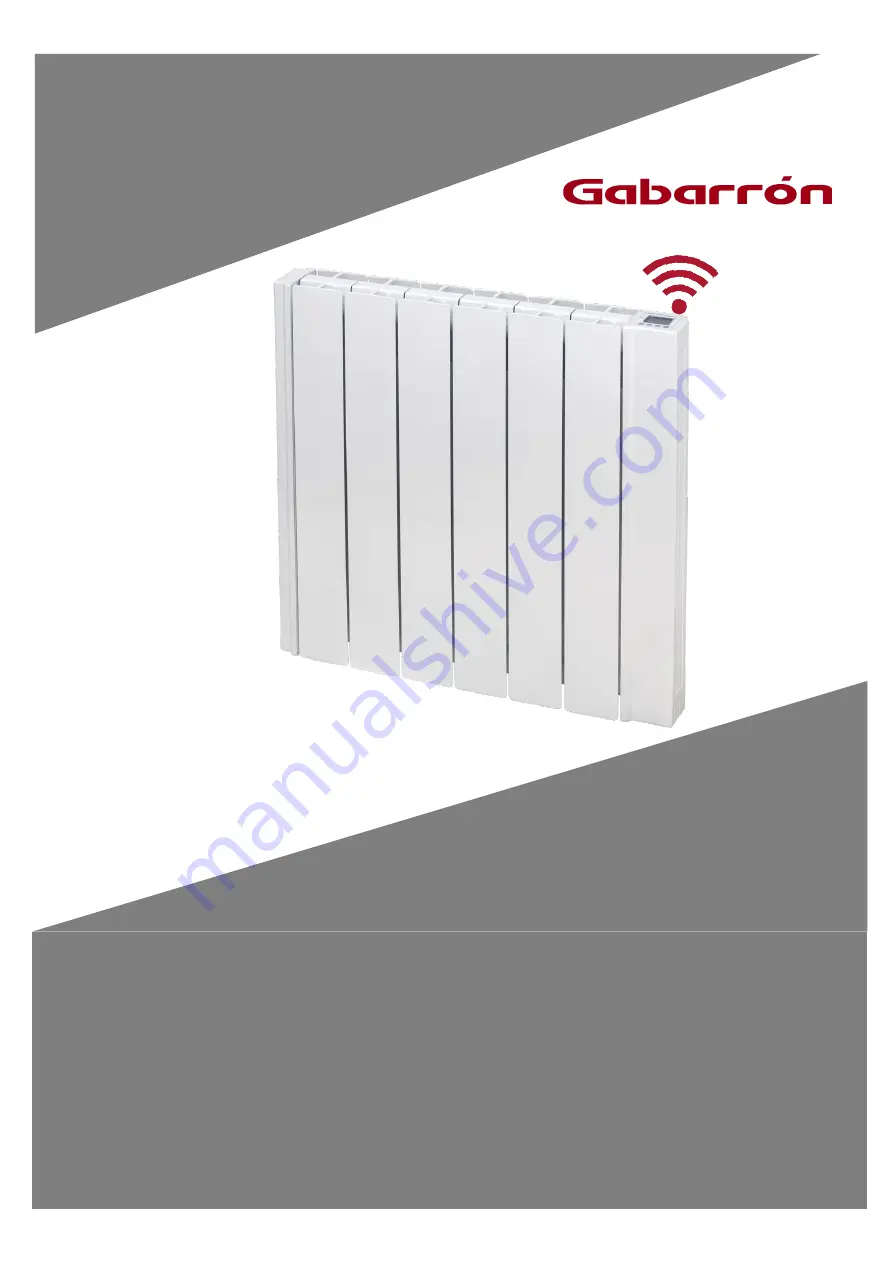
INGENIUM 

WIFI THERMAL RADIATORS 
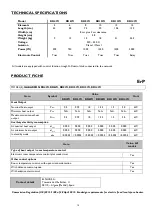
RD4W  RD10W 

RD6W  RD12W 
RD8W  RD14W


Please read these instructions before installing or using this appliance for the first time. These instructions must be followed for the safe installation of the radiator. Any 

problem, fault or damage caused by the non-

observance of these instructions will not be covered under the manufacturer’s warranty. This manual should be retained with t

he 

appliance by the user for future reference.

Summary of Contents for Elnur INGENIUM RD10W

Page 1: ...nstalling or using this appliance for the first time These instructions must be followed for the safe installation of the radiator Any problem fault or damage caused by the non observance of these instructions will not be covered under the manufacturer s warranty This manual should be retained with the appliance by the user for future reference ...

Page 2: ...ion of the appliance They also protect the heater from overheating therefore it is essential that at no time are they covered This heater should be switched off at the isolating switch before any repair work is carried out The installation must be carried out in accordance with the current electrical regulations Should the heater be moved and reinstalled it is essential that the work is carried ou...

Page 3: ... Hang the unit on the hooks of the brackets By turning the screw the metallic square will go downwards retaining the heater Repeat this on the other bracket Mark the fixing points on the wall using a pencil through the two fixing holes in the square brackets and perform corresponding bores Position and fix the brackets at the correct distance from the floor It is possible to use the radiator as me...

Page 4: ...cted to a main supply you can turn the heater ON by switching the main ON OFF switch positioned at the rear right side of the heater as shown above Config Prog Button Press the button to programme and configure the thermal radiator in AUTO Mode OK Mode Button Press the button to select operation mode Auto Manual Off and to set the value of the different parameters Main switch All models are equipp...

Page 5: ...int temperature varies according to the weekly schedule setup in the unit Default programming is Comfort 07 00 to 22 00 Eco 00 00 to 07 00 22 00 to 00 00 3 3 1 Press Hold the Config Prog button until the following is shown The first segment will start to flash By pressing the OK Mode button you can select whether you want a Frost setting 5 C Background setting 17 C or Comfort setting 19 C Now pres...

Page 6: ... the or button until the desired temperature is shown The heater will now cycle on and off and maintain this temperature setting If the room temperature goes below the set temperature then the heaters element will turn on and the symbol will be shown If the room temperature is higher than the set temperature then the heaters element won t turn on and the heating symbol won t be displayed 3 6 OFF M...

Page 7: ...will be displayed To select the next parameter press the button To modify the value of the parameters press the OK Mode button Then use the and buttons to select the different options Press the Ok Mode button again to set the value Use the same procedure to modify the others parameters where necessary It is possible to exit of advanced configuration by pressing the Config Prog button at any time P...

Page 8: ...ee 5 UNIT RESET When the heater is reset it will remove the programming and revert back to the default settings and also disassociate from the RF network and G Control Hub 5 UNIT RESET The heater reset removes the programming and disassociates the device from the RF network if the unit was associated with a G Control Hub Default values are established To reset the unit hold the OK Mode and Config ...

Page 9: ...sales service Time settings are lost There was electric supply shortage or the unit has been disconnected by the main switch The keyboard does not respond If the Lock message is displayed the thermal radiator keyboard is locked Hold and buttons simultaneously for 3 seconds to unlock the keyboard The radiator does not communicate with the G Control Hub Check the unit is associated the symbol must b...

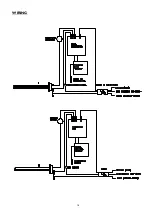
Page 10: ...18 WIRING ...

Page 11: ... Minimum heat output Pmin N A N A N A N A N A N A kW Maximum continuous heat output Pmax c 0 5 0 75 1 0 1 25 1 5 2 0 kW Auxiliary electricity consumption At nominal heat output elmax 0 000 0 000 0 000 0 000 0 000 0 000 kW At minimum heat output elmin 0 000 0 000 0 000 0 000 0 000 0 000 kW In standby mode elSB 0 0005 0 0005 0 0005 0 0005 0 0005 0 0005 kW Item Value All models Type of heat output ro...

Page 12: ...to the applicable collection point for the recycling of electrical and electronic equipment By ensuring this product is disposed of correctly you will help prevent potential negative consequences for the environment and human health which could otherwise be caused by inappropriate waste handling of this product For more detailed information about recycling of this product please contact your local...

Reviews: