0841S Rev 02/16
#8587233
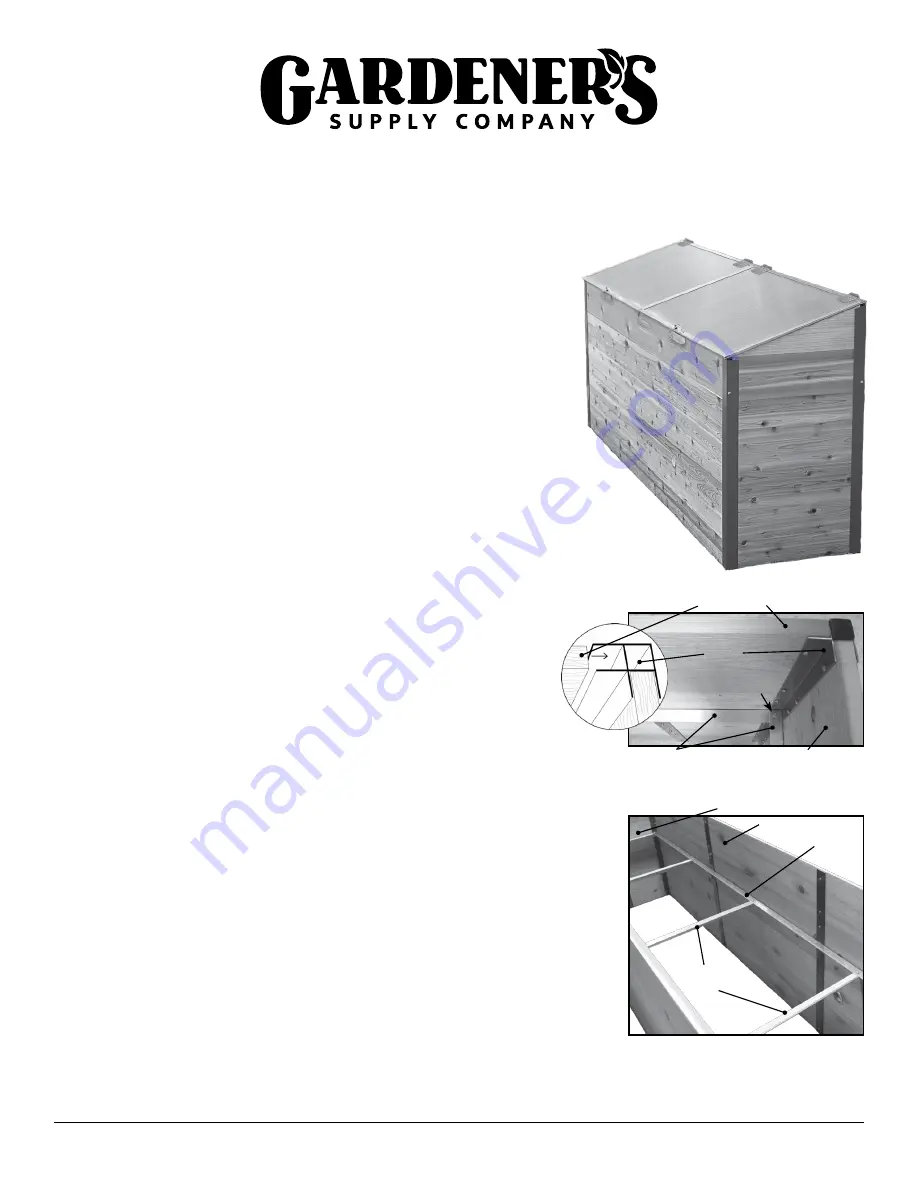
Grow House
®
Greenhouse
This beautiful elevated bed comes with a matching cold frame top to protect plants from harsh weather, making it perfect for starting
seeds, hardening off transplants, and growing greens and other cool-season crops.
Parts
(2) 8' Side Panels (with Corners and Platform Supports) (4) Corner Caps
(2) 2' End Panels (with Platform Supports)
(1) Flat Support
(3) Cross Supports
(2) Roof Panels with hinges
Cedar Floor Planks
(84) Screws
(1) Fabric Liner
(2) Front Corners, with stakes
Tools Required
(2) Back Corners, with stakes
Tape measure and pencil
(1) Front Cedar Board, with roof props, 8'
Rubber mallet or hammer
(2) Back Cedar Boards, 8'
Drill with Phillips bit or
(2) Gable Ends, preassembled
screwdriver
Assembly
Step 1.
Identify and organize all parts on a clean, level surface.
Step 2.
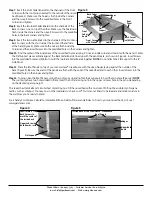
Stand one of the 8' Side Panels upright on the ground. Take one of the 2' End Panels and slide
the edge of it into a Corner on the 8' Side Panel (Figure 1).
NOTE:
The Platform Support on the 2' End
Panel should sit under the Platform Support on the 8' Side Panel. Use a Rubber Mallet to
get the End Panel fully seated into the Corner. Secure the panels together by inserting a
Screw through each predrilled hole in the Corner. Insert another Screw into the
holes that line up in the Platform Supports (Figure 1). Repeat to attach the other
2' End Panel onto the other Corner of the same 8' Side Panel.
Step 3.
Take the remaining 8' Side Panel and slide the Corners' open channels
onto the 2' End Panels to form a box. Make sure the Platform Supports on the
2' End Panels are under the Platform Supports on the 8' Side Panels, and that
all the boards are flush inside the Corners, using a Rubber Mallet if necessary.
Secure the panels together by inserting Screws through the holes in both Corners, as well
as through the holes that line up on the Platform Supports (Figure 1).
Step 4.
Connect the 3 Cross Supports to the Platform Supports on the 8' Side Panels by lining
up the predrilled holes at the ends of the Cross Supports with the holes along the length
of the Platform Supports (Figure 2). Place all Cross Supports underneath the Side Supports,
and insert a Screw through each set of holes.
Step 5.
Set the Cedar Floor Planks on top of the Supports, arranging them so there are small
gaps between the planks. (The gaps allow water to drain.) Place the Fabric Liner over the
Floor Planks.
Step 6.
Slide the stakes of the 2 Front and 2 Back Corners into the Corners of your Side and
End Panels (Figure 3, over). Insert a Corner Cap into the top of each Front and Back Corner,
using a rubber mallet if necessary.
Platform Supports
Figure 1
2' End Panel
Corner
8' Side Panel
Screw
8' Side Panel
2' End Panel
Platform
Support
Cross
Supports
Figure 2
over please


