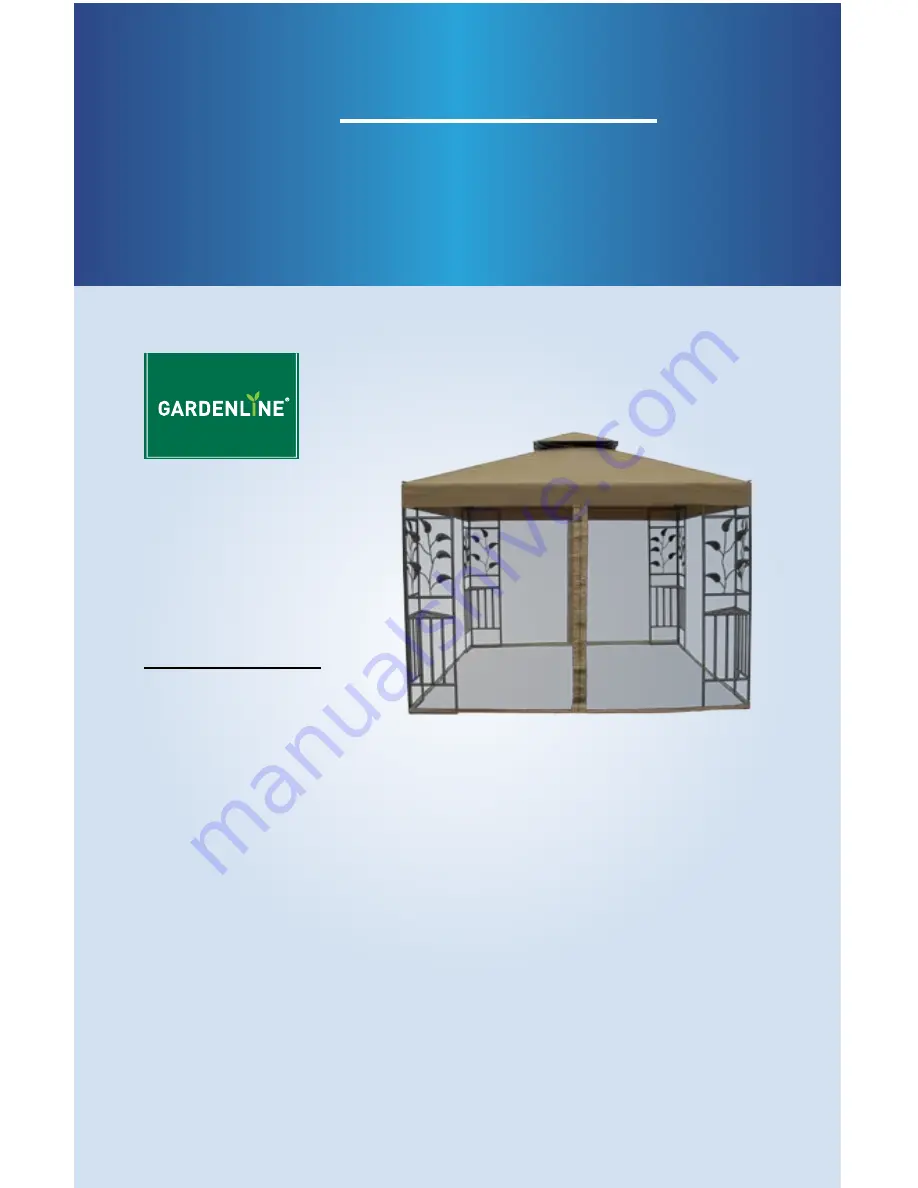
background image

Gazebo with Netting

 AFTER SALES SUPPORT  


       1 


1800 599 8898    


                                       support@tdcusainc.com

MODEL: 7884  PRODUCT CODE: 7884   04/2016

USA

User 

Guide

Manual

del usuario

Gazebo

With

NettiNG

10 ft. x 10 ft.
Glorieta coN 

malla

10 pies x 10 pies

English....  Page 3
Español.... Página 16

Summary of Contents for 7884

Page 1: ...SALES SUPPORT 1 1800 599 8898 support tdcusainc com MODEL 7884 PRODUCT CODE 7884 04 2016 USA User Guide Manual del usuario Gazebo With Netting 10 ft x 10 ft Glorieta con malla 10 pies x 10 pies Englis...

Page 2: ...enter Monday Friday 9 00am 5 00pm EST at 1 800 599 8898 Caution Read all the instructions before assembly Failure to do so may result in faulty assembly and potential injury Assemble product on a soft...

Page 3: ...bs I Connector J Main Canopy K Small Canopy L Corner Shelf M Stake N Rope O M6 x 25mm Screws Nuts P M6 x 40mm Screws Nuts Q M6 x 48mm Screws Nuts R Netting Panel S Plastic Ring Parts List H C I S K J...

Page 4: ...onnector G into the corner of the attached panels then use M6 x 40mm Screws Nuts P to screw all the pieces together Continue finishing one set of panels by adding the Corner Shelf L to the panels See...

Page 5: ...and locked in place on the connector The Canopy Middle Rib D should be placed into the smaller tube of the Connector J Place Corner Canopy Rib C into the Canopy Two Tier Rib H Place the Small Canopy K...

Page 6: ...e Rope N to Stake M Insert the Plastic Rings S onto the metal grommets on the top of the Netting R Hook the Plastic Rings S around the outside of the gazebo on the Cross Beam E O N L T M R N R E S K J...

Page 7: ...anty please send us together with the faulty item the original receipt and the warranty card properly completed the faulty product with all components included in the packaging The warranty does not c...

Page 8: ...s To minimize this condition it is rec ommended that care be taken when assembling and handling the product in order to prevent the paint from being scratched If scratching or damage occurs it is reco...

Page 9: ...samblaje incorrecto lo que puede ocasionar lesiones Ensamble la unidad sobre una superficie blanda y no abrasiva tal como una alfombra o cart n para evitar da arla Pida ayuda para ensamblar las partes...

Page 10: ...y tuercas M6 x 40 mm 12 G Conector de esquina 4 Q Tornillos y tuercas M6 x 48 mm 16 H Varillas de dos niveles del toldo 4 R Panel de malla 4 I Conector 1 S Anilla de pl stico 32 J Toldo principal 1 As...

Page 11: ...a os a los paneles Consulte la imagen sobre estas l neas para guiarse R F O E E E E B A Q Assembly Instructions Inserte alternativamente la varilla central del toldo D y la varilla de dos niveles del...

Page 12: ...D E E G L L L L F O Assembly Instructions Instale el toldo principal J sobre la parte superior de la glorieta de un lado a otro Fije el toldo peque o K al toldo principal J con el velcro Con la ayuda...

Page 13: ...os Este producto est dise ado para el esparcimiento y no es un refugio contra las condiciones meteorol gicas adversas Sus datos Fecha de la compra Nombre Direcci n Correo electr nico Lugar de la compr...

Page 14: ...de servicio ni el vendedor asumen ninguna responsabilidad por los datos o configuraciones que puedan haberse almacenado en el producto por el cliente 1 No guarde la glorieta sino hasta que se haya sec...

Page 15: ...NTY A OS DE GARANT A 2 support tdcusainc com 1800 599 8898 USA MODEL 7884 PRODUCT CODE 7884 4 2016 DISTRIBUTED BY DISTRIBUIDO POR ALDI INC BATAVIA IL 60510 www aldi us AFTER SALES SUPPORT SERVICIO POS...

Reviews: