background image

owner’s manual 

Forerunner

®

 101

personal trainer

Summary of Contents for 101

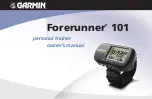
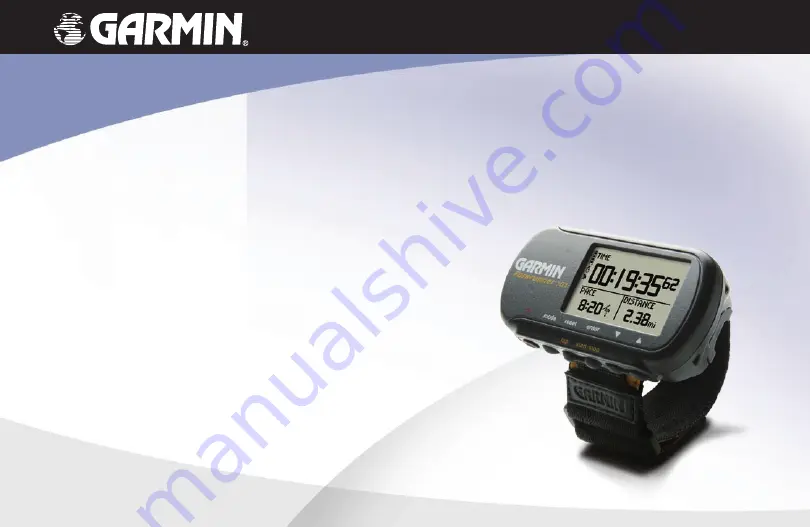
Page 1: ...owner s manual Forerunner 101 personal trainer ...

Page 2: ...to print one copy of this manual or of any revision hereto provided that such electronic or printed copy of this manual or revision must contain the complete text of this copyright notice and provided further that any unauthorized commercial distribution of this manual or any revision hereto is strictly prohibited Information in this document is subject to change without notice Garmin reserves the...

Page 3: ... Manual and the Quick Start Guide to understand the operating features of the unit PRODUCT REGISTRATION Help us better support you by completing your on line registration today Connect to our Web site www garmin com and look for the Product Registration link on the home page Your unit s serial number is on the back of the unit If you have any questions or comments regarding the use of the Forerunn...

Page 4: ...y By Day 6 History By Week 7 History History Totals Delete 8 Training Assistant Auto Pause Lap 9 Training Assistant Virtual Partner 10 Training Assistant Interval Training 13 Training Assistant Pace Speed Alert 15 Training Assistant Time Dist Alert 16 Navigation Add Remove Map Mode 17 Navigation Mark Location 18 Navigation Find Location 19 Navigation Back To Start 23 Navigation Orient Map North Ah...

Page 5: ...Y FROM STATE TO STATE IN NO EVENT SHALL GARMIN BE LIABLE FOR ANY INCIDENTAL SPECIAL INDIRECT OR CONSEQUENTIAL DAMAGES WHETHER RESULTING FROM THE USE MISUSE OR INABILITY TO USE THIS PRODUCT OR FROM DEFECTS IN THE PRODUCT Some states do not allow the exclusion of incidental or consequential damages so the above limitations may not apply to you Garmin retains the exclusive right to repair or replace ...

Page 6: ...o communications However there is no guarantee that interference will not occur in a particular installation If this equipment does cause harmful interference to radio or television reception which can be determined by turning the equipment off and on the user is encour aged to try to correct the interference by one of the following measures Reorient or relocate the receiving antenna Increase the ...

Page 7: ... the property of Garmin and is protected under the United States of America copyright laws and international copyright treaties You further acknowledge that the structure organization and code of the Software are valuable trade secrets of Garmin and that the Software in source code form remains a valuable trade secret of Garmin You agree not to decompile disassemble modify reverse assemble reverse...

Page 8: ...y damage and personal injury CAUTION Use the Forerunner 101 at your own risk To reduce the risk of unsafe opera tion carefully review and understand all aspects of this Owner s Manual When in actual use carefully compare indications from the Forerunner 101 to all available navigation sources in cluding the information from other NAVAIDS visual sightings charts etc For safety always resolve any dis...

Page 9: ...prolonged exposure to temperature extremes may occur such as in the trunk of a car as permanent damage may result User information such as locations tracks and workout history is retained indefinitely in the units memory without battery WATER IMMERSION The Forerunner 101 is waterproof to IEC Standard 60529 IPX7 It can withstand immer sion in 1 meter of water for 30 minutes Prolonged submersion can ...

Page 10: ...mode reset enter lap start stop Back View without strap Built in GPS Antenna Battery Cover ENTER START STOP POWER BACKLIGHT MODE RESET LAP Serial Number Speaker LCD Display with Backlight Front View DOWN UP Unit Overview ...

Page 11: ...on the extension 2 Place on your wrist or arm 3 Slide the end of the extension through the existing connector 4 Adjust to fit comfortably and secure the strap Do not adjust too tightly around your wrist arm as this may restrict blood circulation To remove the wrist strap from the Forerunner 1 Place your Forerunner on a cloth or soft surface to avoid scratching the case 2 While holding the Forerunne...

Page 12: ... up and pull away 2 Compare the battery polarity with the diagram in the battery compartment and install the batteries accordingly 3 To re install the battery cover slide the top portion into the appropriate slot then snap the bottom section securely to the base of the unit Important Note When replacing batteries use only new or fully charged bat teries Do not mix Alkaline and NiMH batteries Recha...

Page 13: ... needs to have an unobstructed clear view of the sky for best performance In a nutshell the GPS receiver s view of the sky generally determines how fast you get a location fix or if you get a fix at all GPS signals are relatively weak and do not travel through rocks buildings people or metal so remember to keep a clear view of the sky at all times for best performance Your Forerunner needs to be giv...

Page 14: ...3 Leave the Forerunner with a clear view of the sky for 15 30 minutes initially If the Forerun ner does not detect any satellites a message appears asking if you are indoors Selecting Yes shuts off the GPS to conserve battery life for indoor practice Selecting No prompts another question asking if the unit has been moved hundreds of miles Choose Yes to have the unit Autolocate the satellite signal...

Page 15: ...ng and tracking distance data 3 Press the LAP button to record when a lap is completed 4 While in Timer Mode the data you are recording is called your Current Run When you reset the Timer the data is considered your Last Run When the timer is stopped press and hold RESET for 3 seconds to reset all workout data The unit automatically stores Last Run and History information NOTE A manual stop and re...

Page 16: ...e By using a combina tion of the GPS and the Timer you can start running anywhere you want and let the Forerun ner 101 track your speed distance and time Timer Mode Buttons The MODE Button Press to go to the next main mode Press and hold to change Pace to Speed Repeat to return to Pace setting The RESET LAP Button Press while timer is running to lap With timer stopped press and hold for 3 seconds ...

Page 17: ...o Pause Lap 9 Virtual Partner 10 11 Interval Training 12 13 Pace Speed Alert 15 Time Dist ance Alert 16 Navigation 17 24 Add Remove Map Mode 17 Mark Location 18 20 Find Location 20 22 Back to Start 23 Orient Map North Ahead 23 24 Settings 24 31 Set Time 22 25 Set Units 26 27 Set Custom Page 27 28 Set Profile 28 Set Display 29 Set System 30 Restore Settings 31 About Forerunner 31 Using Menu Mode The...

Page 18: ...o delete your workout history Last Run Displays a summary of your last run data after the current run Timer is RESET By Day By selecting this option you see a list of workout laps organized by day The upper half of the display is the list of days times of your workout and total laps run With a day high lighted the lower half of the display is an overview of the information of your workout that day...

Page 19: ...k you want to review the Forerunner 101 breaks the week down into individual days To select a week you want to review 1 With HISTORY highlighted in the Menu Mode press ENTER 2 Highlight BY WEEK and press ENTER 3 Press the DOWN or UP button to highlight the week you want to review 4 Once highlighted press ENTER to display the days of that week 5 Press the DOWN or UP button to highlight the day you ...

Page 20: ...n 1 month Older than 3 months Older than 1 year or Delete All Once you choose one of the available options a window appears asking if you are sure you want to delete the lap or workout To delete a workout record 1 With HISTORY highlighted in the Menu Mode press the ENTER button 2 Highlight DELETE and press ENTER 3 Press the DOWN or UP button to highlight your period of workouts you want to delete ...

Page 21: ...s below that setting The stop watch indicator flashes when the timer is paused The Auto Lap is useful if you want the Forerunner 101 to keep track of your laps without having to press the LAP button each time you travel a given distance To set the Auto Pause 1 Highlight TRAINING ASSISTANT in the Menu Mode and press ENTER 2 With AUTO PAUSE LAP highlighted press ENTER 3 Highlight the ON OFF option ne...

Page 22: ...workout goals The Virtual Partner always completes the goal you set Your job is to keep up with your Virtual Partner Your Virtual Partner can help you with Distance Time Time Pace Speed or Distance Pace Speed The Virtual Partner mode displays after you enter your settings In the Virtual Partner mode the top character is your Virtual Partner while you are represented on the bottom As soon as you pr...

Page 23: ...ss the DOWN or UP button to select the total time of your workout and press ENTER to select You can choose CUSTOM to set your own time 8 Highlight DONE and press ENTER 9 When you are ready to begin your workout press the START button To set Time Pace Speed 1 Highlight TRAINING ASSISTANT in the Menu Mode and press ENTER 2 Highlight VIRTUAL PARTNER and press ENTER 3 Highlight SET TIME PACE SPEED and...

Page 24: ...hlight VIRTUAL PARTNER and press ENTER 3 Highlight SET DISTANCE PACE SPEED and press ENTER 4 With DISTANCE highlighted press ENTER 5 Press the DOWN or UP button to select the distance of your workout and press ENTER to select You can choose CUSTOM to set your own distance 6 Press the DOWN button to highlight the PACE SPEED field and press ENTER 7 Press the DOWN or UP button to select the pace speed...

Page 25: ... the setting you wish to change and press ENTER 4 Press the DOWN or UP button to highlight the desired time or distance and press ENTER For CUSTOM choices scroll through the place holders using the DOWN or UP buttons UP button moves the cursor right to left and the DOWN button moves the cursor left to right When you reach the position place you want to change stop and press ENTER Using the DOWN or...

Page 26: ...how the Rest Banner again press the MODE button until it is displayed Press LAP any time during a workout to immediately start a rest period You may also press LAP any time during a rest period to immediately resume your workout If you wish to stop Interval Training choose END TRAINING from the Training As sistant menu While Interval Training is activated Auto Pause and Auto Lap settings are ignor...

Page 27: ...ss the DOWN button to highlight the ALERT AT field and press ENTER 5 Select from a quick option menu SPRINT RUN JOG SPEED WALK WALK or CUSTOM and press ENTER 6 Press the MODE button to return to the Training Assistant To set Slow Pace Speed Alert 1 Highlight TRAINING ASSISTANT in the Menu Mode and press ENTER 2 Highlight PACE SPEED ALERT and press ENTER 3 Press the DOWN or UP button to highlight th...

Page 28: ...0 MINUTES or CUSTOM Press the DOWN or UP button to highlight your selection and press ENTER to select 6 Press the MODE button to return to the Training Assistant mode To set Distance Alert 1 Highlight TRAINING ASSISTANT in the Menu Mode and press ENTER 2 Highlight TIME DIST ANCE ALERT and press ENTER 3 Use the DOWN or UP button to highlight the DISTANCE ALERT field press ENTER to turn the alert OFF...

Page 29: ...ad detailed map data into the Forerunner 101 The Map Mode shows where you the animated figure are and provides a picture of where you have traveled As you travel the animated figure walks and leaves a trail track points Location names and symbols are also shown on the map Once the map has been added pressing the MODE button scrolls through the Timer Mode Map Mode and the Menu Mode To make sure you c...

Page 30: ... the DOWN button to highlight the MARK LOCATION option and press ENTER The Review Location appears Flag with symbol name and location 3 Press the DOWN button to highlight the location symbol and press ENTER 4 Scroll through the available location symbols using the DOWN or UP buttons Press ENTER when you find the location symbol of choice 5 Press the DOWN or UP button to highlight the OK field and pr...

Page 31: ...in memory To change the elevation 1 Highlight NAVIGATION in the Menu Mode and press ENTER 2 Press the DOWN button to highlight the MARK LOCATION option and press ENTER The Review Location Mode appears Flag with symbol name and location 3 Press the DOWN button to highlight the ELEV ATION field and press ENTER 4 Scroll through the elevation position places using the DOWN or UP buttons UP button moves...

Page 32: ...you want Press ENTER The position place is now changed 5 Press the DOWN or UP button to highlight the OK field and press ENTER The Location Mode appears again with the corrected location 6 Press the DOWN or UP button to highlight the OK field and press ENTER Your location with the new latitude longitude is now stored in memory Find Location The FIND LOCATION mode organizes all of your locations in a...

Page 33: ...g if you really want to delete the location If you do press the DOWN or UP button highlight YES and press ENTER 2 If you change your mind and do not want to delete the location press the DOWN or UP button highlight NO and press ENTER The confirmation message box disappears and the location remains in memory You can also press the MODE button to exit To view the NEAREST locations 1 Highlight NAVIGAT...

Page 34: ...ctivated with the selected location as the destination To stop a GOTO 1 Highlight NAVIGATION in the Menu Mode and press ENTER 2 Press the DOWN or UP button to highlight the STOP GOTO option and press ENTER To delete all locations 1 In the FIND LOCATION mode press the DOWN or UP button to highlight DELETE ALL Press the ENTER button A confirmation message box appears asking if you really want to dele...

Page 35: ...hould travel 2 Press the DOWN or UP button to zoom in or zoom out on the map Press MODE to return to the Menu Mode 3 To stop highlight NAVIGATION press the ENTER button Press the DOWN or UP button to highlight the STOP GOTO option and press ENTER Orient Map North Ahead When Orient Map North is selected the map is always oriented to the north As you travel the map is stationary and the animated figu...

Page 36: ...at enter the proper time zone and choose Daylight Savings Time When you select 12 hour time format ting the clock reads like a standard clock with 12 hour AM and 12 hour PM cycles The 24 hour option sets the Forerunner 101 to display a 24 hour cycle Military Time To change the time format 1 Highlight SETTINGS in the Menu Mode and press ENTER 2 Press the DOWN or UP button to highlight SET TIME Pres...

Page 37: ...u must enter the UTC offset for your location and the Daylight Savings time option is not available SET TIME Daylight Savings Daylight savings time can be set to Automatic which automatically changes the clock settings for daylight savings You can choose Yes to manually add daylight savings or No to remain on standard time To change the Daylight Savings Field 1 Highlight SETTINGS in the Menu Mode ...

Page 38: ...hlight the UNITS field Press ENTER 4 Press the DOWN or UP button high light STATUTE or METRIC and press ENTER Press the MODE Button to return to the mode of your choice To change the pace speed mode 1 Highlight SETTINGS in the Menu Mode and press ENTER 2 Press the DOWN or UP button to highlight SET UNITS Press ENTER 3 Press the DOWN or UP button to highlight the PACE SPEED MODE field Press ENTER 4 P...

Page 39: ...data types are available AVERAGE PACE SPEED overall average speed of workout AVG LAP TIME average time of all the laps BEST PACE fastest speed of workout CALORIES total calories burned since timer started see also Pace Speed Mode pg 26 DISTANCE training distance ELEVATION current altitude GRADE slope of terrain LAP DISTANCE distance in lap LAP PACE SPEED average pace of lap LAP TIME time in lap LA...

Page 40: ...de pg 26 and performance data customized to you This data is also used for the Training Assistant pace and settings To change the profile setting 1 From the Menu Mode press the DOWN or UP button to highlight SETTINGS Press ENTER 2 Press the DOWN or UP button to highlight the SET PROFILE field and press ENTER 3 Press the DOWN or UP button to highlight the setting you wish to change and press ENTER 4 ...

Page 41: ... UP button to highlight your selection and press ENTER 5 Press the MODE button to return to the SETTINGS mode To adjust the display contrast 1 From the Menu Mode press the DOWN or UP button to highlight SETTINGS Press ENTER 2 Press the DOWN or UP button to highlight the SET DISPLAY field and press ENTER 3 Press the DOWN or UP button to highlight the CONTRAST field and press ENTER 4 Press the DOWN or...

Page 42: ...nu Mode press the DOWN or UP button to highlight SETTINGS Press ENTER 2 Press the DOWN or UP button to highlight the SET SYSTEM field and press ENTER 3 Press the DOWN or UP button to highlight the LANGUAGE field and press ENTER 4 Press the DOWN or UP button to highlight your selection and press ENTER 5 Press the MODE button to return to the SETTINGS mode To change the battery setting 1 From the Menu...

Page 43: ... Menu Mode press the DOWN or UP button to highlight SETTINGS Press ENTER 2 Press the DOWN or UP button to highlight the RESTORE SETTINGS field and press ENTER 3 Press the DOWN or UP button to highlight your selection and press ENTER About Forerunner Displays the software version of your Forerunner To view the software version 1 From the Menu Mode press the DOWN or UP button to highlight SETTINGS Pr...

Page 44: ...ady state Dynamics Performs to specifications to 6 g s Antenna Built in patch Power Input Two 1 5 volt AAA batteries2 Battery Life 14 15 hours typical use3 Specifications Specifications subject to change without notice 1 Subject to accuracy degradation to 100m 2DRMS under the U S DOD imposed Selective Availability program 2 The temperature rating for the Forerunner 101 may exceed the usable range of ...

Page 45: ... Custom Screen 4 D Data Screens 4 28 Daylight Savings 25 Delete History 8 Delete Location 22 Display Contrast 29 Distance Alert 16 Distance Goals 11 E Elevation 19 F Factory Settings 31 FCC Compliance iv Find Location 20 21 22 G GOTO 22 GPS 1 2 vi H History 6 7 8 History By Day 6 History By Week 7 History Delete 8 History History Totals 8 History Last Run 6 14 I Interval Training 13 14 L Language ...

Page 46: ...store Settings 31 S Serial Number i Set Display 29 Set Profile 28 Set System 30 Set Time 24 25 Set Units 26 Software License v Software Version 31 Specifications 33 Speed Pace Alert 15 Speed Mode 26 Storage vii T Table of Contents ii Time 25 Timer Mode 3 4 Timer Screen 4 Time Alert 16 Time Format 24 Time Goals 11 Time Zone 24 25 Track Log 6 23 Training Assistant 9 10 11 12 13 14 15 16 U Units 26 V V...

Page 47: ...35 Run Notes ...

Page 48: ...Run Notes ...

Page 49: ...Run Notes ...

Page 50: ...Run Notes ...

Page 51: ......

Page 52: ...rmin com Copyright 2004 2006 Garmin Ltd or its subsidiaries Garmin International Inc 1200 East 151st Street Olathe Kansas 66062 U S A Garmin Europe Ltd Unit 5 The Quadrangle Abbey Park Industrial Estate Romsey SO51 9DL U K Garmin Corporation No 68 Jangshu 2nd Road Shijr Taipei County Taiwan www garmin com Part Number 190 00317 00 Rev B ...

Reviews: