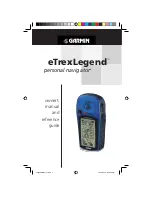
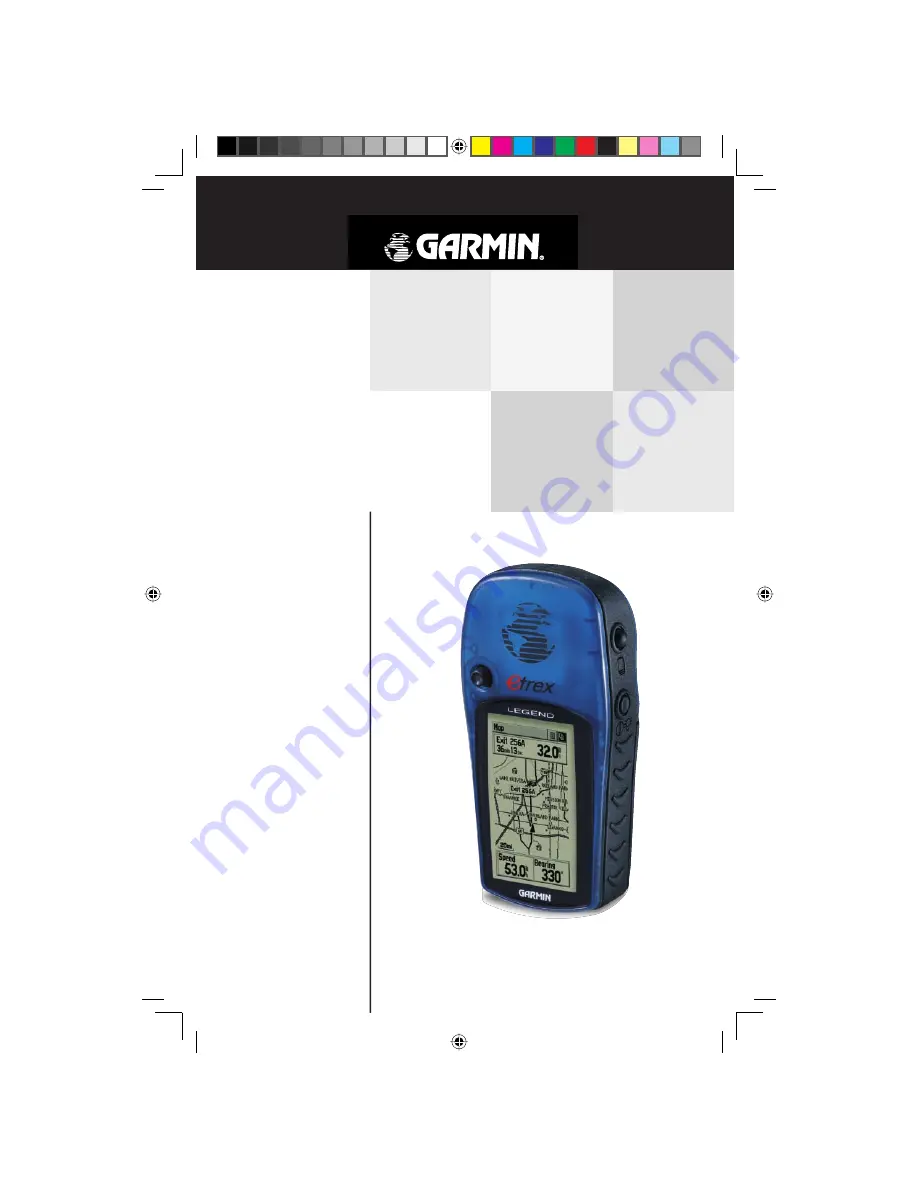
background image

owner’s 

manual 

and 

reference 

guide

   eTrex


Legend

TM


personal navigator


®

LegendOMCover.indd   1

10/11/2002, 9:52:28 AM

Summary of Contents for Etrex Legend - GPS Receiver

Page 1: ...owner s manual and reference guide eTrexLegend TM personal navigator LegendOMCover indd 1 10 11 2002 9 52 28 AM ...

Page 2: ...d drive or other electronic storage medium to be viewed and to print one copy of this manual or of any revision hereto provided that such electronic or printed copy of this manual or revision must contain the complete text of this copyright notice and provided further that any unauthorized commercial distribution of this manual or any revision hereto is strictly prohibited Information in this docu...

Page 3: ...n listed in same order as viewed on screen provides details about using the features of the eTrex Legend according to topic The explanations for each feature in this section are divided into 1 An overview that discusses the feature and how it functions and 2 A detailed Step by Step instruction for using the feature The Appendices include information on items such as Specifications Accessories Data ...

Page 4: ... there is no guarantee that interference will not occur in a par ticular installation If this equipment does cause harmful interference to radio or television reception which can be determined by turning the equipment off and on the user is encouraged to try to correct the interference by one or more of the following measures Reorient or relocate the receiving antenna Increase the separation betwe...

Page 5: ...the vehicle to operate the vehicle in a safe manner maintain full surveillance of all driving conditions at all times and not become distracted by the eTrex Legend to the exclusion of safe driving practices It is unsafe to operate the controls of the eTrex Legend while you are driving Failure by the driver of a vehicle equipped with an eTrex Legend to pay full atten tion to operation of the vehicl...

Page 6: ...irtually all data sources contain inaccu rate or incomplete data to some degree This is particu larly true outside the United States where complete and accurate digital data is either not available or prohibitively expensive Software License Agreement BY USING THE ETREX LEGEND YOU AGREE TO BE BOUND BY THE TERMS AND CONDITIONS OF THE FOLLOWING SOFTWARE LICENSE AGREEMENT PLEASE READ THIS AGREEMENT C...

Page 7: ...age plastic components Storage Storing alkaline batteries in the unit is not recom mended To reduce the chance for battery leakage remove the batteries when storing the unit for more than six months Do not store the eTrex Legend where prolonged exposure to temperature extremes may occur such as in the trunk of a car as permanent damage may result User information such as waypoints routes etc is re...

Page 8: ...T SHALL GARMIN BE LIABLE FOR ANY INCIDENTAL SPECIAL INDIRECT OR CONSEQUENTIAL DAMAGES WHETHER RESULTING FROM THE USE MISUSE OR INABILITY TO USE THIS PRODUCT OR FROM DEFECTS IN THE PRODUCT Some states do not allow the exclusion of incidental or consequential dam ages so the above limitations may not apply to you GARMIN retains the exclusive right to repair or replace the unit or software or offer a...

Page 9: ... today Have the serial number of your eTrex Legend handy and connect to our website www garmin com Look for the Product Registration link on the Home Page Introduction Products sold through online auctions are not eligible for rebates or other special offers from GARMIN Online auction confirmations are not accepted for warranty verification To obtain warranty service an original or copy of the sales...

Page 10: ...gram 58 Index 59 64 Introduction About This Manual i FCC Compliance Statement ii Warnings and Precautions iii iv Software License Agreement iv v Maintenance v Warranty vi vii Product Registration vii Table of Contents viii Getting Started Setup and Features 1 Features and Button Function 2 Battery Installation 3 Backlighting and Contrast 3 The Main Pages Main Page Basics 4 Satellite The Main Page ...

Page 11: ...nts Cities Interstate Exits Points of Interest Street Addresses and Intersections 8 MB of detailed map data storage allowing transfer from GARMIN MapSource CD ROM s Wide Area Augmentation System WAAS capability Getting Started Points of Interest Address and Intersection data must be transferred to the unit using a GARMIN MapSource CD ROM See page 56 for more informa tion About WAAS Because the Wid...

Page 12: ...s a waypoint Battery Compartment Cover Internal Antenna LCD Display Carry Lanyard Slot Getting Started NOTE The eTrex Legend is designed to be held and operated in the left hand but it can be held and operated using the right hand as well to suit your preference The ZOOM IN OUT buttons When on the Map Page press to Zoom in and out When on the Satellite Page press to adjust the screen contrast When...

Page 13: ...he D ring 1 4 turn counter clock wise pull away clockwise 2 Insert batteries observing the polarity 3 Reinstall the battery cover by turning the D ring 1 4 turn Stored data is not lost when the batteries are removed Display Backlighting and Contrast Set Up If lighting conditions make it hard for you to see the display screen you can adjust the contrast or turn on the backlight To turn on the backl...

Page 14: ...f which are accessed by on screen buttons To display these menus highlight the on screen button and press in on the CLICK STICK Option Menu Button Main Page Menu Button Main Page Menu Use to go directly to a Main Page and as an alternate to cycling through the Main Pages Double click the on screen button to toggle between two Main Pages Option Menu These menus provide addi tional features or allow...

Page 15: ...tly overhead Signal Strength Bars for each satellite are shown just below the Skyview Satellites and their signals appear as hollow shapes until a signal is received and then they appear darkened in The stronger the signal the taller the signal bar The Wide Area Augmentation System WAAS capability produces a more accurate position fix When enabled the GPS mode set to Normal and the interface set to...

Page 16: ... Option Menu button at the top of the page and then press it in to display the Options Menu 2 Use the CLICK STICK to highlight the Use With GPS Off option and then press it in to activate The eTrex Legend stops tracking satellites and should not be used for navigation However the next time you turn the unit on it returns to Normal GPS operation To select Track Up or North Up 1 Use the CLICK STICK ...

Page 17: ...ation on the map and press it in The eTrex Legend relies on satellite signals to provide navigational guidance so getting a clear view of the sky is necessary because GPS signals do not travel through rocks buildings people metal or heavy tree cover At least three satellite signals are needed to determine your location otherwise the unit displays a Poor Satellite Reception message This message pro...

Page 18: ...isplayed on the Map Page Goto A direct path to a selected destination waypoint city address etc Track A previous path of travel that has been stored logged in the eTrex Legend A Track allows you to repeat a path or to return to your starting point on the same path using the GARMIN TracBack feature Route A path to a destination consisting of interme diate stops along the way waypoints cities highwa...

Page 19: ... optional CD ROM To allow you to view the map from different perspectives the scale can be changed from 20 feet to 500 miles The ZOOM IN and OUT buttons on the side of the unit allow you to zoom in or out on the map Pressing and holding these buttons causes the scale to change rapidly instead of changing in increments The IN button displays less area but more map detail while the OUT button shows ...

Page 20: ...acy Circle surrounding the Position Icon The eTrex Legend uses both map resolution and GPS accuracy in defining your location to a point within the circle The smaller the circle the more accurate your location When using the Pan Map feature a small outline arrow Map Pointer can be moved about the page to highlight and identify map items or to scroll the map to view areas not shown on the display sc...

Page 21: ...moves the navigation status window to expand the map area or inserts the navigation status window Hide Data Fields Show Data Fields Removes or inserts two programmable data fields at the bottom of the page and expands or reduces the map area Setup Map Displays the Setup Map Pages which allows you to tailor the map to your requirements such as changing text size map orientation and map detail Measur...

Page 22: ...ation page An Options Menu allows you to add it to the Favorites list add it to a route project a waypoint from it save it as a waypoint or view the sun and moon phase from it On screen buttons at the bottom of the page allow you to Goto the map item display it on the map or to select OK and return to the Map Page When using the panning arrow pressing the FIND button displays items with the pannin...

Page 23: ...K Hide Show Data Fields The Hide Data Fields Show Data Fields option allows you to view two programmable data fields When hidden more map area is displayed To hide or show Data Fields 1 Select Hide or Show from the option list and then press in on the CLICK STICK To program a data field 1 Use the CLICK STICK to highlight the data field and then press it in to display the Options Menu 2 Highlight the ...

Page 24: ...s setting only applies to a map feature set to Auto Those features which have a specified scale or are turned Off are unaffected by this setting Lock on Road On or Off available only if MapSource Data is loaded when On the triangle icon locks to the road that you are traveling Display Mode Land or Water choice displays in light color while the other displays in a dark color Tracks Saved Tracks and...

Page 25: ...page button to display the features list for that sub page 3 Highlight a feature on the list and press in on the CLICK STICK to display the options list for that feature 4 Use the CLICK STICK to highlight the desired option and then press it in to activate 5 Press the PAGE button or the on screen X button to return to the Map Page The Measure Distance option To use the Measure Distance option 1 Se...

Page 26: ...ds ETA of the current point the pointer bends to indicate the direction of the turn to the next point while still showing the direction to the current point When you are not on an active Goto Track or Route in other words not traveling to a recorded destination the window at the top of the page displays the status of the GPS Receiver and the approximate accuracy of your current position The Compas...

Page 27: ...pass Ring work inde pendently of the direction of your movement and the direction to your destination The Bearing Pointer always points directly to the destination no matter what your current location might be For example if the arrow is pointing straight up you are going directly to your destination If it points any direction other than up turn towards that direction until the arrow is pointing u...

Page 28: ...ist of options To change data fields 1 Use the CLICK STICK to highlight the desired data field and then press it in to display the list of data options 2 Select the desired option from the list and press in on the CLICK STICK 3 Use the ZOOM IN OUT buttons to jump to the first or last item on the page and to page up or down For definitions see Appendix C pages 54 55 Bearing Course Current Destination C...

Page 29: ...any data information options The default settings for these fields are shown in the illustration By selecting the information options that you prefer and arranging them in a desired order on the page you can customize the Trip Computer Page to meet your navigation needs The Options Menu allows you to reset the Trip Computer data when you are ready to start a new trip 190 00234 00_0C indd 19 10 11 2...

Page 30: ... Options Menu 2 Use the CLICK STICK to move Up or Down the menu to highlight a desired data option 3 Press in on the CLICK STICK to select the option and place it in the data field To access the page Options Menu 1 Use the CLICK STICK to highlight the Options Menu on screen button and press it in to display the Options Menu 2 Highlight the desired option and then press in on the CLICK STICK to acti...

Page 31: ...options as all stored Tracks Waypoints and Routes can be permanently deleted when resetting the Trip Computer Bearing Course Current Destination Current Distance Current ETA Current ETE Elevation Final Destination Final Distance Final ETA Final ETE Heading Location lat lon Location selected Maximum Speed Moving Avg Speed Odometer Off Course Overall Avg Speed Pointer Speed Sunrise Sunset Time of Da...

Page 32: ...nu Page with Feature Icons Battery Capacity Time Date and Backlighting Status Bar Main Menu Setting the Correct Time Zone If the time displayed in the field at the bottom of the Main Menu does not match the time for your current location time zone use the Main Menu to access the Setup Pages select the Time Icon and then follow instructions for setting the time on page 43 To exit these pages highlig...

Page 33: ...g of items such as time format units of measure display backlighting timeout and contrast adjustment interface setups heading selection and system software information Accessories Page Allows you to access Sun and Moon data a Calendar Hunting and Fishing data a Calculator and an Area Calculator Information about the status of backlighting time and date and unit power are displayed in the window at...

Page 34: ...ymbol to a waypoint use the CLICK STICK to highlight the symbol block just above the waypoint name 4 To save the waypoint highlight OK and press in on the CLICK STICK 5 If you do not want to save it as a new waypoint press the PAGE button before pressing any other to cancel To create a waypoint using the map panning arrow 1 With the Pan Map feature active move the panning arrow map pointer to the ...

Page 35: ...CLICK STICK and enter the new coordinates using the numerical keyboard Highlight and press OK when finished 3 You may also change the waypoint name and or symbol To move a waypoint 1 Use the Find Menu to display the Waypoint Page for the waypoint you want to move 2 Highlight and press the Map on screen button to display the map for the waypoint 3 With the waypoint highlighted by the panning arrow p...

Page 36: ... Name field and map Symbol field to make them easier to recognize or can change the coordinates or elevation It can also be deleted To edit a waypoint 1 Use the Find Menu to display the waypoint 2 Use the CLICK STICK to highlight the Waypoint symbol field and then press to display the symbol list Use the CLICK STICK to move up and down the list to highlight a symbol and then press to place the symbol...

Page 37: ...list of find locations is expanded to include categories for Points of Interest Street Addresses and Intersections Press the FIND button to access the Find Menu For some categories there are two methods of list ing The By Name list contains every item in the map database for the selected category while the Nearest list contains only those items that are near to your Current Location or the Map Poin...

Page 38: ...Find List and then press it in to display a prompt to select By Name or Nearest Select then press the CLICK STICK to display the Waypoints List 2 Use the CLICK STICK to select the desired waypoint from the list and then press it in to display the Information Page for that waypoint 3 With the Information Page displayed you can select Goto to create a direct line of travel to the waypoint Select Map...

Page 39: ...el to the item Select Map to view the waypoint location or select OK 4 Use the page Options Menu to add the item to an existing route project a new waypoint from this location or view sun and moon position data for this time and date Finding a City Cities can be found by selecting the Cities option of the Find Menu selecting the city from the list of Nearest or By Name and then displaying the City...

Page 40: ...rstate highway Exits are listed only by Nearest Exit information pages provide a variety of information about services near each exit including rest stops lodging restaurants service stations etc Some services i e service stations on this page can be selected and a separate information page displays with specific information concerning what types of fuel mechanical and food services are available T...

Page 41: ...as a waypoint Favorite project a waypoint or add to an existing route Finding a Point of Interest You can use the Find Point of Interest option to locate a nearby restaurant lodging landmark public building park etc However you must have transferred a MapSource MetroGuide map to the unit map database otherwise this option plus Address and Intersection options displays grayed out and are not functi...

Page 42: ... Name or Nearest options Selecting By Name displays a keyboard allowing you to enter the characters of the name you want A list of matches displays when enough characters are entered 6 Use the CLICK STICK to highlight your selection from the list and then press it in to display the Information Page for that item 7 Use the on screen buttons to Goto or view on the Map or use the page Options Menu Fi...

Page 43: ...ind Menu and use the CLICK STICK to highlight the Intersection category and press it in to display the Find Intersection page 2 Highlight the first Street field and then press in on the CLICK STICK to display the Street list 3 Enter the name of the street in the name field at the top of the list using the keyboard data entry method Once you have spelled enough of the street name you a match displays ...

Page 44: ...cted rate of movement The Data Fields at the bottom of the page displays information relative to your travel as appropriate for the type of data selected to appear in those fields 4 Use the PAGE button or Main Page Menu to access the Map Page and observe your movements and a dark line indicating the direct path from your cur rent location to your destination 5 Use the Bearing Pointer on the Navigat...

Page 45: ...t a route waypoint from one of the Find Menu categories and display the Information Page for the selected waypoint city exit point of interest etc Highlight the on screen OK button and press in on the CLICK STICK to place it on the Routes List 5 To add more waypoints to the route repeat the process in Steps 3 and 4 The route is named for the first and last waypoints on the route You can add waypoin...

Page 46: ...ion and then press in on the CLICK STICK to copy The copied route displays on the Routes Page and is named the same but followed by a numeral 1 You may then rename and or modify the copied route To delete the route 1 Select the Route Page options button and press the CLICK STICK in to access the Options Menu 2 Select Delete and then press in on the CLICK STICK When you see the prompt Do you really...

Page 47: ...y the Find Menu and select a new waypoint city exit point of interest etc 3 With the new waypoint highlighted press in on the CLICK STICK to display the Information Page for the new waypoint and then select the on screen OK button to add it the route To remove a waypoint from the route list 1 Select the waypoint that you want to remove from the Route Waypoints List and press in on the CLICK STICK ...

Page 48: ...d a waypoint at either end of a route 1 Select the Route from the Routes List and press the CLICK STICK in to display the Route Page 2 Highlight the on screen Map button at the bottom of the page and press in on the CLICK STICK to display the Route Map Page 3 Use the CLICK STICK to move the panning arrow to either end of the displayed route until the end waypoint is highlighted Then press it in to...

Page 49: ...K STICK to move the map panning arrow to the waypoint you want to review and press in to pop up the Options Menu Select Review or Remove and press in again to either display the Information Page or remove it from the route To view the next waypoint in the route 1 Follow Steps 1 and 2 above 2 Place the map panning arrow on the waypoint you are currently viewing and press in to display the Options M...

Page 50: ...ce to Point The distance from your current location to a route waypoint ETA To Point Estimated Time of Arrival at a route waypoint in sequence ETE To Point Estimated Time Enroute to a route waypoint Leg Course The line of travel between two route waypoints Leg Distance The distance between two route waypoints Leg Time The time required to travel from a route waypoint to the next Pointer Direction ...

Page 51: ...art traveling The percentage of memory used by the current track log displays at the top of the page After the Track Log is Cleared it displays zero percent When the display reaches 100 the most recent track points start to overwrite the least recent if the default setting Wrap When Full remains selected on the track log setup To avoid losing track points save the Track Log when it approaches the ...

Page 52: ...then press in on the CLICK STICK This displays the Tracback Menu with two options Highlight the desired option To Beginning or To End and then press in on the CLICK STICK to enable Access the Map Page or the Navigation Page to navigate the Track To use Track Log Setup options 1 Highlight the Tracks Page Options Menu button at the top of the page and press in on the CLICK STICK to display the menu ...

Page 53: ...Time Time Zone Can be set to one of the eight US Time Zones or 24 International Time Zones nearest city or geographical region Select Other so you can enter the UTC Time Offset Daylight Savings Time Can be turned On or Off or set to Automatic To set the time 1 Use the PAGE button to access the Main Menu 2 Use the CLICK STICK to highlight the Setup Icon and then press it in to display the Setup Men...

Page 54: ...f a map does specify a datum use the options list to find datums applicable to the region of the map selecting the one that provides the best positioning at a known point If necessary you also may choose the User datum for custom designed grids Distance Speed You can choose from three units of measure to display your rate of travel Elevation You can choose from two units of mea sure to display your...

Page 55: ...hlight the contrast slider and then press in on the CLICK STICK to activate 2 Move the CLICK STICK up or down to move the slider until the desired contrast has been set Heading Page You can select the type of heading displays the types of North References or enter the magnetic variation Display Allows you to choose from Cardinal Let ters Degrees or Mils North Reference You can choose from True Mag...

Page 56: ...ut Allows DGPS input using a standard RTCM SC 104 format and supports the output of standard NMEA 0183 version 3 0 data RTCM In Text Out Allows DGPS input using a standard RTCM SC 104 format and simple ASCII text output of location and velocity information None Provides no interfacing capabilities If GARMIN DGPS or RTCM in NMEA Out format is selected additional fields are provided to control a GARM...

Page 57: ...Date and Backlighting Status The Memory Used figure refers to the non volatile memory within your unit and cannot be adjusted directly Saving a number of track logs and waypoints may affect the percentage but normally will not cause any problems The Power Status icon changes from a battery to an electric plug when external power is connected The Backlight icon changes from a dark outline to a brigh...

Page 58: ...y the different phases of the moon by pressing the center button and then the far right stop button when the desired date appears To set the date and time 1 For the Date and Current Time highlight each field then press in on the CLICK STICK to begin data entry of individual characters 2 To display the current date and time highlight the page Options Menu and press in on the CLICK STICK to display t...

Page 59: ...n the CLICK STICK to begin entering the year using the data entry keyboard Or Choose Set To Current Date from the Options Menu To create a reference note for a selected date 1 Use the CLICK STICK to highlight the day of the month and then press in to display the Options Menu for the date 2 Highlight and select New Note to begin entering text from the keyboard Observe the message as it is created i...

Page 60: ...rs To display the current date highlight the page Options Menu and press in on the CLICK STICK to display the Use Current Date option and then press in on the CLICK STICK to activate To set the location 1 Highlight the Location field and then press in on the CLICK STICK to display the New Location options list 2 Highlight the option desired and then press in on the CLICK STICK to activate If you ch...

Page 61: ...n on the CLICK STICK to see a map with the area shown in a data field at the bottom Calculator This feature provides you with all the basic functions of both of standard or scientific calculator You can per form most calculations identified by the function symbols along the sides of the keypad and can save the results temporarily in the memory The memory is cleared either manually or when you turn of...

Page 62: ...Consumption 0 5 watts max Battery Life Up to 18 hours of typical use in Battery Saver mode4 Specifications are subject to change without notice 1 Subject to accuracy degradation to 100m 2DRMS under the U S DoD imposed Selective Availability program 2 With optional GARMIN Differential Beacon Receiver Input such as GARMIN GBR 21 or 23 3 The temperature rating for the eTrex Legend may exceed the usabl...

Page 63: ...ypoints and routes on your PC using a background map and downloading them to your eTrex Legend See your GARMIN dealer for MapSource details Owner s Manual or Quick Start Guide Included PC Interface Cable Allows for transfer of data from a PC RS 232 serial port connector to an eTrex Legend Included PC Interface Cable and Cigarette Lighter Power Adapter Allows transfer of waypoints and routes from a...

Page 64: ...ted time needed to reach your final destination Heading Your moving direction Location lat lon Your current GPS position Location selected The lat lon of point defined on map Maximum Speed The maximum second by second speed recorded since last reset Moving Avg Speed Average speed while the unit is moving Odometer A running tally of distance travelled based upon the distance between second by second ...

Page 65: ... stopped since the last reset of the trip timers Trip Time Total Total time the unit has been in operation since the last reset of the trip timers Turn The angle difference in degrees between the bearing to your destination and your current line of travel L means turn Left R means turn Right Velocity Made Good The speed at which you are closing on a destination along a desired course Vertical Spee...

Page 66: ...f Personal Waypoints Routes and Saved Tracks See your GARMIN Dealer or visit the GARMIN website at www garmin com for information Transferring Map Data You can transfer detailed map data to the eTrex Legend from a GARMIN MapSource CD ROM The eTrex Legend can accept up to 8 MB of data from any MapSource program loaded on a PC and connected to the eTrex Legend Data Port For this function you need th...

Page 67: ...ng is for RTCM You have not collected enough infor mation from the WAAS satellite MetroGuide map data is not activated The Track Log feature is turned Off There is too much map clutter or the scale is such that map features are too densely displayed Some menus and pages have an X Exit on screen button in the upper right corner Replace batteries Reinstall batteries You must press and hold the POWER...

Page 68: ...GPBOD GARMIN Proprietary Sentences PGRME estimated error PGRMM datum string PGRMZ altitude PSLIB beacon receiver control DGPS Differential GPS corrections are accepted in RTCM SC 104 version 2 0 format through the Data In line The GARMIN GBR 21 and GBR 23 are the recom mended beacon receivers for use with the eTrex Legend Other beacon receivers with the correct RTCM format may be used but may not ...

Page 69: ... 43 Power 3 47 Zoom In Out 3 9 10 Button Location CLICK STICK 2 Find 2 Page 2 Power 2 Zoom In Out 2 C Calculator 51 Calendar 49 Cancel Goto 34 Carrying Case 53 Carrying Holster 53 Carry Lanyard Slot 2 53 Cautions iii iv Cigarette Lighter Adapter 53 Cities by name 27 Cities nearest 27 Cleaning v CLICK STICK 2 Compass Ring 17 Continue Acquiring 7 Contrast Adjustment 45 Set Up 3 Course 13 14 18 21 54...

Page 70: ... Final Distance 13 18 21 54 Final ETA 14 18 21 54 Final ETE 14 18 21 54 Finding Address 32 City 29 Exit 30 Favorite 29 Intersection 32 Point of Interest 31 Waypoint 28 FIND button 2 27 Find Menu 23 27 G GARMIN DGPS 46 Limited Warranty vi vii Proprietary Sentences 58 Getting Started 1 Glide Ratio 21 Global Positioning System GPS 3 5 47 52 58 iii Goto Cancelling Stop Navigation 11 13 34 40 Functions...

Page 71: ...e waypoint 39 review the area of a saved track 51 save a Track Log 42 save Find Menu item as waypoints 27 save Map Menu item as waypoints 27 select a map page option 11 select a serial data format 46 select data field options 40 select Units Page options 44 Setup the Navigation Page 18 How To Continued set the backlighting timeout 45 set the date and time 43 48 49 50 set the location 48 50 show Dat...

Page 72: ...18 21 54 On screen Button 11 12 14 15 20 22 25 26 28 31 32 33 35 38 36 39 41 42 48 57 Option Menus 4 Option Menu Button 4 Orientation 14 Overzoom 10 P PAGE button 2 Page Setup 14 Pan Map 10 11 12 PC Interface Cable 53 PC Interface Cable and Cigarette Lighter Power Adapter 53 Performance 52 Physical 52 Pointer 14 18 21 40 54 Points of Interest 15 Point of Interest categories 31 Position Format 44 P...

Page 73: ... 11 13 17 Storage v Street Label 15 Sunrise 14 18 21 54 Sunrise At Point 40 Sunset 14 18 21 54 Sunset At Point 40 Sun and Moon 48 Symbol Map List 24 System Page 47 System Setup Page 47 T Text 15 Text Out 46 Time Format 43 Icon 22 Of Day 14 18 21 54 Page 43 Status 47 Time Date and Backlighting Status 47 Time Date 47 Time Zone 43 To Course 14 18 21 55 TracBack 41 Tracks Definition of 8 Log 14 Options...

Page 74: ...te 35 37 39 W WAAS Wide Area Augmentation System Warnings iii iv Warranty vi vii Water Immersion v Waypoints 24 27 WGS84 World Geodetic Survey 1984 44 Wide Area Augmentation System WAAS 1 47 Wiring Diagram 58 www GARMIN com vii www nima mil 44 Z ZOOM IN 9 10 ZOOM IN button 2 ZOOM OUT 9 10 ZOOM OUT button 2 Index 190 00234 00_0C indd 64 10 11 2002 9 49 50 AM ...

Page 75: ...LegendOMCover indd 3 10 11 2002 9 52 39 AM ...

Page 76: ...The Quadrangle Abbey Park Industrial Estate Romsey SO51 9AQ U K GARMIN Corporation No 68 Jangshu 2nd Road Shijr Taipei County Taiwan www garmin com For the latest free software updates throughout the life of your GARMIN products visit the GARMIN web site at www garmin com Part Number 190 00234 00 Rev C LegendOMCover indd 4 10 11 2002 9 52 39 AM ...

Reviews: