background image

eTrex

®

 Vista Cx

hiking companion

owner’s manual

Summary of Contents for eTrex Vista Cx

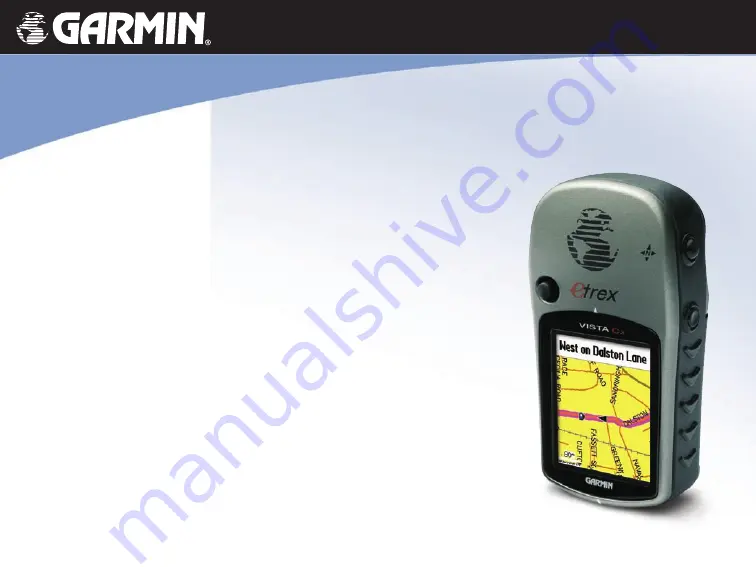
Page 1: ...eTrex Vista Cx hiking companion owner s manual ...

Page 2: ...and to make changes in the content without obligation to notify any person or organization of such changes or improvements Visit the Garmin Web site www garmin com for current updates and supplemental information concerning the use and operation of this and other Garmin products Garmin eTrex AutoLocate TracBack BlueChart and MapSource are registered trademarks of Garmin Ltd or its subsidiaries and...

Page 3: ...provides an overview of the unit how to turn the unit on and acquiring satellites The Basic Operation section provides information about setting up waypoints routes and tracks The Main Pages section contains an overview of the Satellite Trip Computer Map Compass and Altimeter Pages The Main Menu section describes features found on the Main Menu and information about how to change settings The Appe...

Page 4: ...erms 6 Selecting Options and Entering Data 7 The Status Bar and Date and Time 7 On Screen Messages 8 Using the Mapping Databases 8 Transferring Data to a microSD Card 9 Basic Operation 10 Creating and Using Waypoints 10 Marking Your Current Location 10 Creating Waypoints Using the Map 11 Creating a Waypoint Using Coordinates 11 Editing Waypoints 12 Deleting Waypoints 12 Averaging the Waypoint s Lo...

Page 5: ... Text 42 Setting up the Map Page 43 Measuring Distance 46 Turning Declutter On or Off 47 Restoring Defaults 47 Compass Page 48 Using the Electronic Compass 49 Compass Page Options 51 Sight N Go Navigation 52 Using the Course Pointer or Bearing Pointer 53 Data Fields 54 Altimeter Page 55 Altimeter Page Options 56 Plot Over Time or Distance 57 View Pressure or Elevation Plots 57 Zoom Ranges 58 View ...

Page 6: ...topwatch 81 Sun and Moon 82 Hunt and Fish 83 Games Menu 84 Memory Race 84 Virtua Maze 85 GekoSmak 85 Nibbons 86 Gekoids 86 Beast Hunt 87 Appendix 88 Specifications 88 Physical 88 Performance 88 Power 88 Optional Accessories 89 Connecting Your Vista Cx to a Computer 92 What Is WAAS EGNOS 93 Map Datums and Location Formats 94 What Are Map Datums 94 What Is a Location Format 94 Loran TD Setup 95 FCC C...

Page 7: ...ssemble reverse engineer or reduce to human readable form the Software or any part thereof or create any derivative works based on the Software You agree not to export or re export the Software to any country in violation of the export control laws of the United States of America Product Registration Help us better support you by completing our online registration today Have the serial number of y...

Page 8: ...ents apply the liquid to the cloth and then gently wipe the screen with the moistened cloth Storage Do not store the Vista Cx where prolonged exposure to temperature extremes may occur such as in the trunk of a car as permanent damage may result User information such as waypoints and routes are retained in the unit s memory without the need for external power It is always a good practice to back u...

Page 9: ...questions before continuing navigation Use the electronic chart in the eTrex Vista Cx only to facilitate not to replace the use of authorized government charts Official government charts and notices to mariners contain all information needed to navigate safely Warning WARNING This product its packaging and its components contain chemicals known to the State of California to cause cancer birth defec...

Page 10: ...als of Garmin is to provide customers with the most complete and accurate cartography that is available to us at a reasonable cost We use a combination of governmental and private data sources which we identify in product literature and copyright messages displayed to the consumer Virtually all data sources contain inaccurate or incomplete data to some extent This is particularly true outside the ...

Page 11: ... Auxiliary Mount Adapter attachment location Accepts a Belt Clip accessory for convenient access when hiking or walking Accepts the Auxiliary Mount Adapter accessory supplied with the unit Refer to page 89 for acces sory listings Color LCD display GPS antenna Provides quick satellite acquisition N Vista Cx eTrex Vista Cx Owner s Manual 1 GETTING STARTED UNIT OVERVIEW ...

Page 12: ...k cover with the unit and turning the D Ring 1 4 turn clockwise Remove the batteries from your Vista Cx when you do not expect to use the unit for several months Stored data is not lost when batteries are removed To install the lanyard 1 Place the loop of the lanyard through the slot at the upper left side on the back of the unit 2 Route the strap through the loop and pull tight Battery compartmen...

Page 13: ...t or left to move through lists highlight fields on screen buttons or icons enter data or move the map panning arrow Press in and release to enter highlighted options and data or confirm on screen messages Press in and hold at any time to mark your current location as a waypoint Quit Compass key Press to cycle through the main pages Press when using the on screen keyboard to close Press and hold t...

Page 14: ...press and hold the Power key again Adjusting the Backlight You may want to adjust the backlight to see the display better To adjust the backlight level 1 Press and quickly release the Power key 2 Press up on the Rocker to increase the brightness or press down to decrease 3 Press Enter or the Quit key to close the backlight adjustment window Backlight Adjustment Slider See page 68 for information a...

Page 15: ...ites the display at the top of the page changes to indicate position accuracy and location coordinates 3 Press and release the Quit key until the Map Page appears You are now ready to begin GPS aided navigation You can also observe a sky view array of the satellites overhead with your location centered in the array The outer circle represents the horizon and the inner circle represents a position ...

Page 16: ...ve the highlighted area on the screen up down left or right with the Rocker to select individual fields Field the location on a page where data or an option can be shown and entered Select highlight a field using the Rocker to begin entering data or selecting options On screen button use the Rocker to highlight a button and press Enter to select the button Scroll bar when viewing a list of items too...

Page 17: ...s Bar and Date and Time The status bar and Date Time Window appear below the backlight adjustment slider when you press and release the Power key Power to the unit is provided by either batteries or from an auxiliary source Power status is shown on the Main Menu and the Status Bar Date and Time Window The Battery Power icon shows the remaining power as the battery is depleted The external power ic...

Page 18: ...be loaded with detailed maps from optional MapSource disks for your PC This can enhance the versatility of your Vista Cx With selected MapSource detailed mapping data you can view listings of nearby restaurants lodging shopping centers attractions and entertainment and even retrieve addresses and phone numbers for any listed location The amount of data transferred is determined by the capacity pri...

Page 19: ... To transfer map data to the microSD card 1 Lift the weather cover from the USB port on the upper back of the unit 2 Connect the USB cable provided with the unit to the USB port on your PC and to the mini USB port on the back of the unit 3 Follow instructions for selecting and downloading maps provided with the MapSource map data disk PUSH TO EJECT Ta iw an Installing and removing the microSD card...

Page 20: ...nates for a waypoint manually Marking Your Current Location Use the MARK key to quickly capture your current location to create a new waypoint You must have a valid position 2D or 3D fix to mark your current location To mark your current location 1 Press and hold the MARK key until the Mark Waypoint Page appears A default three digit name and symbol are assigned to the new waypoint 2 To accept the ...

Page 21: ...ess Enter 4 To change any information on the Waypoint Page highlight the appropriate field and press Enter to open the on screen keypad After entering and confirming your changes highlight OK and press Enter Creating a Waypoint Using Coordinates You can manually enter location coordinates to create a waypoint This method is useful for creating a waypoint at a specific latitude longitude position from...

Page 22: ... enter new data 5 Press Quit when finished Deleting Waypoints You can delete waypoints from the Waypoint Page NOTE When you delete a waypoint you cannot recover it from the unit To delete a waypoint 1 Press and hold the Find key to open the Find Menu 2 Highlight the Waypoints icon and press Enter to open the Waypoints Page 3 Select the waypoint you want to delete and press Enter The Waypoint Page o...

Page 23: ...x before you can average a waypoint s location You cannot average a waypoint after it has been saved to the waypoints list and the Mark Waypoint page is closed as there is no longer satellite fix for that specific location To calculate the average location 1 Press the Find key to open the Find Menu 2 Highlight the Waypoints icon and press Enter to open the Mark Waypoints Page 3 Select the waypoint f...

Page 24: ...ypoint you want to project and press Enter The Waypoint Information Page opens 4 Press the Menu key to open the Options Menu 5 Select Project Waypoint and press Enter to open the Project Waypoint Page 6 Enter the distance and bearing to the projected waypoint in the appropriate fields at the bottom of the page and press the Quit key when finished Mark Waypoint Page Average Location Page Project Wayp...

Page 25: ...the point to the list on the Proximity Waypoints Page 6 Use the Rocker to highlight the Radius field if you want to enter a value different than the default of 1 mile To turn proximity alarms on or off 1 Press the Menu key twice to open the Main Menu 2 Highlight the Proximity icon and press Enter to open the Proximity Waypoints Page 3 Highlight the Proximity Alarms check box and press Enter to init...

Page 26: ...cluded in the Vista Cx basemap You can also find saved waypoint and geocache points Additional icons appear depending on the optional MapSource data loaded to the unit Press and hold the Find key to open the Find Menu When you access a Find group list it contains only those items near your current location or the pointer if active Waypoint Options Menu Cities Options Menu Find Menu with optional Ma...

Page 27: ...ocker to highlight the icon for the type of item for which you want to search and press Enter OR To search the entire database select the All Points of Interest icon and press Enter 3 Press the Menu key highlight Find By Name and press Enter 4 Use the Rocker and Enter key to operate the on screen keypad and enter the name of the location you want to find When the Find list contains a match highligh...

Page 28: ...out the item Each information page contains three on screen buttons Different buttons appear depending on whether you are selecting a Find item to navigate to or adding a Find item to a route list as a waypoint Find Information Page Options Menu The Options Menu for each information page contains options for using a Find item as a tool for navigation To use the Options Menu 1 With an information p...

Page 29: ...iew Hunt and Fish view Hunt and Fish tables for this item location See page 83 for more information Map Information show the map from which the map item originated See page 92 for information about downloading detailed maps To find an item near another item 1 Press and hold the Find key to open the Find Menu 2 Select an icon on the Find Menu and press Enter 3 Highlight an item in the Find list and ...

Page 30: ...waypoint 1 Press and hold the Find key to open the Find Menu 2 Highlight the Waypoints icon and press Enter to open the Waypoints Page 3 Use the Rocker to select a waypoint and press Enter The Waypoint Page opens Finding a Geocache Use the Geocache icon to view the list of geocache locations created using your Vista Cx or downloaded from your computer A geocache location is a waypoint with a speci...

Page 31: ...utton and press Enter to navigate to the geocache location When you navigate to a geocache the Compass Page changes to Geocache Navigation mode and any additional information about the downloaded cache location is shown in the comment field When a geocache is found the unit marks the cache as found log an entry into the calendar and provide an option that when activated shows the nearest cache Find...

Page 32: ... key select a search method and press Enter Finding an Interstate Exit Use the Exits icon on the Find Menu to find an interstate exit To find an interstate exit 1 Press and hold the Find key to open the Find Menu 2 Highlight the Exits icon and press Enter The Exits Page shows a list of interstate exits near your location 3 Use the Rocker to select an exit and press Enter to open the information page...

Page 33: ...ress 1 Press and hold the Find key to open the Find Menu 2 Highlight the Addresses icon and press Enter to open the Addresses Page If your unit has a GPS fix the Enter Region field is populated with your current region You do not have to specify a city in the Enter City because the database has information for the entire region However you can select a city if you want to reduce the possible number ...

Page 34: ...treet names and a city the Find feature locates the intersection by matching that data with the map database To find an intersection 1 Press and hold the Find key to open the Find Menu 2 Highlight the Intersections icon and press Enter to open the Intersections Page 3 If your unit has a GPS fix the Enter Region field is populated with your current region You do not have to specify a city in the Enter...

Page 35: ...k public building and so on To find a point of interest 1 Press Find to open the Find Menu 2 Highlight the All Points of Interest icon and press Enter to show a list of all points near your current location 3 Highlight an item in the list and press Enter to open the information page for the item OR Press Menu to open the Options Menu where you can select options to help you narrow your search Narro...

Page 36: ...erest by using the Garmin POI Loader utility available from the Garmin web site www garmin com products poiloader Follow the instructions for use on the web Using Tracks The Tracks feature creates an electronic bread crumb trail or track log on the Map Page as you travel The track log contains information about points along its path The track log starts recording as soon as the unit gets a locatio...

Page 37: ...ose from five intervals Interval records a track according to the Record Method and Interval Enter a specific distance time or frequency Color select the color of the active track on the map Log Track to Data Card records the current track log to the microSD card in addition to the unit s internal memory Using this option allows you to record a large number of track points depending on the capacity ...

Page 38: ...ht the Save button and press Enter A message appears asking you if you want to save the entire track 4 Select No and press Enter to save only a portion of the track log A map showing the entire track appears 5 Use the Rocker to move the pointer to the point on the track line that you want to be the beginning point and press Enter 6 Use the Rocker to move the arrow to the point on the track line th...

Page 39: ...e compatible application 4 To delete these track logs from the microSD card highlight individual logs and then press ENTER Use the Delete All button to clear the entire list NOTE Do not remove the microSd card from the unit while logging a track because corruption of the data can result To view a track on the map On the Saved Track Page select the Map button and press Enter to open the Map Page A ...

Page 40: ...ighlight Profile and press Enter to view the Track Profile The beginning of the track is marked by a flag You can scroll across the track profile by pressing the Rocker As you scroll across the profile the elevation for each point on the profile is shown at the top of the page and the distance from the Begin point and the End point are shown at the bottom 3 At any point along the profile you can press En...

Page 41: ...r to open the TracBack Page showing the track You can select the point you want to TracBack to 2 Use the Rocker to move the pointer to the point on the map and press Enter to start navigating the TracBack 3 Select either Follow Road to route back to the selected point using available roadways or select Follow Track to retrace your original path of travel Highlight the Don t Ask Again option and pr...

Page 42: ...Page and you can add waypoints to a route from the Find Menu You can create more complex routes using a PC and MapSource mapping programs and then transfer them to the unit memory Auto Routes which are generated when you select Go To for a Find item map item or waypoint cannot be saved Saved routes with more than 50 waypoints cannot be navigated using the Follow Roads option To create a route 1 Pr...

Page 43: ... point Before each turn in the route a turn page shows a guidance message and a graphic of the turn You can view the turns at any time by pressing up or down on the Rocker while the route is active Both navigation methods change when you select the Follow Roads option on the Routing Setup Page Both Go To navigation and point to point routing become routes that allow you to navigate using roads The...

Page 44: ... page 69 To preview the turns for an active route 1 On the Routes Page highlight a saved route and press Enter to open the Route Page for the selected route 2 Highlight the Navigate button and press Enter to begin navigation and show the route on the Map Page 3 To view the list of turns on the route press the Quit key to open the Active Route Page To view an individual turn on the list use the Roc...

Page 45: ... name To review individual route points 1 Press the Menu key twice to open the Main Menu 2 Highlight the Routes icon and press Enter to open the Routes Page 3 Select a saved route and press Enter 4 Highlight a point on the Route Page and press Enter to open an options menu 5 Highlight Review and press Enter to open the information page for the route point 6 Select Save save the point as a waypoint...

Page 46: ...o the next point Select Distance to enter a radius so that when you are within the entered distance the Vista Cx leads you to the next point on your route Select Manual to transition to the next waypoint anytime while navigating a route Using the Route Page Options The Route Page shows all points stored in memory for the route selected on the Routes Page Press the Menu key to open the Route Page O...

Page 47: ...oute Page appears in the sequence when you are actively navigating The Satellite Page appears only at Start Up Each page has an Options Menu which contains the setup options and functions that apply to the page To view the Options Menu for a page press the Menu key Compass Page Main Menu Map Page Options Menu Altimeter Page Options Menu No Options Map Page Altimeter Page Compass Page Options Menu ...

Page 48: ...es you to turn the GPS receiver on or off Track Up North Up indicates whether satellites are shown with the rings oriented with North toward the top of the display or your current track toward the top of the screen Multicolor Single Color indicates whether each satellite appears as a different color or the same color New Location use if you have moved the unit more than 600 miles and you are havin...

Page 49: ... the white arrow map pointer within the display area When you are in pan mode you can move the map pointer about the page to highlight and identify map items If there is more than one map item under the pointer a list of all the items appears at that point You can add and configure up to four optional data fields to the top of the page to provide a variety of travel and navigational information To s...

Page 50: ...apSource data disks you can view listings of nearby restaurants lodging shopping centers attractions and entertainment and you can retrieve addresses and phone numbers for any listed location With additional BlueChart data you can access information such as marine navaids wrecks obstructions and anchorage locations You can view the map data currently loaded on your microSD data card To review map ...

Page 51: ...apsource appears below the scale Map ranges Map Orientation There are two map orientation options North Up orients the map like a paper map Track Up orients the map in the direction of travel When using Track Up the North arrow indicates the orientation Set the map orientation using the Setup Map option Map Page Options Use the Map Page Options Menu to customize the Map Page With the Map Page open...

Page 52: ... Turn Declutter On Off eliminates the display of items on the map that can block road details when the map is zoomed out Restore Defaults returns the map display to the factory set defaults Guidance Text When navigating guidance text appears at the top of the map Guidance Text shows useful information when navigating to a destination Guidance text To show guidance text 1 Press the Menu key to open...

Page 53: ...for that feature Each page has a sub menu of general options To access this menu press the Menu key with the preferred setup page displayed Map Setup General Page The Map Setup General Page contains the settings for Orientation Below Auto Zoom Detail and Lock On Road Map Setup General Page Orientation selects how the map is shown North Up always shows north at the top of the page Track Up shows yo...

Page 54: ...racks are shown on the map Track Log sets the maximum zoom range at which active track logs are shown Track Points sets the maximum number of track points used to record a track Go To Line selects either a bearing or course line for navigating a track Map Setup Points Page Us the Map Setup Points Page to set the map scale at which Map Points User Waypoints Street Label and Land Cover appear on the...

Page 55: ... the Menu key to view the list of options for displaying maps Map Setup Marine Page Use the Map Setup Marine Page to customize settings for marine colors spot soundings light sectors and symbol sets when using downloaded marine charts MapSource BlueChart marine mapping data Map Setup Marine Page Marine Colors toggles marine colors on or off on the Map Page Spot Soundings toggles spot soundings on ...

Page 56: ...below it 3 Move the arrow to the reference point the starting point you want to measure from and press Enter A push pin icon marks the starting point on the map 4 Move the arrow to the point you want to measure to The distance between the two points is shown in the upper right corner of the Map Page 5 Press Quit to cancel Push pin indicating the beginning point of the measurement End point of meas...

Page 57: ...in the same size regardless of the map scale To turn declutter on or off 1 Press the Menu key to open the Map Page Options menu 2 Highlight Turn Declutter On and press Enter OR To turn Declutter off press Menu select Turn Declutter Off and press Enter Restoring Defaults Use the Restore Defaults option to return the map settings to factory settings Map with declutter off Map with declutter on eTrex...

Page 58: ... Pointers indicates the direction bearing to or course of travel to your destination relative to your current heading direction The compass ring bearing pointer or course pointer work independently to show your direction of movement and the direction to your destination You can choose a Bearing Pointer or Course Pointer for guidance See page 53 for more information Course Pointer Bearing Pointer S...

Page 59: ...g but only when you are moving When stationary or moving slowly you must use the electronic compass for headings You can customize the criteria for switching between the electronic compass and the GPS To turn the electronic compass on or off 1 Press and hold the Quit key to turn the electronic compass on or off The Compass Icon appears in the status bar when the electronic compass is on When you a...

Page 60: ... the electronic compass 1 Press the Menu key to open the Compass Page Options menu 2 Highlight Calibrate Compass and press Enter to open the Calibration Page 3 With the Start button highlighted press Enter and follow on screen directions for holding and turning the unit A Just Right Too Fast or Too Slow message appears notifying you to adjust your turning speed as needed Hold the unit level while ...

Page 61: ...rns active navigation for a route or Go To on and off Recalculate recalculates the path to a destination Course or Bearing Pointer toggles between the course pointer and the bearing pointer Data Fields allows you to select the number of data fields that appear on the Compass Page Change Data Fields allows you to select the type of data you want to show in the data fields Calibrate Compass accesses t...

Page 62: ...ress Enter to open the Compass Page 5 Begin traveling to your destination on a course line using the Course Pointer as a guide OR Highlight Project Waypoint and press Enter to open the Project Waypoint Page 6 Enter an estimated distance from your current location to establish a projected waypoint location 7 Highlight the Go To button and press Enter to open the Map Page and begin navigation to the...

Page 63: ...oving Most efficient if you must move around obstacles lakes private property etc in your path If you are using the course pointer option and you drift away from the line of travel from your original location to your destination the course deviation indicator an arrow with horizontal dotted line provides graphic indication of drift right or left according to the scale shown at the edge of the compa...

Page 64: ... three or four data fields on the Compass Page To show data fields on the Compass Page 1 Press the Menu key to open the Compass Page Options Menu 2 Highlight Data Field and press Enter The Show sub menu appears 3 Select the number of data fields you want to show on the Compass Page three or four and press Enter 0 25 mi The course pointer indicates your course of travel from your original location and...

Page 65: ...default settings 1 Press the Menu key to open the Compass Page Options Menu 2 Highlight Restore Defaults and press Enter to return the page to factory settings Altimeter Page The Altimeter Page shows you the current elevation rate of ascent and descent a profile of elevation changes over distance or time or a profile of pressure changes over time The Status field at the bottom of the page shows the c...

Page 66: ...a plot of elevation changes that occur over a set distance or view changes in the barometric pressure for set period of time Zoom Ranges allows you to set the Zoom Ranges for elevation distance or time when you show the View Elevation Plot Change Data Fields allows you to select the type of data you want to show in the data fields Reset allows you to reset the elevation data and the maximum elevati...

Page 67: ... over a set distance or period of time Select View Pressure Plot to view a record of changes in barometric pressure for a set period of time When one option is active the other option is shown on the Options Menu To view elevation or pressure plots 1 Use the Rocker to select the option you want from the Altimeter Options menu and press Enter to show the plot 2 Adjust the time and distance measurem...

Page 68: ... and distance are shown in the same manner as for elevation plots To adjust zoom ranges 1 Select the type of plot you want to view and use the Rocker to highlight Zoom Ranges on the Options Menu 2 Press Enter to open the Zoom Ranges Page Press up or down on the Rocker to adjust the vertical distance or pressure and press left or right to adjust either the time or distance OR Pressing up or down on...

Page 69: ...s the profile As the cross hairs move across the profile the status window at the bottom of the page changes to show the date time and altitude or pressure for the point at the intersection View Points on Map You can view the location of points on the Map Page To view altitude points on the Map Page 1 With the Altimeter Page open use the Rocker to move the red crosshairs to the point you want to vie...

Page 70: ...and then press Enter to place a check mark in the box next to a selected item You can reset elevation data such as Minimum Elevation all Ascent and Descent data or only the Maximum Elevation 4 Highlight the Apply button and press Enter to reset the data fields A confirmation message appears You can reset or delete data for any of the other features represented on the list by placing a check mark in ...

Page 71: ...t your current location To manually calibrate the altimeter 1 Press the Menu key to open the Altimeter Page Options Menu 2 Highlight Calibrate Altimeter and press Enter to open the Calibration Page 3 At the message Do You Know The Correct Elevation highlight the Yes button and press Enter OR If you do not know the elevation select No to use the pressure option If you do not know the pressure selec...

Page 72: ...he Altimeter Page Options Menu 2 Highlight Change Data Fields and press Enter 3 Use the Rocker to highlight a data field and press Enter to view a list of available data field options 4 Press up or down on the Rocker to highlight an option and press Enter to place it in the data field Data field options Data fields 62 eTrex Vista Cx Owner s Manual MAIN PAGES ALTIMETER PAGE ...

Page 73: ...s available You can reset the trip information by highlighting Reset from the menu and pressing Enter The Reset Page offers options for resetting trip computer data clearing the track log and deleting saved tracks waypoints and routes From this page you can select individual items select all and unselect all When you make your selections highlight the Apply button and press Enter Answer OK to the ...

Page 74: ...e does not appear on the Main Menu Tracks The Tracks Page shows the percentage of track memory used and a list of saved tracks Use the Tracks Page to set up clear or save a track log or enable the TracBack feature for the current track log For more information see page 26 To access the Tracks Page 1 Press the Menu key twice to open the Main Menu 2 Select the Tracks icon and press Enter 3 Highlight...

Page 75: ...cific distance or time The interval field appears only when the Record Method is set to Distance or Time Color sets the color for the track when it appears on the map Routes Page Use the Routes Page to create a route to a destination For more information see Routes on page 32 Highway Page When you are navigating a route the Highway Page provides guidance to your destination by using data fields and a...

Page 76: ... Menu to display the Options Menu You can do the following stop navigation configure data fields from four to three with a destination guidance message change the data fields or restore defaults to factory settings Setup Menu Use the Setup Menu to customize your Vista Cx to your personal preferences To access the Setup Menu 1 Press Menu twice to open the Main Menu 2 Use the Rocker to highlight the Se...

Page 77: ...ine or NiMH Text Language sets the unit s on screen language External Power Lost indicates whether the unit remains on Stay On or turns off Turn Off when external power is removed from the unit Proximity Alarms indicates whether custom POI Points of Interest proximity alarms are on or off System Setup Options The System Setup Options Menu contains Restore Defaults and Software Version Use Restore ...

Page 78: ...me out after a selected period of time has elapsed when using the battery The backlight stays on regardless of this setting when external power is used Backlight Level turns the backlight up or down Press up on the Rocker to increase the intensity or down to decrease Interface Setup Use the Interface Setup Page to transfer data to or from the microSD card contained in your unit To access the Inter...

Page 79: ...drives mapped to your computer Windows may experience difficulty assigning a drive letter for your unit microSD card Either log on without connecting to the network or click Start Settings Control Panel Administrative Tools Computer Management Storage Disk Management and remap a drive letter for the Vista Cx removable storage device 4 Select Edit Paste The file appears in the list of files on the Vis...

Page 80: ... Insert then select the page you want to insert from the list and press Enter To remove a page select Remove and press Enter Map Page Setup Map Page Setup information is located on page 44 Routing Setup Use the Routing Setup Page to customize the manner in which routing functions behave To access the Routing Setup Page 1 On the Setup Menu Page highlight the Routing icon and press Enter 2 Highlight...

Page 81: ...s automatically You can turn Recalculation off Calculation Method sets how the unit searches for the route There are four options Quickest Calculation calculates the route the quickest but it might not produce the best route Quick Calculation takes more time to calculate but generates a better quality route Better Route generates an even better quality route but uses a longer calculation time Best...

Page 82: ...e Setup Page to define marine alarm settings To access the Marine Setup Page On the Setup Menu Page highlight the Marine icon and press Enter Anchor Drag Alarm sets an alarm to sound when you exceed a specified drift distance Off Course Alarm sets an alarm to sound when you are off your chosen course Speed Filter sets an alarm to sound when you enter waters that are too shallow or too deep Time Setu...

Page 83: ...ance and Speed sets the unit of measurement for speed and distance traveled Elevation Vert Speed sets the unit of measurement Feet ft min Meters m min or Meters m sec for indicating your altitude Depth sets the unit of measurement Feet Fathoms or Meters to show the depth Pressure sets the unit of pressure measurement Inches Millibars or Hectopascals Heading Setup Use the Heading Setup Page to spec...

Page 84: ...e message appears 2 Highlight the Compass button and press Enter to open the Compass Calibration Page Follow the instructions on page 50 To calibrate the Altimeter Select Altimeter and press Enter to display the Altimeter Calibration Page Follow the instructions on page 61 Altimeter Setup The Altimeter Setup Page allows you to setup the altimeter to self calibrate each time you turn on the unit to...

Page 85: ... appears when you turn on your Vista Cx To access the Welcome Setup Page On the Setup Menu Page highlight the Welcome Message icon and press Enter To add a welcome message 1 Use the on screen keypad and the Rocker to enter your welcome message and press Enter 2 When finished highlight OK and press Enter 3 Turn your unit off and then on again to view your Welcome message Jumpmaster Setup Jumpmaster ...

Page 86: ...ect an impact point 1 Highlight the Desired Impact Point field and press Enter to view the Find Menu 2 Select the desired point from a list of waypoints or from one of the other Find Menu options A drop altitude of at least 1 000 feet must be specified next Jumpmaster uses the drop altitude as the opening altitude for HAHO jumps while HALO and Static jumps contain a separate field for this feature Co...

Page 87: ...eader DZSTL monitoring the course of a Pilot Balloon PiBal released from the ground at the DIP and wind streamers dropped from aircraft once the HARP is calculated Jumpmaster is capable of handling doglegs in wind direction To use the Wind Setup Page 1 Select Clear All from the Option Menu of this page to clear the list of wind speeds and directions 2 Enter wind speeds and directions as a pair to ...

Page 88: ...n the parachute canopy rating Each parachute should be labeled with a K value Common values may range from 3 0 for K freefall to 48 0 for HAHO K open To use the Constant Setup Page 1 Highlight each field in order and press Enter to open the numerical keypad 2 Enter the appropriate value in each field select OK and then press the Quit key to return to the Jumpmaster Setup Page Clicking the Goto HARP ...

Page 89: ...re the parachute is open Forward Throw Horizontal describes the distance traveled forward due to aircraft speed K values defines the wind drag values for parachutes HAHO High Altitude High Opening describes a type of jump HALO High Altitude Low Opening describes a type of jump HARP High Altitude Release Point describes the location at which the jumper exits from aircraft MSL Mean Sea Level defines t...

Page 90: ...light the day you want to add waypoints to and press Enter to show the Page for that day 4 Press the Menu key to open the Options Menu Highlight Add Point and press Enter to open the Find Menu 5 Select the type of point you want to place on the Day Page See page 16 for details on using the Find Feature With the information page for that point displayed highlight the Use button and press Enter to p...

Page 91: ...r Stopwatch Select the Stopwatch icon to use the Vista Cx as a stopwatch which includes a lap timer You can also have the unit record the lap time based on distance To access the stopwatch 1 Press the Menu key twice to open the Main Menu 2 Select the Stopwatch icon and press Enter To start the stopwatch Highlight the Start button and press Enter to start the stopwatch To stop the stopwatch Highlig...

Page 92: ...e highlight OK and press Enter Sun and Moon The Sun and Moon Page provides you with a graphic depiction of the sun and moon relative to the Earth Sun and moon positions can be shown for any time date and location on Earth The Sun and Moon Page also shows sunrise sunset moonrise and moonset times for a selected time date and location Use the on screen buttons to animate the movement of the sun and ...

Page 93: ...h icon and press Enter The current date and location appear in the date and location fields at the top of the page 3 To view the predictions for a different date highlight the Date field and press Enter to open the on screen keypad 4 To view the predictions for a different location highlight the Location field and press Enter to open the New Location Options Menu Choose Use Map to select a point on t...

Page 94: ... playing field use caution in selecting an area free of hazards such as holes obstructions or proximity to vehicular traffic Playing these games may distract your attention from observing objects in your path 4 Press the Quit key and highlight Yes when prompted to stop playing Memory Race This is a GPS virtual game where the playing piece moves where you move To win the Memory Race remember which sq...

Page 95: ...e time Viewing less of the maze makes the game more difficult TIP Press Menu and select Cheat to start cheat mode Enabling this mode penalizes you by five minutes and counts seconds by 10 instead of 2 Press Enter to turn off the cheat mode GekoSmak GekoSmak is a GPS based game that features you as the player piece In measured rhythm gekos appear on the screen Before the geko disappears move toward t...

Page 96: ...e after you Gekoids This GPS game which can be played without GPS on is all about blasting gekoids The catch is you are the ship and you can survive only when you avoid getting hit Before you begin to play be sure to make your game settings The Northwards setting rotates your ship in the center of the map The map is stationary and north is always up The Ship Up setting rotates the virtual world ar...

Page 97: ...t Beast Hunt from the Games Menu and press Enter The Game Overview Page appears 2 Press Enter to open the Difficulty Level Menu Select a difficulty level Trainee Beginner Expert or Master and press Enter to open the Visibility Menu 3 Select a visibility option Extended or Limited and press Enter to begin play 4 Use the Rocker to jump from platform to platform When you land on a shaded platform you a...

Page 98: ...bject to proper user calibration Power Source Two 1 5 volt AA batteries 12 V DC Adapter Cable or PC USB Adapter Battery Life Up to 32 hours typical use Alkaline batteries lose a significant amount of their capacity as the temperature decreases Use Lithium batteries when operating the Vista Cx in below freezing conditions Extensive use of screen backlighting electronic compass and audible tones sign...

Page 99: ...te lighter MapSource Software Data Disks and Pre Loaded microSD Cards offers several detailed mapping options that are compatible with the Vista Cx Visit the Garmin web site at http garmin com products etrexVistacx for a list of compatible MapSource products Carrying Case protects the Vista Cx when not in use Marine Mount Kit allows installation on a boat Automotive Mount Kit allows installation o...

Page 100: ...ation the entire distance from beginning to end of a route ETA At Next the estimated time that you will arrive at the next point on your route if you maintain your current speed and course ETA At Destination the estimated time that you will arrive at your destination if you maintain your current speed and course Elevation the distance above or below mean sea level Elevation Maximum The highest ele...

Page 101: ...me and date It can be displayed in 12 or 24 hour format in local time or universal UTC time To Course your direction of travel to get back on course Trip Odometer the running total of distance traveled since the Trip Computer was reset Trip Time Moving the length of time your vehicle has been in motion since the trip computer was reset Trip Time Stopped the length of time that the vehicle has been...

Page 102: ...le into the matching port 2 Connect the remaining cable end to your computer s USB port Information about USB Drivers The USB drivers are automatically installed when you install the MapSource Trip and Waypoint Manager software that came with your Vista Cx When you initially connect the Vista Cx to a USB port your computer might prompt you to locate the destination of the drivers for the device Yo...

Page 103: ...ited States and portions of Alaska WAAS and EGNOS are just two service providers that adhere to the MOPS Minimum Operational Performance Standard for global satellite based augmentation systems SBAS Eventually there are to be several more services of worldwide geostationary communication satellites that broadcast integrity information and differential correction data as transmitted by ground refer...

Page 104: ... to the same datum as the map to ensure the most accurate navigation What Is a Location Format Your current location is viewed on the GPS in the form of coordinates Because different maps and charts use different location formats Garmin GPS units allow you to choose the correct coordinate system for the type of map you are using The most common format is latitude and longitude which is used by all...

Page 105: ...n secondary stations or offsets have been changed since the waypoint was created the waypoint references the active GRI chain and secondary stations and adjusts the TD coordinates accordingly Remember that the Vista Cx is not relying on the LORAN signal for navigation and actually converts the TD coordinate to a useful latitude and longitude coordinate before storing the waypoint to memory or usin...

Page 106: ...es cause harmful interference to radio or television reception which can be determined by turning the equipment off and on the user is encouraged to try to correct the interference by one of the following measures Reorient or relocate the receiving antenna Increase the separation between the equipment and the receiver Connect the equipment into an outlet on a circuit different from that to which t...

Page 107: ...E IN NO EVENT SHALL GARMIN BE LIABLE FOR ANY INCIDENTAL SPECIAL INDIRECT OR CONSEQUENTIAL DAMAGES WHETHER RESULTING FROM THE USE MISUSE OR INABILITY TO USE THIS PRODUCT OR FROM DEFECTS IN THE PRODUCT Some states do not allow the exclusion of incidental or consequential damages so the above limitations may not apply to you Garmin retains the exclusive right to repair or replace the unit or software...

Page 108: ... warranty is provided by international distributors for units purchased outside the United States This warranty is provided by the local in country distributor and this distributor provides local service for your unit Distributor warranties are only valid in the area of intended distribution Units purchased in the United States or Canada must be returned to the Garmin service center in the United ...

Page 109: ... 3 F FCC compliance 96 fields data 56 find 16 an address 23 an intersection 24 a city 22 a geocache 20 a point of interest 25 by name 17 item information page 18 recent finds 18 waypoints 20 G games 84 GRI chain 95 H highway page 65 navigation 66 how to adjust zoom ranges 58 59 create a route 32 find a point of interest 25 manually calibrate the altimeter 61 program a data field 62 project a waypoint 1...

Page 110: ...etup menu 66 altimeter setup 74 calibration setup 74 display setup 68 geocache setup 72 heading setup 73 Jumpmaster setup 75 map page setup 70 marine setup 72 page sequence setup 70 routing setup 70 system setup 67 time setup 72 tones setup 69 units setup 73 welcome page setup 75 Sight N Go 52 software license agreement v specifications 88 status bar 7 stopwatch 81 storage vi sun and moon 82 T trac...

Page 111: ......

Page 112: ... www garmin com 2006 Garmin Ltd or its subsidiaries Garmin International Inc 1200 East 151st Street Olathe Kansas 66062 U S A Garmin Europe Ltd Unit 5 The Quadrangle Abbey Park Industrial Estate Romsey SO51 9DL U K Garmin Corporation No 68 Jangshu 2nd Road Shijr Taipei County Taiwan www garmin com Part Number 190 00514 00 Rev B ...

Reviews: