background image

GNS 430(A)

Pilot’s Guide and Reference

Summary of Contents for GNS 430

Page 1: ...GNS 430 A Pilot s Guide and Reference ...
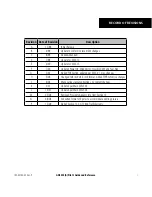
Page 2: ......

Page 3: ... Power On Wind Vector Crossfill DME and Fuel Plan G 5 03 Added FDE Section updated per SW 5 01 misc changes H 5 06 Changed to 8 inch x 8 5 inch format Added TERRAIN misc changes J 6 06 Made various layout corrections no content changes K 2 07 Updated per Main SW v5 02 L 10 07 Updated per Main SW v5 03 M 05 08 Removed Proximity Advisory info from Section 12 N 08 08 Converted format of figures to ac...

Page 4: ...is and other Garmin products Except as expressly provided herein no part of this manual may be reproduced copied transmitted disseminated downloaded or stored in any storage medium for any purpose without the express written permission of Garmin Garmin hereby grants permission to download a single copy of this manual and of any revision to this manual onto a hard drive or other electronic storage ...

Page 5: ...ersection Page 7 14 7 9 NDB Page 7 15 7 10 VOR Page 7 15 7 11 User Waypoint Page 7 17 SECTION 8 NRST PAGES 8 1 8 1 NRST Page Group 8 1 8 2 Nearest Airport Page 8 4 8 3 Nearest Intersection Page 8 6 8 4 Nearest NDB Page 8 6 8 5 Nearest VOR Page 8 7 8 6 Nearest User Waypoint Page 8 8 8 7 Nearest Center ARTCC Page 8 9 8 8 Nearest Flight Service Station FSS Page 8 10 8 9 Nearest Airspace Page 8 11 SEC...

Page 6: ...itude displayed by pressure altimeters in aircraft GPS altitude should never be used for vertical navigation Always use pressure altitude displayed by pressure altimeters in the aircraft WARNING The Jeppesen database used in the GNS 430 system must be updated regularly in order to ensure that its information remains current Updates are released every 28 days A database information packet is includ...

Page 7: ...ervice center Unauthorized repairs or modifications could void both the warranty and the pilot s authority to operate this device under FAA FCC regulations NOTE All visual depictions contained within this document including screen images of the GNS 430 panel and displays are subject to change and may not reflect the most current GNS 430 system Depictions of equipment may differ slightly from the a...

Page 8: ...NTY OF MERCHANTABILITY OR FITNESS FORA PARTICULAR PURPOSE STATUTORY OR OTHERWISE THISWARRANTY GIVESYOU SPECIFIC LEGAL RIGHTS WHICH MAYVARY FROM STATE TO STATE IN NO EVENT SHALL GARMIN BE LIABLE FOR ANY INCIDENTAL SPECIAL INDIRECT OR CONSEQUENTIAL DAMAGES WHETHER RESULTING FROM THE USE MISUSE OR INABILITY TO USE THE PRODUCT OR FROM DEFECTS IN THE PRODUCT SOME STATES DO NOT ALLOW THE EXCLUSION OF IN...

Page 9: ...k Reference Guide Database Subscription Packet Warranty Registration Card GNS 430 Simulator CD ROM The Garmin dealer installs and configures the GNS 430 The GNS 430 is secured in the installation rack with the proper wiring connections A Garmin dealer can answer questions about the installation such as location of antennas or any connections to other equipment in the panel After installation the N...

Page 10: ...rge left knob Large right knob Small left knob Small right knob CDI OBS MSG message FPL flight plan PROC procedures VLOC Volume COM Power Volume VLOC Flip flop COM Flip flop CLR clear ENT enter MENU RNG map range Direct to 1 2 3 4 5 6 7 8 9 10 11 12 13 14 15 16 17 18 4 6 3 2 5 8 9 7 1 10 11 12 13 14 15 16 17 18 Figure 1 1 Keys and Knobs Experiment with the unit and refer to the reference sections ...

Page 11: ...t NAV Page 6 Direct to Key Provides access to the direct to function which allows the pilot to enter a destination waypoint and establishes a direct course to the selected destination Section 4 7 RNG Key Allows the pilot to select the desired map range Use the up arrow to zoom out to a larger area or the down arrow to zoom in to a smaller area 8 MENU Key Displays a context sensitive list of option...

Page 12: ...oint Pressing the OBS Key again returns the unit to normal operation with automatic sequencing of waypoints When OBS mode is selected the pilot may set the desired course to from a waypoint using the Select OBS Course pop up window or an external OBS selector on the HSI or CDI 14 MSG Key Used to view system messages and to alert the pilot to important warnings and requirements See Section 14 1 for...

Page 13: ...ption This takeoff tour is intended to provide a brief introduction of the GNS 430 s major features Sections 2 through 13 of this manual describe these features and others in additional detail Refer to these sections as needed to learn or review the details regarding a particular feature Afterbecomingfamiliarwiththebasics somesuggested reading within this Pilot s Guide includes Flight plan feature...

Page 14: ... 5 Instrument Panel Self Test Page To ensure that the GNS 430 and any connected instruments are working properly check for the following indications on the CDI HSI RMI external annunciators and other connected instruments Course deviation Half left no flag TO FROM flag TO Bearing to destination 135 Distance to destination 10 0 nm All external annunciators if installed On Glideslope Half up no flag...

Page 15: ...s the ENT Key and verify that fuel on board FOB now matches the fuel capacity CAP figure Fuel on board is reduced over time based on the fuel flow FF figure To view the Checklists Page 1 Turn the large right knob to highlight Go To Chklist Figure 1 8 and press the ENT Key Figure 1 8 Go To Chklist Highlighted 2 Turn the large right knob to select the desired checklist then execute each step Section...

Page 16: ...r the satellites and the relative signal strength of each satellite received as a bar graph reading Searching Sky indicates that satellite almanac data is not available or has expired if the unit hasn t been used for six months or more This means the unit is acquiring satellite data to establish almanac and satellite orbit information which can take five to ten minutes The data is recollected from...

Page 17: ...to select the kHz of the desired frequency To place the standby communication frequency in the active field Press the COM Flip flop Key Figure 1 12 Figure 1 12 Active Frequency 135 325 MHz Once the active frequency has been entered repeat steps 1 and 2 to enter the standby frequency After both communication frequencies have been entered the COM Window may be kept hot by leaving the cursor on the s...

Page 18: ...Group Position of Current Page within Current Page Group To select the desired page group Turn the large right knob until a page from the desired page group is displayed Figure 1 13 To select the desired page within the page group Turn the small right knob until the desired page is displayed Figure 1 13 NAV Pages There are seven pages available under the NAV Page Group Default NAV Page Map Page TE...

Page 19: ...ion terms While viewing the Map Page the pilot can quickly declutter and remove many of the background map details by pressing the CLR Key repeatedly until the desired detail is depicted To change the map range press the up arrow to zoom out or the down arrow to zoom in of the RNG map range Key The current map range is depicted in the lower left corner of the Map Display Direct to Navigation The G...

Page 20: ...g of Flight Plan User selectable Data Fields The Default NAV Page Figure 1 17 displays a graphic course deviation indicator CDI the active leg of the flight plan as defined by the current from and to waypoints and six user selectable data fields The default settings for these fields are distance to waypoint DIS desired track DTK bearing to waypoint BRG ground speed GS ground track TRK and estimate...

Page 21: ...ist of airports departure arrival and enroute for the flight plan or direct to Continue to turn the small right knob until the desired airport is selected 3 Press the ENT Key to display the frequency list for the selected airport A frequency listed on the NAV COM Page can be quickly transferred to the standby field of the COM Window or the VLOC Window This time saving process prevents having to re...

Page 22: ...re stored within the NavData Card and are available using the PROC procedures Key To display the Procedures Page Figure 1 22 press the PROC Key Figure 1 22 Procedures Page The steps required to select and activate an approach departure or arrival are identical This introductory section shows examples of the steps required to select an approach but keep in mind the same process also applies to depa...

Page 23: ...uence of waypoints contained within the selected procedure Nearest NRST Pages The NRST Page Group provides detailed information on the nine nearest airports VORs NDBs intersections and user created waypoints within 200 nm of the current position In addition pages are also provided to display the five nearest center ARTCC FIR and Flight Service Station FSS points of communication plus alert the pil...

Page 24: ...olling the Nearest Airport List To view additional information for a nearby airport 1 Press the small right knob to activate the cursor 2 Turn the large right knob to select the desired airport from the list 3 Press the ENT Key to display waypoint WPT information pages for the selected airport Figure 1 26 Figure 1 26 Airport Location Page 4 To display runway and frequency information press the sma...

Page 25: ...ST Airspace Page The last page in the NRST group the Nearest Airspace Page Figure 1 28 provides information for up to nine controlled or special use airspaces near or in the flight path Airspace information appears on this page based on the same criteria used for airspace alert messages If the projected course will take the aircraft inside an airspace within the next ten minutes the message Airspa...

Page 26: ...mation about a nearby airspace such as controlling agency frequency and floor ceiling limits is available from the Nearest Airspace Page Section 8 9 To view additional airspace information 1 Press the small right knob to activate the cursor 2 Turn the large right knob to select the desired airspace from the list 3 Press the ENT Key to view the airspace information Flight Plans FPL The GNS 430 lets...

Page 27: ...elow WAYPOINT Use the large and small right knobs to enter the identifier of the first waypoint in the flight plan The small knob is used to select the desired letter or number and the large knob is used to move to the next character space 6 Press the ENT Key once the identifier has been selected The cursor moves to the next blank waypoint identifier field 7 Repeat steps 5 and 6 above until all wa...

Page 28: ...GNS 430 A Pilot s Guide and Reference 190 00140 00 Rev P 1 20 SECTION 1 INTRODUCTION Blank Page ...

Page 29: ...tic squelch function when listening to a distant station or when setting the desired volume level The COM Power Volume Knob allows the pilot to disable the automatic squelch and keep the COM audio open continuously To override the automatic squelch press the COM Power Volume Knob momentarily Press the COM Power Volume Knob again to return to automatic squelch operation COM Window and Tuning Commun...

Page 30: ...press the small left knob momentarily Figure 2 3 Figure 2 3 Standby Frequency of 135 325 2 Turn the large left knob to select the desired megahertz MHz value For example the 135 portion of the frequency 135 325 3 Turn the small left knob to select the desired kilohertz kHz value For example the 325 portion of the frequency 135 325 NOTE The active frequency in either window cannot be accessed direc...

Page 31: ...the list To select another airport turn the large right knob to highlight the desired airport 4 The NearestAirport Page displays the common traffic advisory frequency CTAF for each listed airport To select this frequency turn the large right knob to highlight the desired airport s CTAF frequency and press the ENT Key to place the frequency in the standby field of the COM Window To display the enti...

Page 32: ... 1 Select the NAV COM Page from the NAV Page Group Section 3 1 or press and hold the CLR Key then turn the small right knob until the NAV COM Page appears 2 Press the small right knob to place the cursor on the airport identifier field To the left of this field appears Departure Enroute or Arrival depending on the placement of the displayed airport within the flight plan 3 Turn the small right kno...

Page 33: ...nnel The GNS 430 s emergency channel select provides a quick method of selecting 121 500 MHz as the active frequency in the event of an in flight emergency Emergency channel select is available anytime the unit is on regardless of GPS or cursor status or loss of the display To quickly tune and activate 121 500 PressandholdtheCOM Flip flopKey orCOM RemoteTransfer Switch for approximately two second...

Page 34: ...rs in the COM Window If the microphone key is stuck or accidentally left in the on position or the microphone continues to transmit after the key is released the COM transmitter automatically times out ceases transmitting after 35 seconds of continuous broadcasting A COM push to talk key stuck message Figure 2 11 is displayed as long as the condition continues Figure 2 11 Message Page ...

Page 35: ...ch operations See Section 6 Figure 3 1 Current Page and Page Group Current Page Group Number of Pages in Current Page Group Position of Current Page within Current Page Group To select the desired page from any page 1 Press and hold the CLR Key to select the Default NAV Page Turn the large right knob to select the desired page group 2 Turn the small right knob to select the desired page NOTE The N...

Page 36: ...the current position at the center of the indicator relative to the desired course the moving course deviation needle As with a traditional mechanical CDI when off course simplysteertowardtheneedle TheTO FROMarrowinthe center of the scale indicates whether the aircraft is heading TO up arrow or FROM the waypoint down arrow NOTE The GNS 430 always navigates TO a waypoint unless the OBS switch is se...

Page 37: ...Enroute safe altitude ESA Estimated time of arrival ETA Estimate time enroute ETE Fuel flow FLOW when configured Ground speed GS Ground track TRK Minimum safe altitude MSA Track angle error TKE Vertical speed required VSR If no flight plan or direct to destination has been selected only speed track altitude and minimum safe altitude data may be displayed All other data types appear as blank lines ...

Page 38: ...ing Factory Settings All data fields settings can be quickly returned to original factory settings To restore all six data fields to factory default settings 1 From the Default NAV Page press the MENU Key to display the Default NAV Page Menu 2 Turn the large right knob to highlight the Restore Defaults option Figure 3 7 and press the ENT Key Figure 3 7 Default NAV Page Menu Dual Unit Consideration...

Page 39: ...t types The identifiers for any on screen waypoints can also be displayed The identifiers are enabled by default Special use and controlled airspace boundaries appear on the map showing the individual sectors for Class B Class C and Class D airspaces Table 3 3 lists the symbols used to depict the various airports and NAVAIDS on the Map Page Symbol Description Airport with hard surface runway s pri...

Page 40: ...tings will cause overzoom to be replaced with no map and the geographic detail will be removed from the Map Display airport and NAVAID remain Figure 3 9 Overzoom on Map Page The Setup Map option described in Section 3 4 allows the pilot to define the maximum range at which each map feature appears This provides the pilot with complete control to minimize screen clutter The pilot can also quickly r...

Page 41: ...t knob to move right turn clockwise or left counterclockwise 4 To cancel the panning function and return to the present position press the small right knob When the target pointer is placed on an object the name of that object is highlighted even if the name wasn t originally displayed on the map This feature applies to airports NAVAIDS user created waypoints roads lakes rivers almost everything d...

Page 42: ...t the target pointer location a new waypoint called MAP Figure 3 13 is created at the target pointer location before the direct to is initiated Airspace Information on the Map When a special use or controlled airspace boundary appears on the Map Display the pilot can quickly retrieve information such as floor ceiling limits and controlling agency directly from the map To view airspace information ...

Page 43: ...ap Setup Many of the GNS 430 s functions are menu driven Each of the main pages has an options menu allowing customization of the page to the pilot s preferences and or selection of special features which specifically relate to that page A Map Page Menu Figure 3 16 provides additional settings to customize the Map Page and additional features related specifically to the Map Page To display the Map...

Page 44: ...splay of each information type NOTE Large medium and small classifications are used on the GNS 430 for airports and cities Large airports are those with a runway longer than 8100 feet Medium airports include those with a runway longer than 5000 feet or with a control tower Large cities are those with approximate populations greater than 200 000 and medium cities with greater than 50 000 To change ...

Page 45: ... small right knob to select Map and press the ENT Key 3 Turn the large right knob to highlight the appropriate field 4 Turn the small right knob to select On or Off 5 Press the ENT Key to accept the selected option To display airports NAVAIDs active flight plan waypoints user created waypoints state provincial boundaries rivers lakes and cities 1 From the Map Page Menu turn the large right knob to...

Page 46: ...ure bearing and distance between two points 1 From the Map Page Menu turn the large right knob to highlight Measure Dist Figure 3 20 Figure 3 20 Map Page Menu 2 Press the ENT Key an on screen reference pointer appears on the Map Display at the present position 3 Turn the small and large right knobs to place the reference pointer at the desired location to measure FROM and press the ENT Key Figure ...

Page 47: ...ht Change Fields Figure 3 23 and press the ENT Key Figure 3 23 Map Page Menu 2 Turn the large right knob to highlight the data field to be changed 3 Turn the small right knob to select the type of data Figure 3 24 desired to appear on this field and press the ENT Key Figure 3 24 Select Data Field Window 4 Press the small right knob to remove the cursor NOTE The on screen traffic information occupi...

Page 48: ...ing Indicator The heading indication on the TERRAIN Page always displays TRK for Track up unless there is no valid heading Obstacles Potential Impact Points Figure 3 26 TERRAIN Page 120 View GPS derived MSL Altitude Red Terrain Warning Terrain Above or Within 100 Below Aircraft Altitude Number of Pages in Current Page Group Position of Current Page within Current Page Group Current Page Group Head...

Page 49: ...nge the display range Select theTERRAIN Page and press up or down on the RNG Key to select the desired range 1 nm 2 nm 5 nm 10 nm 25 nm 50 nm 100 nm Figure 3 29 Display Range Field Figure 3 29 TERRAIN Display Range Aviation information such as airports VORs and other NAVAIDS can be turned on or off from the TERRAIN Page To show or hide aviation data 1 Select theTERRAIN Page and press the MENU Key ...

Page 50: ...ENU Key Enable Terrain is selected by default 2 Press the ENT Key The TERRAIN system is functional again TERRAIN Symbols NOTE See Section 11 2 for a complete description of TERRAIN symbology The following symbols Figure 3 33 are used to represent obstacles and potential impact points on the Terrain Page Red Symbol Terrain Obstacle is above or within 100 feet below the aircraft altitude Yellow Symb...

Page 51: ...encies for the airport nearest the departure position Figure 3 34 NAV COM Page Frequency Type Departure Enroute or Arrival Airport Assigned Frequency and Usage Information when applicable Number of Pages in Current Page Group Position of Current Page within Current Page Group Current Page Group To select a frequency list for a departure enroute or arrival airport 1 Press the small right knob to ac...

Page 52: ...To place a frequency in the standby field of the COM or VLOC Window highlight the desired frequency and press the ENT Key Some listed frequencies may include designations for limited usage as follows TX Transmit only RX Receive only PT Part time frequency If a listed frequency has sector or altitude restrictions the frequency is preceded by an Info designation To view usage restrictions for a freq...

Page 53: ...cator for quick at a glance ground track information Directly below are three user selectable fields which by default display track ground speed and altitude Barometric pressure BARO settings and minimum safe altitude MSA can also be displayed in these fields MSA is the recommended minimum altitude within approximately ten miles of the present position MSA is calculated from the information contai...

Page 54: ...ange Fields and press the ENT Key 3 Turn the large right knob to highlight the waypoint type field bottom left corner of the page default setting shows APT see Figure 3 42 Figure 3 42 Waypoint Type Field Highlighted 4 Turn the small right knob to display the list of available waypoint types Figure 3 43 Continue turning the small right knob to select the desired data item from the list Figure 3 43 ...

Page 55: ...indow 8 Press the small right knob momentarily to remove the cursor from the page Restoring Factory Settings A Restore Defaults option allows all data fields to be reset to their original factory default settings This returns the three user selectable fields at the top of the page AND the reference waypoint fields to default settings To restore the factory default settings 1 Press the MENU Key to ...

Page 56: ...ition of Current Page within Current Page Group 10 As the GPS receiver locks onto satellites a signal strength bar appears for each satellite in view with the appropriate satellite number 01 32 underneath each bar The status of satellite reception is shown as follows No signal strength bars The receiver is looking for the satellites indicated Hollow signal strength bars The receiver has found the ...

Page 57: ...llites should be in view 2D Navigation The GPS receiver is in 2D navigation mode Altitude data is provided by an altitude serializer 3D Navigation The GPS receiver is in 3D navigation mode and computes altitude using satellite data Poor Coverg The GPS receiver cannot acquire sufficient satellites for navigation Rcvr Not Usbl The GPS receiver is unusable due to incorrect initialization or abnormal ...

Page 58: ... Reference AGL or MSL 3 Target Reference 4 Vertical Speed Desired 5 Vertical Speed Required 6 Current Page Group 7 Number of Pages in Current Page Group 8 Position of Current Page within Current Page Group 9 NOTE To use the vertical navigation features ground speed must be greater than 35 knots and the pilot must be navigating to a direct to destination or using a flight plan V E R T I C A L N A V...

Page 59: ... 53 Reference Distance Selected 6 Turn the small right knob to select Before or After and press the ENT Key This setting designates whether the offset distance defines a point before the aircraft reaches the target reference waypoint or after the aircraft reaches the waypoint 7 When using a flight plan the target reference waypoint itself can be specified from the waypoints contained in the flight...

Page 60: ...roper descent or climb angle At 500 feet above or below for a climb the target altitude an Approaching Target Altitude message is provided The VSR readout on the Default NAV Page and the Map Page is blanked out at this point Vertical navigation messages can be turned on or off by default the messages are off Turning the messages off allows the pilot to keep the previous profile settings without ha...

Page 61: ...ith the waypoint identifier field highlighted Figure 4 1 Select Direct to Waypoint Page 2 Use the small and large right knobs to enter the identifier of the desired destination waypoint Figure 4 2 Figure 4 2 Waypoint Identifier Field Selected 3 Press the ENT Key to confirm the selected waypoint and press the ENT Key again to activate the direct to function Figure 4 3 Figure 4 3 Activate Field High...

Page 62: ...ighted 2 Turn the large right knob to highlight the facility name second line or the city third line field 3 Use the small and large right knobs to enter the facility name or city location of the desired destination waypoint Figure 4 5 When spelling the facility name or city the GNS 430 s Spell N Find feature selects the first entry in the database based upon the characters entered up to that poin...

Page 63: ...NT Key again to activate the direct to function Selecting the Nearest Airport as a Direct to Destination The Select Direct to Waypoint Page always displays the nearest airports from the present position in the NRST field Nearby airports may also be selected as direct to destinations using the steps described in Section 8 1 To select a nearby airport as a direct to destination 1 Press the Direct to...

Page 64: ...ion 1 If a single airport NAVAID or user waypoint is displayed on screen Figure 4 9 Figure 4 9 Single Waypoint Displayed a Press the Direct to Key b Press the ENT Key twice 2 If a list of waypoints is displayed on screen a Press the small right knob to activate the cursor b Turn the large right knob to highlight the desired waypoint Figure 4 10 Figure 4 10 Nearest List c Press the Direct to Key fo...

Page 65: ...s highlighted Figure 4 11 Press the Direct to Key and the ENT Key twice to navigate to the waypoint Figure 4 11 Panning Pointer Placed on Waypoint 4 If the panning pointer is placed on an open location press the Direct to Key then press the ENT Key twice to create a MAP waypoint and navigate to it Cancelling Direct to Navigation Once a direct to is activated the GNS 430 provides navigation guidanc...

Page 66: ... Use the small and large right knobs to select the destination waypoint 3 Press the ENT Key to confirm the selected waypoint then turn the large right knob to highlight the course CRS field Figure 4 13 Figure 4 13 CRS Course Field Highlighted 4 Turn the small and large right knobs to select the desired course Figure 4 14 and press the ENT Key Figure 4 14 Course Field Selected 5 Press the ENT Key a...

Page 67: ... Plan Catalog Page The Flight Plan Catalog Page allows the pilot to create edit activate delete and copy flight plans Flight plans numbered from 1 through 19 are used to save flight plans for future use Flight plan 00 is reserved exclusively for the flight plan currently in use for navigation When a flight plan is activated a copy of the flight plan is automatically transferred to flight plan 00 o...

Page 68: ...t plan 1 Press the FPL Key and turn the small right knob to display the Flight Plan Catalog Page 2 Press the small right knob to activate the cursor 3 Turn the large right knob to highlight the desired flight plan and press the ENT Key 4 Turn the large right knob to select the point to add the new waypoint If an existing waypoint is highlighted the new waypoint is placed directly in front of this ...

Page 69: ...the Flight Plan Catalog Page A one line user comment may be added to any flight plan which is displayed on the Flight Plan Catalog Page next to the flight plan s number By default as the flight plan is being created the comment shows the first and last waypoints in the flight plan To change the comment line for an existing flight plan 1 From the Flight Plan Catalog Page press the small right knob ...

Page 70: ...lan Catalog Page Menu 3 Turn the large right knob to highlight Activate Flight Plan and press the ENT Key Figure 5 9 Figure 5 9 Flight Plan Catalog Page Menu Inverting Flight Plans After travelling along a flight plan the pilot may wish to reverse the route for navigation guidance back to the original departure point To activate an existing flight plan in reverse order 1 From the Flight Plan Catal...

Page 71: ...default the next empty catalog location is offered To select a different location turn the large right knob to select the flight plan number use the small and large right knobs to enter a different number and press the ENT Key 5 With Yes highlighted press the ENT Key to copy the flight plan Deleting Flight Plans When finished with a flight plan it can easily be deleted from the Flight Plan Catalog...

Page 72: ... on one unit is seen on the other For additional information see Section 10 2 Flight Planning Page Crossfill To crossfill flight plans between two 400 or 500 Series Garmin units 1 Select the Crossfill option from the Flight Plan Catalog Page Menu Figure 5 13 and press the ENT Key Figure 5 13 Flight Plan Catalog Page Menu 2 Turn the large right knob to select the Method field Figure 5 14 Figure 5 1...

Page 73: ...cribed previously in this section The copy function is useful for duplicating an existing flight plan before making changes Delete Flight Plan Allows the pilot to remove the selected flight plan from memory as described previously in this section Deleting a flight plan does not delete the individual waypoints contained in the flight plan from the database or user waypoint memory Delete All Flight ...

Page 74: ... the ENT Key Figure 5 18 Flight Plan Catalog Page Menu 5 2 Active Flight Plan Page The Active Flight Plan Page provides information and editing functions for flight plan 00 the flight plan currently in use for navigation When a direct to or flight plan has been activated the Active Flight Plan Page shows each waypoint for the flight plan or a single waypoint for a direct to Figure 5 19 along with ...

Page 75: ...ection In many cases it is convenient to select approaches using the PROC Key as described in Section 6 1 Select Arrival Allows the pilot to select a published standard terminal arrival route STAR for the destination airport or replace the current arrival with a new selection Section 6 1 for information on selecting arrivals using the PROC Key Select Departure Allows the pilot to select a publishe...

Page 76: ...e small right knob to select the desired data item Figure 5 22 and press the ENT Key Figure 5 22 Select Field Type Window 5 Press the small right knob to remove the cursor To restore factory default settings for data fields on the Active Flight Plan Page 1 With the Active Flight Plan Page displayed press the MENU Key to display theActive Flight Plan Page Menu 2 Turn the large right knob to highlig...

Page 77: ...nob to highlight the desired transition waypoint and press the ENT Key The Vectors option assumes the pilot will receive vectors to the final course segment of the approach and will provide navigation guidance to intercept this final course Figure 5 26 Transitions Window 4 Turn the large right knob to highlight Load or Activate and press the ENT Key Load adds the approach to the flight plan withou...

Page 78: ...ting available transitions Figure 5 29 for the arrival Turn the small right knob to highlight the desired transition waypoint and press the ENT Key Figure 5 29 Transitions Window 4 With Load highlighted press the ENT Key To select a departure for the departure airport 1 Select the Select Departure option from the Active Flight Plan Page Menu and press the ENT Key 2 A window appears listing the ava...

Page 79: ...Active Flight Plan Page Menu Figure 5 31 and press the ENT Key Figure 5 31 Active Flight Plan Page Menu 2 A window appears with the reference waypoint field highlighted Use the small and large right knobs to enter the identifier of the reference waypoint and press the ENT Key 3 A confirmation window appears for the selected reference waypoint Figure 5 32 Press the ENT Key to accept the waypoint Fi...

Page 80: ...ight the title for the approach Figure 5 33 departure or arrival to be deleted Titles appear in light blue directly above the procedure s waypoints Figure 5 33 Highlight Item To Be Deleted 3 Press the CLR Key to display a confirmation window Figure 5 34 Figure 5 34 Remove Approach Window 4 With Yes highlighted press the ENT Key to remove the selected procedure This same process may also be used to...

Page 81: ...o display an Activate Leg confirmation window Figure 5 37 Figure 5 37 Activate Leg Window 3 With Activate highlighted press the ENT Key When using instrument procedures this feature can be used not only to activate a specific point to point leg but to also activate the procedure turn portion of an approach follow a DME arc or activate a holding pattern Any approach departure or arrival can be revi...

Page 82: ...GNS 430 A Pilot s Guide and Reference 190 00140 00 Rev P 5 16 SECTION 5 FLIGHT PLANS Blank Page ...

Page 83: ...rports must have published procedures associated with them To select an approach departure or arrival 1 Press the PROC Key to display the Procedures Page 2 Turn the large right knob to highlight Select Approach Select Departure or Select Arrival Figure 6 1 and press the ENT Key Figure 6 1 Procedures Page 3 A window appears listing the available procedures Figure 6 2 Turn the large right knob to hi...

Page 84: ... an approach a GPS designation to the right of the procedure name Figure 6 4 indicates the procedure can be flown using the GPS receiver Some procedures do not have this designation meaning the GPS receiver may be used for supplemental navigation guidance only ILS approaches for example must be flown by tuning the VLOC receiver to the proper frequency and coupling the VLOC receiver to the external...

Page 85: ...Precision Approach Operations The GNS 430 provides non precision approach guidance using its built in GPS receiver The GPS receiver can also be used as a supplemental aid for precision approaches and for non precision localizer based approaches but the localizer and glideslope receivers must be used for primary approach course guidance Approaches designed specifically for GPS are often very simple...

Page 86: ...e flight plan but retains course guidance in the enroute section until the approach is activated 4 Activate the full approach or vectors to final as appropriate In some scenarios it may be more convenient to immediately activate the approach and skip the Load process outlined in the preceding step 3 The GNS 430 provides both options Approaches with Procedure Turns The procedure turn portion of an ...

Page 87: ...ncy from the list on the NAV COM Page Section 3 6 and Figure 6 9 and place it in the standby field of the COM Window Use the COM Flip flop Key to make the ATIS frequency active Figure 6 9 NAV COM Page 3 Press the PROC Key Figure 6 10 and select the VOR 03 approach using the steps outlined in Section 6 1 Figure 6 10 Procedures Page 4 From the Transitions Window Figure 6 11 select LYH VOR the IAF Al...

Page 88: ...lection Figure 6 13 Figure 6 13 CDI Scale at 1 0 nm 2 Several miles prior to reaching the IAF LYH the pilot may wish to review the approach sequence Press the FPL Key to display the Active Flight Plan Page Press the small right knob and then turn the large right knob to review each segment of the approach Figure 6 14 When finished press the FPL Key again to return to the previous page Figure 6 14 ...

Page 89: ...Map Page and indicated as the active leg on the Default NAV Page and theActive Flight Plan Page The CDI needle starts moving to the right 7 When turning to intercept the inbound course the GNS 430 sequences to the inbound leg to the FAF the CDI needle swings to the opposite side to provide proper sensing along the final course segment and NEXT DTK 025 appears in the lower right corner of the scree...

Page 90: ...ears above the OBS Key Figure 6 19 indicating that automatic sequencing of approach waypoints is suspended at the MAP A from indication is displayed on the CDI and Default NAV Page but course guidance along the final approach course continues If a missed approach is required use the OBS Key to initiate the missed approach sequence as outlined beginning on the following page Figure 6 19 SUSP Annunc...

Page 91: ...n the lower right hand corner of the screen recommends entry procedures for the holding pattern i e HOLD DIRECT HOLD PARALLEL or HOLD TEARDROP see Figure 6 22 When flying the holding pattern a timer appears on the Default NAV Page Figure 6 23 The timer automatically resets on the outbound side of the hold when the aircraft is abeam the hold waypoint The timer again resets as the aircraft turns inb...

Page 92: ... Waypoint Page 3 Press the ENT Key twice This time the pilot selects the GPS runway 21 approach into Farmville Regional The GPS runway 21 approach begins with a holding pattern at the IAF BODRY intersection 4 Press the PROC Key and select the GPS 21 approach Figure 6 26 also Section 6 1 for additional instructions Figure 6 26 Approach Window 5 From the Transitions Window select BODRY intersection ...

Page 93: ...try Figure 6 30 HOLD DIRECT or HOLD PARALLEL may be offered on other similar approaches Figure 6 30 HOLD TEARDROP Annunciation 9 As mentioned in the missed approach example the Default NAV Page displays a timer during the holding pattern Figure 6 31 The timer can be used to fly the one minute outbound portion of the holding pattern The holding pattern is displayed on the Map Page and indicated as ...

Page 94: ... already been passed re activate the holding pattern using the steps described in Section 5 2 DO NOT USE FOR NAVIGATION Figure 6 32 Approach Mode Refer to Figure 6 32 for the following steps 11 When approaching BODRY intersection a waypoint alert NEXT DTK 209 appears in the lower right corner of the screen Figure 6 33 Figure 6 33 Waypoint Alert 12 At 2 0 nm from the FAF DEPOY intersection the GNS ...

Page 95: ...ent is displayed in magenta the active leg of the flight plan always appears in magenta and a dashed line extends the course beyond the MAP Do not follow this extended course Instead follow published missed approach procedures 15 When approaching the MAP a waypoint alert APPRCHINGWPT appears in the lower right corner 16 After crossing the MAP SUSP appears above the OBS Key Figure 6 35 indicating t...

Page 96: ... Figure 6 36 Enroute Mode NOTE As this manual was being written the letter number DME arc names were being replaced with standard five letter intersection names Either naming convention may be used for an approach This example is based upon a flight from Hutchinson Kansas Municipal KHUT to Billard Municipal KTOP in Topeka Kansas The VOR DME runway 22 approach is selected along with D258G as the IA...

Page 97: ...om 5 0 to 1 0 nm full scale deflection 4 If the approach has not yet been activated in step 2 above do so when cleared for the approach Figure 6 41 Figure 6 41 Procedures Page 5 WhenapproachingtheIAF D258G awaypoint alert NEXT DTK 353 appears in the lower right corner of the screen Figure 6 42 As the distance DIS to the IAF approaches zero the alert is replaced by a turn advisory TURN TO 353 Figur...

Page 98: ...dvisory TURNTO 205 Dial this course into the CDI or HSI using the OBS knob Figure 6 43 Intermediate Approach Fix 8 At 2 0 nm from the FAF TOP VOR the GNS 430 switches from terminal mode to approach mode CDI scaling is tightened from 1 0 to 0 3 nm full scale deflection Refer to Figure 6 44 for the following steps DO NOT USE FOR NAVIGATION Figure 6 44 Approach Mode 9 When approaching the FAF NEXT DT...

Page 99: ... but course guidance along the final approach course continues Do not follow this extended course Follow published missed approach procedures using the OBS Key to initiate the missed approach sequence as outlined in Flying the Missed Approach in this section Figure 6 47 SUSP Annunciation Vectors to Final Take a second look at the VOR 22 approach into Billard Municipal Instead of following the DME ...

Page 100: ...ey or as the last waypoint in a flight plan 2 Press the PROC Key and select the VOR 22 approach using the steps outlined in Section 6 1 3 From the Transitions Window select D258G as the IAF Figure 6 49 Also select Load Figure 6 49 Transitions Window 4 When cleared press the PROC Key and select Activate Vector To Final Figure 6 50 Figure 6 50 Procedures Page Flying the Vectors Approach With vectors...

Page 101: ... the GNS 430 to provide guidance to the final approach course 3 ATC instructs the pilot to turn left to a heading of 025 This places the aircraft parallel to the final approach course in the opposite direction Figure 6 52 CDI needle deflection is to the left Figure 6 52 Heading of 025 4 ATC instructs the pilot to turn right to a heading of 115 Figure 6 53 Figure 6 53 Heading of 115 5 ATC instructs...

Page 102: ... Figure 6 57 Figure 6 57 Waypoint Alert 8 When crossing the FAF the destination sequences to the MAP RW22 9 When approaching the MAP a waypoint alert APPRCHINGWPT appears in the lower right corner 10 After crossing the MAP SUSP appears above the OBS Key Figure 6 58 indicating that automatic sequencing of approach waypoints is suspended at the MAP A from indication is displayed on the CDI and Defau...

Page 103: ...ve Flight Plan Page DO NOT USE FOR NAVIGATION Palmdale CA AF Plant 42 VOR DME or GPS Rwy 25 Figure 6 60 KPMD Approach This example uses the VOR DME RWY 25 approach into Palmdale California KPMD andincludesateardropcourse reversal refer to Figure 6 60 for the following steps 1 At the initial approach fix PMD a waypoint alert NEXT DTK 070 appears in the lower right corner of the screen As the distan...

Page 104: ...he FAF NEXT DTK 265 appears in the lower right corner of the screen 7 After crossing the FAF the destination sequences to the MAP MA25 8 When approaching the MAP a waypoint alert APPRCHINGWPT appears in the lower right corner of the screen 9 After crossing the MAP SUSP appears above the OBS Key indicating that automatic sequencingofapproachwaypointsissuspended at the MAP If a missed approach is re...

Page 105: ... few seconds of pressing the OBS Key to release suspend mode and start the approach sequence SUSP re appears above the OBS Key as the GNS 430 returns to suspend mode This is normal when flying a course from fix to altitude leg and indicates that automatic leg sequencing is suspended 3 Fly the outbound course The Map Page depicts the flight path extending indefinitely from PMD VOR Figure 6 66 The d...

Page 106: ...s the PROC Key to reactivate the approach or select a different approach or press the Direct to Key to select another destination Course from fix to manual sequence legs appear on the Active Flight Plan Page and the Map Page with man seq in place of a waypoint identifier An example of this type of course leg appears in the COASTAL ONE DEPARTURE from Westfield Massachusetts Barnes Muni The example ...

Page 107: ...manual sequence leg The distance displayed on the Active Flight Plan Page the Default NAV Page Figure 6 70 and the Map Page is FROM the waypoint fix the departure runway in this example Figure 6 70 Default NAV Page 3 Fly the outbound course When cleared to sequence to the next leg press the OBS Key Confirm that SUSP no longer appears directly above the OBS Key An alert NEXT DTK 186 appears in the ...

Page 108: ...lot intercepts the final approach course When the ILS approach is activated the GNS 430 automatically switches within 1 2 nm left or right of the final approach course This switch can take place anywhere from 2 0 to 15 0 nm from the FAF NOTE When intercepting the approach course at a distance less than 2 0 nm from the FAF the GNS 430 does not automatically switch the CDI to VLOC In this case press...

Page 109: ...Scale Alarms The factory default setting is Auto which enables the automatic switch to VLOC Selecting an ILS Approach This example uses a flight from Laughlin Bullhead Arizona International to Flagstaff Pulliam KFLG and selects the ILS runway 21 approach SHUTR intersection is selected as the IAF which includes an outbound leg and a procedure turn Of course vectors to final could also be selected a...

Page 110: ...e the message When an ILS approach is loaded or activated the ILS frequency is automatically placed in the standby field of the VLOC Window To use this frequency press the VLOC Flip flop Key to place it in the active frequency field Flying the ILS Approach When Activate is selected for an ILS approach automatic switching of the external CDI is enabled unless turned off from the CDI Alarms Page Onc...

Page 111: ...ars in the lower right corner of the screen Figure 6 79 Figure 6 79 Waypoint Alert 4 Press the VLOC Flip flop Key to activate the ILS frequency If this step is forgotten the GNS 430 displays a reminder message within 3 nm of the FAF to activate the ILS frequency 5 As the distance DIS to the IAF approaches zero the alert is replaced by a turn advisory TURN TO 030 see Figure 6 80 Figure 6 80 Turn Ad...

Page 112: ...frequency has not been activated per step 4 this automatic CDI switching does not occur Figure 6 83 Waypoint Alert 10 Turn to track the ILS approach course NOTE From this point on primary navigation is provided by the VLOC receiver The pilot may continuetousetheGPSreceiverforsupplemental navigation guidance only ALSO when using an external CDI not an HSI expect reverse sensing when flying outbound...

Page 113: ...reen Figure 6 84 13 AftercrossingSHUTR thedestinationsequences to the MAP RW21 the runway threshold see Figure 6 86 Fly toward the MAP When viewing the Map Page as in Figure 6 87 note that the final course segment is displayed in magenta the active leg of the flight plan always appears in magenta and a dashed line extends the course beyond the MAP Figure 6 86 Default NAV Page Figure 6 87 Map Page ...

Page 114: ...put to the GPS receiver GPS is indicated above the CDI Key If the pilot leaves the CDI output on VLOC and the pilot is using an external CDI not an HSI expect reverse sensing on the backcourse of the ILS 6 4 Points to Remember for All Approaches The GNS 430 is designed to complement printed approach plates and vastly improve situational awareness throughout the approach However the pilot must alwa...

Page 115: ...LOC late in the approach may not provide the autopilot enough time to respond and intercept the approach course prior to the FAF depending upon the performance characteristics of the autopilot and aircraft In such cases the pilot should manually fly the approach or refer to the documentation provided with the autopilot When an ILS approach is first selected and loaded or activated the ILS frequenc...

Page 116: ...GNS 430 A Pilot s Guide and Reference 190 00140 00 Rev P SECTION 6 PROCEDURES 6 34 Blank Page ...
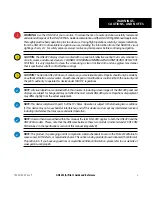
Page 117: ...of the main pages 2 Turn the large right knob to select the WPT Page Group WPT appears in the lower right corner of the screen 3 Turn the small right knob to select the desired WPT page NOTE The GNS 430 uses International Civil Aviation Organization ICAO identifiers for all airports All U S airport identifiers which contain only letters use the prefix K For example Los Angeles International is KLA...

Page 118: ... press the small right knob To enter a waypoint facility name or city location 1 Select the Airport Location Page NDB Page or VOR Page from the WPT Page Group as described on the preceding page 2 Press the small right knob to activate the cursor 3 Turn the large right knob to select the facility name or location city field 4 Turn the small right knob to select the desired character Figure 7 2 Figu...

Page 119: ...ty name or city location 2 When spelling the facility name or location using the small and large right knobs the GNS 430 s Spell N Find feature selects the first entry Figure 7 5 in the database based upon the characters entered up to that point Figure 7 5 First Facility for Albuquerque 3 Continue turning the small right knob to scroll through any additional database listings Figure 7 6 for the se...

Page 120: ... Field Elevation and Available Fuels 6 Airspace Type 7 Best Available Approach 8 Current Page Group 9 Position of Current Page within Current Page Group 10 Number of Pages in Current Page Group The following descriptions and abbreviations are used Type Usage type Public Heliport Military or Private Position Latitude Longitude degrees minutes or degrees minutes seconds MGRS or UTM UPS Elevation In ...

Page 121: ...pe Runway Designations Runway Length and Width Surface and Lighting Number of Pages in Current Page Group Position of Current Page within Current Page Group Current Page Group To display information for each additional runway 1 Press the small right knob to activate the cursor 2 Turn the large right knob to place the cursor on the runway designation field Figure 7 9 3 Turn the small right knob to ...

Page 122: ...7 4 Airport Frequency Page The Airport Frequency Page displays radio frequencies and frequency types for the selected airport as well as sector and altitude restrictions where applicable If the selected airport has a localizer based approach the localizer frequency ies is also listed on the Airport Frequency Page Figure 7 12 The Airport Frequency Page may be used to quickly select and tune a COM o...

Page 123: ... 7 14 Figure 7 14 Frequency Moved to Standby Field 4 To remove the flashing cursor press the small right knob Some listed frequencies may include designations for limited usage as follows TX Transmit only RX Receive only PT Part time frequency If a listed frequency has sector or altitude restrictions the frequency is preceded by an Info designation To view usage restrictions for a frequency 1 Turn...

Page 124: ... The Airport Approach Page Figure 7 17 shows the available approach procedures for the selected airport Where multiple initial approach fixes IAFs and feeder routes are available that information may also be displayed A map image provides a layout diagram for each approach and transition Figure 7 17 Airport Approach Page Airport Identifier Symbol and Type Map Image Approach Procedure Name Transiti...

Page 125: ...e desired transition or select VECTORS for guidance only along the final course segment of the approach Figure 7 19 Transitions Window 6 Press the ENT Key To remove the flashing cursor press the small right knob NOTE Not all approaches in the database are approved for GPS use When selecting an approach a GPS designation to the right of the procedure name indicates the procedure can be flown using ...

Page 126: ...irport Approach Page 1 Select the desired approach and transition using the steps outlined in Section 6 1 Figure 7 20 2 Press the MENU Key to display the Airport Approach Page Menu 3 Turn the large right knob to highlight Load intoActive FPL and press the ENT Key Figure 7 21 Figure 7 21 Airport Approach Page Menu 4 TheActive Flight Plan Page appears Press the FPL Key to return to the Airport Proce...

Page 127: ...t Page within Current Page Group Number of Pages in Current Page Group Current Page Group To scroll through the available arrivals 1 Press the small right knob to activate the cursor 2 Turn the large right knob to place the cursor on the arrival ARVL procedure name field Figure 7 22 3 Turn the small right knob to display a window of available arrivals for the selected airport Figure 7 23 Continue ...

Page 128: ... press the small right knob Airport Arrival Page Options The following option is available for the Airport Arrival Page by pressing the MENU Key Load into Active FPL allows the pilot to load the selected arrival into the active flight plan This is identical to loading an arrival procedure from the Procedures Page as described in Section 6 1 To load an arrival procedure from the Airport Arrival Pag...

Page 129: ...place the cursor on the departure DEP procedure name field Figure 7 27 3 Turn the small right knob to display a window of available departures for the selected airport Figure 7 28 Continue turning the small right knob to select the desired departure Figure 7 28 Departure Window 4 Press the ENT Key The cursor moves to the runway field 5 Turn the small right knob to display a window of available run...

Page 130: ... Intersection Page Figure 7 31 displays the latitude longitude region and country for the selected intersection The Intersection Page also displays the identifier radial and distance from the nearest VOR VORTAC or VOR DME Figure 7 31 Intersection Page Intersection Identifier and Symbol Region Country Nearest VOR and Symbol Radial and Distance from Nearest VOR Latitude Longitude Position Number of ...

Page 131: ...rmation is broadcast on the selected facility s frequency 7 10 VOR Page The VOR Page Figure 7 33 displays the facility name city region country magnetic variation latitude and longitude for the selected VOR The VOR Page also displays the frequency and a weather broadcast indication if applicable Figure 7 33 VOR Page VOR Identifier and Symbol Facility Name City and Region Country Frequency and Weat...

Page 132: ...er field Figure 7 34 To select another VOR use the small and large right knobs and press the ENT Key when finished Figure 7 34 VOR Identifier Field Selected 3 Turn the large right knob to highlight the frequency field Figure 7 35 and press the ENT Key to place the frequency in the standby field of the VLOC Window Figure 7 35 Frequency Field Highlighted 4 To activate the standby VLOC frequency pres...

Page 133: ...magnetic or degrees true depending upon unit configuration DIS Distance from reference waypoint in nautical miles statute miles kilometers depending upon unit configuration Position Latitude Longitude degrees minutes or degrees minutes seconds MGRS or UTM UPS User waypoints may only be selected by name identifier as described in Section 7 1 Creating User Waypoints User waypoints may be created fro...

Page 134: ...r 2 Use the small and large right knobs to enter a name for the new waypoint and press the ENT Key 3 Turn the large right knob to highlight the first reference waypoint REF WPT field 4 Use the small and large right knobs to enter the identifier of the reference waypoint The reference waypoint can be an airport VOR NDB intersection or another user waypoint Press the ENT Key to accept the selected i...

Page 135: ... that is stored with the user waypoint By default this field displays a radial from the nearestVOR However the pilot can select any waypoint by identifier to use as a reference in this field The GNS 430 can store user defined waypoints which are generated from other equipment in the panel For example an EFIS equipped with joystick inputs can be used to create user waypoints which if the installati...

Page 136: ...t select that waypoint on the User Waypoint Page and enter the new position information directly over the old information To modify a user waypoint by changing its latitude longitude position 1 With the User Waypoint Page displayed press the small right knob to activate the cursor 2 Use the small and large right knobs to enter the name of the desired waypoint and press the ENT Key 3 Turn the large...

Page 137: ... The cursor moves to the radial RAD field Figure 7 47 Use the small and large right knobs to change the radial from the reference waypoint if desired Press the ENT Key to accept the selected radial Figure 7 47 Radial Field Selected 6 The cursor moves to the distance DIS field Figure 7 48 Use the small and large right knobs to change the distance from the reference waypoint to the new user waypoint...

Page 138: ...ntly used and available memory Figure 7 50 If more user waypoints are stored than can be displayed on a single screen turn the large right knob to scroll through the UserWaypoint List Figure 7 50 User Waypoint List Page 4 Press the small right knob to return to the User Waypoint Page Delete User Waypoint allows the pilot to delete the selected waypoint from memory To delete a user waypoint 1 Selec...

Page 139: ...m this page the pilot may review all information defining the waypoint and its position 4 To modify the waypoint s position or reference waypoint information follow the steps described in this section 5 To exit the User Waypoint Page turn the large right knob to highlight Done and press the ENT Key To rename a user waypoint from the User Waypoint List 1 Select the User Waypoint List as described i...

Page 140: ...aypoint Window 4 With Yes highlighted press the ENT Key to delete the selected user waypoint To delete all user waypoints from memory 1 Select the User Waypoint List as described in this section 2 Press the MENU Key to display a menu for the User Waypoint List Figure 7 56 Figure 7 56 User Waypoint List Page Menu 3 With Delete All User Waypoints highlighted press the ENT Key 4 A delete all waypoint...

Page 141: ...s the pilot to any nearby Special Use SUA or Controlled Airspaces Page Groups NAV Group WPT Group AUX Group NRST Group see Section 3 see Section 7 see Section 10 8 NRST pages Table 8 1 Page Groups Figure 8 1 NRST Pages NRST Airport NRST Intersection NRST NDB NRST VOR NRST User NRST Center NRST Flight Service NRST Airspace To quickly select a NRST page 1 From any page press and hold the CLR Key to ...

Page 142: ...he desired NRST page using the steps outlined on the preceding page 2 Press the small right knob to activate the cursor 3 Turn the large right knob to scroll through the list The scroll bar along the right hand side of the page indicates which part of the list is currently being viewed Figure 8 4 Figure 8 4 Nearest Airport Page Scroll Bar 4 Press the small right knob to remove the flashing cursor ...

Page 143: ...intersection or user waypoint as a direct to destination 1 Use the flashing cursor to scroll through a NRST page list Figure 8 6 and highlight the desired nearest waypoint as outlined in Section 8 1 Figure 8 6 Nearest VOR Page 2 Press the Direct to Key to display the select Direct to Waypoint Page Figure 8 7 Figure 8 7 Direct to Waypoint Page 3 Press the ENT Key to accept the selected waypoint s i...

Page 144: ...t the corresponding airports do not appear on the list The pilot may wish to use this feature to exclude seaplane bases or runway lengths which would be difficult or impossible to land upon See Section 10 5 Setup Page 2 Nearest Airport Criteria for additional details The Nearest Airport Page may be used to quickly tune the COM transceiver to a nearby airport The selected frequency is placed in the...

Page 145: ...ctivate the cursor 3 Turn the large right knob to scroll through the list highlighting the identifier of the desired airport Figure 8 13 Figure 8 13 Desired Airport Highlighted 4 Press the ENT Key to display the Airport Location Page for the selected airport Figure 8 14 Figure 8 14 Airport Location Page 5 To view additionalWPT pages for the selected airport including theAirport Runway Page and the...

Page 146: ...istance To Current Page Group Intersection Identifier and Symbol Position of Current Page within Current Page Group Number of Pages in Current Page Group 8 4 Nearest NDB Page The Nearest NDB Page Figure 8 17 displays the identifier symbol bearing distance and frequency to the nine nearest NDBs within 200 nm of the present position To view additional information for a nearby NDB start from the near...

Page 147: ...Distance To VOR Frequency Current Page Group Scroll Bar VOR Identifier and Symbol Position of Current Page within Current Page Group Number of Pages in Current Page Group To quickly tune a VOR s frequency from the nearest VOR Page 1 Select the nearest VOR Page using the steps outlined in Section 8 1 2 Press the small right knob to activate the cursor 3 Turn the large right knob to scroll through t...

Page 148: ...splay theVOR Page for the selected VOR 5 To return to the nearest VOR Page verify that Done is highlighted by the flashing cursor and press the ENT Key or press the CLR Key 6 Press the small right knob to remove the flashing cursor 8 6 Nearest User Waypoint Page The Nearest User Waypoint Page Figure 8 21 displays the name bearing and distance to the nine nearest user waypoints within 200 nm of the...

Page 149: ...e To Current Page Group Frequency ies Position of Current Page within Current Page Group Number of Pages in Current Page Group To quickly tune an ARTCC s frequency from the Nearest Center Page 1 Select the Nearest Center Page using the steps outlined in Section 8 1 2 Press the small right knob to activate the cursor 3 Turn the large right knob to scroll through the list selecting the desired ARTCC...

Page 150: ...ndicating receive only or transmit only frequencies The associated VOR is also provided for reference Figure 8 25 Nearest FSS Page FSS Name Bearing To and Distance To Current Page Group Frequency ies VOR Identifier For Duplex Operation Position of Current Page within Current Page Group Number of Pages in Current Page Group To quickly tune an FSS s frequency from the Nearest Flight Service Station ...

Page 151: ...light path Alerts are provided according to the following conditions If the aircraft s projected course will take it inside an airspace within the next ten minutes the alert message Airspace ahead less than 10 minutes appears Figure 8 29 The Nearest Airspace Page shows the airspace as Ahead Figure 8 29 Airspace Messages If the aircraft is within two nautical miles of an airspace and the current co...

Page 152: ...eturn to the previous page Once an airspace alert message appears detailed information concerning the specific airspace is provided on the Nearest Airspace Page Figure 8 31 The Nearest Airspace Page displays the airspace name status Ahead Ahead 2nm etc as described on the preceding page and a time to entry if applicable By selecting any airspace name listed on the Nearest Airspace Page additional ...

Page 153: ...lashing cursor and press the ENT Key 6 Press the small right knob to remove the flashing cursor To view and quickly tune the frequency for a controlling agency 1 Follow steps 1 through 4 on the preceding page to display the Airspace Page Figure 8 34 for the desired controlled or special use airspace 2 Turn the large right knob to highlight Frequencies and press the ENT Key 3 Turn the large right k...

Page 154: ...g TRSA Unspecified Warning The bottom right hand corner of the Airspace Page displays the floor and ceiling limits of the airspace The following are examples of what may appear as vertical limits for an airspace 5000 ft msl 5000 feet mean sea level 5000 ft agl 5000 feet above ground level MSL at mean sea level NOTAM Notice to Airmen Unknown Unlimited See Chart Surface All airspace alert messages e...

Page 155: ...unterclockwise to decrease volume VLOC Window and Tuning VLOC frequencies are tuned with the large and small left knobs when the tuning cursor is in the standby VLOC frequency field The standby frequency always appears below the active frequency The active frequency is the frequency currently in use The tuning cursor remains in the COM Window To select a VOR Localizer ILS frequency press the small...

Page 156: ...y highlighting the desired frequency on the VOR Page Section 7 10 or the Nearest VOR Page Section 8 5 and pressing the ENT Key This process is referred to as auto tuning Once a frequency is selected in the standby field it may be transferred to the active frequency by pressing the VLOC Flip flop Key Auto tuning can also be performed from VLOC frequencies listed on the NAV COM Page the Airport Freq...

Page 157: ...he frequency Additional information on approach procedures is provided in Section 6 1 To select an approach and automatically tune the proper VLOC frequency 1 Select the destination airport using the Direct to Key or as the last waypoint in the active flight plan 2 Press the PROC Key to display the Procedures Page 3 Turn the large right knob to highlight Select Approach and press the ENT Key Figur...

Page 158: ...precision approaches and some non precision approaches a reminder window appears indicating that GPS guidance on such approaches is strictly for monitoring only use theVLOC receivers and external CDI or HSI for primary navigation To confirm this reminder highlight Yes and press the ENT Key CDI Key The GNS 430 s CDI Key is used to couple the GPS or VLOC receiver to the external CDI or HSI When the ...

Page 159: ...4 AUX pages see Section 8 Table 10 1 Page Groups Figure 10 1 AUX Pages Flight Planning Utility Setup 1 Setup 2 NOTE The AUX Page Group may have five AUX pages available when the GNS 430 installation includes connection to a weather information source See Section 10 of this manual for more information To quickly select an AUX page 1 From any page press and hold the CLR Key to select the Default NAV...

Page 160: ...responding page appears providing additional information and features Figure 10 4 Flight Planning Page Current Page Group Menu Options to Select Highlight with Cursor and Press the ENT Key Position of Current Page within Current Page Group Number of Pages in Current Page Group To select a menu option from the Flight Planning Page 1 Press the small right knob momentarily to activate the flashing cu...

Page 161: ...altitude at which the aircraft can perform depending upon several environmental conditions including indicated altitude IND ALT barometric pressure BARO and total air temperature TAT the temperature including the heating effect of speed read on a standard outside temperature gauge This menu option computes true airspeed TAS based upon the factors above and the calibrated airspeed CAS Also this men...

Page 162: ...ning Figure 10 9 turn the small and large right knobs to enter the identifier of the from waypoint Once the waypoint s identifier is entered press the ENT Key to accept the waypoint The flashing cursor moves to the to waypoint Again turn the small and large right knobs to enter the identifier of the to waypoint and press the ENT Key to accept the waypoint OR Figure 10 9 Fuel Planning Page Point to...

Page 163: ... GS field Use the small and large right knobs to enter the ground speed Press the ENT Key when finished 9 With all variables entered the following information is provided Figure 10 12 REQ Quantity of fuel required LFOB Left over fuel on board LRES Left over fuel reserve time EFF Efficiency expressed in distance per fuel units e g nautical miles per gallon RNG Range distance ENDUR Flight endurance ...

Page 164: ...g To perform trip planning operations 1 Select Trip Planning from the Flight Planning Page using the steps described in this section 2 The current trip planning leg mode is displayed at the top of the page POINT TO POINT or FPL LEG for a flight plan leg To change the leg mode press the MENU Key to display the Flight Planning Page Menu for the other leg mode then press the ENT Key to accept the oth...

Page 165: ...DTK Desired track or desired course DIS Distance ETE Estimated time enroute ESA Enroute safe altitude ETA Estimated time of arrival Flight Planning Page Density Alt TAS Winds To calculate density altitude true airspeed winds aloft 1 Select Density Alt TAS Winds from the Flight Planning Page Figure 10 17 using the steps described at the beginning of this section Figure 10 17 Density Alt TAS Winds H...

Page 166: ...e ENT Key when finished Figure 10 19 Heading Field Highlighted 7 With all variables entered the following information is provided DEN ALT Density altitude TAS True airspeed WIND Wind direction and speed HEAD TAIL WIND Magnitude of head wind or tail wind component NOTE If the installation includes components such as an airdata sensor to provide any of the variables above the DensityAlt TAS Winds Pa...

Page 167: ... data transfer error or data transfer cancelled are received during an automatic or manual transfer the pilot must force another transfer To transfer flight plans or user waypoints to from a second 400 500 series unit 1 Select Crossfill from the Flight Planning Page using the steps described at the beginning of this section 2 The flashing cursor highlights the method field Turn the small right kno...

Page 168: ...t plan number field is highlighted Turn the small right knob to select the desired flight plan and press the ENT Key 6 For a specified user waypoint UserWaypoint data option the waypoint identifier field is highlighted Use the small and large right knobs to enter the identifier of the desired user waypoint Press the ENT Key when finished 7 The flashing cursor moves to the CROSS SIDE field Turn the...

Page 169: ...ngPage using the steps described at the beginning of this section 2 The flashing cursor highlights the first message field 3 To edit the message text turn the large right knob to highlight the desired message field Use the small and large right knobs to edit the message text entering the new text directly over the old message Press the ENT Key when finished 4 To edit the time field turn the large ...

Page 170: ...in Current Page Group Number of Pages in Current Page Group To select a menu option from the Utility Page 1 Press the small right knob momentarily to activate the flashing cursor Figure 10 29 2 Turn the large right knob to select the desired menu option Figure 10 30 and press theENT Key Figure 10 31 Figure 10 30 Sunrise Sunset Highlighted Figure 10 31 Waypoint Field Highlighted The following menu ...

Page 171: ... is insufficient to pass built in RAIM tests When this occurs the GPS receiver continues to provide navigation information but should not be used for primary navigation guidance Use the GNS 430 s VLOC receiver or another suitable navigation source Figure 10 32 INTEG Annunciation If a WARN annunciation appears at the bottom left corner GPS satellite coverage may be sufficient but the GNS 430 has de...

Page 172: ...e small and large right knobs to enter each checklist item followed each time by the ENT Key Each checklist may contain up to 30 line items of as much as 16 characters long To execute a checklist 1 With the Checklists Page displayed Figure 10 34 turn the large right knob to select the desired checklist and press the ENT Key Figure 10 34 Desired Checklist Highlighted 2 As each checklist item is com...

Page 173: ...urn the large right knob to select Copy Checklist and press the ENT Key to copy the checklist to an empty checklist memory location To sort the checklists by name or entry 1 With the Checklists Page displayed press the MENU Key to display an options menu 2 Turn the large right knob to select Sort List By Entry or Sort List By Name and press the ENT Key Utility Page Flight Timers To view use or res...

Page 174: ...ct the desired reset mode Figure 10 38 Pwr on records a departure time when the GNS 430 is turned on GS 30kt records a departure time once the GPS computed ground speed exceeds 30 knots Figure 10 38 Reset Mode Window 4 Press the ENT Key when finished 5 To reset the departure time turn the largeright knob to highlight Reset and press the ENT Key To view use or reset total trip time 1 Select Flight ...

Page 175: ... only Reset Odometer Resets odometer readout only Reset All Resets all trip statistics readouts 3 Turn the large right knob to select the desired reset option and press the ENT Key Utility Page RAIM Prediction To predict RAIM availability 1 Select RAIM Prediction from the Utility Page Figure 10 42 using the steps described at the beginning of this section Figure 10 42 RAIM Prediction Highlighted 2...

Page 176: ...ion during all flight phases including non precision approaches NOTE RAIM computations predict satellite coverage within 15 minutes of the specified arrival date and time Refer to Section 10 4 for specific information regarding RAIM protection limits also refer to Section 13 for FDE Fault Detection and Exclusion information Utility Page Sunrise Sunset To calculate sunrise and sunset times at any w...

Page 177: ...ble from this page Figure 10 48 Software Versions Page Utility Page Database Versions The Database Versions Page Figure 10 49 displays the navigation database type and version information as well as the land database type and version This page is for information purposes only no user functions are available from this page Figure 10 49 Database Versions Page Utility Page Terrain Database Versions T...

Page 178: ...d special use airspace message alerts on or off This does not affect the alerts listed on the Nearest Airspace Page or the airspace boundaries depicted on the Map Page It simply turns on off the warning provided when the aircraft is approaching or near an airspace An altitude buffer is also provided which expands the vertical range above or below an airspace For example if the buffer is set at 500...

Page 179: ...0 2 CDI Scales An auto ILS CDI selection allows the GNS 430 to automatically switch the external CDI from the GPS receiver to the VLOC receiver when established on the final approach course Section 6 3 Or select manual to manually switch the external CDI connection as needed An arrival alarm provided on the CDI Alarms Page may be set to notify the pilot with a message when a user defined distance ...

Page 180: ...te the offset by adding or subtracting the correct number of hours Setup 1 Page Airspace Alarms To set the airspace warning messages or change the altitude buffer 1 Select AirspaceAlarms from the Setup 1 Page Figure 10 55 using the steps described at the beginning of this section Figure 10 55 Airspace Alarms Highlighted 2 Turn the large right knob to highlight the On Off field next to the desired ...

Page 181: ...phases of flight as described at the beginning of this section 3 Press the ENT Key to accept the selected scale The System CDI field displays the CDI scale currently in use Figure 10 59 The System CDI setting may differ from the Selected CDI depending upon the current phase of flight Figure 10 59 Selected CDI Field Highlighted To change the ILS CDI selection 1 Select CDI Alarms from the Setup 1 Pa...

Page 182: ...its Mag Var Page Setup 1 Page Units Mag Var To set the magnetic variation 1 Select Units Mag Var from the Setup 1 Page Figure 10 61 using the steps described at the beginning of this section Figure 10 61 Units Mag Var Highlighted 2 The flashing cursor highlights the heading mode field Turn the small right knob to select the desired heading mode Auto True or User Figure 10 62 Press the ENT Key to a...

Page 183: ...the desired units of measure for the selected category Press the ENT Key to accept the selection Setup 1 Page Position Format Map Datum To change the position format 1 Select Position Format Map Datum from the Setup 1 Page Figure 10 64 using the steps described at the beginning of this section Figure 10 64 Position Map Datum Highlighted 2 The flashing cursor is on the position format field Figure ...

Page 184: ...t knob to display a window of available time formats Local 12hr Local 24hr or UTC Figure 10 67 Time Format Window 3 Continue turning the small right knob to select the desired time format 4 Press the ENT Key to accept the selection To set the local time 1 Select Date Time from the Setup 1 Page using the steps described at the beginning of this section 2 Turn the large right knob to highlight the t...

Page 185: ...section 2 Press the MENU Key to display the Date Time Page Menu Figure 10 69 Figure 10 69 Date Time Page Menu 3 With Restore Defaults highlighted press the ENT Key 10 5 Setup 2 Page The Setup 2 Page Figure 10 70 provides access via menu options to display adjustments parameters which define the nearest airport search and COM transceiver channel spacing When a menu option is selected the correspond...

Page 186: ...Nearest Airport Criteria Defines the minimum runway length and surface type used when determining the nine nearest airports to display on the Nearest Airport Page A minimum runway length and or surface type may be entered to prevent airports with small runways or runways that are not of appropriate surface from being displayed The default settings are 0 feet or meters for runway length and any for...

Page 187: ...ct the desired mode Auto or Manual Press the ENT Key to accept the selection 4 If Manual is selected the flashing cursor moves to the contrast level field Turn the small right knob to select the desired level Press the ENT Key to accept the selection Setup 2 Page Nearest Airport Criteria To set the minimum runway length and runway surface 1 Select Nearest Airport Criteria from the Setup 2 Page usi...

Page 188: ...he flashing cursor highlights the channel spacing field Figure 10 78 Turn the small right knob to select the desired channel spacing 8 33 kHz or 25 0 kHz Press the ENT Key when finished Figure 10 78 Channel Spacing Window Restoring Factory Settings When making changes to any Setup 2 Page option a Restore Defaults menu selection restores the original factory settings for the selected option To rest...

Page 189: ...ta contained in the TERRAIN databases comes from government agencies Garmin accurately processes and cross validates the data but cannot guarantee the accuracy and completeness of the data TERRAIN displays terrain and obstructions relative to the altitude of the aircraft The displayed alerts are advisory in nature only Individual obstructions may be shown if available in the database However all o...

Page 190: ...e the GPS position and GPS MSL altitude are used to calculate and predict the aircraft s flight path in relation to the surrounding terrain and obstacles In this manner TERRAIN can provide advanced alerts of predicted dangerous terrain conditions Detailed alert modes are described later in this section Baro Corrected Altitude Baro correctedaltitude orindicatedaltitude isderived by adjusting the al...

Page 191: ...le Projected Flight Path 1000 ft 100 ft Threshold Terrain more than 1000 ft below the aircraft altitude Black Terrain between 100 ft and 1000 ft below the aircraft altitude Yellow Terrain above or within 100 ft below the aircraft altitude Red Figure 11 1 Terrain Altitude Color Correlation Unlighted Obstacle Lighted Obstacle Potential Impact Points Obstacle Location Alert Level 1000 AGL 1000 AGL 10...

Page 192: ...coded according to Table 11 2 Figure 11 2 TERRAIN Annunciation Field TERRAIN Annunciation NOTE TERRAIN Advisory Alerts are displayed as constant black text on a yellow background TERRAIN CautionAlerts are displayed as flashing black text on a yellow background Pop up terrain alerts Figure 11 3 11 4 can also appear during an alert but only when the TERRAIN Page is not displayed There are two option...

Page 193: ...ilable None Required Terrain Clearance RTC Advisory Required Terrain Clearance RTC Caution FLASHING FLASHING Imminent Terrain Impact ITI Advisory Imminent Terrain Impact ITI Caution FLASHING FLASHING Required Obstacle Clearance ROC Advisory Required Obstacle Clearance ROC Caution FLASHING FLASHING Imminent Obstacle Impact IOI Advisory Imminent Obstacle Impact IOI Caution FLASHING FLASHING Prematur...

Page 194: ...RTC or ROC alert is issued a potential impact point is displayed on the TERRAIN Page Imminent Terrain Impact ITI and Imminent Obstacle Impact IOI These alerts are issued when the aircraft is below the elevation of a terrain or obstacle cell in the aircraft s projected path ITI and IOI alerts are accompanied by a potential impact point displayed on the TERRAIN Page The alert is annunciated when the...

Page 195: ... 7 8 9 10 11 12 13 14 15 Too Low Terrain Too Low Terrain Runway Threshold Figure 11 5 PDA Alerting Threshold TERRAIN Inhibit TERRAIN also has an inhibit mode that deactivates the FLTA PDA visual alerts Pilots should use discretion when inhibiting TERRAIN and always remember to enable the system when appropriate Inhibiting TERRAIN 1 Select theTERRAIN Page and press the MENU Key Inhibit Terrain is s...

Page 196: ...TERRAINNOTAVAILABLE isgeneratedontheTERRAIN Page Figure 11 8 When the GPS signal is re established and the aircraft is within the database coverage area the TER N A visual annunciation is removed Figure 11 8 TERRAIN NOT AVAILABLE Display TERRAIN Failure Alert TERRAIN continually monitors several system critical items such as database validity hardware status and GPS status If the terrain obstacle ...

Page 197: ... guarantee the accuracy and completeness of the data The terrain obstacle databases are contained on a datacard which is inserted in the right most slot of the GNS 430 units Appendix A NOTE Obstacles 200 and higher are included in the Obstacle Database It is very important to note that not all obstacles are necessarily charted and therefore may not be contained in the Obstacle Database Database Ve...

Page 198: ...ata card from and insert the new card into the right most slot of the GNS 430 4 Turn on the GNS 430 and verify that the TERRAIN system passes self test Terrain Obstacle Database Areas of Coverage Table 11 5 lists the area of coverage available in each database Regional definitions may change without notice Database Coverage Area Worldwide WW Latitudes N75 to S60 Longitudes W180 to E180 United Stat...

Page 199: ...0 Mode STransponder and a GDL 49 or GDL 69 A Data Link Satellite Receiver NOTE Proximity Advisories and Other Traffic symbols normally displayed in white may be displayed in cyan if configured for alternate traffic color see the 400 series installation manual 12 1 Traffic Information Service TIS This section is written for Garmin GNS 400 Main System Software Version 5 01 and later GTX 330 330D Mai...

Page 200: ...ns section of the Aeronautical Information Manual Section 1 3 5 TIS is not intended to be used as a collision avoidance system and does not relieve the pilot responsibility to see and avoid other aircraft TIS should not be used for avoidance maneuvers during IMC or other times when there is no visual contact with the intruder aircraft TIS is intended only to assist in visual acquisition of other a...

Page 201: ...nce and altitude remain relatively accurate and may be used to assist see and avoid Some of the more common examples of these errors follow When client or intruder aircraft maneuver excessively or abruptly the tracking algorithm may report incorrect horizontal position until the maneuvering aircraft stabilizes When a rapidly closing intruder is on a course that crosses the client aircraft course a...

Page 202: ...ding to TCAS symbology on a dedicated Traffic page and on the moving Map Page The symbology is shown in Table 12 1 and Figures 10 2 10 3 and 10 4 The symbology is described in Table 12 2 A Traffic Advisory TA symbol appears as a solid yellow circle or half circle on the outer range ring if the traffic is outside the range of the dedicated Traffic Page Other Traffic is displayed as hollow white may...

Page 203: ...d Track The target track vector is a short line displayed in 45 increments The vector protrudes from each target symbol in the approximate direction of travel Table 12 2 TIS Options Traffic Page TIS Traffic data is displayed on the Traffic Page Figure 12 5 and the Map Page Unlike other forms of traffic TIS traffic does not require heading data to be valid on the map If heading is available the Tra...

Page 204: ...sponder Figure 12 9 No Data Message OPER When the Traffic Page displays OPER in the upper right hand corner of the display Figure 12 11 the TIS system is in operational mode and available to display traffic on the Traffic or Map Page STANDBY When the Traffic Page displays STANDBY Figure 12 10 the TIS system is in standby mode and cannot display traffic data Figure 12 10 Standby Message TRFC CST Th...

Page 205: ...pressing the ENT Key or go back to the previous page by pressing the CLR Key Figure 12 13 Traffic Warning Window NOTE The Traffic Warning Window is disabled when the aircraft ground speed is less than 30 knots or when an approach is active Non Bearing Traffic Advisory TA Banner Traffic is only displayed graphically if aircraft heading data is available When heading is not available Traffic Advisor...

Page 206: ...proximity advisories are displayed on the Map Page proximity advisories are not applicable to TIS configuration TA only Only traffic advisories are displayed on the Map Page TRAFC SMBL Allows the user to select the map range at which the traffic symbol s and TA text appear TRAFC LBL Allows the user to select at what map range the altitude trend arrow and altitude deviation indicator appear Figure ...

Page 207: ...ing TIS Traffic Using Map Page Panning Another Map Page feature is panning which allows the pilot to move the map beyond its current limits without adjusting the map scale Press the small right knob to select the panning function a target pointer flashes on the map display A window appears at the top of the map display showing the latitude longitude position of the pointer plus the bearing and dis...

Page 208: ...g mode from the standby mode to display TIS traffic 1 Press the small right knob to activate the cursor and highlight STBY 2 Turn the small right knob to select OPER 3 Press the ENT Key to confirm Placing the display into standby mode from operating mode to stop displaying TIS traffic 1 Press the small right knob to activate the cursor and highlight OPER 2 Turn the small right knob to select STBY ...

Page 209: ...hat the intruder is outside of the current range of the Traffic Page Proximity Advisory PA Proximity Advisories PA are displayed as solid white may be configured as cyan diamonds PAs are defined as traffic within the 6 0 nm range within 1200 ft of altitude separation and are not a traffic advisory TA Other Traffic Symbol The hollow white may be confiugred as cyan diamond represents traffic detecte...

Page 210: ...ivity Level Intruder Altitude Available TA Alerting Conditions A Yes Intruder closing rate provides less than 20 seconds of vertical and horizontal separation Or Intruder range is within 0 2 nm and vertical separation is within 600 feet A No Intruder closing rate is less than 15 seconds B Yes Intruder closing rate provides less than 30 seconds of vertical and horizontal separation Or Intruder rang...

Page 211: ...squat switch the Standby Screen is displayed Figure 12 21 If the GTS 8XX fails the power up test as indicated by a FAILED screen the GTS 8XX is inoperable see the GTS 8XX Installation Manual for detailed information on Failure Response NOTE The FAILED message is displayed when the system detects an error that prohibits further traffic display operation NOTE When the system is in standby the GTS 8X...

Page 212: ...ey to confirm and place the GTS 8XX in standby mode NOTE The GTS 8XX goes into standby mode 24 seconds after landing which is determined by ground speed or by a transition of the aircraft squat switch if connected This delay allows the GTS 8XX to remain out of standby during a touch and go maneuver Traffic Page Traffic can be displayed both on the Map Page only if heading is available and on the T...

Page 213: ...play Mode 1 From the Traffic Page press the small right knob to activate the cursor and highlight the current mode Figure 12 25 2 Turn the small right knob to cycle through the options The screen changes to display the traffic detected within the selected altitude display range Refer to Figure 12 24 for information regarding altitude display ranges Figure 12 24 Altitude Display Modes 2 700 ft Draw...

Page 214: ... active Display Range Traffic Banner Figure 12 27 Traffic Banner Configuring Traffic Data on the Map Page Traffic is only displayed on the Map Page if aircraft heading data is available The Traffic Mode setting allows the operator to choose which traffic type is displayed all traffic traffic and proximity advisories or traffic advisories only The Traffic Symbol and Traffic Label settings determine...

Page 215: ...page function is panning which allows changing the map beyond its current limits without adjusting the map scale Select the panning function by pressing the small right knob a target pointer flashes on the map display Figure 12 30 Also a window appears at the top of the map display showing the latitude longitude position of the pointer and the bearing and distance to the pointer from the present p...

Page 216: ...XRAD and METAR data is collected by the National Weather Service and disseminated to Meteorlogix a weather information provider This data is then delivered to a weather server in the Echo Flight Message System With the weather data on the system an incoming customer request is filled logged and turned around for delivery to ORBCOMM in less than five seconds ORBCOMM is a provider of global messagin...

Page 217: ...tenna points directly at the sun Military aircraft deploy metallic dust chaff which can cause alterations in radar scans Interference from buildings or mountains which may cause shadows NEXRAD Limitations CAUTION NEXRAD weather data is to be used for long range planning purposes only Due to inherent delays and relative age of the data that can be experienced NEXRAD weather data cannot be used for ...

Page 218: ... hour Source of NEXRAD Echo GDL 49 GDL 69 Atmos Cloud Rain Snow Sleet Hail 10 00 00 10 00 00 5 00 trace 0 00 trace 05 Very Light GREEN 5 00 trace 10 Light GREEN 10 0 trace 10 Light Light 15 01 1 2 Light Light 20 02 2 3 Light Light 25 05 3 5 Light Light Medium YELLOW YELLOW 30 09 5 7 Light Moderate Moderate 35 24 7 1 0 Moderate Heavy 40 48 1 or sleet Heavy Heavy RED RED 45 1 25 1 or sleet Heavy Hea...

Page 219: ...RAD data from a specific waypoint identifier If From ID is selected as the reference point for the request the WPT field is displayed in place of Position The WPT field is used to enter a waypoint identifier as the reference point for the request From Lat Lon Request NEXRAD data from a specific latitude and longitude This is only selectable when requesting from the map The Position field displays ...

Page 220: ...s on the NEXRAD Request Page 5 Select Manual Send or Update Request and press the ENT Key The request has been sent Note that selecting Auto Request and pressing the ENT Key does not send the request until after the auto time period 6 To exit from the NEXRAD Request Page press the small right knob The Data Link Page is displayed Requesting NEXRAD data from the Map Page 1 Select the Map Page 2 Pres...

Page 221: ...e Weather Page The pilot can customize the NEXRAD data on the Weather Page from the Page Options Menu Customizing the NEXRAD data on the Weather Page 1 From the Weather Page press the MENU Key to display the NAV Weather Page Options Menu 2 Select from the following options to customize the NEXRAD data View 120 View 360 There are two viewing options available each shown relative to the position of ...

Page 222: ... Map Page 5 Highlight the NEXRAD Density field use the small right knob to set the density desired i e the transparency see Table 12 7 of the NEXRAD cells The density values are LOW MED HIGH Press the ENT Key to make the selection then press the CLR Key to go back to the Map Page Precipitation Intensity Map Configuration Pattern Color Light Precipitation Low sparse dotted area fill Green Light Pre...

Page 223: ...ing the Airport Location Page Use the small and large right knobs to select the Airport Location Page from the WPT Group of pages On the Map Page move the target pointer to high light an on screen airport Press the ENT Key On any page that displays an airport identifier use the cursor and highlight the desired airport identi fier Press the ENT Key Once the Airport Location Page is displayed enter ...

Page 224: ...yed Figure 12 39 Figure 12 39 Data Link Request Log Page Sending Position Reports GDL 49 Only The Data Link allows for accurate location tracking of the aircraft by sending the aircraft s position manually or automatically to the EchoFlight website www EchoFlight com for use by third party EchoFlight customers Sending the Present Position 1 Select the Data Link Page see preceding step 1 2 Highligh...

Page 225: ...end This field is used to send out a current single position report Figure 12 41 Figure 12 41 Position Report Page Requesting Graphical METARs Graphical METAR data can be requested from the Data Link Page Map Page or Airport Page Requesting graphical METARs from the Data Link Page 1 Select the Data Link Page from the AUX Page Group 2 Press the small right knob to activate the cursor Turn the small...

Page 226: ...use as the reference point for the request Radius Graphical requests only This field selects a request radius from 50 to 250 nm from the selected position Position also WPT or Flight Plan Current Posn Position is current Look Ahead Position is look ahead position From ID Position is from the ID entered into the WPT field Flight Plan is the ID selected from the active flight plan Auto Request GDL 4...

Page 227: ...ent Note that selecting Auto Request and pressing the ENT Key does not send the request until after the auto time period 6 To exit from the METAR Request Page press the small right knob The Map Page is displayed Displaying graphical METARs on the NAV Weather Page Once received graphical METAR data is displayed on the NAV Weather Page Displaying graphical METARs on the NAV Weather Page 1 Select the...

Page 228: ...played Figure 12 45 for the type of data that was selected Use the small right knob and scroll through the various descriptions for the symbols that are shown Press the small right knob to return to the Weather Page Figure 12 45 Weather Legend Page for METAR Data The following symbology is shown for the various types of data For METAR Data Age of Data in Minutes Ceiling Visibility and Precipitatio...

Page 229: ... field flashes 3 Turn the small right knob and select TEMP DP 4 Press the small right knob The Temperature Dewpoints are displayed on the NAV Weather Page NOTE See a complete description of all METAR Wind and Temp Dewpoint symbols at the end of this section Troubleshooting Although it is the responsibility of the facility that installed the GDL 49 or GDL 69 69A to correct any hardware problems the...

Page 230: ... SAT ID CONNECTIVITY FIELD MESSAGE DESCRIPTION _ _ _ RS 232 communication with the GDL 49 has been lost Data Link has failed There is a disconnect inside the GDL 49 Linked to sat Can exchange data with the satellite Satellite in view Found satellite but have not yet identified it Searching No satellite is currently in view Table 12 8 Sat ID Connectivity Field SATCOM Operation This field indicates ...

Page 231: ...oor 2 good and 3 excellent XM GDL 69 69A not yet communicating with internal satellite radio hardware normal during power up X0 X1 X2 or X3 X Satellite radio service activated Satellite signal quality is indicated by the numbers 0 1 2 or 3 where 0 none 1 poor 2 good and 3 excellent Table 12 10 Sat ID Field CONNECTIVITY FIELD MESSAGE DESCRIPTION Satellite in view Indicates a signal quality between ...

Page 232: ...tation xxxx are numbers PRESFR Pressure falling rapidly PRESRR Pressure rising rapidly RA Rain RMK Remarks SCT Scattered clouds SLP Sea Level Pressure SM Statue Miles SN Snow TEMPO Occasionally Trrn Terrain TS Thunderstorm VV Vertical Visibility Table 12 12 Forecast Abbreviations METAR Graphics The age symbols listed in Table 12 13 are common to METARs Winds and Temperature Dewpoint graphics METAR...

Page 233: ...sibility Station Identifier Data Age Figure 12 48 METAR Symbol Winds Wind Vector The wind vector indicates the direction of the surface wind to the nearest 30 increment e g 30 60 90 120 etc Wind Speed In general the sum of the wind barbs see Table 12 16 is the sustained surface wind speed Wind Speed Blank Unknown Short Barb 5 kts Long Barb 10 kts 37 kts Table 12 16 Wind Speed Graphics Gust Offset ...

Page 234: ...ction of 300 at a speed of 25 knots gusting to 36 knots or greater The data age is 11 20 minutes old Gust Offset Wind Speed Wind Vector Data Age Figure 12 49 Wind Symbol Temperature Dewpoints The Temperature Dewpoint Range symbols Table 12 18 display the difference between the reported temperature and dewpoint Differences are shown in degrees Fahrenheit Temp Dewpoint Display Ranges Blank Unknown 1...

Page 235: ...he exclusion function excludes one or more failed satellites and prevents them from being used during navigation This allows the GPS receiver to return to normal performance without interruption The process is entirely automated and does not require pilot interaction during flight On the Satellite Status Page the pilot can view information related to FDE operation To enhance safety FDE functionali...

Page 236: ...Standard Terminal Arrival Routes STARs if a NOTAM indicates a GPS satellite or satellites is scheduled to be out of service per FAA AC 90 100 U S Terminal and En Route Area Navigation RNAV Operations Prior to departure the operator must use the FDE Prediction Program supplied with the 400 series Trainer Software Figure 13 2 to demonstrate that there are no outages in the capability to navigate on ...

Page 237: ...referenced to True North The GNS 430 has not detected a NavData Card in the left data card slot Altitude input failure The GNS 430 is configured to receive altitude serializer data Icarus Rosetta or Shadin and it is not being received Or the data was being received but has been interrupted If a grey code altitude input is available it is used instead If the problem persists contact a Garmin dealer...

Page 238: ...Check unit cooling The GNS 430 has detected excessive display backlighting temperature The backlighting has been automatically dimmed to reduce the temperature Check for adequate ventilation or check cooling air flow Contact a Garmin dealer for assistance COM has failed Internal system to system communication between the main processor and the COM transceiver has failed COM is not responding Inter...

Page 239: ...e database versions of the two GNS 430s are not identical If necessary update the database s so they match Contact Jeppesen or your Garmin dealer for assistance Data transfer error please re transmit An error was detected during unit to unit crossfill of user data user waypoints and or flight plans The data transfer should be attempted again Data transfer is complete The unit to unit crossfill of ...

Page 240: ...available when a new NavData Card was installed database change G S has failed The GNS 430 has detected a failure in its glideslope receiver The glideslope receiver is not available and the unit should be returned to a Garmin dealer for service G S is not responding Internal system to system communication between the main processor and the glideslope receiver has failed Operational status of the g...

Page 241: ...s and satellite data Near airspace less than 2 nm The GPS calculated position is within 2 nm of a special use airspace boundary but the aircraft is not projected to enter the airspace This message is automatically disabled within 30 nm of an arrival airport when an approach is loaded Need altitude display position page The GPS receiver needs altitude input in order to start and or continue 2D navi...

Page 242: ... alternate source for navigation guidance such as the GNS 430 s VLOC receiver RAIM not available from FAF to MAP waypoints When performing an instrument approach Receiver Autonomous Integrity Monitoring RAIM has determined that sufficient GPS satellite coverage does not exist to meet the required protection limits Select an alternate source for navigation guidance such as the GNS 430 s VLOC receiv...

Page 243: ...ypoints flight plans and system settings have been lost due to a memory battery failure or system reset Terrain See Section 11 3 for complete list of TERRAIN related Alerts and Annunciations Terrain configuration conflict The hardware configuration does not match the terrain software configuration The operational status of the terrain components is unknown and the unit should be returned to a Garm...

Page 244: ...y is stuck The remote VLOC transfer switch is stuck in the enabled or pressed state Try pressing the switch again to cycle its operation If the message persists contact a Garmin dealer for assistance VLOC transfer key stuck The VLOC Flip flop Key is stuck in the enabled or pressed state Try pressing the VLOC Flip flop Key again to cycle its operation If the message persists contact a Garmin dealer...

Page 245: ...eed CDI Course Deviation Indicator CLR Clear COM Communications Transceiver CRSR Cursor CTA ICAO Control Area CTAF Common Traffic Advisory Frequency CTR Center ARTCC CTS Course To Steer CUM Cumulative DB Database DEN Density DEP Departure DIS Distance DME Distance Measuring Equipment DOP Dilution of Precision DTK Desired Track EFF Efficiency ELEV Elevation ENDUR Endurance ENR Enroute ENT Enter EPE...

Page 246: ... Kilometers kph Kilometers Per Hour kt Knots LAT LON Latitude Longitude lb Pounds LCL Local LFOB Left over Fuel On Board LOC Localizer LRES Left over Fuel Reserve Time Lrg Large lt Liters M Degrees Magnetic m Meters mb Millibars of Pressure Med Medium MHz Megahertz mi Statute Miles MOA Military Operations Area mph Statute Miles Per Hour mpm Meters Per Minute mps Meters Per Second MSA Minimum Safe ...

Page 247: ...oute SUA Special Use Airspace T Degree True TACAN Tactical Air Navigation TAS True Airspeed TAT Total Air Temperature TEMP Temperature TERM Terminal TKE Track Angle Error TMA ICAO Terminal Control Area TRANS Transition TRFC Traffic TRK Track also Ground Track TRSA Terminal Radar Service Area twr Tower TX Transmit uni Unicom UTC Coordinated Universal Time also GMT or Zulu VAR Variation VER Version ...

Page 248: ... present position to a destination waypoint CAS calibrated airspeed Indicated airspeed corrected for instrument errors CTS course to steer The recommended direction to steer in order to reduce course error or stay on course Provides the most efficient heading to get back to the desired course and proceed along the flight plan CUM cumulative The total of all legs in a flight plan cumulative distanc...

Page 249: ...icated altitude LFOB left over fuel onboard The amount of fuel remaining on board after the completion of a one or more legs of a flight plan or a direct to LRES left over fuel reserve The amount of fuel remaining on board after the completion of a one or more legs of a flight plan or a direct to expressed in time and based upon a known fuel consumption flow rate MSA minimum safe altitude Uses Gri...

Page 250: ...GNS 430 A Pilot s Guide and Reference 190 00140 00 Rev P SECTION 14 MESSAGES ABBREVIATIONS NAV TERMS 14 14 Blank Page ...

Page 251: ...er begins to count down and if the card is not replaced within 30 seconds the GNS 430 automatically re initializes Pressing the ENT Key will manually re initialize the unit Figure A 1 Data Card Slot Locations Terrain Data Card Slot right hand slot NavData Card Slot left hand slot To insert the NavData or Terrain Data Card Figure A 2 1 Place the card into the appropriate card slot with the label fa...

Page 252: ...rd motion at the front center of the data card This partially deploys the swing arm handle 2 Rotate the swing arm handle upward and outward until it locks into place perpendicular to the face of the GNS 430 unit 3 Grasp the top and bottom surfaces of the swing arm handle between your thumb and forefinger and pull directly away from the face of the GNS 430 unit to remove the data card ...

Page 253: ...rs 49 ft RMS Velocity 0 1 knot RMS steady state Dynamics 999 kts maximum velocity 6g maximum acceleration VHF COM PERFORMANCE Channels 760 25 kHz spacing or 2280 8 33 kHz spacing Frequency Range 118 000 MHz to 136 975 MHz Transmit Power 10 watts minimum 430 16 watts minimum 430A VOR PERFORMANCE Frequency Range 108 00 MHz to 117 95 MHz LOCALIZER PERFORMANCE Frequency Range 108 10 MHz to 111 95 MHz ...

Page 254: ...GNS 430 A Pilot s Guide and Reference 190 00140 00 Rev P APPENDIX B SPECIFICATIONS B 2 Blank Page ...

Page 255: ...approaches During oceanic enroute and terminal phases of flight RAIM is available nearly 100 of the time Because of the tighter protection limit on approaches there may be times when RAIM is not available The GNS 430 automatically monitors RAIM and warns the pilot with an alert message Section 13 when it is not available and the INTEG annunciator appears at the bottom left corner of the screen If ...

Page 256: ... if the procedure has not been modified If an approach departure or arrival procedure is no longer available the flight plan becomes locked until the procedure is deleted from the flight plan or the correct database is installed For information on loading an approach departure or arrival see Section 6 1 See Section 5 1 for instructions on saving and copying flight plans Can I file slant Golf G usi...

Page 257: ...the active waypoint provided the active waypoint is not the last waypoint Refer to Section 6 2 for an example using the OBS Key One application for the OBS Key is holding patterns The OBS Key is used to suspend waypoint sequencing and select the desired course along the waypoint side of the hold For many approach operations setting and resetting of waypoint sequencing is automatic Holding patterns...

Page 258: ...hen automatic sequencing is enabled i e no OBS or SUSP annunciation directly above the OBS Key For automatic sequencing to occur the aircraft must also cross the bisector of the turn being navigated The bisector is a perpendicular line between two flight plan legs which crosses through the waypoint common to both legs How do I skip a waypoint in an approach departure or arrival The GNS 430 allows ...

Page 259: ... flips momentarily to indicate that the aircraft has crossed the midpoint of the turn For more information on waypoint alerts and turn advisories see Sections 6 2 and 6 3 When does the CDI scale change and what does it change to The GNS 430 begins a smooth CDI scale transition from the 5 0 nm enroute oceanic mode to the 1 0 nm terminal mode scale 30 nm from the destination airport Figure C 7 The C...

Page 260: ...hen press the ENT Key twice How do I re select the same approach or activate a new approach after a missed approach After flying all missed approach procedures the pilot may reactivate the same approach for another attempt from the Procedures Page Once given clearance for another attempt activate the approach from the Procedures Page by highlighting ActivateApproach andpressingtheENTKey The GNS 43...

Page 261: ... Backlighting 10 28 14 2 14 3 Bearing 1 6 1 11 1 12 3 3 3 7 3 12 3 13 3 20 3 21 5 9 5 13 8 4 8 6 8 7 8 8 8 9 8 10 14 9 14 12 Bottom row keys 1 4 C CAUTIONS v CDI Key 1 4 6 26 6 32 6 33 9 4 14 2 14 7 CDI scale 3 2 6 11 6 15 6 19 6 29 6 30 10 20 10 21 10 23 10 24 C 5 C 6 CDI switching 6 33 Ceiling and visibility graphics 12 35 Checklists 1 7 10 12 10 14 10 15 Closest point of flight plan 14 4 CLR Ke...

Page 262: ... 7 6 7 7 7 9 7 15 7 16 8 4 8 10 8 13 9 1 9 4 10 28 14 6 14 7 Frequency selection 9 1 Fuel planning 10 1 10 4 G GDL 49 12 18 GDL 69 69A 12 18 Generic timer 10 15 10 16 GPS receiver status 3 22 3 23 GPS Window 1 9 Graphic track indicator 3 19 Ground speed 1 11 1 12 3 3 3 6 3 13 3 19 3 23 3 24 6 23 6 25 10 3 10 5 10 7 10 12 10 16 10 17 14 13 Ground track 1 11 1 12 3 3 3 19 14 13 Gust offset graphics ...

Page 263: ...Nearest FSS 1 15 8 2 8 10 Nearest Intersection Page 1 15 Nearest NDB Page 1 15 Nearest User Waypoints Page 1 15 Nearest VOR Page 1 15 NEXRAD 12 18 12 21 NEXRAD Request Page 12 21 NOAA 12 20 Non bearing traffic advisory 12 7 NRST Page Group 1 16 8 1 O OBS Key 1 4 6 8 6 9 6 11 6 12 6 13 6 17 6 20 6 22 6 25 6 32 14 1 14 6 C 2 C 6 Odometer 10 17 Overzoom 3 6 P Page groups 1 3 3 1 8 1 10 1 PDA prematur...

Page 264: ...C 6 Traffic advisory 12 4 Traffic coasting 12 6 Traffic Page 12 5 Traffic Warning Window 12 7 Transitions 5 11 5 12 6 1 6 5 6 10 6 18 7 8 7 9 7 11 7 13 9 3 14 3 C 5 Trip planning 10 1 10 2 10 3 10 6 Trip statistics 10 12 10 17 True airspeed 10 1 10 2 10 3 10 7 Tuning cursor 1 3 1 9 2 1 2 2 9 1 Turn advisories C 5 Turn anticipation 14 7 C 5 U Units of measure 1 5 10 20 10 21 10 24 10 25 User waypoi...

Page 265: ......

Page 266: ...391 3411 f 503 364 2138 Garmin Europe Ltd Liberty House Bulls Copse Road Hounsdown Business Park Abbey Park Industrial Estate Southampton SO40 9RB U K p 44 0 870 8501241 f 44 0 870 8501251 Garmin Corporation No 68 Jangshu 2nd Road Shijr Taipei County Taiwan p 886 2 2642 9199 f 886 2 2642 9099 www garmin com 190 00140 00 Rev P 2009 Garmin Ltd or its subsidiaries ...

Reviews: