background image

GPS 158

Owner’s Manual

Summary of Contents for GPS 158

Page 1: ...GPS 158 Owner s Manual ...
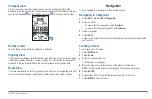
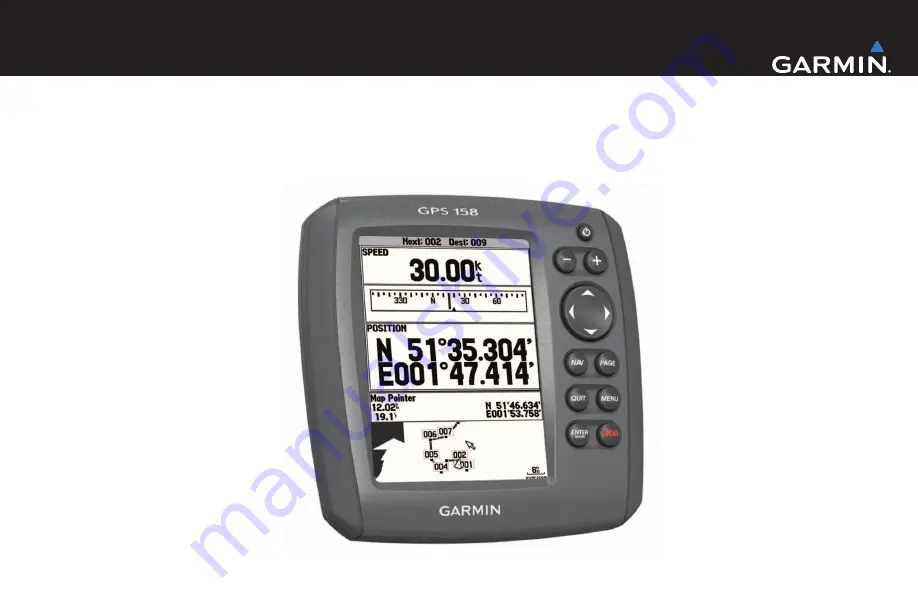
Page 2: ...n 6 Viewing GPS Information 6 Viewing the Calendar 6 Device Settings 7 Trip 7 Tracks 7 Time 7 Pages 7 Map 7 Highway 7 System 8 Units 8 Communications 8 Alarms 8 Installation 9 Tools Needed 9 Installation Preparation 9 Installing the Swivel Mount 9 Installing the Cradle in the Swivel Mount 11 Installing the Cables and Connectors 11 Appendix 13 Specifications 13 Cleaning the Outer Casing 13 Cleaning...

Page 3: ...t QUIT to exit a menu and return to the map or data page view Select menu once to open the menu for the current page Select menu twice to open the main menu Select and to highlight menu items Select ENTER to select an item or make a selection Select MOB to mark a man overboard waypoint Selecting the Map or a Data Page 1 From the map or any data page select PAGE 2 Select MENU to change the settings...

Page 4: ...ting the Zoom Level 1 Select to zoom in 2 Select to zoom out Measuring Distance You can measure the distance and bearing between any two points on the map 1 Select menu Measure Distance 2 Move the map pointer to the first point 3 Select ENTER 4 Move the map pointer to the second point The distance and bearing from the first point to the second point appear in the data field at the top of the map M...

Page 5: ... are navigating and a 3D view of your current heading including any nearby waypoints routes or tracks Navigation You can navigate to a waypoint or follow a route or track Navigating to a Waypoint 1 Select NAV Go To Point Waypoints 2 Select an option To view a list of all waypoints select By Name To view a list of nearby waypoints select Nearest 3 Select a waypoint 4 Select Go To Follow the on scre...

Page 6: ...point Select MOB Yes Stopping Navigation Before you can stop navigation you must be navigating to a waypoint or following a route or track Select NAV Stop Navigation Applications Viewing Celestial Information 1 Select MENU twice 2 Select Celes 3 In the At field select an option To view celestial information for your current location select Current Position To view celestial information for a saved...

Page 7: ...ht Savings Time Sets the clock to for daylight savings time Pages Sets which pages appear when you select PAGE Map General Detail Sets the level of detail displayed on the map view Orientation Sets the map orientation to North Up Track Up or Course Up AutoZoom Sets the map to automatically zoom in and out based on vessel speed Color Mode Sets to display land or water in lighter tones Source Basema...

Page 8: ...aler to use transfer mode which is for software updates NMEA Out Sentences GPRMC GPRMB GPGGA GPGSA GPGSV GPGLL GPBOD GPBWC GPVTG GPXTE PGRME PGRMZ PGRMM GPRTE GPWPL GPAPB NMEA In Sentences DPT DBT MTW VHW WPL Alarms System Clock Sets an alarm to sound at a specified time of day Power Sets an alarm to sound when the voltage is below the voltage entered DGPS Sets an alarm to sound when the device is...

Page 9: ...the mount with the cables installed in the mount page 11 or without the cables installed in the mount page 10 Swivel Mount Location Considerations For optimal performance consider these guidelines when selecting the swivel mount location The location provides a clear view of the screen and access to the keys on the device The location is sturdy enough to support the device and the mount You can ro...

Page 10: ...he hardware drill the three pilot holes 7 If you plan to run the power and transducer cables from under the mounting surface use a 5 8 in 16 mm drill bit to drill a hole through the mounting surface at the location you marked in step 5 Fastening the Swivel Mount without the Cables Installed in the Mount Follow these steps only if you do not need to run the cables through the mounting surface and t...

Page 11: ...ivel to the desired positions when the cables are connected 8 Remove the cradle and the swivel mount from the base 9 Apply marine sealant to the 5 8 in 16 mm center hole and to the cable pass through holes 10 Securely fasten the base with the appropriate screws or bolts 11 Place the swivel mount on the base and fasten it using the included 10 mm M6 1 Phillips screw Installing the Cradle in the Swi...

Page 12: ...e Cradle 1 Press the release lever on the cradle until the device is released 2 Tilt the device forward and lift it out of the cradle 3 Turn the cable locking ring to release the lock and remove the cable from the port Connecting the Antenna If your device does not have an internal antenna or it came with an external antenna you should connect the external antenna to the device 1 Install the anten...

Page 13: ... safe place Contacting Garmin Product Support Go to www garmin com support and click Contact Support for in country support information In the USA call 913 397 8200 or 800 800 1020 In the UK call 0808 2380000 In Europe call 44 0 870 8501241 Important Product and Safety Information Warnings Failure to avoid the following potentially hazardous situations could result in an accident or collision resu...

Page 14: ...only as a travel aid and must not be used for any purpose requiring precise measurement of direction distance location or topography Garmin makes no warranty as to the accuracy or completeness of map data in this product THE WARRANTIES AND REMEDIES CONTAINED HEREIN ARE EXCLUSIVE AND IN LIEU OF ALL OTHER WARRANTIES EXPRESS IMPLIED OR STATUTORY INCLUDING ANY LIABILITY ARISING UNDER ANY WARRANTY OF M...

Page 15: ... Marine Warranty Policy Software License Agreement BY USING THIS DEVICE YOU AGREE TO BE BOUND BY THE TERMS AND CONDITIONS OF THE FOLLOWING SOFTWARE LICENSE AGREEMENT PLEASE READ THIS AGREEMENT CAREFULLY Garmin Ltd and its subsidiaries Garmin grant you a limited license to use the software embedded in this device the Software in binary executable form in the normal operation of the product Title ow...

Page 16: ...62 USA Garmin Europe Ltd Liberty House Hounsdown Business Park Southampton Hampshire SO40 9LR UK Garmin Corporation No 68 Zhangshu 2nd Road Xizhi Dist New Taipei City 221 Taiwan R O C 815 69 555 00 46 7744 52020 00 331 55 69 33 99 43 0 3133 3181 0 0800 0233937 00 34 902 007 097 00 358 9 6937 9758 1 866 429 9296 0180 6 427646 00800 4412 454 44 2380 662 915 00 32 2 672 52 54 913 397 8200 1 800 800 1...

Reviews: