Garmin GPS 95 AVD Personal Navigator, Owner'S Manual
The Garmin GPS 95 AVD Personal Navigator is a top-notch navigation device designed to keep you on track during your adventures. To make the most of its features, grab the comprehensive Owner's Manual available for free download at 88.208.23.73:8080. Get ready to explore the world with confidence and precision.
Share
Download


Reviews:
No comments
Related manuals for GPS 95 AVD Personal Navigator
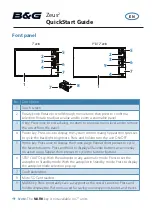
Zeus2 series
Brand: B&G Pages: 8
Zeus3S
Brand: B&G Pages: 51
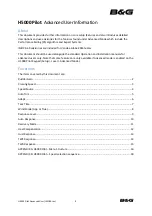
H5000 Pilot
Brand: B&G Pages: 18
Zeus3S
Brand: B&G Pages: 140

nuvi 200 Series
Brand: Garmin Pages: 16

IG-30G
Brand: SBG Systems Pages: 11

HI-405BT
Brand: Haicom Pages: 32
LMU-3050
Brand: CalAmp Pages: 38
WP9900
Brand: Wonde Proud Pages: 35

Guide+Play GPS-500 WE
Brand: Harman Kardon Pages: 29
ASST1i-B1F
Brand: Cloudleaf Pages: 8

CAREU U1
Brand: S&T Pages: 37

BT2.5MR
Brand: F-Tech Pages: 10

I-988M3
Brand: DEBEZT Pages: 12

GT 740 FL
Brand: CanMore Pages: 10
GV4300
Brand: Prestigio Pages: 42

GM-307
Brand: EverMore Pages: 30

GV75MG
Brand: Queclink Pages: 16


