background image

190-01007-A1

March 2013

Revision 5

System Maintenance Manual

GTN 6XX/7XX Part 23 AML STC

Contains Instructions for Continued Airworthiness

for STC SA02019SE-D

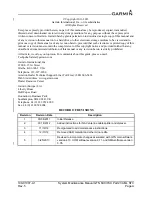
Aircraft Make, Model, Registration Number, and Serial 

Number along with the applicable STC configuration 

information must be completed in Appendix A and 

saved with aircraft permanent records.

Summary of Contents for GTN 6XX

Page 1: ...Part 23 AML STC Contains Instructions for Continued Airworthiness for STC SA02019SE D Aircraft Make Model Registration Number and Serial Number along with the applicable STC configuration information...

Page 2: ......

Page 3: ...hat any unauthorized commercial distribution of this manual or any revision hereto is strictly prohibited At Garmin we value your opinion For comments about this guide please e mail Techpubs Salem gar...

Page 4: ...GINATION Section Pagination Table of Contents i vi Section 1 1 1 through 1 4 Section 2 2 1 through 2 6 Section 3 3 1 through 3 18 Section 4 4 1 through 4 8 Section 5 5 1 through 5 20 Section 6 6 1 thr...

Page 5: ...rt Administration Act of 1979 Include this notice with any reproduced portion of this document This information in this document is subject to change without notice Visit the Garmin web site www garmi...

Page 6: ...l Inspection 4 3 4 5 Electrical Bonding Test 4 4 4 6 Transient Voltage Suppressor TVS If Installed 4 6 4 7 GPS WAAS Antenna Cable Overbraid Inspection If Installed 4 8 4 8 WXR HSDB Cable Overbraid Ins...

Page 7: ...SERVICE PROCEDURE 8 1 8 1 Maintenance Records 8 1 APPENDIX A AIRCRAFT SPECIFIC INFORMATION A 1 A 1 General Information A 1 A 2 Configuration Log A 2 A 3 Wire Routing A 9 A 4 Aircraft Wiring Diagrams...

Page 8: ...13 Figure 3 15 COM Transmit Power Configuration Page 3 14 Figure 3 16 Weather Radar Page 3 15 Figure 3 17 GTN 6XX and 7XX Diagnostics Pages 3 17 Figure 4 1 TVS Assembly Check 4 8 Figure 5 1 Failure Sc...

Page 9: ...ther Radar Alert Troubleshooting Guide 5 16 Table 5 11 TAWS Alert Troubleshooting Guide 5 17 Table 5 12 Third Party Sensor Alert Troubleshooting Guide 5 18 Table 5 13 GMA 35 Troubleshooting 5 19 Table...

Page 10: ...System Maintenance Manual GTN 6XX 7XX Part 23 AML STC 190 01007 A1 Page vi Rev 5 This page intentionally left blank...

Page 11: ...ol and Operation Presents basic control and operation information specifically tailored to maintenance practices Basic GTN Configuration Mode operation is also described as well as loading of software...

Page 12: ...Distance Measuring Equipment EFIS Electronic Flight Instrument System EHSI Electronic Horizontal Situation Indicator FIS B Flight Information Services Broadcast FPGA Field Programmable Gate Array G S...

Page 13: ...VS Transient Voltage Suppressors TX Transmit UTC Coordinated Universal Time VDC Volts Direct Current VFR Visual Flight Rules VHF Very High Frequency VOR VHF Omni directional Range WAAS Wide Area Augme...

Page 14: ...ain the latest revision of this document on the Garmin Dealer Resource Center website Owner operators may obtain the latest revision of this document from www flyGarmin com or by contacting a Garmin d...

Page 15: ...roved for IFR en route terminal oceanic non precision and precision approach operations when installed in accordance with the instructions in the manuals referenced in the GTN AML STC The GTN 750 incl...

Page 16: ...Maintenance Manual GTN 6XX 7XX Part 23 AML STC 190 01007 A1 Page 2 2 Rev 5 2 2 Backplate Connectors Figure 2 1 GMA 35 Connector Layout Detail Rear View Figure 2 2 GTN 650 Connector Layout Detail Rear...

Page 17: ...190 01007 A1 System Maintenance Manual GTN 6XX 7XX Part 23 AML STC Rev 5 Page 2 3 Figure 2 3 GTN 750 Connector Layout Detail Rear View...

Page 18: ...ta Computer Altitude Serializer or Fuel Air Data Computers Autopilot EFIS Displays EHSI Displays IRU AHRS Navigation Indicators Weather Traffic Terrain Systems DME CDI HSI Source Selection Annunciator...

Page 19: ...725 3 20 0 8 2 20 5 027 75 16 5 20 5 027 75 16 5 6 7 20 5 027 781 83 20 5 027 781 6 7 6 20 5 027 781 2 1 0 523 21 20 8 2 9 2 8 2 32 5 5281 5 5 7 32 5 5281 925 2 1 9 5 1 1 1 9 5 1 287 32 5 5281 5 5 7...

Page 20: ...System Maintenance Manual GTN 6XX 7XX Part 23 AML STC 190 01007 A1 Page 2 6 Rev 5 This page intentionally left blank...

Page 21: ...tem Maintenance Manual GTN 6XX 7XX Part 23 AML STC Rev 5 Page 3 1 3 GTN CONTROL AND OPERATION 3 1 GTN Controls 3 2 GTN Normal Mode Overview Figure 3 1 GTN 6XX Normal Mode Screen Figure 3 2 GTN 7XX Nor...

Page 22: ...support at this time NOTE An SD card reader is needed to create the GTN Software Loader card using the application that is downloaded from Garmin The approved readers are SanDisk SDDR 999 and SDDR 93...

Page 23: ...Rev 5 Page 3 3 Figure 3 4 System and Software Version 6 Click Next and the window shown in Figure 3 5 will appear CAUTION In order to create a GTN Software Loader Card the drive that you select will b...

Page 24: ...hat appear The progress window in Figure 3 6 will appear when the card is being created Figure 3 6 Update Progress Window 8 After the card has been created the window shown in Figure 3 7 in will appea...

Page 25: ...dates key to display the software that is available 6 To select GMA 35 software updates touch the GTN Software Updates key on the top left corner of the display and select GMA 35 Software Updates 7 To...

Page 26: ...the display activates and the name Garmin appears fully lit on the screen The first page displayed is the Configuration Mode page as shown in Figure 3 8 For detailed information regarding how to conf...

Page 27: ...rsion being loaded to the GTN matches the software version listed on the GTN STC Equipment List 005 00533 C1 The Updates page displays the version that is installed on the unit and the version install...

Page 28: ...e page The System Information page displays the unit type serial number and system ID for the GTN It also contains the software and hardware versions of the Main I O Display Keypad LED GPS WAAS COM an...

Page 29: ...he user to set which Ethernet ports are connected Interfaced Equipment This page allows the user to configure which LRUs are installed and interfaced to the GTN The transponder selection is automatica...

Page 30: ...Mic 1 Gain and sidetone volume These selections are only available for the GTN 635 650 and 750 units VOR LOC GS This page allows the user to verify the CDI outputs from the VOR LOC GS receiver as well...

Page 31: ...190 01007 A1 System Maintenance Manual GTN 6XX 7XX Part 23 AML STC Rev 5 Page 3 11 3 4 4 GTN Options Page Figure 3 12 GTN 7XX Options Pages...

Page 32: ...e circuit breaker to the GTN while holding the HOME key 4 Go to the Terrain Configuration page from the GTN Options page Touch the TAWS B key When the TAWS feature is activated the TAWS B key will be...

Page 33: ...nly describes the necessary steps to re enable the feature for existing installations 1 Turn the GTN off by pulling the NAV GPS circuit breaker 2 Remove the database SD card from the SD card slot and...

Page 34: ...y steps to re enable the feature for existing installations 1 Turn the GTN off by pulling the NAV GPS circuit breaker 2 Remove the database SD card from the SD card slot and insert the 16W Enablement...

Page 35: ...stallations 1 Turn the GTN off by pulling the NAV GPS circuit breaker 2 Remove the database SD card from the SD card slot and insert the Digital Radar Enablement Card P N 010 00878 42 that was used at...

Page 36: ...45 that was used at the initial installation 3 Enter configuration mode on the GTN by applying power to the GTN closing the circuit breaker while holding the HOME key 4 Go to the Weather Radar page fr...

Page 37: ...also for troubleshooting incorrect or swapped wiring to the input ports The data log can be paused by toggling the Pause key Clear the data log by touching Clear Log key Serial Inputs This page displ...

Page 38: ...lator temperature and AGC voltage This page also allows the GPS SBAS engine to be reset Temps This page displays the current minimum maximum and average board temperatures for the LED Board Main Board...

Page 39: ...e rate The GTN Database card Garmin P N 010 00900 00 includes the Basemap Obstacle SafeTaxi and Navigation databases CAUTION The databases on the GTN Database Card are locked to specific GTN installat...

Page 40: ...System Maintenance Manual GTN 6XX 7XX Part 23 AML STC 190 01007 A1 Page 3 20 Rev 5 This page intentionally left blank...

Page 41: ...in tests BIT are continuously executed Detected errors are indicated as failure annunciations system messages or a combination of the two Operation of the GTN 6XX 7XX and GMA 35 is not permitted unles...

Page 42: ...isplay brightness is not suitable for its intended use Contact the Garmin factory repair station when the backlight lamp requires service On Condition Battery Replacement The GTN has an internal keep...

Page 43: ...ke slots on the sides and bottom of the GTN unit s bezel for dust dirt or obstructions Clean as needed 6 Conduct a visual check of the GPS WAAS antenna cable overbraid if installed 7 Conduct a visual...

Page 44: ...s in the panel Re verify the resistance between the mounting rack and nearby exposed portion of aircraft metallic structure and ensure that the resistance is less than or equal to 2 5 milliohms 4 Rein...

Page 45: ...mounting rack and nearby exposed portion of aircraft metallic structure and ensure that the resistance is less than or equal to 2 5 milliohms 5 Reinstall the backplate assembly and reinstall the GMA u...

Page 46: ...TN power interconnect drawings To check the TVS on the GTN power inputs the following steps should be followed 1 Remove the GTN as described in Section 6 1 2 Open the GTN s circuit breaker and use a m...

Page 47: ...n ground and the black lead on the connector socket contact i If the diode drop is outside of the above range replace the TVS diode corresponding to the contact being checked ii If the meter indicates...

Page 48: ...e GPS WAAS antenna end and at the GTN6XX 7XX If any of these checks shows evidence of a lightning strike replace the overbraid assembly in accordance with Section 6 9 4 8 WXR HSDB Cable Overbraid Insp...

Page 49: ...d main avionics switch The GTN does not compute a position Not receiving adequate GPS signals Check the GPS antenna connections Make sure the aircraft is clear of hangars buildings trees etc Wait 20 m...

Page 50: ...r or improper connection Check the resolver specifications and wiring OBS indication on GTN does not agree with OBS setting GTN resolver input not calibrated correctly Check wiring and calibration Res...

Page 51: ...N ARINC 429 output not configured correctly Check ARINC 429 output port setting for port that device is connected to Receiving LRU ARINC 429 input port speed not correct Check ARINC 429 input port spe...

Page 52: ...e rather than normal mode Software Loader Card is inserted into SD card slot Remove Software Loader Card and insert database card Ensure GTN powers up in normal mode after this Reload software into th...

Page 53: ...nance Manual GTN 6XX 7XX Part 23 AML STC Rev 5 Page 5 5 5 2 GTN Failure Annunciations If data fields become invalid the GTN typically annunciates the failures with a large red X as shown in Figure 5 1...

Page 54: ...overcurrent Superflags should not drive more than 320 mA GTN GTN needs service The GTN has detected an internal failure Contact Garmin Technical Support COOLING GTN overtemp Reducing backlight brightn...

Page 55: ...led or pressed state Go to the GTN DIAGNOSTICS DISCRETE INPUTS page in configuration mode and check that the state of the input changes when the CDI switch is pressed and released Verify that the CDI...

Page 56: ...anual GTN 6XX 7XX Part 23 AML STC 190 01007 A1 Page 5 8 Rev 5 GNS CROSSFILL Waypoint transfer failed Waypoint transfer failed incomplete The data transfer should be reattempted Alert Text Possible Cau...

Page 57: ...r pressed state Press the PTT switch to cycle its operation If the message persists contact Garmin technical support Go to the GTN DIAGNOSTICS DISCRETE INPUTS page in configuration mode and check that...

Page 58: ...cle its operation Go to the GTN DIAGNOSTICS DISCRETE INPUTS page in configuration mode and check that the state of the input changes when the COM remote frequency decrement switch is pressed and relea...

Page 59: ...dings trees etc RF interference at 1575 42 MHz from VHF COM Move GPS antenna further from the COM antenna Add a 1575 42 MHz notch filter in COM coaxial Fix or replace the COM Disconnect the ELT antenn...

Page 60: ...eds service The GTN 650 750 has detected an internal failure in its glideslope receiver Contact Garmin technical support GLIDESLOPE Glideslope receiver has failed The GTN has detected an internal fail...

Page 61: ...k for correct wiring Refer to the transponder installation manual TRANSPONDER 2 Transponder 2 is inoperative or connection to GTN is lost The GTN cannot communicate with the transponder or the transpo...

Page 62: ...GAD 42 is reporting an internal failure Contact Garmin technical support Alert Text Possible Cause Corrective Action TRAFFIC Traffic device is inoperative or connection to GTN is lost Traffic device...

Page 63: ...t page in configuration mode on the GTN Refer to the GDL 88 STC Installation Manual DATALINK GDL 88 ADS B fault The GDL 88 has detected a fault with one of the GDL 88 UAT 1090 antennas Refer to the GD...

Page 64: ...o the GDL 88 STC Installation Manual DATALINK GDL 88 needs service GDL 88 has detected an internal fault Check the GDL 88 Fault page in configuration mode on the GTN Refer to the GDL 88 STC Installati...

Page 65: ...sts contact Garmin technical support TAWS AUDIO INHIBITED The TAWS Audio Inhibit discrete has been active for at least 30 seconds There is a wiring problem or a problem with the remote LRU that is con...

Page 66: ...l for troubleshooting STORMSCOPE Invalid heading received from Stormscope The Stormscope is receiving invalid heading Refer to Stormscope installation manual for troubleshooting DATA SOURCE Pressure a...

Page 67: ...on against the configuration log to ensure that the GMA 35 is configured properly Audio panel operates only in failsafe mode pilot headset connected to one COM radio red X over the audio panel control...

Page 68: ...mote Audio Panel Alert Troubleshooting Guide Alert Text Possible Cause Corrective Action AUDIO PANEL Audio panel needs service Audio panel should be serviced Return audio panel to Garmin for service A...

Page 69: ...ulled from the rack 4 Slide the GTN unit out of the rack Reinstallation 1 Ensure that the GTN GPS NAV and COM circuit breakers are pulled 2 Slide the GTN straight into the rack until it stops about 1...

Page 70: ...ounting Rack Assembly 71 71 71 5 81 7 6 5 37 21 211 725 7 3 7 7 3 7 7 217 17 5 1 6 47 167 7 21 7 3 57 2 71 1 71 1 5 76 6 7 25 7 217 17 5 1 6 5 5 1 71 71 1 71 5 76 6 7 25 7 5 5 1 1 250 7 21 72548 1 6 7...

Page 71: ...Rack Assembly 3 7 7 217 17 5 1 6 47 3 7 7 211 725 7 167 7 21 7 71 71 71 71 5 81 7 6 5 37 21 71 02817 1 5 1 211 725 71 3 7 1 63 5 211 725 7 1 211 725 6 28 5 6 5 6 5 3 57 2 71 71 1 71 1 5 76 6 7 25 7 21...

Page 72: ...slope Vert Deviation Half scale up deviation flag pulled Annunciators All On Selected Course OBS The GTN displays the OBS value 149 5 if interfaced to an HSI with driven course pointer Desired Track 1...

Page 73: ...rack 6 Slide the GMA 35 unit out of the rack Reinstallation 1 Ensure that the audio panel circuit breaker is pulled and the GTN units are not receiving power 2 Slide the GMA 35 straight into the rack...

Page 74: ...0 01007 A1 Page 6 6 Rev 5 Figure 6 3 GMA 35 Mounting Rack Assembly Overview 3 57 2 3 7 7 3 57 2 211 725 7 6 5 0 02817 1 5 6 5281 37 5 211 725 3 16 5 0 3 7 6 5 6 7 25 7 5 5 1 1 250 7 21 3 57 2 167 7 21...

Page 75: ...r edge of the SD card To replace the data card complete the following steps 1 Ensure that the GTN is turned off 2 Remove the data card by pressing the card until it disengages and then pull the SD car...

Page 76: ...ad Stainless NASM51958 MS51958 AN520C Washer 032 thickness NAS1149C0332R AN960C 10L Washer 063 thickness NAS1149F0363P AN960C 10 Nut Self locking Metal Hex Thin NASM21043 3 NAS1291C3 MS21043 3 Nut Sel...

Page 77: ...Part Number Screw Pan Head Stainless MS51957 AN515C Washer 016 thickness NAS1149CN416R AN960C 4L Washer 032 thickness NAS1149CN432R AN960C 4 Nut Self locking Metal Hex Thin NASM21043 04 NAS1291C04 MS2...

Page 78: ...tion module harness Configuration modules are located within the GTN harness connector backshell Item 6 Figure 6 4 There are two configuration module kits that have been approved for use with the GTNs...

Page 79: ...Unplug the connector from the configuration module 1 4 Remove the configuration module from the backshell connector Reinstallation 1 Inspect the connector for damaged pins 4 2 Place the configuration...

Page 80: ...nnector Reinstallation 1 Inspect the connector for damaged pins 4 2 Apply spacer 2 by wrapping it around the PCB board 1 making sure to insert the plastic connector mounted on the board into the hole...

Page 81: ...Remove power from aircraft 2 Remove the GTN unit from the rack Refer to Section 6 1 3 Loosen the four 4 40 x 0 25 panhead screws at each corner of the inside rear wall of the rack 4 While depressing...

Page 82: ...Crimp socket contacts onto each wire of the three conductor wire harness Insert newly crimped socket contacts and wires into the appropriate connector housing location as shown in Figure 6 7 2 Plug t...

Page 83: ...190 01007 A1 System Maintenance Manual GTN 6XX 7XX Part 23 AML STC Rev 5 Page 6 15 Figure 6 7 Fan Wiring Replacement...

Page 84: ...ove the ring terminal from the backshell of the connector as shown in Figure 6 8 2 Open the fuse holder and remove the fuse 3 Carefully remove heat shrink from the TVS ensuring not to cut the insulati...

Page 85: ...insulation on the wire under the heat shrink 3 If replacing the entire TVS assembly unplug the 4 pin connector remove the ground ring terminal and proceed to step 1 of the replacement If it is not ne...

Page 86: ...g onto the wire end 5 Carefully remove heat shrink installed in Step 3 from the TVS ensuring not to cut the insulation on the wire under the heat shrink 6 Attach an appropriately sized section of heat...

Page 87: ...the TVS assembly should be oriented so that it does not normally conduct from power to ground The meter should indicate open when the red lead is attached to the power bus terminal lug and the black l...

Page 88: ...for replacement of the assembly will be the length of the GPS SBAS antenna cable plus 6 inches Refer to Figure 6 11 before beginning the reinstallation steps below 1 If the antenna cable insulation sh...

Page 89: ...LATE OVERBRAID INTSTALLED OVER ENTIRE LENGTH OF THE GPS ANTENNA CABLE GPS SBAS ANTENNA 2 MAX WHEN REINSTALLING OVERBRAID AT CONNECTOR END OF PIGTAIL THE OVERBRAID IS PUSHED DOWN UNTIL IT TOUCHES THE T...

Page 90: ...System Maintenance Manual GTN 6XX 7XX Part 23 AML STC 190 01007 A1 Page 6 22 Rev 5 This page intentionally left blank...

Page 91: ...replace the cable s 2 Slide the new overbraid over the HSDB cabling from the WXR R T to the bulkhead 3 At the bulkhead end of the overbraid comb out a maximum of two inches of braid twist it cut to l...

Page 92: ...System Maintenance Manual GTN 6XX 7XX Part 23 AML STC 190 01007 A1 Page 6 24 Rev 5 This page intentionally left blank...

Page 93: ...able Overbraid Details Sheet 1 of 2 7 50 1 8 06 29 5 5 44 5 7 25 44 7 7 5 5 5 211 725 6 1 7 7 17 56 7 0 7 86 29 5 5 167 29 5 7 5 5 5 1 7 7 6 1 5 20 5 35 25 72 17 5 1 7 0 7 86 29 5 5 1 6 QVXUH WKDW WKH...

Page 94: ...System Maintenance Manual GTN 6XX 7XX Part 23 AML STC 190 01007 A1 Page 6 26 Rev 5 This page intentionally left blank...

Page 95: ...190 01007 A1 System Maintenance Manual GTN 6XX 7XX Part 23 AML STC Rev 5 Page 6 27 Figure 6 12 WXR HSDB Cable Overbraid Details Sheet 2 of 2 8 29 5 5 0 080 326...

Page 96: ...System Maintenance Manual GTN 6XX 7XX Part 23 AML STC 190 01007 A1 Page 6 28 Rev 5 This page intentionally left blank...

Page 97: ...eir software and configuration files are deleted during the repair testing progress It is recommended to perform the connector engagement check to ensure that the GTN is properly seated to the connect...

Page 98: ...the Basemap Navigation SafeTaxi and Obstacle databases are up to date per Section 3 5 and insert SD card from previous GTN into the replacement unit GTN 6XX 7XX Replacing Configuration module with new...

Page 99: ...XX 7XX Replacing altitude encoders air data computers or fuel air data computers No action required GTN 6XX 7XX Replace traffic system or weather system Perform the appropriate interface check per Sec...

Page 100: ...2 1 Connector Engagement Check Prior to configuration and checkout of the GTN the connector engagement should be checked as described below 1 Ensure that the GTN GPS NAV and COM circuit breakers are p...

Page 101: ...a GPS position From the Home page touch the System key and then touch the GPS Status key Under GPS Solution ensure that a 3D Fix or 3D Diff Fix is obtained If the unit is unable to acquire satellites...

Page 102: ...ngs for audio routing volume and miscellaneous options See Figure 7 1 Touch Back to return to the Audio Panel page Touch the Connected Radios key to set the status Present or Not Present of COM 2 COM...

Page 103: ...eration by exercising the COM1 microphone microphone key and audio over the pilot s headphones NOTE Use of a true mono headset is required for this test to ensure proper wiring even if a stereo jack i...

Page 104: ...k Ensure the GMA 35 and each installed NAV receiver is powered on 1 Tune the NAV receiver to a local VOR station 2 Ensure the Morse code identifier is being received over the crew headsets 3 If the au...

Page 105: ...r plugs in a monaural headset 1 Place the audio panel into ALL ICS mode refer to the GTN 725 750 Pilot s Guide P N 190 01007 03 so that all ICS positions hear all others 2 Deselect or turn off other a...

Page 106: ...procedures and interface checks after reinstalling or replacing any of the optionally interfaced equipment 7 4 1 Navigation Indicator 1 Perform calibration per Section 7 4 1 1 1 1 if using GPS or Sect...

Page 107: ...o the NAV board P1001 to be ground checked and allows the NAV indicator interface to be verified See Section 7 4 1 2 1 for the ground check 7 4 1 1 2 VOR LOC GS Configuration Page GTN 650 750 Only Sel...

Page 108: ...nding selections 4 Verify correct operation of the vertical deviation and flag using the corresponding selections 5 Verify correct operation of the OBS knob using the OBS Resolver Setting display At 3...

Page 109: ...is required when replacing a display with an equivalent unit 7 4 3 1 Honeywell Bendix King EFS 40 50 Interface Check If a Honeywell EFS 40 50 has been connected to the GTN the interface should be veri...

Page 110: ...ication will not be displayed unless the SN3308 is receiving valid heading 3 While the GTN is displaying the Instrument Panel Self Test page verify that the SN3308 is displaying the following data fro...

Page 111: ...Self Test page verify that the SN3308 is displaying the following data from GPS1 Course Deviation Half scale left deviation TO indication flag pulled Vertical Deviation Half scale up deviation flag p...

Page 112: ...ment Panel Self Test page is displayed see Section 6 1 1 10 Select GPS2 by pressing the NAV key on the SN3308 Repeat steps 4 through 8 with the second GTN Perform the same procedure for the second SN3...

Page 113: ...transponders configure transponder per Section 7 4 4 1 2 Perform interface check per Section 7 4 4 2 7 4 4 1 Remote Transponder Configuration A remote transponder can be configured by the GTN via RS 2...

Page 114: ...ver the transponder data field on the screen 2 Ensure that a code can be entered into the code field Enter a code using the keypad and then touch the Enter key Ensure the code that was entered is disp...

Page 115: ...fy that the traffic system mode can be changed from STBY to OPER 4 Switch the traffic system mode to STBY and then run the traffic self test from the Menu 5 Verify that the traffic system executes a s...

Page 116: ...terface check for the weather radar No additional GTN configuration steps are required for replacing a weather radar with an equivalent unit 7 4 6 1 GWX 68 70 Weather Radar Interface Check This sectio...

Page 117: ...turn the radar to Weather mode and turn stabilization on in the weather menu Verify that STAB On is displayed in the upper right corner or the radar display If STAB INOP is displayed verify that stab...

Page 118: ...e External Systems key 3 Touch the GDL 88 key 4 Touch Diagnostics and then the GPS SBAS Data key 5 Verify that the GDL 88 is receiving valid position source data 6 Verify that the status of the Extern...

Page 119: ...ction 3 4 4 for guidance on enabling features 7 5 1 TAWS Configuration and Checks For Units with TAWS Only Reconfigure TAWS settings per the Configuration Checkout Log The TAWS configuration settings...

Page 120: ...TAWS key 4 Wait until the TAWS self test completes 10 15 seconds to hear the TAWS system status aural message The aural message TAWS System Test OK will be annunciated if the TAWS system is functionin...

Page 121: ...th this document the aircraft may be returned to service Record the following information in the appropriate aircraft maintenance logs Software versions loaded as part of any maintenance action Record...

Page 122: ...System Maintenance Manual GTN 6XX 7XX Part 23 AML STC 190 01007 A1 Page 8 2 Rev 5 This page intentionally left blank...

Page 123: ...ral Information about Installation Date ____ ____ ____ By ______________________________________ AIRCRAFT Aircraft Make Aircraft Model Aircraft Serial Aircraft Reg GTN 1 Unit P N Mod Level Unit Model...

Page 124: ...Traffic System Traffic Intruder Symbol Coloer Alert Volume Level Traffic Configuration White Cyan No Yes High Low High Low High Pilot Position Enhanced Lighting Mode Airframe Type Fuel Type GPS Anten...

Page 125: ...ion Obstacle x2 Obstacle Ahead x2 IOI Caution EDR Caution Sink Rate NCR Caution TAWS B Terrain Proximity N A Too Low Terrain Don t Sink PDA Caution Too Low Terrain Caution Obstacle x2 Obstacle Ahead x...

Page 126: ...stem Traffic Intruder Symbol Coloer Alert Volume Level Traffic Configuration White Cyan No Yes High Low High Low High Pilot Position Enhanced Lighting Mode Airframe Type Fuel Type GPS Antenna height a...

Page 127: ...DC 28 VDC 5 VDC 5 ADC 14 VDC 28 VDC 5 VDC 5 ADC sec sec Enhanced Lighting Display Source Lighting Bus 1 Photocell Keys Source Display Minimum Level sec Photocell Response Time Lighting Bus 1 Photocell...

Page 128: ...ion Obstacle x2 Obstacle Ahead x2 IOI Caution EDR Caution Sink Rate NCR Caution TAWS B Terrain Proximity N A Too Low Terrain Don t Sink PDA Caution Too Low Terrain Caution Obstacle x2 Obstacle Ahead x...

Page 129: ...DC 28 VDC 5 VDC 5 ADC 14 VDC 28 VDC 5 VDC 5 ADC sec sec Enhanced Lighting Display Source Lighting Bus 1 Photocell Keys Source Display Minimum Level sec Photocell Response Time Lighting Bus 1 Photocell...

Page 130: ...True Audio processor generates COM1 internal sidetone False True False True False True Audio processor generates COM3 internal sidetone False True False False True Ambient Noise Mic On Audio Panel Se...

Page 131: ...AML STC Rev 5 Page A 9 A 3 Wire Routing A 3 1 Single Engine The following diagram depicts approximate location of all LRUs and antenna s along with the wire routing for the GTN 6XX 7XX and GMA 35 thro...

Page 132: ...STC 190 01007 A1 Page A 10 Rev 5 A 3 2 Twin Engine The following diagram depicts approximate location of all LRUs and antenna s along with the wire routing for the GTN 6XX 7XX and GMA 35 throughout t...

Page 133: ...on manual detailing which equipment was installed and how it was connected NOTE Electrical loads for equipment installed by this STC are listed in the GTN 6XX 7XX AML STC Installation Manual A 5 Equip...

Page 134: ...del s Write in the model number or numbers of the equipment that is interfaced to the GTN Interface s Write in the type of interface used to connect to the GTN GTN Port Numbers When applicable write i...

Page 135: ...dio Panel Yes No Yes No Air Data Computer s Yes No Yes No Altitude Serializer or Fuel Air Data Yes No Yes No Autopilot Yes No Yes No Autopilot Roll Steering Converter Yes No Yes No EFIS display s Yes...

Page 136: ...9A Yes No Yes No DME Yes No Yes No CDI HSI Source Selection Annunciator Yes No Yes No TAWS Annunciator Panel Yes No Yes No Multifunction Display s Yes No Yes No Interface Adapter s e g GAD 42 Yes No Y...

Page 137: ...dio Panel Yes No Yes No Air Data Computer s Yes No Yes No Altitude Serializer or Fuel Air Data Yes No Yes No Autopilot Yes No Yes No Autopilot Roll Steering Converter Yes No Yes No EFIS display s Yes...

Page 138: ...on Annunciator Yes No Yes No TAWS Annunciator Panel Yes No Yes No Multifunction Display s Yes No Yes No Interface Adapter s e g GAD 42 Yes No Yes No Synchro Heading Source Yes No Yes No Weather Radar...

Page 139: ...alled in the aircraft but not interfaced to the GMA 35 check No Model s Write in the model number or numbers of the equipment that is interfaced to the GMA 35 If a GMA 35 audio panel is not installed...

Page 140: ...System Maintenance Manual GTN 6XX 7XX Part 23 AML STC 190 01007 A1 Page A 18 Rev 5 This page intentionally left blank...

Page 141: ......

Page 142: ......

Reviews: