background image


User's Manual


and Spare Parts Book


GF-1107-147 MH 


ANITA B, s.r.o. 

Průmyslová 2453/7 

680 01 Boskovice 

Czech Republic 
tel:  +420 516 454 774 

        +420 516 453 496 

fax: +420 516 452 751                 

        e-mail: 

info@anita.cz


MP02300EN_170818


Summary of Contents for GF-1107-147 MH

Page 1: ...r s Manual and Spare Parts Book GF 1107 147 MH ANITA B s r o Průmyslová 2453 7 680 01 Boskovice Czech Republic tel 420 516 454 774 420 516 453 496 fax 420 516 452 751 e mail info anita cz MP02300EN_170818 ...

Page 2: ...N_170818 2 All rights reserved All rights reserved property of Anita B and protected by copyright The use of this content without written permission is prohibited Copyright Anita B s r o 2017 w w w g a r u d a n c z ...

Page 3: ...ding the bobbin thread 13 14 Thread tension 14 15 Thread take up spring 15 16 Adjusting the thread take up stroke 16 17 Adjusting the needle stop position 16 18 Oil check and addition 17 19 Adjusting of the pedal 18 20 Pedal operation 19 22 Needle to hook relationship 20 23 Change of counter knife and moving knife 21 24 Adjustment of trimming system 22 25 Sending to the change 22 26 Height and til...

Page 4: ...n Application Sewing speed 3500 rpm Stitch length 0 4mm Needle DP 5 9 18 Presser foot lift By hand lifter 8mm standard By knee lifter 15mm max Oil Hook White Oil No 10 Gear Box Shell Tellus Oil No 22 Rated power 550W w w w g a r u d a n c z ...

Page 5: ...ed by using a rubber based adhesive Then oil pan is placed 3 Remove air vent cap attached to the machine bed Be sure to attached cap when transporting the machine head in the state that the machine head is removed from the machine table 4 Fit hinge into the opening in the machine bed and fit the machine head to table rubber hinge before placing the machine head on cushions on the four corners Caut...

Page 6: ...is 10mm 2 You can adjust the presser foot lift up to 15mm using knee lifter adjust screw Caution Do not operate the sewing machine state that the presser foot is lifter 10mm or more since the needle bar in contact with the presser foot 4 Installing the thread stand 1 Assemble the thread stand unit and insert it in the machine table 2 Tighten locknut to fix the thread stand 3 For ceiling wiring pas...

Page 7: ...h up to the engraved maker line of oil tank If the oil is filled excessively it will leak from the air vent hole in the oil tank or proper lubrication will be not performed So be careful 4 when you operate the sewing machine refill oil if the top end of oil amount indicating rod comes down to the lower engraved marker line of oil amount indicating rod comes down to the lower engraved marker line o...

Page 8: ...unt adjustment screw Adjustment procedure Tighten turn clockwise oil amount adjustment screw to increase the amount of oil in the hook or loosen turn counterclockwise to decrease it Caution 1 When using RP hook hook for dry head for the SS type be sure to loosen the oil amount adjustment screw up to the minimum so as to reduce the oil amount in the hook 2 Never drain the oil in the oil tank even w...

Page 9: ...ke extreme caution not to allow your fingers to come in contact with the hook 1 If the machine has not been sufficiently warmed up for operation make the machine run idle for approximately three minutes Moderate intermittent operation 2 Place the amount of oil oil splashes confirmation paper under the hook while the sewing machine is in operation 3 Confirm that oil exists in the oil tank 4 Confirm...

Page 10: ... to excessively increase decrease the amount of oil in the hook If the amount of oil is too small the hook will be sized the hook will be hot If the amount of oil is too much the sewing product may be stained with oil 2 Adjust the amount of oil in the hook so that the oil amount oil slashes should not change while checking the oil amount three times on the three sheets of paper w w w g a r u d a n...

Page 11: ...acing exactly to the right in direction B 3 Insert the needle fully into the hole in the needle bar in the direction of the arrow until the end of hole is reached 4 Securely tighten screw 5 Check that long groove C of the needle is facing exactly to the left in direction D Caution When filament thread is used if the indented part of the needle is tilted toward operator s side the loop of thread be...

Page 12: ...r to marker dot A on the machine arm 2 The dial calibration is in millimeters 3 When you want to decrease the stitch length turn stitch length dial 11 Presser foot pressure Warning Turn OFF the power before starting the work so as to prevent accidents caused by abrupt start of the sewing machine 1 Loosen nut as you turn presser spring regulator clockwise in direction A the presser foot pressure wi...

Page 13: ...e on the left Then wind clockwise the end of the bobbin thread on the bobbin several times In case of the aluminum bobbin after winding clockwise the end of the bobbin thread wind counterclockwise the thread coming from the bobbin thread tension several times to wind the bobbin thread with ease 3 Press the bobbin winder trip latch in the direction of A and start the sewing machine The bobbin rotat...

Page 14: ... the adjustment tighten the nut Caution 1 When winding the bobbin thread start the winding in the state that the thread between the bobbin and thread tension disk is tense 2 When winding the bobbin thread in the state that wing is not performed remove the needle thread from the thread path of thread take up and remove the bobbin from the hook 14 Thread tension 1 Adjusting the needle thread tension...

Page 15: ...e in direction B the pressure will be decreased Usually upon the machine coming out all the take up spring has been adjusted well only while sew special material thread it need to be adjusted again To judge the work of the thread take up spring confirm whether or not the thread take up spring works up to the last before needle thread is pulled out from A when pulling out needle thread in the direc...

Page 16: ...ting the needle stop position Warning Turn OFF the power before starting the work so as to prevent accidents caused by abrupt start of the sewing machine 1 Stop position after thread trimming 1 The standard needle stop position is obtained by aligning marker dot A on the pulley cover with white marker dot B on the hand wheel 2 The needle position reference position adjustment Parameter P 75 Set up...

Page 17: ...ting oil of gear box is sufficient While you running the machines the oil is spent continuously we can inspect the oil of gear box is sufficient or not through the oil mark on gear box According to the picture we can see gear box s oil mark It means oil is enough and machines can be running safely It means oil is used out and need to add oil immediately 2 If the oil is used out please uncover the ...

Page 18: ...ing machine 1 Installing the connecting rod Move pedal to the right or left as illustrated by the arrows so that motor control lever and connecting rod are straighted 2 Adjusting the pedal angle 1 The pedal tilt can be freely adjusted by changing the length of the connecting rod 2 Loosen adjust screw and adjust the length of connecting rod w w w g a r u d a n c z ...

Page 19: ...rther depress the back part the thread trimmer is actuated If you reset the pedal to its neutral position during the automatic reverse feed stitching at seam start the machine stops after it completes the reverse feed stitching The machine will perform normal thread trimming even if you depress the back part of the pedal immediately following high or low speed sewing The machine will completely pe...

Page 20: ... bar with the bottom end of needle bar lower bushing 2 While using DA needle loosen the three hook set screw turn the band wheel and align marker line D on ascending needle bar with the bottom end of needle bar lower bushing 4 After making the adjustments mentioned in the above steps align hook blade point with the center of the needle provide a clearance of 0 04mm to 0 10mm reference value betwee...

Page 21: ...ANITA MP02300EN_170818 21 23 Change of counter knife and moving knife w w w g a r u d a n c z ...

Page 22: ...to the change Warning turn DFF the power before starting the work so as to prevent accidents caused by abrupt start of the sewing machine 1 When you use screw to connect needle bar small rod with swing front crank shaft the feed way of machine is needle feed 2 When you use screw to connect needle bar small rod with needle bar holder the feed way of machine is lower feed w w w g a r u d a n c z ...

Page 23: ...ilt of the feed dog will change by turning both shafts and with a screwdriver 3 For the relation between the rotating direction of each shaft and tilt of feed bar refer to the figure on the left 4 After the adjustment securely tighten the setscrews Tighten setscrews and in the state that shafts and are pushed against the hand wheel side Caution 1 If the tilt of the feed dog is adjusted with one sh...

Page 24: ...ng can be changed by changing the stop position of feed eccentric cam How to adjust the feed timing 1 Tilt the sewing machine head and loosen two setscrews in feed eccentric cam 2 Turn feed eccentric cam to change the feed timing Turn feed eccentric cam in the direction of Increases the feed timing Turn feed eccentric cam in the direction of Decreases the feed timing w w w g a r u d a n c z ...

Page 25: ...d How to release 1 Remove the cap in the machine head and loosen thread tension release changeover screw using a hexagon wrench 2 Fix screw on the top of thread tension release changeover plate The thread tension disk does not rise even when the presser foot is lifted and the needle thread tension is not loosened The thread tension disk rises only when thread trimming is performed Caution Do not u...

Page 26: ...icro lifting Gradually tighten screw for presser foot micro lifting in the state that nut is loosened adjust the presser foot to the position where it is finely lifted until it matches the material and fix it with nut Caution When the presser foot micro lifting mechanism is not used adjust the height of screw so that it is higher by approximately 11mm than the sewing machine If the sewing machine ...

Page 27: ...y the sewing machine Carry the sewing machine with two person as shown in the figure Caution Do not hold the hand wheel 2 Caution when placing the sewing machine Do not place any protruding thing such as screwdriver or the like on the place where the sewing machine is set w w w g a r u d a n c z ...

Page 28: ...ANITA MP02300EN_170818 w w w g a r u d a n c z ...

Page 29: ...Manual for motor GF 1107 147 MH ANITA B s r o Průmyslová 2453 7 680 01 Boskovice Czech Republic tel 420 516 454 774 420 516 453 496 fax 420 516 452 751 e mail info anita cz ...

Page 30: ... signal detecting device has been broken if sewing machine handwheel correctly installed E015 Model type error Unable identify operating box model type Check operating box E021 E022 E023 Motor overload motor stall motor overload If electric engine plug is well contacted if machine head or thread cutting mechanism has been blocked completely f materials are too thick Electrical signal detection sig...

Page 31: ...Spare Parts List GF 1107 147 MH ANITA B s r o Průmyslová 2453 7 680 01 Boskovice Czech Republic tel 420 516 454 774 420 516 453 496 fax 420 516 452 751 e mail info anita cz ...

Page 32: ...N_170818 2 All rights reserved All rights reserved property of Anita B and protected by copyright The use of this content without written permission is prohibited Copyright Anita B s r o 2017 w w w g a r u d a n c z ...

Page 33: ... SHAFT COMPONENTS 2 2 12 4 HANG LIFTER TENSION RELEASE COMPONENTS 14 5 THE NEEDLE BAR SWING COMPONENTS 16 6 FEED ADJUST MECHANISM COMPONENTS 18 7 PRESSER FOOT COMPONENTS OF OIL PLATE KNEE LIFT 20 8 BOBBIN WINDER COMPONENTS 22 9 AUTOMATIC REVERSE FEED COMPONENTS 24 10 THREAD STAND COMPONENTS 26 11 WIPER COMPONENTS 28 12 THREAD TRIMMER COMPONENTS ROTATION KNIFE 1 2 30 12 THREAD TRIMMER COMPONENTS RO...

Page 34: ...ANITA MP02300EN_170818 4 1 MACHINE FRAME MISCELLANEOUS COVER COMPONENTS 1 2 w w w g a r u d a n c z ...

Page 35: ...706 Slide Plate ASM 1 16 10022846 Face Plate Packing 1 17 20006907 Pace Plate 1 18 10008972 Screw SM3 16 x28 L 10 3 19 10005468 Face plate Adorning 1 20 10008977 Rubber Plug 2 21 10008937 Arm Thread Guide B 1 22 10008973 Screw SM11 64 x40 L 6 1 23 10012142 Screw SM15 64 x28 L 9 2 24 10004374 Screw SM11 64 x40 L 4 8 2 25 10004373 Ruler Stop Seat 1 26 10010593 Screw SM15 64 x28 L 7 5 1 27 10008940 A...

Page 36: ...ANITA MP02300EN_170818 6 1 MACHINE FRAME MISCELLANEOUS COVER COMPONENTS 2 2 w w w g a r u d a n c z ...

Page 37: ... Rubber Ring 1 40 10012141 Air discharging 1 41 10012867 Thread Tension Guide 1 42 10011313 Screw M6x12 2 43 10022344 Revers Feed Solenoid Base 1 44 10013621 Revers Feed Lever Stopper 1 45 10012149 Screw 1 46 10008936 Saftey Label 1 47 10006157 Screw 4 48 10038018 Controll Box 1 49 10022342 Rulley Cover 1 50 10022848 Rlate 1 w w w g a r u d a n c z ...

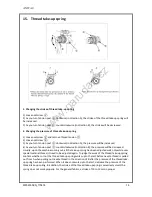
Page 38: ...ANITA MP02300EN_170818 8 2 MAIN SHAFT THREAD TEKE UP COVER COMPONENTS w w w g a r u d a n c z ...

Page 39: ...6 10012607 Crank 1 17 10010082 Screw 1 18 10005020 Screw 2 19 10010545 Screw 1 20 10012663 Main shaft 1 21 10036288 Needle DB 1 14 1 22 10013181 Thread guide 1 23 10013182 Screw 1 24 10022347 Needle bar ASM 1 25 10005745 Closing ring 1 26 10013590 Screw 2 27 10030286 Screw 1 28 10010590 Joint pin 1 29 10022346 Thread take up lever Asm 1 30 10005785 Connecting rod ASM 1 31 10010586 Sliding block 1 ...

Page 40: ...ANITA MP02300EN_170818 10 3 HORIZONTAL FEED VERTICAL FEED AND HOOK DRIVING SHAFT COMPONENTS 1 2 w w w g a r u d a n c z ...

Page 41: ...ed rocker shaft 1 13 10010066 Screw 1 14 10031259 Positioning finger 1 15 10012536 Oil seal 1 16 10012492 Crank 1 17 10013015 Screw 1 18 10010096 Pin 1 19 10005746 Feed adjusting 1 20 10010506 Screw 2 21 10012495 Rubber plug 2 22 10012532 Pin 2 23 10010087 Pin 1 24 10012459 Pin 1 25 10013590 Screw 5 26 10010075 Connecting plate 2 27 10012537 Connecting plate 2 28 10010071 Screw 1 29 10010069 Pin 1...

Page 42: ...ANITA MP02300EN_170818 12 3 HORIZONTAL FEED VERTICAL FEED AND HOOK DRIVING SHAFT COMPONENTS 2 2 w w w g a r u d a n c z ...

Page 43: ...sh 1 46 10010065 Screw 2 47 10005750 Cam 1 48 10010083 Screw 2 49 10005789 Crank 1 50 10012498 Pin 1 51 10005790 Closing ring 2 52 10005744 Bearing 1 53 10012503 Cover plate 1 54 10012534 Hook driving shaft 1 55 10010063 Oil wick 1 56 10010064 Screw 1 57 10012554 Gear 1 58 10012678 Shaft sleeve 1 59 10012423 Oil seal 1 60 10026221 Bearing 1 61 10012585 Bearing bush 1 62 10014503 Oil seal 1 63 1001...

Page 44: ...ANITA MP02300EN_170818 14 4 HANG LIFTER TENSION RELEASE COMPONENTS w w w g a r u d a n c z ...

Page 45: ...012130 Screw 3 17 10012445 Wire holder 2 18 10033588 Base plate 1 19 10012181 Screw 1 20 10022854 Tension Release Return 1 21 10003248 Closing ring 1 22 10022508 Spring 1 23 10030397 Connecting rod vertical 1 24 10005881 Fixing shutter 1 25 10012621 Screw 2 26 10022853 Lifting lever link 1 27 10010649 Closing ring 2 28 10012429 Guide plate 1 29 10012637 Screw 1 30 10005685 Hand lifter link ASM 1 3...

Page 46: ...ANITA MP02300EN_170818 16 5 THE NEEDLE BAR SWING COMPONENTS w w w g a r u d a n c z ...

Page 47: ... 11 10004611 Screw SM3 16 28 L 12 1 12 10022338 Bushing 1 13 10022356 Needle feed shaft 1 14 10011284 collar 2 15 10022339 Bushing 1 16 10012014 Screw M5 4 2 17 10010030 Screw SM3 16 28 L 12 2 18 10012855 Nut M6 3 5 2 19 10022357 Needle feed rod cpmpl 1 20 10022359 Washer 2 21 10022353 Needle feed rod cpmpl 1 22 10014106 Bearing 1 23 10022358 Screw 1 24 10022858 Screw 1 25 10022857 Screw 1 26 1002...

Page 48: ...ANITA MP02300EN_170818 18 6 FEED ADJUST MECHANISM COMPONENTS w w w g a r u d a n c z ...

Page 49: ...007795 Oil pipe 1 17 10031476 Spring 1 18 10012418 Connecting pin 1 19 10040562 Connecting plate 1 20 10012635 Pin 1 21 10013866 Pin 1 22 10010106 Nut 1 23 10010643 Screw SM9 64 x40 L 6 2 24 10012583 Adjustor 1 25 10012626 Shaft sleeve 1 26 10008862 Screw SM1 4 x40 L 5 8 2 27 10012428 Closing ring 1 28 20000150 Crank ASM 1 29 10012638 Crank 1 30 10010095 Screw 1 31 10010287 Pin 1 32 10012578 Shaft...

Page 50: ...ANITA MP02300EN_170818 20 7 PRESSER FOOT COMPONENTS OF OIL PLATE KNEE LIFT w w w g a r u d a n c z ...

Page 51: ...ing shaft I 1 10 10002559 Snap ring 3 11 10012677 Spring 1 12 10008465 Screw 2 13 10008464 Connecting Plate 1 14 10003890 Nut 6 15 10003895 Screw 2 16 10003898 Screw 2 17 10008463 Connecting Rod I 1 18 10008466 Knne pressing shaft II 1 19 10008383 Connecting Rod II 1 20 10009985 Knee pressing plate ASM 1 21 10003894 Screw 1 22 10003897 Knee pressing plate holder 1 23 10003901 Knee pressing plater ...

Page 52: ...ANITA MP02300EN_170818 22 8 BOBBIN WINDER COMPONENTS w w w g a r u d a n c z ...

Page 53: ...ART NO NAME OF THE PART QTY 1 10013875 Bobbin winder ASM 1 2 10008773 Rubber ring 1 3 10004380 Screw 3 4 10013269 Screw 2 5 10011149 Thread cutter 1 6 10013064 Bobbin thread tension ASM 1 7 10011158 Screw 1 8 10011200 Thread guide plate 1 w w w g a r u d a n c z ...

Page 54: ...ANITA MP02300EN_170818 24 9 AUTOMATIC REVERSE FEED COMPONENTS w w w g a r u d a n c z ...

Page 55: ...ERSE FEED COMPONENTS REF NO PART NO NAME OF THE PART QTY 1 10008934 Screw 1 2 10038021 Option Switch ASM 1 3 10034506 Electromagnet ASM 1 4 10012142 Screw 2 5 10012587 Washer 1 6 10012628 Crank Pin 1 7 10013538 Screw 1 w w w g a r u d a n c z ...

Page 56: ...ANITA MP02300EN_170818 26 10 THREAD STAND COMPONENTS w w w g a r u d a n c z ...

Page 57: ...289 Thread Guide Pipe 1 8 10004285 Thread Guide Bushing 1 9 10004298 Thread Hanger Upper 1 10 10004286 Column Pipe Connector 1 11 10004291 Column Pipe Lower 1 12 10004290 Washer 16 30 1 5 2 13 10004295 Washer 16 5 27 5 3 2 14 10002953 Nut M5 1 15 10004288 Spool 2 16 10004287 Spool Cushion 2 17 10004281 Soft Cushion Of Thread Plate 2 18 10004299 Thread Plate 2 19 10003312 Screw M5x30 1 20 10004284 ...

Page 58: ...ANITA MP02300EN_170818 28 11 WIPER COMPONENTS w w w g a r u d a n c z ...

Page 59: ...ANITA MP02300EN_170818 29 11 WIPER COMPONENTS REF NO PART NO NAME OF THE PART QTY 1 10034507 Wiper ASM 1 2 10012631 Screw 2 w w w g a r u d a n c z ...

Page 60: ...ANITA MP02300EN_170818 30 12 THREAD TRIMMER COMPONENTS ROTATION KNIFE 1 2 w w w g a r u d a n c z ...

Page 61: ...14 10010595 Screw M4x7 5 2 15 10013023 Fixed Plate 1 16 10009626 Screw M3x4 35 3 17 10013026 Knife Holder 1 18 10011588 Screw SM1 1 6 4 40 L 4 7 2 19 10011494 Round Knife 1 20 10013045 Round Knife Bracket 1 21 10011578 Nut 1 22 10010736 Thread Trimmer Cam 1 23 10013465 Screw SM1 4 40 L 1 0 2 24 10013030 Spring 1 25 10014462 Bushing 1 26 10012162 Screw M5x5 1 27 10013008 Washer 1 28 10014196 Spring...

Page 62: ...ANITA MP02300EN_170818 32 12 THREAD TRIMMER COMPONENTS ROTATION KNIFE 2 2 w w w g a r u d a n c z ...

Page 63: ...QTY 38 10011605 Screw SM1 4 x28 L 12 1 39 10009471 Nut M4 2 40 10006131 Solenoid Base 1 41 10013046 Solenoid Connecting Shaft 1 42 10011845 Washer 1 43 10011606 Washer 1 44 10006137 Thread Trimmer Solenoid 1 45 10013590 Screw SM11 64 x40 L 4 1 46 10008834 Spring 1 47 10012467 Screw 1 w w w g a r u d a n c z ...

Page 64: ...ANITA MP02300EN_170818 34 13 OIL LUBRICATION COMPONENTS w w w g a r u d a n c z ...

Page 65: ... 12 10007800 Oil pipe 1 13 10007800 Oil pipe 1 14 10008101 Oil wick 1 15 10012160 Pipe stopper 2 16 10030182 Oil connection ASM 1 17 10013012 Nut 1 18 10007800 Oil pipe 1 19 10007800 Oil pipe 1 20 10008781 Pipe stopper 2 21 10008779 Oil connection 1 22 10008783 Screw 1 23 10010240 O ring 1 24 10008972 Screw 2 25 10009469 Washer 2 26 10012669 Oil tank ASM 1 27 10013025 Screw 1 28 10014461 O ring 1 ...

Page 66: ...ANITA MP02300EN_170818 36 14 ACCESSORIE PART COMPONENTS w w w g a r u d a n c z ...

Page 67: ...013185 Screw Driver Small 1 6 10005639 Needle Thread Guide ASM 1 7 10010994 Screw Driver Large 1 8 10005776 Frame Viinyl Cover 1 9 B Accessorie Bag ASM B 1 10 10006286 Rubber Cushion 2 11 10013113 Oil Reservior Seat 2 12 10003889 Nail 6 13 10004466 Hinge Compl 2 14 10013101 Oil Reservior Cushion 2 15 10010060 Bobbin 3 16 10013294 Oiler ASM 1 17 10004455 Oil Box 1 18 10034917 Needle 134R Nm110 18 3...

Page 68: ......

Reviews: