

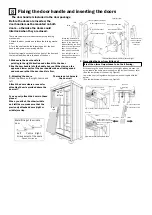
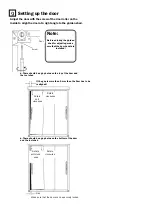

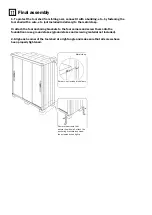
Assembly instructions
METAL GARDEN SHED
FLORIAN 1207
Thank you for choosing our product!
This manual is for the model ESD-1207E
Restrictions on the installation location:
- Do not mount on the roof of a building!
- Do not block any passageways or escape routes!
- Avoid installation in places where avalanches could fall on the tool shed or
where roof water falls directly onto the garden shed!
- Only set up where appropriate safety is guaranteed (not on cliffs or
in extremely windy places!)
Assembly:
- Ensure that the garden shed is well anchored to its foundations!
- Wear protective gloves during assembly!
- Do not assemble the tool shed in strong winds!
- Where required, use a sturdy stepladder
- Make sure that all screws and metal parts are tightened securely and no parts are left over!
- Some holes and recesses may not be required for your model – therefore work exactly
according to these instructions!
For safety
- When locking it, make sure that no one is inside the tool shed!
- Always lock the tool shed when it is not in use!
- Make sure that children do not use the tool shed (as a toy)!
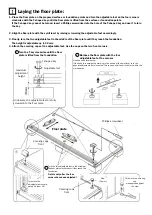
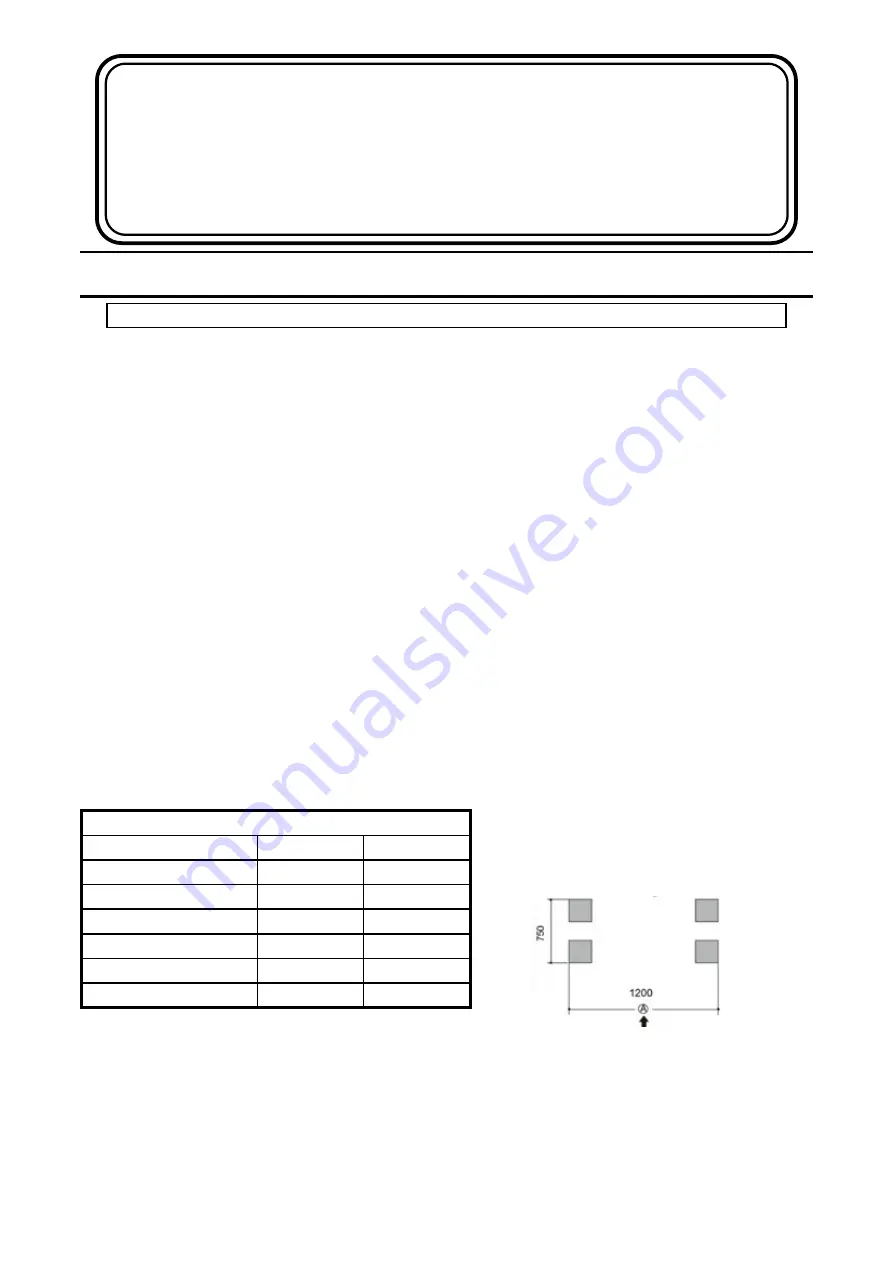
Foundation points
If you choose a point foundation, place the
foundation points as follows
Make sure that the foundation points are
balanced and that the points are aligned at right
angles!
Make sure that you leave enough distance to
adjacent walls etc. for installation, as you need
this space!
Make sure that the roof overhangs do not collide
with a wall, etc.!
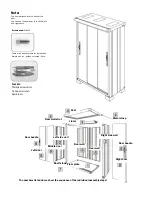
The following packages are required:
Designation:
Package no.
Amount
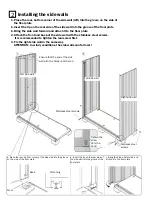
Sidewall:
ES4-0425
1
Roof, floor:
ES4-0913
1
Rear wall:
ES4-1022
1
Door:
ES4-1722
1
Shelf (optional):
ES4-1917
1
Shelf (optional):
ES4-1918
1
Front


