background image

DESIGN, INSTALLATION 

AND SErvIcING INSTrucTIONS

THE GAS SAFETY (INSTALLATION AND uSE) 

rEGuLATIONS 

I

n your own interest and that of safety, it is 

law that all gas appliances are installed by 

competent persons and in accordance with the 

above regulations.

ISSUE 5:

  06-08

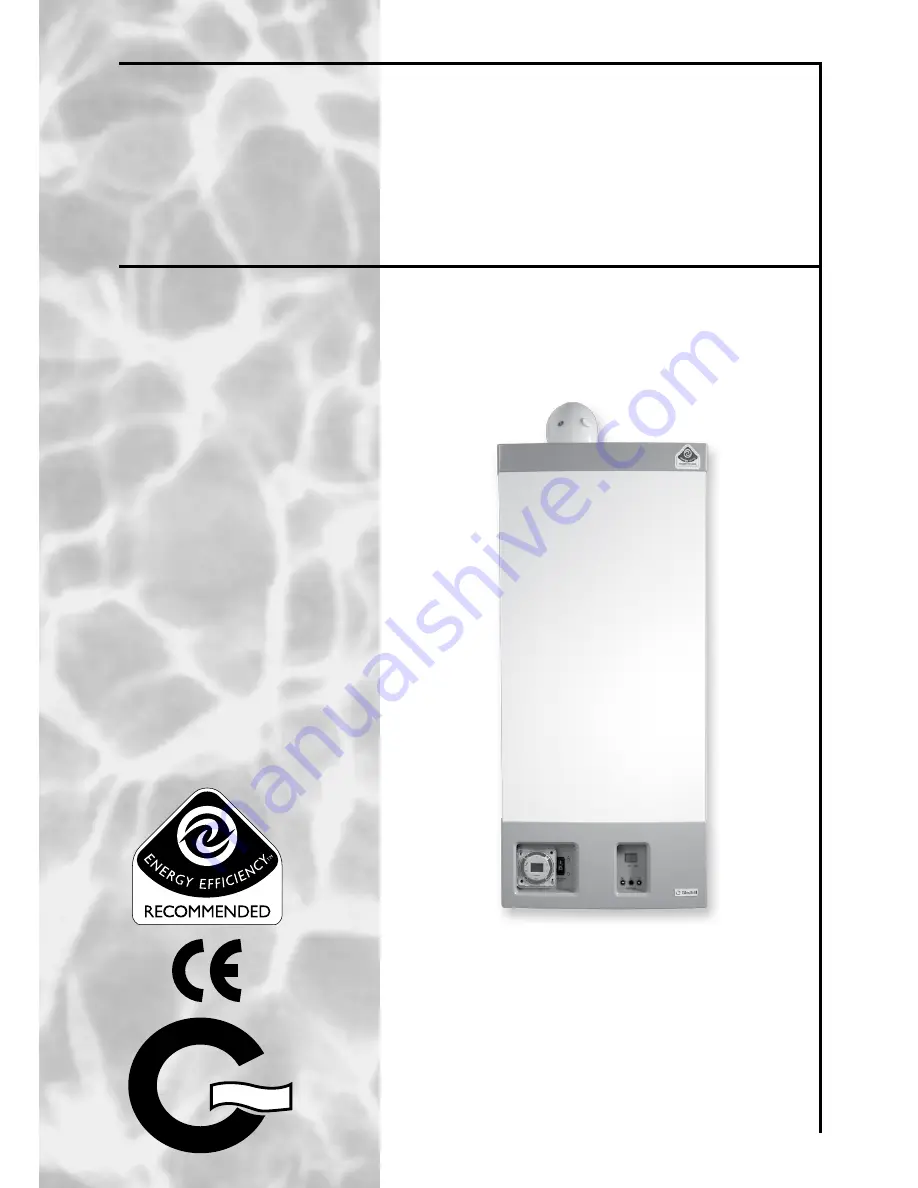
Gledhill High Efficiency 

Combination Boiler

Model: GB35C

Summary of Contents for GB35C

Page 1: ...ETY INSTALLATION AND USE REGULATIONS In your own interest and that of safety it is law that all gas appliances are installed by competent persons and in accordance with the above regulations ISSUE 5 06 08 Gledhill High Efficiency Combination Boiler Model GB35C ...

Page 2: ...following boiler models and only apply to the appliancessoldandinstalledinGreatBritain GB andIreland IE Thisappliance has been certified for safety and therefore these instructions must be followed BoththeapplianceandtheInstallationInstructionsmustnotbemodifiedunless recommended and approved byGledhillWaterStorage Limited in writing Any alteration not approved by Gledhill Ltd could invalidate the ...

Page 3: ... Controls 26 7 COMMISSIONING 7 1 General 27 7 2 Commissioning the boiler 28 7 3 Setting central heating timer 28 7 4 Checking boiler functions 29 7 5 Completion 30 CONTENTS PAGE 8 ANNUAL SERVICING 8 1 General 31 8 2 Spark Flame Sensing Electrodes 31 8 3 Burner 31 8 4 Combustion Chamber Heat Exchanger 31 8 5 Condensate Drain 31 8 6 Inner Casing Panel Seal Check 31 8 7 Combustion Check 31 8 8 DHW Fi...

Page 4: ...onform to the safety and performance specifications of the manufacturer Do not use reconditioned or copy parts that have not been clearly authorised by Gledhill Water Storage Ltd 1 4 HANDLING AND STORING THE APPLIANCE This appliance should be handled carefully to avoid damageandanymanualhandling liftingoperationswill need to comply with the requirements of the Manual Handling Operations Regulation...

Page 5: ...eset any external controls to resume normal operation of the central heating c Normal operation of the boiler should resume when the electrical supply is restored If the boiler does not resume normal operation turn the mains switch off and on If the boiler does not resume normal operation after this the overheat thermostat may have operated The overheat thermostat would only operate under abnormal...

Page 6: ...condition and usage but in general once a year is recommended If this boiler is installed in a rented property there is a duty of care imposed on the owner of the property by the current issue of the Gas Safety Installation and Use regulations Section 35 Theinstallation serviceengineershouldcompletethecommissioningchecklist and service record log on completion of commissioning and service work 1 1...

Page 7: ...estic hot water The boiler is supplied with a filing loop and a central heating programmer The boiler must be installed with one of the purpose designed Gledhill flue systems such as the standard balanced flue kit part no GT461 Various flue extensions bends vertical flue kits and plume management kits are available as optional extras These are detailed in a separate manual The boiler data badge gi...

Page 8: ...lue Gas Sensor Expansion Vessel 7 Litre Heat Exchanger Burner Assembly Window Spark Electrode Flame Sensing Electrode Overheat Thermostat Boiler Flow Temperature Control Thermostat Sensor Fan Assembly Gas Valve Assembly Air Gas Venturi Figure 2 2a Condensate Trap Cap for cleaning Condensate Drain Connection Air Vent Diverter Valve Modulating Pump DHW Flow Rate Temperature Sensor CH Bypass Flow Adj...

Page 9: ...0 11 12 13 14 15 16 17 18 19 20 21 22 23 24 Figure 2 4 Domestic hot water circuit 1 2 3 4 5 6 7 8 9 10 11 12 13 14 15 16 17 18 19 20 21 22 23 24 Figure 2 3 Central heating circuit 25 25 26 26 1 2 3 4 5 6 7 8 9 10 11 12 13 14 15 16 17 18 19 20 21 22 23 24 Figure 2 4 Domestic hot water circuit 1 2 3 4 5 6 7 8 9 10 11 12 13 14 15 16 17 18 19 20 21 22 23 24 1 2 3 4 5 6 7 8 9 10 11 12 13 14 15 16 17 18...

Page 10: ...e 1000 mm Maximum 26 3 kW Casing width 380 mm Heat input CH Net Minimum 7 5 kW Casing depth 385 mm Maximum 29 2 kW Minimum clearances Heat input CH Gross Minimum 8 3 kW Above casing 200 mm Maximum 26 0 kW Below casing 200 mm Heat output CH Non C ondensing Minimum 7 4 kW Front In operation 20 mm Maximum 28 9 kW Front For servicing 600 mm Heat output CH Condensing L H Side 20 mm R H Side 20 mm Heat ...

Page 11: ...plate Appliance case A 75 85 G 850 95 30 A 60 123 190 190 306 333 B C D E F G H 30 A B C D E F G H A C D Appliance case Front Elevation Side Elevation A 75 40 60 85 G 40 345 385 850 180 66 95 H 380 373 140 37 95 290 30 A 60 123 190 306 333 B C D E F G 50 842 H 130 1 5o slope Towards boiler CONNECTIONS A Condensate drain 21 22mm plastic overflow pipe B CH Flow 22mm Copper tail C DHW out 15mm Copper...

Page 12: ...ntrols e g room thermostat b Timed Central position The heating will operate according to the position of the tappets and will be controlled during the on period by the main appliance controls and or room thermostat c Off Bottom position No central heating available Note Domestic hot water will operate on demand irrespective of the position of the 3 position switch To set the time of day Turn the ...

Page 13: ...g P 2 3 d Automatic frost protection mode Dot D1 Flashing In standby mode Dot D1 ON Burner is live Bar C Lit Boiler pump on Display F Constant Frost protection Level 1 Display F Flashing Frost protection Level 2 Display shows boiler temperature e g F 03 S2 S1 Set Reset S3 D1 D2 D3 D4 System Pressure Reading in bar e g P 2 3 b Hot Water Draw Off Mode Dot D1 ON Burner is lit Bar a ON Hot water deman...

Page 14: ...aller and must comply with the relevant requirements of Manufacturer s instructions supplied The Gas Safety Installation and use Regulations The Building Regulations and localWater Company Bylaws The Health and Safety at Work Act Control of Substances Hazardous to Health The Electricity at Work Regulations and any other applicable local regulations The detailed recommendations are contained in the...

Page 15: ...es recommended are Betz Dearbon Sentinel X100 and Fernox Copal and these should be used following the inhibitor manufacturer s instructions It is important to check that the inhibitor concentration after installation system modification and at every service is in accordance with the manufacturer s instructions Important Notes Failure to flush and add inhibitor correctly to the system at the correc...

Page 16: ...Guide Typical filling arrangements are shown in figure 4 4 if installed in GB In accordance with the current edition of I S 813 if installed in IE In GB the sealed primary circuit may be filled or replenished by means of a temporary connection betweenthecircuitandthecoldwatersupply provided a Listed i eWRASapproveddoublecheckvalveorsome other no less effective back flow prevention device is perman...

Page 17: ...vel over a drain It should be routed and terminated in such a way that no hazard occurs to people or damage is caused to wiring or electrical components The end of the pipe should terminate facing down and towards the wall or be provided with a suitable guard The discharge must not be above a window or other public access way When choosing a location consideration should always be given to the pos...

Page 18: ...ems has been found to be between 2 3 bar b Terminal fittings The boiler supplies mains pressure hot water therefore allterminalfittingsmustbesuitableformainspressure hot water It is recommended that flow regulators are fitted to all taps showers etc in line with flow rates set out in Section 8 1 of the NHBC Standards BS 6700 If a shower is supplied from this appliance then it should be the thermos...

Page 19: ...always left in the ON position to give frost protection It may also be necessary to install additional frost protection device to protect other parts of the system Theboilermaybefittedinsideacupboardoracompartmentwithoutanyairvents Theappliancewillrunsufficientlycoldwithoutventilation The installation in cupboards must comply with BS 5440 Part 2 which refers to room sealed appliances installed in ...

Page 20: ... 3 4 plastic pipe see figure 4 10 A plastic drain pipe must be fitted to the boiler to allow discharge of condensate to a suitable drain The drainpipe should have a fall of at least 2 1 20 away from the boiler and must not rise at any point along its length The pipe should be a minimum of 20mm diameter and supported using suitably spaced clips in line with the manufacturers installation instructio...

Page 21: ...nse pipe must incorporate a tundish to prevent a backup in to the boiler in the case of a drain blockage a Connection to an internal soil and vent pipe b Termination to drain or gully S2 S1 Set Reset S3 D1 D2 D3 D4 2o minimum fall i e 1 20 450mm minimum S2 S1 Set Reset S3 D1 D2 D3 D4 2o minimum fall i e 1 20 Pipe must terminate above water level but below surrounding surface c Termination to a soa...

Page 22: ...s W see figures 4 12a 4 12d can be calculated as follows Rear outlet L1 mm W 66 45 W 111 RH side outlet L2 mm W 110 20 45 W 175 LH side outlet L3 mm W 22 20 45 W 87 An extended flue system can be installed with the addition of extension kits see section 4 5 b The flue system must always be designed and installed to have a continuous fall towards the boiler of at least 1 º i e 18mm per metre run Th...

Page 23: ...e outlet This should be taken in to consideration when selecting the position for the terminal Carports or similar extensions of roof only or roof and one wall require special consideration with respect to any openings e g doors vents or windows under the roof Care is required to protect the roof if it is made of plastic sheeting If the carport has a roof and two walls then seek advice from the lo...

Page 24: ...ashed inclined line on the template to the side wall This dashed line is drawn at 18mm metre 1 rise from the boiler Where this line reaches the side wall a horizontal line should be marked The vertical centre line of the flue should then be marked at 180mm from the back wall see figure 4 12 Toallowforthefluepassingthroughthewallatthisanglea125mmholeshould be drilled irrespective of internal or ext...

Page 25: ... a double pole isolator with 3mm contact separation in both poles and fused at 5A maximum The fused spur box should be readily accessible and located within 1 metre of the appliance and it should be identified as to its use Alternativelytheconnectioncanbemadethroughanun switchedshutteredsocket and 5A fused 3 pin plug both to the current issue of BS 1363 provided they are not used in a room contain...

Page 26: ...manent 230V ac 50Hz supply via a double pole isolator must be connected to terminals L N and E as shown in figure 6 2 e The boiler is supplied with an electro mechanical central heating programmer fitted However a room thermostat must be connected to the boiler terminals for central heating to function Any external controls must meet the relevant requirements of Building Regulations Parts L1A and ...

Page 27: ...prevent corrosion in the system and to prevent deterioration of the efficiency of the system and components it is important that the system commissioning cleansing and dosing should comply with BS7593 requirements before it is handed over to the customer see also section 4 2 b b Failure to flush and add inhibitor to the system will invalidate the appliance warranty S2 S1 Set Reset S3 D1 D2 D3 D4 f...

Page 28: ...ler is also vented The boiler air vent is located near to the front left hand side on the top of the boiler casing It is recommended that a suitable hose be fitted to drain the water during purging g The system must be flushed in accordance with BS 7593 and the flushing agent manufacturers instructions See also section 4 2 b Under no circumstances should the pressure relief valve be used for drain...

Page 29: ...flue turretelbowortheverticalflueadapter Checkthatthereadingsareconsistentwiththedetailscontained in the Technical Data Section 3 of these instructions Upon completion shut the DHW tap replace the sampling point cap and remove the gas pressure gauge Check that the gas pressure sensing point is gas tight b Central heating Ensure that the central heating timer and the room thermostat are calling for...

Page 30: ...rocedures outlined in section 10 of this document c CarefullyreadandcompleteallsectionsoftheBenchmarkCommissioning Checklist at the rear of this publication that are relevant to this appliance andtheinstallation Thesedetailsarerequiredintheeventofanywarranty work The publication MUST be handed to the user for safe keeping and each subsequent regular service visits should be recorded In addition fo...

Page 31: ...and check the spark gap is 3 5 4 5mm Check the electrode gasket for signs of damage and replace if necessary 8 3 Burner For access refer to section 9 1 General and 9 4 Burner Sub Assembly Clean the burner with a soft brush taking great care not to damage the front insulation DO NOT use wire or sharp instruments to clean the holes in the burner Inspect the burner for any signs of damage Removal of ...

Page 32: ...d 2 no retaining screws at the bottom The retaining screws should be removed from the bottom using a pozi type screw driver and the panel lifted clear of the locating pins To remove the inner casing panel undo the eight retaining screws holding the inner casing panel using a pozi screw driver Take care not to damage the seal NOTE The gas valve and Venturi are a single assembly which is factory set...

Page 33: ... of the earth lead simply pull off the push fit spade connectors from the spark electrode and the PCB Disconnect the flame sensing electrode lead by removing the spark plug type connector off the electrode and removing the stocho crimp connector from the 6 way plug after releasing the side clip and removing the plug from the PCB Pull out completely the whole three wire harness having first removed...

Page 34: ...ding the gas valve and venturi assembly to the fan using a Torx T25 driver then remove the four nuts securing the fan to the gas manifold with a 8mm A F spanner Check and replace any seals and gaskets as necessary Be particularly careful not to damage the cork gasket between the fan and the gas valve and venturi assembly and check when re assembling each of these items that they are correctly alig...

Page 35: ...lockwise the manual air vent provided on the top left hand side of the boiler casing Unscrew the manual air vent from the top of the boiler casing using a 17mm AF spanner and release the flow and return connections from the quick release connections provided on the hydraulic monoblock assembly see below for details Heat exchanger flow connection Heat exchanger return connection Then pull out the f...

Page 36: ...ber release the holding plate with a 2 5mm allen key turning anti clockwise and the pull out the insulation 9 7 OVERHEAT THERMOSTAT For access refer to section 9 1 General Pull off the2 no electrical spade connectors from the thermostat and unscrew using a 17mm AF spanner 9 8 BOILER FLOW TEMPERATURE CONTROL SENSOR For access refer to section 9 1 General Squeeze in the retaining clip on the side of...

Page 37: ...the boiler compartment slightly and then tilt the top forwards to allow it to be removed NOTE Check the air pressure of the new expansion vessel at the Schrader type connector provided at the top of the expansion vessel and adjust if necessary before fitting When fitting the new expansion vessel check the O ring is in place on the connecting pipe before pushing into the hydraulic monoblock and ref...

Page 38: ...5mm AF spanner 9 12 FUSE Foraccessrefertosection9 1General Thefuseislocatedinthebottomlefthandcornerofthecontroller PCB To replace pull out from its holder Controller PCB 9 13 DHW FLOW RATE AND TEMPERATURE SENSOR For access refer to section 9 1 General Drain down the DHW side of the appliance by shutting off the isolating valve on the pipework below the hydraulic monoblock compartment and opening ...

Page 39: ...he hydraulic monoblock by pulling to the right and then lift out the valve and elbow NOTE Disconnect the male iron copper outlet elbow from the old valve and re use on the new one 9 17 PLATE HEAT EXCHANGER For access refer to Section 9 1 General and for draining procedures Section 9 5 Heat Exchanger Also isolate and drain down as necessary the hot and cold water domestic system After ensuring the ...

Page 40: ...TOR VALVE HEAD For access refer to Section 9 1 General and for draining procedures Section 9 5 Heat Exchanger After ensuring the appliance is drained down push down the retaining clip on the front of the electrical plug and pull to the left to remove Remove the actuator by moving the front of the head 45º to the right and then pulling up and out of the valve 9 21 AUTOMATIC AIR VENT TO HYDRAULIC MO...

Page 41: ...arry out electrical system checks i e Earth continuity Resistance to earth Short circuit and Polarity with suitable meter Note These checks should be repeated after any fault finding and servicing h Ensure that all external controls are calling for heat and check all external and internal fuses i Before carrying out any servicing or replacement of parts ensure that the gas and the electricity supp...

Page 42: ...nding to P1 P2 P3 P1 P2 P9 Press S3 Press S3 Press S3 Press S2 Flow rate Flow limits Table Digit 2 Alternatively flashing L and 1 3 Digits 3 4 Flow rate corresponding to L1 L2 L3 L1 L2 L3 Press S3 Press S3 Press S3 Press S2 Fan speed settings Table Digit 2 Alternatively flashing F and 1 4 Digits 3 4 Fan speed corresponding to F1 F4 F1 F2 F4 Press S3 Press S3 Press S3 Press S2 Lockout error codes T...

Page 43: ...ure 50o C 50 60o C P5 CH temperature return 60o C 40 65o C P6 Low pressure limit 0 5 bar P7 High pressure limit 3 0 bar ii Control set points When the controller display is in level_1 the temperature control set point mode is selected by scrolling the mode by pressing button S2 until P flashes on digit 2 of the display The required set point is selected by pressing button S3 The control set points...

Page 44: ... the display There are 16 fault codes stored in order of occurrence The fault code C0 is the current or last fault code and the fault code CF is that happened the longest time ago When no fault is stored at the displayed fault number an FF is displayed It is also possible that EE is displayed for an internal error number This means that the controller is busy reading the memory The lockout error c...

Page 45: ...LTY_EARTH_ERROR 16 15MS_XRL_ERROR 47 WD_COMMUNICATION_ERROR 17 SENS_DIFF_ERROR 48 APPLIANCE_SELECTION_ERROR 18 T_MAX_LOCK_ERROR 49 MULTIPLE_SENSOR_ERROR 19 STACK_ERROR 50 SENSOR_00_OPEN 20 FLAME_OUT_TOO_LATE_ERROR 51 SENSOR_01_OPEN 21 FLAME_ERROR_1 52 SENSOR_02_OPEN 22 20MS_XRL_ERROR 53 SENSOR_03_OPEN 23 41MS_ERROR 54 SENSOR_04_OPEN 24 TOO_MANY_FLAME_FAILURES 55 SENSOR_05_OPEN 25 FLAME_FLAG_CPL_ER...

Page 46: ...r must correspond to the ID resistor The boiler type 07 is factory set However if a PCB is replaced then the boiler type must be set as described below Select Level 2 mode on the controller using procedure described above Level 2 mode is indicated by dot D4 Cycle the display by pressing buttons S2 minus or S3 plus until A is displayed on the first digit and the current boiler model is displayed on...

Page 47: ...the display using buttons S2 or S3 until cd is displayed on the two left hand digits and the current temperature difference setting is displayed on the two right hand digits e g as 30 To change the CH temperature difference press and hold button S1 until the dot D4 starts flashing Select the temperature using buttons S2 or S3 Press and hold button S1 to confirm selection The controller will only a...

Page 48: ...0B10 Flue gas S5 Tasseron type TS861 12K 3 DWG No TSSD2050 OHT Hawco Auto Reset thermal cu out thermostat Ref 03EN 15S040 5x6 95 4 80 4 DHW cir cui t Grundfos Direct Sensor VFS 1 20 Flow Temperature Primary Circuit 3 2 1 J J7 J7 2 L J7 1 E J13 Gas valve earth Gas valve connector Auto reset OHT J13 5 J13 6 GV 5 J13 4 GV 1 J13 3 Flame sensing electrode PTFE insulated HT lead J13 2 J9 Fan earth Fan c...

Page 49: ...Page 49 CONDENSING COMBI BOILER ...

Page 50: ...Page 50 ...

Page 51: ...EN FITTED YES NO WHAT TYPE OF SCALE REDUCER HAS BEEN FITTED FOR THE DOMESTIC HOT WATER MODE MEASURE RECORD GAS RATE ft3 hr MAXIMUM BURNER OPERATING PRESSURE IF APPLICABLE mbar COLD WATER INLET TEMPERATURE C HOT WATER OUTLET TEMPERATURE C WATER FLOW RATE lts min FOR CONDENSING BOILERS ONLY CONFIRM THE FOLLOWING THE CONDENSATE DRAIN HAS BEEN INSTALLED IN ACCORDANCE WITH THE MANUFACTURER S INSTRUCTIO...

Page 52: ... ID CARD SERIAL No COMMENTS SIGNATURE SERVICE 3 DATE ENGINEER NAME COMPANY NAME TEL No CORGI ID CARD SERIAL No COMMENTS SIGNATURE SERVICE 4 DATE ENGINEER NAME COMPANY NAME TEL No CORGI ID CARD SERIAL No COMMENTS SIGNATURE SERVICE 5 DATE ENGINEER NAME COMPANY NAME TEL No CORGI ID CARD SERIAL No COMMENTS SIGNATURE SERVICE 6 DATE ENGINEER NAME COMPANY NAME TEL No CORGI ID CARD SERIAL No COMMENTS SIGN...

Page 53: ...Page 53 CONDENSING COMBI BOILER ...

Page 54: ...ials or workmanship we will either repair or supply replacement at our option with the closest substitute in the case of any obsolete product to any address in Great Britain i free of all charge during the first year after delivery by us ii thereafter at a charge of one tenth of the then current list price and any copper price supplement and delivery charge during the second year after delivery by...

Page 55: ...ubject to of any other contract between the Purchaser and us which at the time of payment of the full price of the goods sold under this contract have been delivered to the Purchaser but not paid for in full c until property in the goods supplied hereunder passes to the Purchaser in accordance with paragraph 2 above i the Purchaser shall hold the goods in a fiduciary capacity for us and shall stor...

Page 56: ......

Reviews: