background image

Summary of Contents for GVR-F435

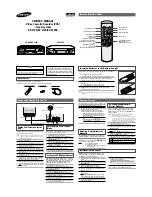
Page 1: ...GoldStar VIDEO CASSETTE RECORDER OWNER S MANUAL Before connecting operating or adjusting this product please read this instruction booklet carefully and completely GVR F435 ...

Page 2: ...ense on the surface of the glass This is moisture condensation Moisture condensation on the head drum one of the most crucial parts of the unit will cause damage to the tape When the VCR is exposed to a rapid temperature change from cold to warm some condensation will occur Under this condition connect the power cord to the AC line press POWER button on and allow at least two hours for the VCR to ...

Page 3: ...Azimuth 4 Head System Quick Response Mechanism 181 Channel Frequency Synthesized Cable Compatible Tuner with Autochannel Programming and Multichannel Scan 1 Year 8 Event Timer with DAILY and WEEKLY Function High Quality HQ Picture Enhancement System for Improved Image Sharpness and Detail Auto Power and Playback Functions ITR Instant Timer Recording Real Time Tape Counter Tape Remaining Time Jet S...

Page 4: ...roductandto protectit from overheating Andthese openingsmustnotbe blockedorcovered The openings should never be blockedby placingthe producton a bed sofa rug or other similarsurface This product shouldnot be placed in a built ininstallation suchas a bookcaseor rackunlessproperventilation is provided or the manufacturer s instructions have beenfollowed Power Source This productshouldbe operatedonly...

Page 5: ...r circuits as con tact with them might be fatal 18 Overloading Do not overload wall outlets and exten sion cords as this can result in a risk of fire or electric shock 21 22 23 24 25 Object and Liquid Entry p Never push objects of any kind throughopeningsinto this productas they may touch dangerousvoltagepointsor short outpartsthat couldresultin a fire or electricshock Never spillliquid of any kin...

Page 6: ... ANTENNA CATV CONNECTIONS on page 8 VCR TO TV CONNECTION 75 ohm Coaxial Cable supplied Antenna Splitter 75 ohm to VHF UHF 300 ohm not supplied TV Antenna Terminals ___ To OUT TO TV TV set 1 2 3 Connect the 75 ohm Coaxial Cable to OUT TO TV on the VCR Connect the other end to the 75 ohm antenna input or to the screws labeled VHF on back of the IV If UHF is used in your area a sep arate splitter may...

Page 7: ...e This cable will con nect directly to the connector marked IN FROM ANT on your VCR If your antenna lead wire is a flat type antenna cable connect it to a Antenna Adaptor 300 ohm to 75 ohm not supplied and slip the Adaptor onto the IN FROM ANT terminal The Adaptor does not screw on to the VCR it just slips over the connector IIO0000110001410001tOOOOItOOOOQOOOOQ OOOQOOOOOOOeOOOOOIOOOQOO0 O0 OO0000 ...

Page 8: ... receive all midband super band and hyperband channels TV set Antenna I Splitter not supplied 95 1 Remove round wire from TV and screw onto VCR s IN FROM ANT connector CABLE CONVERTER 75 ohm Cable System VCR 75 ohm Coaxial Cable supplied 2 Use the supplied coaxial cable between the VCR s OUT TO TV connector and the TV s 75 ohm connector 8 CABLE and PAY TV reception area scrambled signals If a conv...

Page 9: ... grounding and in particular specifies that the cable ground shall be con I nected to the grounding system of the building as close to the point of cable entry as practical VCR OUTPUT CHANNEL SETTING AUDIO V C_EO otrr _UTrOW F VCR OUTPUT CHANNEL SWITCH During playback of a video tape and when the TV_ R button is set to the VCR position the VCR OUTPUT converter changes the video and audio signals t...

Page 10: ...s button during the STOP mode to rewind the tape or during the PLAY mode for fast reverse picture search REVIEW mode FF BUTTON Press this button during the STOP mode to advance the tape or dur ing the PLAY mode for fast for ward picture search CUE mode J INFRARED REMOTE SENSOR This sensor receives the signal from the infrared remote control PLAY BUTTON Press to play a recorded tape II P STILL P ST...

Page 11: ...O IN JACK Connect the audio output cable from an external unit to this terminal VIDEO IN JACK i _J Connect the video output cable from an external unit to this terminal t INDICATOR PANEL i VHF UHF ANTENNA OUTPUT CONNECTOR Connect this terminal to the VHF or UHF antenna terminals on the back of a TV POWER Indication This indicator lights when POWER button is pressed to ON POWER VCR Indication This ...

Page 12: ...E CMpAN I EJECT BUTTON Press to remove a cassette in the STOP mode MENU BUTTON Displays the programming menu on the TV screen ENTER BUTTON Accesses the onscreen menu Displays functions on the TV screen EXIT BUTTON Quits the current screen or Pop up or returns to the currently turned channel _ _ CLEAR BUTTON Cancels a timer recording 1 t t NUMBER BUTTONS Use these buttons numbered 0 9 to select a c...

Page 13: ...a 0 Pt A _ _ STOP I II I REW _ FFIr_ I II I CLEK_M RESET P STILL REC ITR OPERATION OF REMOTE CONTROL Aim the remote control unit at the sensor on the front panel of the VCR NOTES 1 If the range is short t0 new batteries 2 An object between the VCR and remote control unit may block the invisible light beam and operation will be impossible 3 Batteries installed backwards may leak and damage your Rem...

Page 14: ... TRK _T CHIA_ IZ2 CZI_ _ VISS_IME CMSCAN J _ENTER Bu_on ONSCREEN DISPLAY OSD MENU SYSTEM The SETUP clock setting and timer recordings are accessed conveniently with Onscreen Menu Displays that lead you through each step The following pages describe the Onscreen selections BLUE SCREEN DISPLAY The blue screen display appears when an inactive TV channel is selected on the VCR NOTES The TV VCR button ...

Page 15: ... on 2 Switch on the TV and set the TV s channel selector to match the VCR s output channel 3 or 4 NOTE If a direct VIDEO AUDIO connection is made between the VCR and the TV via the RCA plugs set the TV s source selector to VIDEO MENU SELECTION Your VCR allows remote control adjustment of several features 1 Press MENU button 2 Select the desired menu with the UP DOWN button and then press the ENTER...

Page 16: ...UNER Press LEFT or RIGHT repeatedly to switch between TUNER and AV 4 Press UP or DOWN to choose the AUTO CHANNEL SET item Press LEFT or RIGHT to set the channel The tuner will automatically cycle through all available channels in the area and place them in the tuner s memory 5 After the AUTO CHANNEL SET operation is complete make sure the TUNING BAND is set appropriately TM or CATV by pressing the...

Page 17: ...ed by a number or in some cases are the same as used by UHF channels Cable channels are considered to be VHF channels not UHF For example CATV Channel 26 is not the same as UHF Channel 26 VIEWING TV ONLY Switch on the iV and set it to the chan nel that you wish to watch Set the POWER button to OFE You don t need to disconnect the VCR from the TV to watch IV separately When the VCR s power is OFF o...

Page 18: ...top Insert the cassette gently into the slot in the direction of the arrow on the cassette until the loading mechanism automatically pulls the cassette into the unit Make certain that the cassette is inserted correctly NOTES Do not force the cassette into the VCR Insert the cassette gently If the cassette is not loaded correctly the VCR will eject the cassette automatically after approximately 3 s...

Page 19: ...lustrated will appear on the TV screen Press UP or DOWN button to choose the CLOCK item Press ENTER to enter selected item The CLOCK menu will appear as illustrated to the left NOTE The initial Clock Setting is JANUARY 1 1996 12 00 PM CLOCK SET MENU Example July 5 1996 2 15 PM lm mimmlW_ DAY 1 MON YEAR 1996 TIME 12 00 PM liffl SELECT B _ ADJUST TO EXIT PRESS E X T rl S Press LEFT or RIGHT button t...

Page 20: ...y the VCR In playback the TV VCR Selector switches to VCR mode automatically PLAY appears on the TV screen for a moment 1 Press the STOP button to stop playback STOP appears on the TV screen for a moment At the end of the tape the VCR will automatically stop rewind eject and turn itself off TRACKING CONTROL 1 AUTO TRACKING The automatic tracking function adjusts the picture to remove snow or strea...

Page 21: ...r a desired tape section in either direction forward called CUE and reverse called REVIEW During playback press either search button once to engage the visual search mode REV or CUE will appear on the TV screen 2 To continue normal playback press the PLAY button NOTE If the VCR is left in the CUE or REVIEW mode for more than 3 minutes the VCR will automatically enter the PLAY mode to protect the t...

Page 22: ...r REVIEW mode will continue until the FF or REW button is released 4 When released Fast Forward or Rewinding resumes 5 Press the STOP or PLAY button to stop the FF or REW mode PICTURE SEARCH NOTES The Picture Search function may not provide a usable picture when searching a tape recorded in the LP mode During the high speed picture search modes horizontal lines noise bars will appear on the TV scr...

Page 23: ...sired program press the PLAY button Normal playback of that pro gram will begin VISS SEARCH You can locate the desired program and play it back automatically by designating the number of its VISS signal Up to the 99th VISS signal from the preset position on the tape can be located From the play or stop mode 1 Press the VISS TIME button once during PLAYBACK or STOP mode The VISS 00 indicator will a...

Page 24: ... to record in LP mode Press the REC ITR button once and REC will appear on the TV screen and the REC indicator will light on the indicator panel Recording will start NOTE lf a cassette with no safety tab is loaded the cassette will be ejected automat ically _ Press the STOP button to stop recording If the tape reaches the end before STOP is pressed the VCR will automati cally stop rewind eject and...

Page 25: ...tically ejected MAIN MENU CLOCK _ ROGRAM TUNING SETUP B_ SELECT _ ENTER TO EXIT PRESS Check the following first Turn on the power of both the VCR and the IV Be sure the IV is set to the VCR output channel 3 or 4 Aim the remote control at the VCR _ o Press MENU button on the remote control The menu will appear on the IV screen as illustrated to the left NOTE Make sure the TUNING BAND in the TUNING ...

Page 26: ...box converter you must set the chan nel in this step to match the cable box output channel usually CH 3 or 4 Change channels on the cable box instead of with the VCR 1 Press DOWN button to choose the SPEED item Press LEFT or RIGHT button to choose the desired tape speed SP EP or AUTO Example SP NOTE The AUTO mode determines how much tape is left and switches speed from SP to EP if necessary to com...

Page 27: ...The MENU as illustrated will appear on the TV screen 2 Press UP or DOWN button to choose the PROGRAM item Press ENTER button to see the program review 3 Press LEFT or RIGHT button to see the another program review 4 Press EXIT button to return to the TV screen ERASING A TIMER PROGRAM 1 Press MENU button on the remote control The MENU as illustrated will appear on the TV screen 2 Press UP or DOWN b...

Page 28: ...elector to desired speed SP or EP by pressing the SP EP button The tape speed will appear on the TV screen 4 Press the REC ITR button twice The ITR menu as illustrated will appear on the IV screen 5 Press the REC ITR button again to select the recording time length 6 At the end of recording the display will read 0H00 the VCR will stop recording and shut off J CHECKING THE ITR TIME Press the REC IT...

Page 29: ... of tape you want to view immediately after recording or ifyou want to return to the same point several times 1 Begin recording or playing a tape 2 Press the ENTER button twice to display the counter mode 3 Press the CLK CNT REM button to display the real time counter and M appears in the TV screen 4 At the point where you want playback to begin reset the real time counter to M 0 00 00 by pressing...

Page 30: ...ing back the video tape Otherwise the color may be too bright too faint or even change OPERATING HINTS After you have finished using the VCR rewind eject and remove the cassette Place the cassette in its protective sleeve to protect it from dust It is not nec essary to rewind the cassette before removing it but if you do it will be ready to play or record the next time you use it Be sure the VCR C...

Page 31: ...d to the VCR you can see the video playing 4 When you desire recording to begin press the VCR s REC ITR button once to start Camera _ From Camcorder Audio and Video AN Outputs VCR TO VCR DUBBING U ANT VCR 2 To Record VCR 1 To Play AUDIO OUT VIDEO OUT If you wish to exchange or copy some of your friend s favorite home recordings the following instructions can be used to connect one VCR to another f...

Page 32: ...ved Stick a piece of cellophane tape overthe erase prevention tab holeorselecta differentcassette PLAYBACK OF PRE RECORDED CASSETTE No picture appears on television Set the television to the VCR channel 3 or 4 depending upon the selected screen when PLAY button is pressed channel on the back of the VCR Output Channel Try a different cassette tape No picture but audio is clear The heads may require...

Page 33: ...lug in again VIDEO HEAD CLEANING Picture playback may become blurred or interrupted even though the TV pro gram received is clear This does not mean that the recorded program has been erased Dirt accumulation on the head after long periods of use can cause these prob lems If high quality video tapes are used in this VCR the video heads should not require cleaning because of the built in automatic ...

Page 34: ...ystem 33 35 mm sec 16 67 mm sec 11 12 mmfsec 12 7 mm 2 HOURS T 120 6 HOURS T 120 8 HOURS T 160 Less than 210 seconds T 120 EIA Standard 525 lines 60 fields NTSC type color signal 2 13 14 69 4A A W W 1 W 84 A 5 A 1 1 0 Vp p 75 ohms unbalanced 1 0 Vp p 75 ohms unbalanced More than 45 dB at SP mode 7 8 dBm 7 8 dBm More than 40 dB at SP mode Monaural type 75 ohms 75 ohms Channel 3 or 4 Switchable 360 ...

Page 35: ......

Page 36: ...WARRANTY OF MERCHANTABILITY APPLICABLE TO THIS PRODUCT Some states do not allow the exclusion or limitation of incidental or consequential damages or limitations on how long an implied warranty lasts so these limitations or exclusions may not apply to you This warranty gives you specific legal rights and you may also have other rights which vary from state to state THE ABOVE WARRANTY DOES NOT APPL...

Reviews: