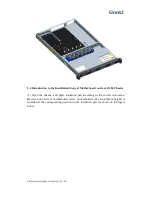
background image

RMC1104-670-HS

User Manual

Version 1.0

Summary of Contents for RMC1104-670-HS

Page 1: ...RMC1104 670 HS User Manual Version 1 0 ...

Page 2: ...Shenzhen Gooxi Hengyu Technology Co Ltd Content Manual Structure Foreword Chapter 1 Chassis Overview Chapter 2 Easy Installation Instruction Chapter 3 Chassis Parameters ...

Page 3: ... focuses on the quality and content Gooxi RMC1104 670 HS server chassis uses imported first class SGCC galvanized steel and possessed with the characteristics of fingerprint resistance corrosion resistance heat resistance heat transfer and thermal reflectivity formability as well as weldability In addition taking into account the higher stability requirements of the server during usage Gooxi RMC11...

Page 4: ... Co Ltd Chapter 1 Chassis Overview 1 1 Chassis Structure Base Rear window Ventilation wall Hard disk module Front cover Top cover Handle Hard drive bracket Fan 1 2 Rear Window Construction Power site I O washer position Expansion slot ...

Page 5: ...ieces of active studs with the total height of 8mm are used to install the motherboard 16 pieces of 6 32 6mm cross recessed pan head screws are used for fastening the motherboard and power supply 0 3 SAS label One 100 120 0 045mm PE valve bag 1 4 Chassis View Front view Missing picture Rear view Missing picture 1 5 Related Indicators of Chassis Panel ...

Page 6: ... No Picture LED Appearance Description 1 The green light is on The device is on The yellow light is on Alarm indication including system alarm fan alarm power alarm etc the specific can be viewed through IPMI management software Green light flashes The system is running normally Reset The button is used to restart the server The green light is on Internet access 1 connection is normal The green li...

Page 7: ...nction Act LED Fault LED Status LED Hard disk at site ON OFF OFF Hard disk activity Flash 4Hz s OFF OFF Hard disk location ON Flash 4Hz s OFF Hard disk fault ON OFF ON RAID reconstruction ON OFF Flash 1Hz s 1 7 Brief Introduction to Backplane The standard configuration of Gooxi backplane model is RMC1104 BP 12G and the specific description is as follows ActLED Fault LED StatusLED ...

Page 8: ... jumper slot Corresponding site Interface jumper slot 1 2 3 4 4 29PINSAS output interfaces 7 8 9 10 11 12 Sockets of 4 temperature control fans 5 6 2 ATX power input 13 1 个 SFF 8643 12Gb SAS interface 14 CPLD decoding chip 1 8 Introduction to the Output Interface of Backplane Hard Disk ...

Page 9: ...ogy Co Ltd Chapter 2 Easy Installation Instruction 2 1 Introduction to the Disassemble Steps of Gooxi 1104 Chassis Cover Unscrew the top cover screws Press the button of chassis back cover Push the back cover 4 Pull the back cover ...

Page 10: ...ug Steps of Gooxi1104 Chassis Hard Disk Press the button to pull out the hard disk from the hard disk site 2 Install the 3 5 inch hard drive to the hard drive bracket according to screw holes as shown in the figure below 3 The installed hard disk is shown in the following figure ...

Page 11: ...Shenzhen Gooxi Hengyu Technology Co Ltd 4 Insert hard disk to the chassis and close the switch As shown in the following figure ...

Page 12: ...Shenzhen Gooxi Hengyu Technology Co Ltd 2 3 Introduction to the Installation Steps of Gooxi1104 Chassis Fan Install 8 soft nails to the fan as shown in the figure below ...

Page 13: ...Shenzhen Gooxi Hengyu Technology Co Ltd Complete the insertion respectively The final installation effect ...

Page 14: ...of Motherboard on Gooxi 1104 Chassis 1 Open the chassis and place insulation pad according to the correct orientation Based on the hole of motherboard screw motherboard active stud 8mm height is installed at the corresponding position on the insulation pad As shown in the figure below ...

Page 15: ...en Gooxi Hengyu Technology Co Ltd 2 After the motherboard active stud 8mm height is installed place the motherboard into the chassis and fasten motherboard screw at the hole site As shown in the figure below ...

Page 16: ...i 1104 Chassis 2 5 1 Installation Steps of Two 2 5 inch Non Hot Swappable Hard Disks 1 Remove the screws marked at the following figure lift the top cover and remove it As shown in the figure below 2 Fix the two 2 5 inch hard disks with expandable bracket respectively 3 The final installation effect is as follows ...

Page 17: ...Shenzhen Gooxi Hengyu Technology Co Ltd 4 Install the expandable hard disk to the chassis as shown in the figure below 5 The final installation effect of expandable hard disk shown in the figure below ...

Page 18: ...Shenzhen Gooxi Hengyu Technology Co Ltd 5 Restore the front cover when the expandable hard disk is finished installation ...

Page 19: ...swappable expandable sites Hard disk shockproof system Hard disk bracket is designed with EMI shrapnel The unique shockproof fan design can reduce the resonance between the fan and hard disk without affecting the I O speed of hard disks Cooling system Five 4056 fans are the standard configuration Windshield Optional configuration Intelligent control of temperature Support Expanded card site One fu...

Page 20: ...imension 902 591 183mm Length width height Overall gross weight 9 7KG Safety certification CE FCC RoHS Note This manual is a general instruction of RMC1104 670 HS series Specific parameters of each type please refer to the chassis detailed parameters ...

Reviews: