MDS80314 (PIC00373)
Revised: 9/16/2020
Medline
Raised
Toilet
Seat
Installation
&
User
Instructions
Reorder Number: MDS80314
WARNINGS
TO INSTALL THE EQUIPMENT TO THE TOILET BOWL
CAUTIONS
SAFETY SUMMARY:
The following recommendations are
made for the safe assembly of the raised toilet seat.
DO NOT assemble or use this equipment without first
reading and understanding this instruction sheet. If you
are unable to understand the Warnings, Cautions or
Instructions, contact a healthcare professional, dealer
or technical personnel before attempting to install this
equipment. Otherwise, injury or damage may occur.
Certain toilet fixtures will prevent the locking raised toilet
seat from working properly and/or will damage the locking
raised toilet seat. If the toilet bowl has on its top or inner
ring any raised or protruding points or sections, then the
locking raised toilet seat should not be used.
After assembly and BEFORE use, ensure that ALL
attaching hardware is securely tightened.
Always check to make sure that the raised toilet seat is
properly and securely locked in place before using. Make
certain that the knob that secures the raised toilet seat to
the commode is tight at all times.
Center your weight on the raised toilet seat. The seat may
tip if you lean too far forward to either side.
Users with limited physical capabilities should be
supervised or assisted when using the raised toilet seat.
The raised toilet seat’s weight capacity is:
350 lbs (159 kg).
Rotate the adjustment knob by hand only to prevent over-
torque of the assembly. Use of a wrench or other tool will
break the screw assembly. DO NOT FORCE knob as this
may damage the knob and/or the raised toilet seat.
The Medline raised toilet seat is not designed for
permanent installation. The unit should be loosened and
retightened at least once a week to ensure a proper fit.
If, for any reason, a proper fit in installation cannot be
achieved, “DO NOT” use and contact retailer where
purchased for return instructions.
The Medline raised toilet seat has been designed to accommodate
a wide variety of toilet bowl types. However, certain bowl types will
require the removal of the existing seat and/or lid to ensure proper
fit when installed.
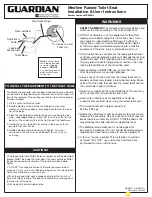
1. Lift the seat and lid of the toilet.
2. Rotate adjustment knob of the raised toilet seat counter
clockwise until the paddle is far enough back to clear the inner
rim of the bowl.
3. Place the raised toilet seat onto the bowl rim hooking the rear
wings under edge of bowl. Check that the unit rests flat on the
bowl rim. The knob must be at the front end of the toilet bowl.
4. Center the unit on the bowl rim and push the back as far as
possible with your hands.
5. Rotate adjustment knob clockwise to tighten. Turn until
resistance is felt, then turn an additional 1/8 inch (0.3 cm)
until snug.
• The raised toilet seat MUST be level, straight, and the adjustment
bracket MUST be inside the toilet bowl. The rear seat wings MUST
be positioned under the rear lip of the toilet bowl. (See above
figure)
• “DO NOT” Use raised toilet seat if the toilet lip measurement
exceeds 13/4 inches (4.5 cm) (See above figure), as the raised toilet
seat will not hold and may cause injury.
• When the raised toilet seat is properly installed, the unit will sit
flat on the top of the lip of the bowl and should fit securely against
the inner rim of the bowl.
• Not made with natural rubber latex.
Seat Installed
Toilet Bowl
Rear Seat Wings
Adjustment Knob
Adjustment
Knob
Locking
Mechanism
Width-Adjustable Armrest (MDS80320)
13/4 inches (4.5 cm)
Toilet Lip
√
√
√
√
√
√
√
Note:
Check all parts
for shipping damage.
In case of shipping
damage, “
DO NOT
”
use. Contact place of
purchase for further
instruction.


