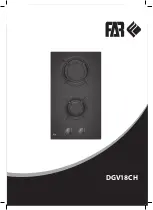
background image

PIANO VETROCERAMICA

 - Istruzioni per l'uso

GLASKERAMIK-KOCHFELD

 - Gebrauchsanweisung

PLACA VITROCERÁMICA

 - Instrucciones de uso

TABLE VETROCERAMIQUE 

- Notice d'utilisation

GLASS CERAMIC HOB

 - Operating instructions

GLASKERAMISCHE KOOKPLAAT

 - Gebruiksaanwijzing

PLACA EM VITROCERÂMICA

 - Instruções para a utilização

SKLOKERAMICKÁ VARNÁ DESKA

 - Návod k použití

GLASKERAMISK KOGEPLADE

 - Brugsanvisning

LASIKERAAMINEN KEITTOTASO

 - Käyttöohjeet

ΥΑΛΟΚΕΡΑΜΙΚΗ ΕΠΙΦΑΝΕΙΑ

 - Οδηγίες χρήσης

KERÁMIA FŐZŐLAP

 - Használati útmutató

GLASSKERAMIKKTOPP

 - Bruksanvisning

PŁYTA ZE SZKŁA CERAMICZNEGO

 - Instrukcja obsługi

СТЕКЛОКЕРАМИЧЕСКАЯ ВАРОЧНАЯ ПАНЕЛЬ

 - Инструкции по эксплуатации

GLASKERAMIKHÄLL

 - Bruksanvisning

STIKLOKERAMIKINĖ KAITLENTĖ

 - Naudojimo instrukcijos

СКЛОКЕРАМIЧНА ПОВЕРХНЯ

 - Iнструкцiя з використання

SKLOKERAMICKÁ VARNÁ DOSKA

 - Návod na použitie

GB

P

E

NL

D

F

I

DK

FIN

N

S

RUS

PL

LT

CZ

SK

GR

H

UA

Summary of Contents for H05V2V2-F

Page 1: ...vod k použití GLASKERAMISK KOGEPLADE Brugsanvisning LASIKERAAMINEN KEITTOTASO Käyttöohjeet ΥΑΛΟΚΕΡΑΜΙΚΗ ΕΠΙΦΑΝΕΙΑ Οδηγίες χρήσης KERÁMIA FŐZŐLAP Használati útmutató GLASSKERAMIKKTOPP Bruksanvisning PŁYTA ZE SZKŁA CERAMICZNEGO Instrukcja obsługi СТЕКЛОКЕРАМИЧЕСКАЯ ВАРОЧНАЯ ПАНЕЛЬ Инструкции по эксплуатации GLASKERAMIKHÄLL Bruksanvisning STIKLOKERAMIKINĖ KAITLENTĖ Naudojimo instrukcijos СКЛОКЕРАМIЧН...

Page 2: ...Ηλεκτρική τροφοδοσία Áramellátás Strøm Zasilanie elektryczne Электрическое питание Strömförsörjning Srovë Електричне живлення Elektrické napájanie Piano in vetroceramica Glaskeramikkochfeld Encimera en vidrio cerámica Plaque en vitro céramique Glass ceramic cooker top Plaat van glaskeramiek Placa em vidro cerâmica Sklokeramická varná deska Glaskeramisk plade Keraaminen liesi Υαλοκεραμική επιφάνεια...

Page 3: ...220 240 V2 H05V2V2 F 220 240 V H05V2V2 F R1 R2 Z A D E C B F I Fig 2 Fig 2B 3 ...

Page 4: ...380 415V 2N H05V2V2 F 4G 220 240V 2 H05V2V2 F 3G 220 240V 1N H05V2V2 F 3G R1 R2 R3 R4 Z Z A D E B C I B2 B1 Fig 3 Fig 3B 4 ...

Page 5: ...R1 R2 R3 Z Z A D E C N I M1 M3 M2 Fig 4 5 ...

Page 6: ...F1 F1 F2 F1 F2 B A 30 mm 40 mm 3 1 2 52 55 max 290 62 max 580 770 290 580 770 490 50 Min 2 0 510 50 Min 50 Min 270 560 750 2 0 2 0 2 0 Fig 6 Fig 7A Fig 5 6 ...

Page 7: ... 40 50 mm 25mm 500 x 10 80 mm 4 mm B A Fig 8 Fig 7B Fig 9 7 ...

Page 8: ...50 mm 40mm 4 mm 500 x 10 500 x 50 B A Fig 10 8 ...

Page 9: ...ed electrician for assistance Important Metal objects such as knives forks spoons or lids must not be placed on the cooker surface as they can get hot After use switch the cooker off using the control device and do not rely on the pan detector Avoid liquid spilling therefore to boil or heat liquids reduce the heat supply Do not leave the heating elements switched on with empty vessels or without v...

Page 10: ...F JH A ON OFF key PPLJOH POF display PPLJOH POF 3 display Timer display PPLJOH POF 3 display Timer display PPLJOH POF TFMFDUJPO key D key Timer key E key Timer key I Decimal point indicator t 6TF JH A ON OFF key PPLJOH POF 3 display PPLJOH POF 3 display Timer display PPLJOH POF 3 display N Timer Display PPLJOH POF TFMFDUJPO key D key Timer key E key Timer key I Decimal point indicator To activate ...

Page 11: ...and keys simultaneously Afterwards the remaining time will appear on the timer F display When time is up an acoustic signal beeps and the timer displaysflash Anykeycanbeselectedtostoptheacoustic signal If you leave the acoustic signal it will deactivate after about 2 minutes To EFBDUJWBUF UIF UJNFS GVODUJPO CFGPSF UIF TFU UJNF select the cooking zone and then press the and keys simultaneously By s...

Page 12: ...software automatically lowers power of the previously selected zone until it reaches the allowed power level The display of the zone with limited power will begin to flash for about 3 seconds During this time it is possible to modify the power level t BJOUFOBODF JH Remove any residues of food and drops of grease from the cooking surface using the special scraper supplied on request Clean the heate...

Page 13: ...s e g IGBT 1 The error is automaticly cancelled after 8s and the cooking zone can be used again In case of further upcoming errors the pot have to be changed E 4 Unconfigured induction modul Induction modul is not configured 1 Delete the hob configuration and activate the manual configuration 2 Start the UI service menu to configure the induction modul E 5 No communication between UI and induction...

Reviews: