background image

Please read this manual carefully 
before using this TV set and keep it  
for future reference.

OWNER'S MANUAL


COMBINED 21" TV AND DIVX DVD PLAYER

DTA-2198

Summary of Contents for DTA-2198

Page 1: ...Please read this manual carefully before using this TV set and keep it for future reference OWNER S MANUAL COMBINED 21 TV AND DIVX DVD PLAYER DTA 2198 ...

Page 2: ...sing the unit in TV mode Searching channels 7 Auto search 7 Search 8 Manual fine tune 9 Program Exchange 10 Program skip 11 Watching TV Watching TV program 12 Program swap 13 Convenient picture functions 14 Multiple picture modes 14 TV Set up 15 Language 15 Blue Back 15 Game 15 Calendar 16 Teletext 17 Using the unit in DVD mode Basic Playback 18 Advanced Playback 19 Special Function Playback 20 DV...

Page 3: ...amage to the TV set 3 Don t place the TV set in direct sunlight or near a heat source 6 If the TV set is not going to be used for a long time or there is a severe thunder Lighting storm it is recommended that the TV set be disconnected from the AC power outlet and the aerial plug removed Cleaning the tube If the picture tube require cleaning disconnect the power and use a dry soft cotton cloth Do ...

Page 4: ...n for the remote control Battery installation Tips for remote operation Note It is recommended that a 75 ohm coaxial antenna is used to avoid interference To avoid interference from electrical signals do not bind the antenna cable together with any mains lead 300 twin lead cable Antenna adapter 75 coaxial cable Plug AC power socket Aerial input 75 standard coaxial type Not supplied Not supplied ...

Page 5: ...AXIAL DVD SCART Terminal TV SCART Terminal Digital audio coaxial output terminal VIDEO L AUDIO R TV AV DVD MENU V V P P Video R LAudio The DVD Player Power Indicator Signal Receiver TV AV DVD Switching Menu Volume up down Channel Position up down Open close the DVD Stop the DVD Power Switch Play the DVD ...

Page 6: ...V Menu Button 16 DVD Display Button 17 DVD Program Button 18 DVD stop Button 19 DVD Clear Button 20 DVD Enter Play Button 21 DVD Pause Step Button 22 DVD Fast reverse Button 23 DVD Fast forward Button 24 DVD Menu Button 25 DVD Next Button 26 DVD Previous Button 27 DVD Repeat Button 28 DVD Setup Button 29 DVD Repeat A B Button 30 DVD Navigation Button 31 DVD Slow Button 32 DVD Angle Button 33 DVD S...

Page 7: ... indicator is lighting in red press the P P button on the panel or on the remote control the power indicator will become green After several seconds the TV would start normal operation 3 If you want to change to standby status please press the button on the remote control The power indicator will become red Auto switch off function If a channel with no boardcast is selected the sound will automati...

Page 8: ...ntil the TUNE menu display 2 Press the P buttons to select AUTO SEARCH 3 Press V button to start auto search The TV will begin memorizing all the channels available in your area TUNE TUNE AUTO SEARCH SEARCH BAND UHF FINE TUNE COLOUR AUTO SOUND BG SKIP OFF PROGRAM 2 AUTO SEARCH VHF L AUTO SEARCH SEARCH BAND UHF FINE TUNE COLOUR AUTO SOUND BG SKIP OFF PROGRAM 2 1 2 3 ...

Page 9: ... Tune Menu will appear 5 Continue the tuning procedure until you have tuned in all the channels required To exit press the TV MENU button TUNE TUNE AUTO SEARCH SEARCH BAND UHF FINE TUNE COLOUR AUTO SOUND BG SKIP OFF PROGRAM 2 SEARCH VHF L AUTO SEARCH SEARCH PROGRAM 2 BAND UHF FINE TUNE COLOUR AUTO SOUND BG SKIP OFF 2 Press the P buttons to select PROGRAM then press the V buttons to select the prog...

Page 10: ...adjust for the best possible picture and sound results Under poor reception conditions it is sometimes possible to improve the quality of picture and sound using the fine tune 1Press the P buttons or PROGRAM NUMBER 0 9 button to choose desired channels TUNE AUTO SEARCH SEARCH BAND UHF COLOUR AUTO SOUND BG SKIP OFF PROGRAM 1 FINE TUNE VHF L FINE TUNE Searching Channels continued 1 2 2 4 ...

Page 11: ...t EXCHANGE After auto search there may be some Program numbers duplicated and some blank To re order the channels 1 Press the TV MENU until the PROG EXCHANGE menu appears 3 Press P buttons to select PROG II then press the V buttons to set desired program PROG EXCHANGE PROG I 2 PROG II 0 EXCHANGE PROG EXCHANGE PROG I 2 PROG II 0 EXCHANGE PROG EXCHANGE PROG I 2 EXCHANGE PROG II 0 Searching Channels ...

Page 12: ...ect the channel number to be recovered 2 Repeat the above procedure 2 3 3 Press the V buttons to turn the SKIP function OFF After presetting you can skip needless channels so that you could choose the desired channels TUNE AUTO SEARCH SEARCH BAND UHF FINE TUNE COLOUR AUTO SOUND BG PROGRAM 2 SKIP OFF TUNE AUTO SEARCH SEARCH BAND UHF FINE TUNE COLOUR AUTO SOUND BG PROGRAM 2 SKIP ON 1 Press the P but...

Page 13: ... the 3 digit channel number Press the P button to increase channel number Press the P button to decrease channel number For proper operation before selecting channel they should be set into the memory See pages 9 Searching Channels 2 Using P buttons Sound mute 1 Press the MUTE button on the remote control to turn off the sound 2 Press MUTE again to turn the sound back on Sleep Timer Press the SLEE...

Page 14: ...used just now is 8 and the channel number you are using is 18 as shown in the figure 2 If you want to return to the last watched program channel 8 you can simply press the TXT MODE SWAP button 3 If you want to return to channel 18 press the button again Through this function you can easily change between the channel you are using and the channel you used last time ...

Page 15: ...ion confirmed the picture will change instantly PP MILD DYNAMIC STANDARD How to customize your own picture status PP 1 Press the TV MENU until the PICTURE menu appears 2 Press the P buttons to select the item you want to adjust then press the V buttons to obtain the desired effect CONTRAST BRIGHTNESS COLOUR SHARPNESS Hue Weak Dark Shallow Soft lean to purple Strong Bright Deep Sharp lean to green ...

Page 16: ...Press P buttons to select GAME then press V buttons to enter game 3 Use MENU to rotate clockwise P button to rotate anti clockwise Use V button to move left V button to move right 4 Press TV AV button to quit the game Blue Back When there is no broadcasting signal the screen will be in blue colour when this function is on 1 Press TV MENU until SETUP menu appears 2 Press P buttons to select BLUE BA...

Page 17: ... press the V button to enter the Calendar Press TV MENU until SETUP menu appears 3 Press the P buttons to turn the YEAR MONTH DAY press the V buttons to set or adjust the YEAR MONTH DAY S M T W T F S 1 2 3 4 5 6 7 8 9 10 11 12 13 15 16 17 18 19 21 22 23 24 25 26 27 28 29 30 14 20 Y 2004 M 6 D 20 CALENDAR 1 2 3 ...

Page 18: ...IN TO RETURN TO THE TELETEXT HOLD PRESS BUTTON TO HOLD THE CURRENT PAGE PRESS THE MIX BUTTON TO SUPERIMPOSE THE TELETEXT ON TV PICTURE PRESS AGAIN TO EXIT MIX TIME SUBCODE IN TV MODE PRESS BUTTON TO DISPLAY THE TIME IN TELETEXT MODE PRESS THIS BUTTON TO ENTER SUBCODE ENLARGE PRESS THE ENLARGE BUTTON TO ENLARGE THE TELETEXT PAGE PRESS AGAIN TO RETURN TO THE NORMAL TELETEXT SIZE REVEALS PRESS THE RE...

Page 19: ... and Fast reverse 1 Press FWD to fast forward through the disc Each time the FWD button is pressed the fast forward motion speed changes 2 Press PLAY ENTER to resume normal playback 3 Press REV to fast reverse through the disc Each time the REV button is pressed the fast reverse motion speed changes 4 Press PLAY ENTER to resume normal playback Basic playback Single step playback Basic Playback Bas...

Page 20: ...s pressed the slow motion speed changes Press PLAY ENTER to resume normal playback Note This function is invalid for CD D MENU Press this key to display root menu select item according to your preference This function will work with a DVD having a multi layer menu ANGLE When enjoying sports concert or theatre press this key to watch same actions in different angles Valid for discs possessing this ...

Page 21: ...how the products pictures one by one to consumers NOTE The actual content will be different as per disc JPEG DISC PLAYBACK SCREEN SAVER FUNCTION Special Function Playback This unit employs a screen saver mode to help protect the tube during static video pictures This can be turned off on the GENERAL SETUP PAGE see Pg 28 AVi_1 AVi_ 2 AVi_ 3 AVi_ 4 AVi_ 5 AVi_ 6 00 00 00 00 001 010 MPEG 4 is the for...

Page 22: ...CD brings you the tools to enhance share and manage your pictures on your computer Playback When a Kodak Picture CD is inserted in the player an automatic slide show is launched Each picture in the Kodak Picture CD will be displayed consecutively in a slide show fashion and will be scaled to fit in the whole TV screen To display an image indefinitely press the PAUSE key To resume the slideshow pre...

Page 23: ... be specially coded Such discs are uncommon 4 3 LB LB Letter Box You may select this if you have a normal aspect ratio 4 3 TV Widescreen material will be shown in pure unaltered form allowing the entire picture area of the original film to be viewed without any side cropping Black bars will appear above and below the picture 16 9 You may select this if you have a widescreen 16 9 TV Back bars may s...

Page 24: ...CM This surround sound format is output to a Dolby Digital DTS decoder through the coaxial connector on the back panel of the product TV Display LB General Setup Page Angle Mark On OSD Lang ENG SPDIF Output Caption On Screen Saver Off HDCD Off On Off TV Display LB This item allows you to set Angle Mark ON or OFF ANGLE MARK Users can select a particular camera angle when playing a DVD which offers ...

Page 25: ... are up to 8 censorship classes for DVDs Note 1 To change this setting you must enter your password Initial password is 1234 2 When set to OFF all discs may be viewed Preference Page TV Type Auto Parental Password Default 1 Kid Saf 2 G 3 Pg 4 Pg 13 5 Pgr 6 R 7 Nc17 8 Adult TV Type Auto Parental Password Default PAL Multi NTSC Preference Page PASSWORD CHANGE You can change your password by entering...

Page 26: ... password and parental lock status for this DVD player back to the manufacturers original settings Press ENTER to perform the reset Note Some functions may not be available depending on the type of disc TV Type Auto Parental Password Default Preference Page Reset SETUP ENTER PLAY ...

Page 27: ...cannot play non standardized discs even if they may be labeled as above The performance of CD R or CD RW disc is depend on the way of disc burning In a few cases their performance may not be very well or even not playable MPEG4 Support discs DVD VCD CD R CD RW SVCD DVCD HDCD JPEG CD G MPEG 4 Kodak CD W MA ...

Page 28: ... 12cm 8cm Disc diameter 30cm 20cm 12cm 12cm Horizontal resolution More than 500 line No more than 430 line No more than 350 line No more than 250 line Multiple kinds Picture proportion One kind One kind One kind Subtitle 32 kinds 16 kinds at most 4 kinds at most 4 kinds at most 4 kinds 2 kinds 2 kinds Language 8 kinds Sound quality 48KHz 96KHz 6 20 24bit 44 1KHz 16bit 44 1KHz 16bit 44 1KHz 16bit 4...

Page 29: ...ment such as another TV or other audio amplification equipment to the scart digital coaxial sockets at the rear of the set to enjoy higher quality sound and picture Stereo To video audio input DVD VCD and other reproducing equipment To outside input DVD EXT TV EXT COAXIAL Coaxial cable To COAXIAL type digital audio input Amplifier To TV EXT To TV EXT To DVD EXT To another TV SCART terminal ...

Page 30: ...with snow Noise Colour Spot Normal volume Scramble Normal or Weak Volume No colour Normal volume No Picture No sound No sound Normal Normal Disturb Noise Double or Triple Image Note 1 If the fault can not be repaired using the above guide consult with your local authorized service center 2 The TV set must only be repaired by a qualified registered service person Never attempt to remove the back co...

Page 31: ... specifications are subject to change without notice Dimensions quoted in this manual are approximate AC 230V 50Hz 80W Picture tube Accessories M o d e l Colour system Sound system Sound output power Power requirements Power consumption Dimension DTA 2198 2X2W 10 THD 21 colour picture tube 51cm viewable Remote control X1 Owner s manual X1 Battery AA X2 504 Width x482 Depth x512 Height mm BG LL PAL...

Page 32: ......

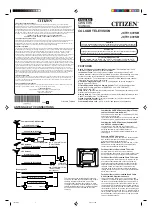
Page 33: ...21 DTA 2198 ...

Page 34: ......

Page 35: ......

Page 36: ...300 twin lead cable Antenna adapter 75 coaxial cable Plug AC power socket Aerial input 75 standard coaxial type No incluido No incluido ...

Page 37: ...DVD EXT TV EXT COAXIAL VIDEO L AUDIO R TV AV DVD MENU V V P P The DVD Player Power Indicator TV AV DVD ...

Page 38: ...UTE 1 2 3 4 5 6 7 8 9 9 0 0 TV AV TV DVD P P V V MENU DISPLAY PROG STOP SETUP PAUSE STEP F REV F FWD PREV NEXT D MENU REPEAT ENTER PLAY SLOW PLAY ANGLE TITLE PBC SEARCH SUBTITLE INDEX ZOOM AUDIO ST D I II CLEAR REPEAT A B TXT MODE SWAP ...

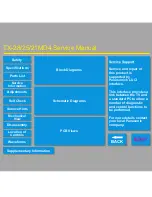
Page 39: ...V POWER P P V V MENU 1 2 3 ...

Page 40: ... P V V MENU P P V V MENU 1 2 3 6 TUNE TUNE AUTO SEARCH SEARCH BAND UHF FINE TUNE COLOUR AUTO SOUND BG SKIP OFF PROGRAM 2 AUTO SEARCH VHF L AUTO SEARCH SEARCH BAND UHF FINE TUNE COLOUR AUTO SOUND BG SKIP OFF PROGRAM 2 ...

Page 41: ... TUNE TUNE AUTO SEARCH SEARCH BAND UHF FINE TUNE COLOUR AUTO SOUND BG SKIP OFF PROGRAM 2 SEARCH VHF L AUTO SEARCH SEARCH PROGRAM 2 BAND UHF FINE TUNE COLOUR AUTO SOUND BG SKIP OFF TUNE AUTO SEARCH SEARCH BAND UHF FINE TUNE COLOUR AUTO SOUND BG SKIP OFF PROGRAM 2 ...

Page 42: ...P P V V MENU P P V V MENU P P V V MENU 1 2 2 4 1 TUNE AUTO SEARCH SEARCH BAND UHF COLOUR AUTO SOUND BG SKIP OFF PROGRAM 1 FINE TUNE VHF L FINE TUNE ...

Page 43: ...P P V V MENU P P V V MENU P P V V MENU 1 2 4 3 PROG EXCHANGE PROG I 2 PROG II 0 EXCHANGE PROG EXCHANGE PROG I 2 PROG II 0 EXCHANGE PROG EXCHANGE PROG I 2 EXCHANGE PROG II 0 ...

Page 44: ... V MENU P P V V MENU P P V V MENU 1 2 3 4 TUNE AUTO SEARCH SEARCH BAND UHF FINE TUNE COLOUR AUTO SOUND BG PROGRAM 2 SKIP OFF TUNE AUTO SEARCH SEARCH BAND UHF FINE TUNE COLOUR AUTO SOUND BG PROGRAM 2 SKIP ON ...

Page 45: ...P P V V MENU P P V V MENU MUTE SLEEP 1 2 3 4 5 6 7 8 9 0 ...

Page 46: ...TXT MODE SWAP ...

Page 47: ...P P V V MENU P P V V MENU PP 1 2 PP MILD DYNAMIC STANDARD PICTURE BRIGHTNESS 32 COLOUR 32 CONTRAST 32 SHARPNESS 32 HUE 0 ...

Page 48: ...P P V V MENU P P V V MENU P P V V MENU P P V V MENU TV AV 4 1 2 3 1 3 2 3 1 2 3 SETUP LANG ENGLISH BLUE BACK ON GAME CALENDAR SETUP LANG ENGLISH BLUE BACK ON GAME CALENDAR ...

Page 49: ...P P V V MENU 1 2 3 S M T W T F S 1 2 3 4 5 6 7 8 9 10 11 12 13 15 16 17 18 19 21 22 23 24 25 26 27 28 29 30 14 20 Y 2004 M 6 D 20 CALENDAR ...

Page 50: ...TXT MODE SWAP ...

Page 51: ......

Page 52: ......

Page 53: ......

Page 54: ......

Page 55: ...ption On Screen Saver Off 4 3 PS 4 3 LB 16 9 TV Type Auto Parental Password Default PAL Multi NTSC Preference Page General Setup Page 4 3 PS 4 3 LB 16 9 TV Display LB Angle Mark On OSD Lang ENG SPDIF Output Caption On Screen Saver Off HDCD Off SETUP ENTER PLAY SETUP ENTER PLAY ...

Page 56: ... ENGLISH SPANISH General Setup Page General Setup Page Angle Mark On OSD Lang ENG SPDIF Output Caption On Screen Saver Off HDCD Off TV Display LB Spdif Off Spdif RAW Spdif PCM General Setup Page Angle Mark On OSD Lang ENG SPDIF Output Caption On Screen Saver Off HDCD Off On Off TV Display LB General Setup Page General Setup Page Angle Mark On OSD Lang ENG SPDIF Output Caption On Screen Saver Off H...

Page 57: ...SETUP ENTER PLAY ...

Page 58: ...SETUP ENTER PLAY ...

Page 59: ...MPEG4 ...

Page 60: ......

Page 61: ......

Page 62: ......

Page 63: ...DTA 2198 21 51 80 504 x482 x512 mm PAL SECAM NTSC PLAYBACK BG LL ...

Page 64: ......

Reviews: