background image

Dishwasher

HDW101SST

HDW101WHT

Instructions for Use

0120505589

Summary of Contents for HDW101SST

Page 1: ...Dishwasher HDW101SST HDW101WHT Instructions for Use 0120505589 ...

Page 2: ...nse aid and the detergent dispenser Not suitable for the dishwasher Arranging crockery glasses etc in the dishwasher Programme overview Washing dishes How to keep your dishwasher in shape Care and maintenance Fault finding Technical data Important information 2 4 6 7 8 9 11 12 14 15 16 19 19 ...

Page 3: ...the washing of household dishes and cooking utensils This appliance cannot be installed outdoor not even if the area in which it is installed is covered by a roof it is also very dangerous to leave it exposed to the rain and elements Do not place any heavy objects or stand on the door when it is open The appliance could tip forward The water inside the dishwasher is not suitable for drinking Do no...

Page 4: ... the door lock so that the door can no longer be closed If a fault occurs If the appliance malfunctions turn off water supply to the appliance and disconnect the plug from the wall socket Then consult the section entitled Finding fault If you cannot solve the problem contact a service center To maintain the EFFICIENCY and SAFETY of this appliance we recommend call only the Service Centers authoriz...

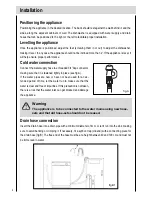
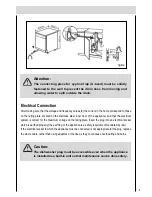
Page 5: ...r mains using new hose sets and that old hose sets should not be reused Cold water connection Connect the water supply hose to a threaded 3 4 bsp connector making sure that it is fastened tightly in place see fig A If the water pipes are new or have not been used for an ex tended period of time let the water run to make sure that the water is clear and free of impurities If this precaution is not ...

Page 6: ...nce and that the electrical system is correct for the maximum voltage on the rating plate insert the plug into an electrical socket which is earthed properly the earthing of the appliance is a safety requirement mandated by law If the electrical socket to which the appliance must be connected is not appropriate for the plug replace the whole cable rather than using adaptors or the like as they cou...

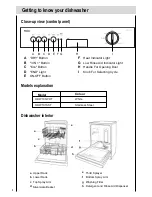
Page 7: ...cting Cycle A B C D E DRY Button 3 IN 1 Button Eco Button END Light ON OFF Button B D A C F G H I E Models explanation Model Colour HDW101WHT HDW101SST White Stainless Steel Dishwasher interior a e d f g h b c Upper Rack Detergent and Rinse Aid Dispenser a b c d e f g h Top Spray Arm Silverware Basket Third Sprayer Bottom Spray Arm Washing Filter Lower Rack ...

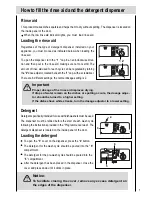
Page 8: ...of water remain on the dishes or spotting occurs the dosage adjus tor should be turned to a higher setting If the dishes have white streaks turn the dosage adjustor to a lower setting How to fill the rinse aid and the detergent dispenser 2 1 Detergent Detergent specifically intended for use with dishwashers must be used The dispenser must be refilled before the start of each wash cycle following t...

Page 9: ...been washed many times in a dishwasher Highly absorbent materials such as sponges and towels should never be placed in the dishwasher Our recommendation In future only purchase table or kitchenware that has been confirmed as being dishwasher proof Important Dishes or cutlery that have been soiled by tobacco ash wax Iubricating grease or paint should not be put in the dishwasher Possible causes typ...

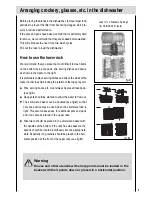
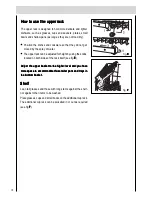
Page 10: ...ng dishes and lids on the sides of the racks in order to avoid blocking the rotation of the top spray arm Pots serving bowls etc must always be placed face down see fig C Deep pots should be slanted to allow the water to flow out Silverware should be placed in the silverware basket with the handles at the bottom if the rack has side baskets the spoons should be located individually into the approp...

Page 11: ...l and you have Adjust the upper basket to the higher level and you have Adjust the upper basket to the higher level and you have Adjust the upper basket to the higher level and you have Adjust the upper basket to the higher level and you have more space to accommodate those taller pans and trays in more space to accommodate those taller pans and trays in more space to accommodate those taller pans...

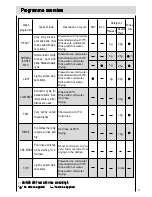
Page 12: ...inse with cold water Drying Very dirty dishes pots and pans Not to be used with deli cate items Normal load of dirty dishes pots and pans Standard daily cycle Lightly soiled deli cate items Economic cycle for delicate items Run immediately after dishes are used Very lightly solied mixed dishes For dishes that only require a rinse and dry Pre rinse of dishes while waiting for a full load Types of l...

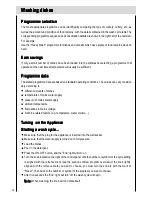
Page 13: ...der ably according to different amounts of dishes temperature of mains water supply pressure of mains water supply ambient temperature fluctuations in mains voltage machine related factors e g temperature water volume Turning on the Appliance Turning on the Appliance Turning on the Appliance Turning on the Appliance Turning on the Appliance Starting a wash cycle Starting a wash cycle Starting a wa...

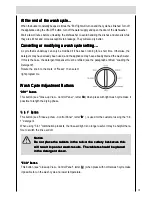
Page 14: ...the dishwasher Wait a few minutes before unloading the dishwasher to avoid handling the dishes and utensils while they are still hot and more susceptible to breakage They will also dry better Cancelling or modifying a wash cycle setting Cancelling or modifying a wash cycle setting Cancelling or modifying a wash cycle setting Cancelling or modifying a wash cycle setting Cancelling or modifying a wa...

Page 15: ...ecifically for dishwashers Moving the Appliance Moving the Appliance Moving the Appliance Moving the Appliance Moving the Appliance If the appliance must be moved try to keep it in a vertical position If absolutely necessary it can be positioned on its back Seals Seals Seals Seals Seals One of the factors that cause odors to form in the dishwasher is food that remains trapped in the seals Periodic...

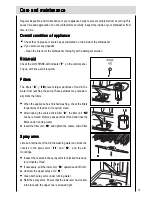
Page 16: ...s finished washing check the filters for particles of food and if required clean After undoing the coarse micro filter 9 9 9 9 9 the filter unit 10 10 10 10 10 can be removed Remove any particles of food and rinse the filters under running water Insert the filter unit 10 10 10 10 10 and tighten the coarse micro filter 15 Rinse aid Rinse aid Rinse aid Rinse aid Rinse aid Check the LOW RINSE AID ind...

Page 17: ...e appliance itself with the appliance itself When the buzzer go and for beeps as this turn on 2 seconds and then turn off 2 seconds When the buzzer go and for beeps as this turn on 2 seconds and then turn off 2 seconds When the buzzer go and for beeps as this turn on 2 seconds and then turn off 2 seconds When the buzzer go and for beeps as this turn on 2 seconds and then turn off 2 seconds When th...

Page 18: ...etergent compartment cannot be closed Detergent compartment has been overfilled Mechanism is clogged with remnants of detergent Indicator lamps do not extinguish after washing has finished Indicator lamps do not extinguish after washing has finished Indicator lamps do not extinguish after washing has finished Indicator lamps do not extinguish after washing has finished Indicator lamps do not extin...

Page 19: ...ses are not dishwasher proof Glasses become clouded and discoloured coating cannot be wiped off Glasses become clouded and discoloured coating cannot be wiped off Glasses become clouded and discoloured coating cannot be wiped off Glasses become clouded and discoloured coating cannot be wiped off Glasses become clouded and discoloured coating cannot be wiped off Cutlery is not sufficiently rustproo...

Page 20: ...sposal Notes on waste disposal Old appliances still have some residual value An environment friendly method of disposal will ensure that valuable raw materials can be recovered and used again When an appliance has reached the end of its working life unplug it from the mains Cut through the mains cable and dispose of it together with the plug Destroy the door locking mechanism This will ensure that...

Page 21: ...inserted in the uppermost position If the comparability tests do not comply fully with AS NZS 2007 e g degree of soiling type of dishes and cutlery etc contact the appliance manufacturer before starting the test Diagram Diagram Diagram Diagram Diagram A Wring box B Power switch C Power indicator D Door switch E Water lever switch F Drain pump G Dispenser H Overflow switch I Inlet valve J Washing p...

Reviews: