background image

DISHWAHSER

DW0904S006V0

2009

IDW12P-E
IDW12P-U


Summary of Contents for proline IDW12P-E

Page 1: ...DISHWAHSER DW0904S006V0 2009 IDW12P E IDW12P U ...

Page 2: ...7 4 4 ANTI FLOODING PROTECTION 7 4 5 DRAIN HOSE CONNECTION 8 4 6 ELECTRICAL CONNECTION 8 4 7 DISSEMBLE AND ASSEMBLE 9 4 8 FITTING INSTRUCTIONS FOR THE INTEGRATED DISHWASHER 14 5 PARTS AND FUNCTIONS 18 5 1 CLOSE UP VIEW CONTROL PANEL 18 5 2 DISHWASHER INTERIOR 18 6 HOW TO FILL THE SALT 19 6 1 SALT 19 6 2 LOADING THE SALT INTO THE CONTAINER 19 6 3 ADJUSTING SALT CONSUMPTION 19 7 HOW TO FILL THE RINS...

Page 3: ...WASHER IN SHAPE 27 12 CLEAN AND MENTENANCE 28 12 1 OVERALL CONDITION OF APPLIANCE 28 12 2 FILTERS 28 12 3 SPRAY ARMS 28 13 FAULT FINDING 29 13 1 RESOLVING MINOR PROBLEMS YOURSELF 29 13 2 PROBLEMS 29 13 3 DURING WASHING 31 13 4 WITH THE DISHES CUTLERY ETC 31 14 MAINTENANCE SERVICES AND TROUBLE SHOOTING 33 15 TECHNICAL DATA 39 ...

Page 4: ...DW12P U Issue Rev 1 Features A grade for energy consumption of European standard EN50242 B grade for washing efficiency of European standard EN50242 B grade for drying efficiency of European standard EN50242 Super capacity for 12 settings ...

Page 5: ...nt and human health which could otherwise be caused by inappropriate waste handling of this product For more detailed information about recycling of this product please contact your local city office your household waste disposal service or the shop where you purchased the product Warning A warning is used when there is danger of personal injury Caution A caution is used when there is danger that ...

Page 6: ... The plastic housing on the water inlet contains an electrically operated valve The connecting wires are inside the inlet hose Do not cut through this hose and do not immerse the plastic housing in water 3 3 During normal use The dishwasher must only be used by adults for the washing of household dishes and cooking utensils This appliance cannot be installed outdoors not even if the area in which ...

Page 7: ...l socket Then consult the section entitled Fault finding If you cannot solve the problem contact a service center Only specialised personnel are authorised to make repairs If the supply cord is damaged it must be replaced by the manufacture its service agent of similarly qualified persons in order to avoid a hazard To maintain the EFFICIENCY and SAFETY of this appliance we recommend call only the ...

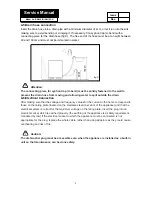
Page 8: ...that the water is clear and free of impurities If this precaution is not taken there is a risk that the water inlet can get blocked and damage the appliance NOTE The minimum water pressure is 0 03 Megapascals The maximum water pressure is0 6 Megapascals Warning The appliance is to be connected to the water mains using new hose sets and that old hose sets should not be reused 4 4 Anti Flooding prot...

Page 9: ...rain 4 6 Electrical Connection After making sure that the voltage and frequency values for the current in the home correspond to those on the rating plate located on the stainless steel inner door of the appliance and that the electrical system is correct for the maximum voltage on the rating plate insert the plug into an electrical socket which is earthed properly the earthing of the appliance is...

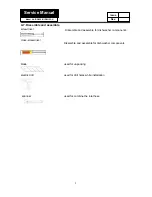
Page 10: ...mble and assemble screwdriver cross screwdriver Dissemble and assemble for dishwasher components Dissemble and assemble for dishwasher components blade used for unpacking electric drill used for drill holes while installation spanner used for combine the inlet hose ...

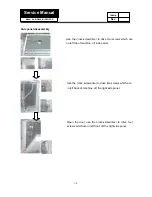
Page 11: ...crewdriver to drive two screws which are on left top of machine off side panel Use the cross screwdriver to drive five screws which are in left back of machine off the right side panel Open the door use the cross screwdriver to drive four screws which are in left front off the right side panel ...

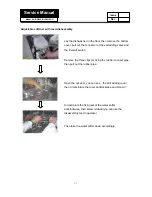
Page 12: ...ing valve and the low salt switch Remove the three clips for fixing the rubber connect pipe then pull out the rubber pipe Open the out door you can see the salt adding cover then circumrotate the cover anticlockwise and screw it Circumrotate the fixing set of the water softer anticlockwise then screw id down you can use the disassembly tool to operate Then take the water softer down accordingly ...

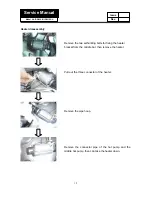
Page 13: ...bly Remove the two self drilling bolts for fixing the heater bracket from the middle bar then remove the heater Pull out the three connector of the heater Remove the pipe hoop Remove the connector pipe of the hot pump and the middle hot pump then can take the heater down ...

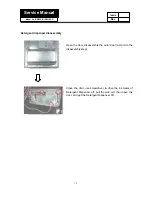
Page 14: ...Detergent dispenser disassembly Open the door disassemble the outer door Accord to the disassembly step Close the door use screwdriver to drive the 6 screws of Detergent Dispenser off pull the wire out then open the door and get the Detergent Dispenser off ...

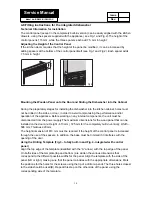
Page 15: ...rking on any internal components the unit must be disconnected from the power supply The maximum dimensions for the wood panel that can be installed on the door are Height 610 mm 725 mm for the completely built in version Width 598 mm Thickness 20 mm The height dimension of 610 mm must be reduced if the height of the control panel is increased through the use of the spacers In addition the base mu...

Page 16: ... top Mounting the Wood Door Panel onto the Dishwasher Place the wood panel onto the door of the dishwasher Then perform the installation steps described below based on whether the panel is for a totally built in model or integrated with the control panel Panel Integrated with the Control Panel Insert the metal fins into the slots located on the dishwasher door hooking the panel into place by slidi...

Page 17: ...he screws provided Fig 9 Remember to cover the two holes with the plastic plugs removed earlier Adjusting the Door Springs Fig 10B The door must be perfectly balanced In the factory the tension of the springs is regulated to ensure that the door is perfectly balanced when light wood door panels are mounted on the door If heavier solid wood door panels are used the door can be balanced by simply tu...

Page 18: ...e dishwasher into the cutout opening and turn the feet to make it level and to adjust for height so that the crosspiece A for fastening it in place located on the top part of the machine Fig 14 comes into contact with the counter Align the door panel mounted on the dishwasher with the doors on the adjacent cabinet 2 Important The dishwasher must absolutely be fastened to the counter top to prevent...

Page 19: ...w control panel A Programme Indicator B Programme Button C ON OFF Indicator D ON OFF Button 5 2 Dishwasher interior a Upper Rack b Lower Rack c Top Spray Arm d Silverware Basket e Bottom Spray Arm f Salt Container Cap g Washing Filter h Detergent and Rinse Aid Dispenser A B C D a d e f g h b c ...

Page 20: ...r to come out of the salt container Carefully screw the cap back on Important To prevent the formation of rust load the salt just before beginning a wash cycle 6 3 Adjusting salt consumption The dishwasher is designed to allow for adjusting the amount of salt consumed based on the hardness of the water used This is intended to optimize and customize the level of salt consumption so that it remains...

Page 21: ...the rinse aid improves drying If drops of water remain on the dishes or spotting occurs the dosage adjuster should be turned to a higher setting If the dishes have white streaks turn the dosage adjuster to a lower setting 7 3 Detergent Detergent specifically intended for use with dishwashers must be used The dispenser must be refilled before the start of each wash cycle following the instructions ...

Page 22: ...21 Service Manual Model No IDW12P E IDW12P U Issue Rev Notice The usage of 3 in 1 or similar tablets is forbidden when Rapid Wash and Soak programmes are selected ...

Page 23: ...ce down see fig C Deep pots should be slanted to allow the water to flow out The silverware basket can be doubled see fig D so that only one section may be used when the silverware load is light This also makes space for additional pots and pans and it can also be placed in the upper rack Warning knives and other utensils with sharp points must be loaded in the basket with their points down or pla...

Page 24: ...Rev 8 3 Shelf Lean tall glasses and those with long stems against the shelfnot against other items to be washed Place glasses cups and small bowls on the additional cup rack The additional cup rack can be swivelled in or out as required see fig G fig G ...

Page 25: ...h at 40 C Cold rinse Short cold wash to pre vent food residue from drying on the dishes Pre wash use cold water Extended wash at 50 C Rinse with cold water Rinse with hot water Drying Soups casseroles sauces potatoes pasts rice eggs roast or fried food a lot a little stuck on hard Soups potatoes pasta rice eggs roast or fried food loosely attached Coffee cakes milk sausage cold drinks salads Very ...

Page 26: ...ev Delayed Start Detergent Extended Wash Prewash Rinse Aid Duration in minutes Energy consump tion in kWh Water consump tion in litres 5g 5g 5g 25g 25g 25g 112 102 162 32 12 1 62 1 24 1 05 0 40 0 02 18 16 15 9 3 15g EN50242 test with rinse aid setting 5 ...

Page 27: ...ld rinse 6 5 hot rinse Natural drying 2 2 2 Normal Normal Normal wash wash wash Cold pr e w ash 5 5 ma in w ash Cold rinse 6 5 hot rinse Natural drying 3 3 3 Light Light Light wash wash wash 50 M a in w ash Cold rinse Cold pr e w ash 6 5 hot rinse Natural drying 4 4 4 Rapid Rapid Rapid wa wa wash sh sh 4 0 C M a in w ash Cold rinse 5 5 5 Soak Soak Soak Cold rinse ...

Page 28: ...ith water and a little while vinegar or cleaning product made specifically for dishwashers 11 4 Moving the Appliance If the appliance must be moved try to keep it in a vertical position If absolutely necessary it can be positioned on its back 11 5 Seals One of the factors that cause odors to form in the dishwasher is food that remains trapped in the seals Periodic cleaning with a damp sponge will ...

Page 29: ...e particles may occasionally block the filters When the appliance has finished washing check the filters for particles of food and if required clean After undoing the coarse micro filter 7 the filter unit 8 can be removed Remove any particles of food and rinse the filters under running water Insert the filter unit 8 and tighten the coarse micro filter 12 3 Spray arms Lime and remnants of food in t...

Page 30: ...rogramme button has not been pressed Water tap not turned on Blocked strainer in water intake hose The strainer is situated in the Aquastop or supply hose connection Caution Do not forget that repairs should only be carried out by a qualified specialist Improper repairs can lead to considerable equipment damage as well as danger to the user with the appliance itself When the buzzer emits 10 short ...

Page 31: ...the dishwasher still does not function and or the problem persists contact the nearest authorised service center and provide them with the following information the nature of the problem the model type number Mod And the serial number S N which are indicated on the plate located on the side of the inner part of the door Lower spray arm rotates with difficulty Spray arm is blocked by small items or...

Page 32: ...been laid and it has no effect upon the way the appliance functions There is no remedy for this 13 4 With the dishes cutlery etc Remnants of food are stuck to the dishes cutlery etc Dishwasher was not loaded properly Jets of water could not reach all parts of the dishes etc Too many items in the rack Items in the rack were touching each other Not enough detergent was added to dispenser Selected wa...

Page 33: ...sses have a dull appearance Amount of rinse aid was set too low Tea stains or traces of lipstick have not been completely removed Detergent does not have a sufficient bleaching effect Washing temperature was set too low Traces of rust on cutlery Cutlery is not sufficiently rustproof Salt content in washing water is too high Lid on salt container is not screwed tight Too much salt was spilt while f...

Page 34: ...eakdowns Door switch trouble Phenomenon the dishwasher does not work Whether the door is closed Close the door Check if door flap is OK Dismantle the door case and use avometer to measure if the two terminals of the door switch is connected Replace it Change the door switch Cable or the controller board is broken Y Y Y N N N ...

Page 35: ...hose Whether the stopcock is turned on Turn on the stopcock Whether solenoid valve is working Check whether the water intake velocity is too slow Measure whether solenoid valve is electrified User s water pressure is too low Whether water level switch is ok Y Y Y N Y Cable or the controller board is broken N Change the solenoid valve Change water level switch N N Y ...

Page 36: ...menon water cannot be drained Whether drain pump is working Repair the pipeline and drain pump Whether the pipeline and drain pump was blocked Whether drain pump is electrified The drain hose is too high Cable or the controller board is broken The drain pump is broken N N Y Y N Y ...

Page 37: ...t cannot work Whether socket connector is connected well Check the resistance between the heater resistor Check whether the circuit between the two terminals is open The cable or the controller board is suspected damaged Y Y N Connect it well Replace the heater Connect the two terminals well N N Y ...

Page 38: ...the bottom case Whether the water overflow swich is ok The controller board or the cable is broken N Y Whether water flows out of the water overflow conduit Check whether the water level switch is closed The cable or the controller board is broken Y N Change the water overflow switch Bottom case is leaking Change the water level switch N N Y Y Y ...

Page 39: ...upply trouble Phenomenon dishwasher cannot work Check whether the power connector is in position Check whether the circuit between the two terminals is open Replace the power switch Connect it properly The cable or the controller board should be suspected N N Y Y ...

Page 40: ...2E U IDW12P U Issue Rev 15 Technical data Width 59 6 cm Depth 55 cm Height 82cm Capacity 12 standard place settings Mains water pressure 0 03 0 6MPa Power voltage 220 240V 50Hz Total absorbed power 1950W Maximum current intensity 10A ...

Page 41: ...40 Service Manual Model No IDW12E U IDW12P U Issue Rev Sincere Forever Haier Group Haier Industrial Park No 1 Haier Road 266101 Qingdao China http www haier com ...

Reviews: