HQ AMARA
QM29252
HQ FORTE
QM29253
www.HandiQuilter.com • 1-877-MY-QUILT (697-8458)
TO INSTALL THE QUILT FROM THE BACK KIT
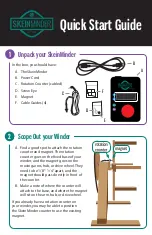
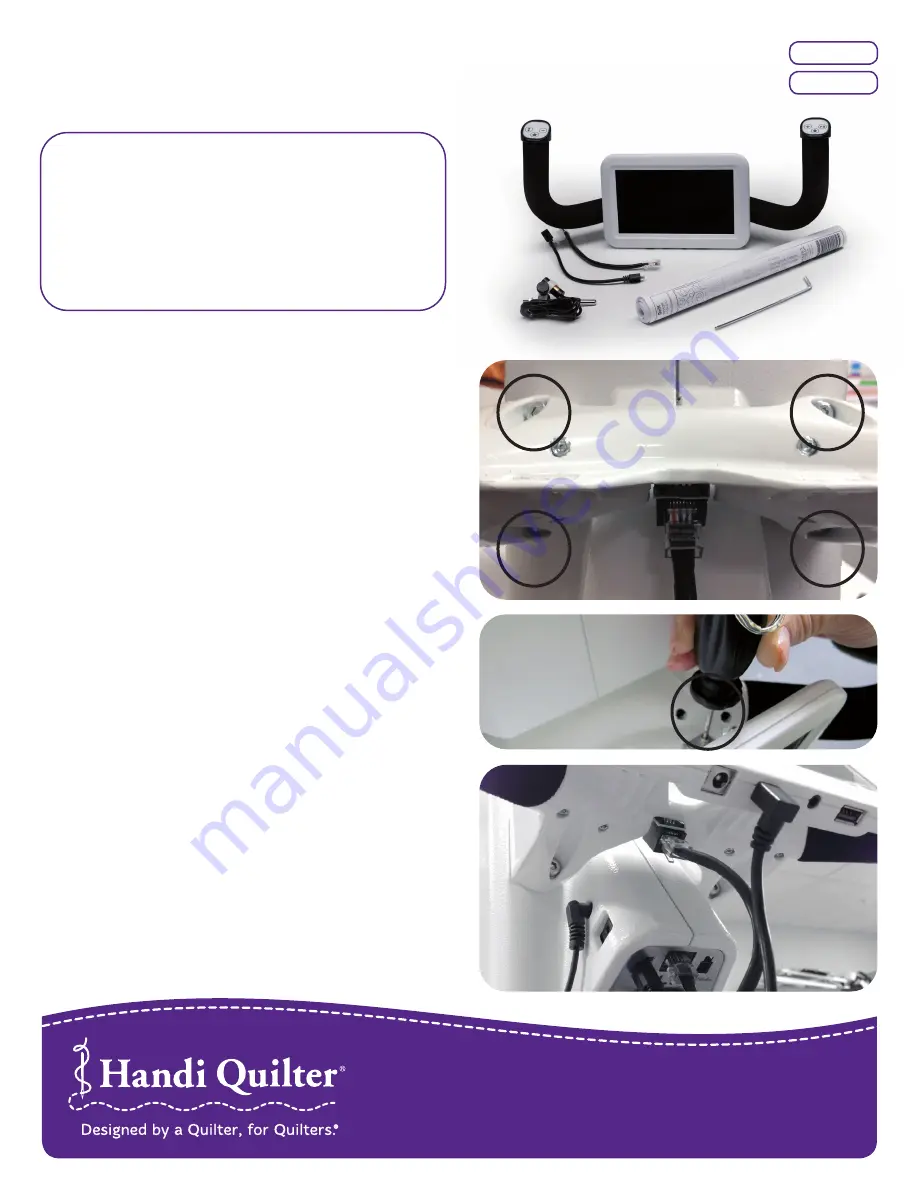
KIT CONTENTS
1. Rear Hand 7-inch Color Display (QM29251)
TOOL REQUIRED
1. Phillips-head Screwdriver
2. Laser Light Assembly (QM10290)
3. Golden Threads “Drift” Pantograph (QM30263)
4. 4mm Hex Wrench (QM40407)
Quilt From the Back Kit
™
Installation Instructions for HQ Amara
™
and HQ Forte
™
longarm machines.
Locate the four 4mm hex screws for the rear handlebars
and the 4mm hex wrench.
1)
Align the four holes in the handlebars with the holes on
the back of the machine.
2)
Slide the bolts into holes until they stop. Use the 4mm
hex wrench to firmly tighten the bolts and securely
fasten the handles to the back of the machine.
3)
Connect one end of the RJ45, or network style, phone
cord into the handlebars and the other ends into the
machine’s back panel.
4)
TO INSTALL THE REAR DISPLAY
Locate four Phillips-head screws (screws may be pre-
installed in hinges) and a Phillips-head screwdriver.
You’ll also need a display with the hinges attached to
the bottom row of connectors on the back of the
display, plus the USB mini B cable with 90° connector on
one end.
NOTE:
If you do not have Phillips-head screws,
then you will have 2.5mm hex screws for the rear handle
bar hinges.
1)
Insert the screws into the openings on the display’s
metal hinge. Align the screws in the hinge with the holes
on the display bracket. Use the 2.5mm hex wrench or
Phillips-head screwdriver as required to fully tighten the
screws.
2)
Plug the USB mini B cable with 90° end into the rear
display and the straight end into the rear panel of the
machine.
NOTE:
This cable powers the display. The
round power input to the display is not used.
3)
©2018 Handi Quilter, Inc.