background image

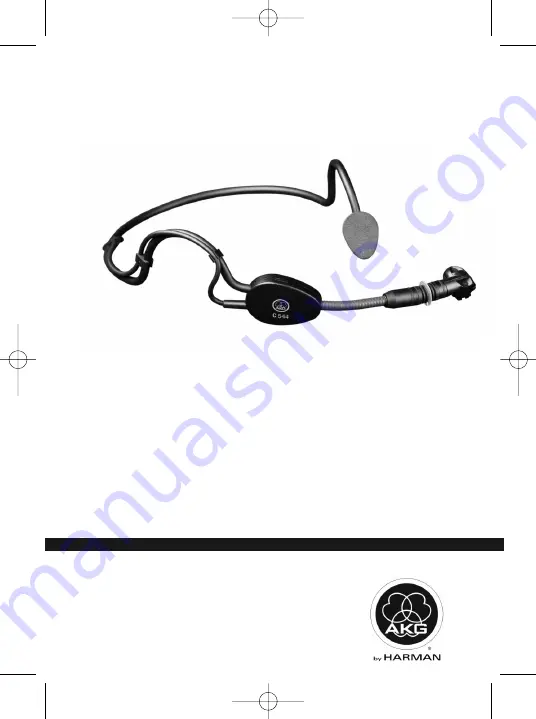
C

544

B E D I E N U N G S A N L E I T U N G

. . . . . . . . . .

S. 2

Bitte vor Inbetriebnahme des Gerätes lesen!

U S E R I N S T R U C T I O N S

. . . . . . . . . . . . . . .

p. 1 2

Please read the manual before using the equipment!

M O D E D ’ E M P L O I

. . . . . . . . . . . . . . . . . . . . .

p. 2 2

Veuillez lire cette notice avant d’utiliser le système!

I S T R U Z I O N I P E R L’ U S O

. . . . . . . . . . . . .

p. 3 2

Prima di utilizzare l’apparecchio, leggere il manuale!

M O D O D E E M P L E O

. . . . . . . . . . . . . . . . . . .

p. 4 2

¡Sirvase leer el manual antes de utilizar el equipo!

I N S T R U Ç Õ E S D E U S O

. . . . . . . . . . . . . . .

p. 5 2

Favor leia este manual antes de usar o equipamento!

C 544_F031107_E1

31.03.2011  11:53 Uhr  Seite 1

Summary of Contents for AKG C544

Page 1: ...MODE D EMPLOI p 22 Veuillez lire cette notice avant d utiliser le syst me ISTRUZIONI PER L USO p 32 Prima di utilizzare l apparecchio leggere il manuale MODO DE EMPLEO p 42 Sirvase leer el manual ant...

Page 2: ...h r 4 Mikrofon 4 Abtropfring 4 3 Anschluss 5 Einleitung 5 Mikrofon anschlie en 5 4 Anwendung 6 Mikrofon aufsetzen 6 Windschutz 7 Abtropfring austauschen 7 5 Reinigung 8 Mikrofongeh use 8 Windschutz 8...

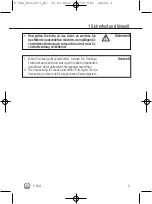
Page 3: ...entspricht und mit einer Si cherheitserdung versehen ist 1 Wenn Sie das Ger t verschrotten trennen Sie Geh use Elektronik und Kabel und entsorgen Sie alle Komponenten gem den daf r geltenden Entsorgun...

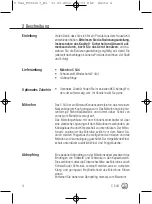
Page 4: ...Mikrofon hat eine nie renf rmige Richtcharakteristik und nimmt daher Schall von vorne vom Mund bevorzugt auf Das Mikrofongeh use mit dem Kondensatorwandler ist ber eine elastische Lagerung mit dem Mik...

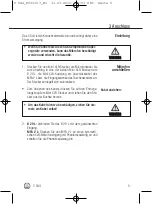
Page 5: ...am Anschlusskabel des MPA V L bzw die Eingangsbuchse des Taschensenders an Der Stecker verriegelt sich automatisch Zum Abziehen des Kabels dr cken Sie auf den Entriege lungsknopf am Mini XLR Stecker...

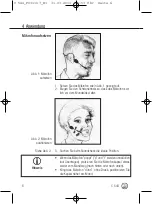
Page 6: ...dass das Mikrofon seit lich vor dem Mundwinkel sitzt 3 Suchen Sie beim Soundcheck die ideale Position Wenn das Mikrofon poppt p und t werden unnat rlich laut bertragen platzieren Sie die Mikrofonkapse...

Page 7: ...gen Sie den mitgelieferten Schaumstoff Wind schutz am Mikrofon 1 Stecken Sie den Windschutz auf die Mikrofonkapsel auf 2 Ziehen Sie den Windschutz auch ber das u ere Ende der Mikrofonkapsel Sollte der...

Page 8: ...das Geh use des Mikrofons mit einem mit Wasser befeuchteten Tuch Den Schaumstoff Windschutz reinigen Sie am besten mit einer milden Waschmittell sung Der Windschutz ist sofort nach dem Trocknen wieder...

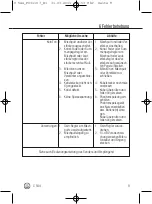
Page 9: ...Mischpult oder Laut st rkeregler des Ver st rkers auf gew nsch ten Pegel einstellen 3 Mikrofon an Mischpult oder Verst rker an schlie en 4 Kabelstecker nochmals anstecken 5 Kabel berpr fen und falls n...

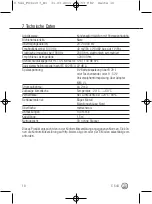
Page 10: ...riespeisung ber B 29 L oder Taschensender oder 9 52 V Universalphantomspeisung ber Adapter MPA V L Stromaufnahme ca 2 mA Zul ssige klimatische Temperatur 20 C 60 C Verh ltnisse Rel Luftfeuchte bei 20...

Page 11: ...Frequenzkurve Polardiagramm 7 Technische Daten C 544 11 C 544_F031107_E1 31 03 2011 11 53 Uhr Seite 11...

Page 12: ...Moisture Shield 14 3 Interfacing 15 Introduction 15 Connecting the Microphone 15 4 Operating Notes 16 Putting the Microphone On 16 Using the Windscreen 17 Replacing the Moisture Shield 17 5 Cleaning 1...

Page 13: ...ad 1 When scrapping the equipment separate the case circuit boards and cables and dispose of all components in ac cordance with local waste disposal rules 2 The packaging of the equipment is recyclabl...

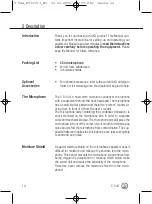
Page 14: ...pattern and therefore prefers sounds ar riving from in front of it from the user s mouth The microphone body containing the condenser transducer is shock mounted on the microphone arm in order to sup...

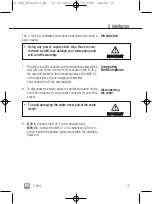
Page 15: ...e mini XLR socket on the connecting cable of the MPA V L or the input jack on your bodypack transmitter The connector will lock automatically To disconnect the cable press the unlocking button on the...

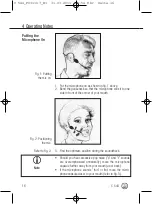
Page 16: ...ill sit to one side in front of the corner of your mouth 3 Find the optimum position during the soundcheck Should you hear excessive pop noise p and t sounds are overemphasized unnaturally move the mi...

Page 17: ...wind or pop noise be comes audible attach the supplied windscreen to the micro phone 1 Slide the windscreen onto the microphone capsule 2 Pull the windscreen over the outer edge of the microphone cap...

Page 18: ...ody Windscreen To clean the microphone surface use a soft cloth moistened with water Clean the foam windscreen in mild soap suds You can use the windscreen again as soon as it has dried C 544_F031107_...

Page 19: ...xer or vol ume control on ampli fier to desired level 3 Connect microphone to mixer or amplifier 4 Check cable connectors for secure seat 5 Check cable and replace if damaged 6 Switch phantom power on...

Page 20: ...pack transmitter or 9 to 52 V universal phantom power through MPA V L adapter Current consumption Approx 2 mA Environment Temperature 20 C to 60 C R H at 20 C 99 Case materials Headband metal Micropho...

Page 21: ...7 Specifications C 544 21 Frequency Response Polar Diagram C 544_F031107_E1 31 03 2011 11 54 Uhr Seite 21...

Page 22: ...rohpone 24 Bague collectrice 24 3 Raccordement 25 Introduction 25 Raccordement du micro 25 4 Utilisation 26 Mettre le microphone 26 Bonnette antivent 27 Remplacement de la bague collectrice 27 5 Netto...

Page 23: ...curit en vigueur et poss de une prise de terre de s curit 1 Si vous mettez le micro la ferraille d montez bo tier lec tronique et c bles et liminez chacun de ces l ments conform ment aux prescriptions...

Page 24: ...Le C 544 est un microphone lectrostatique miniature fix un arceau se portant sur la nuque Il s agit d un micro cardio de captant principalement les sons sur l avant sons sortant de la bouche Le bo tie...

Page 25: ...t XLR mi niature du c ble de raccordement du MPA V L ou dans l embase d entr e de l metteur de poche Le connecteur se verrouille automatiquement Pour d tacher le c ble appuyez sur le bouton de d ver r...

Page 26: ...e pour que le micro soit plac devant la commissure des l vres 3 Cherchez la position id ale pendant le soundcheck Si on entend trop les bruits de souffle de vent ou les pops loignez le c t sensible du...

Page 27: ...u vent en plein air au souffle ou aux pops fixez la bonnette antivent fournie sur le micro 1 Placez la bonnette sur la capsule du micro 2 Tirez la bonnette jusqu l extr mit de la capsule Si la bague c...

Page 28: ...bo tier du micro se nettoie avec un chiffon l g rement humide eau claire La bonnette antivent se lave l eau savonneuse en utilisant un produit doux La bonnette peut tre r utilis e d s qu elle est s c...

Page 29: ...e de mixage ou le r glage de niveau sonore de l am pli sur la valeur voulue 3 Connecter le micro la console de mixage ou l ampli 4 Enfoncer la fiche cor rectement 5 Contr ler le c ble et le remplacer...

Page 30: ...tion pile B 29 L ou metteur de poche ou 9 52 V alimentation fan t me universelle via l adaptateur MPA V L Consommation env 2 mA Conditions climatiques temp rature 20 C 60 C hygrom trie 99 20 C Mat ria...

Page 31: ...7 Caract ristiques techniques C 544 31 R ponse en fr quence Diagramme polaire C 544_F031107_E1 31 03 2011 11 54 Uhr Seite 31...

Page 32: ...4 Disco antiumidit 34 3 Collegamento 35 Introduzione 35 Come collegare il microfono 35 4 Impiego 36 Come indossare il microfono 36 Antisoffio 37 Come sostituire il disco antiumidit 37 5 Pulizia 38 Sca...

Page 33: ...di sicurezza vigenti e se dotato di una messa a terra di sicurezza 1 Se rottamate l apparecchio separate scatola parti elet troniche e cavi e smaltite tutti i componenti secondo le norme di smaltiment...

Page 34: ...fonica con il trasduttore a condensatore col legato al braccio microfonico per mezzo di una sospensione ela stica per sopprimere i rumori causati dal cavo e dalle vibrazioni meccaniche Il braccio micr...

Page 35: ...ento mini XLR disposto sul cavo di collegamento del MPA V L servendovi del cavo di collegamento in dotazione Per sfilare il cavo premete il bottone di sblocco sul connet tore mini XLR e sfilate il con...

Page 36: ...oundcheck Se si avvertono forti rumori pop p e t esaggerati girate la capsula microfonica a una distanza un poco pi grande dalla bocca verso dietro o basso Se il microfono ha un suono sottile senza fo...

Page 37: ...i pop fissate l antisoffio in espanso in dotazione sul microfono 1 Infilate il filtro antisoffio sulla capsula microfonica 2 Infilate l antisoffio anche sul lato esterno della capsula mi crofonica Se...

Page 38: ...Pulite la scatola del microfono con un panno inumidito con acqua L antisoffio in espanso viene pulito preferibilmente con una blanda soluzione detersiva appena asciugato l antisoffio subito pronto all...

Page 39: ...rincipale del mixer o il regolatore del volume dell amplifi catore 3 Collegare il microfono al mixer o all amplifica tore 4 Inserire di nuovo il con nettore del cavo 5 Controllare il cavo e sostituirl...

Page 40: ...imentazione alimentazione a batteria 9 V attraverso dal B 29 L trasmettitore da tasca oppure alimentazione phantom universale 9 52 V con MPA V L Assorbimento 2 mA circa Condizioni climatici temperatur...

Page 41: ...7 Dati tecnici C 544 41 Risposta in frequenza Diagramma polare C 544_F031107_E1 31 03 2011 11 54 Uhr Seite 41...

Page 42: ...l micr fono 44 Anillo escurridor 44 3 Conexi n 45 Introducci n 45 Conectar el micr fono 45 4 Utilizaci n 46 Colocar el micr fono 46 Pantalla antiviento 47 Cambiar el anillo escurridor 47 5 Limpieza 48...

Page 43: ...i n a tierra 1 Para deshacerse del aparato s quele las pilas comunes o recargables y des rmelo separando caja electr nica y cables y elimine cada uno de los componentes cum pliendo con las correspondi...

Page 44: ...tiene caracter stica direccional cardioide y el sonido lo capta prefe rentemente desde adelante de la boca La caja del micr fono con el transductor de condensador est unida al brazo del micr fono por...

Page 45: ...lamiento mini XLR en el cable de conexi n del MPA V L o en la entrada del emisor de bolsillo El conector queda enclavado autom ticamente Para desconectar el cable presione el desbloqueador del conecto...

Page 46: ...l forma que el micr fono quede ubicado al lado de la comisura de los labios 3 Busque la mejor posici n durante el soundcheck Si se escuchan ruidos fuertes pop de viento o de respira ci n ubique el mic...

Page 47: ...psula del micr fono 2 Recubra tambi n el extremo libre de la c psula del micr fono con la pantalla antiviento Si el anillo escurridor se da a lo puede cambiar por uno de los anillos escurridores sumin...

Page 48: ...to Limpie la caja del micr fono con un pa o humedecido con agua La pantalla antiviento de goma espuma puede limpiarse f cilmente con un detergente suave y reutilizarse inmediata mente despu s de haber...

Page 49: ...dor master del pupitre de mezcla o el regula dor de volumen del amplificador 3 Conectar el micr fono al pupitre de mezcla o al amplificador 4 Enchufar nuevamente los conectores del cable 5 Controlar...

Page 50: ...bater a 9 V con el B 29 L o el emisor de bolsillo o alimentaci n antasma universal 9 52 V con el adaptador MPA V L Toma de corriente aprox 2 mA Condiciones clim ticas Temperatura 20 C a 60 C Humedad r...

Page 51: ...7 Datos t cnicos C 544 51 Respuesta de frecuencia Diagrama polar C 544_F031107_E1 31 03 2011 11 54 Uhr Seite 51...

Page 52: ...nais 54 Microfone 54 Anel de gotejamento 54 3 Conex o 55 Introdu o 55 Conectar o microfone 55 4 Aplica o 56 Meter o microfone 56 Paravento 57 Substituir o anel de gotejamento 57 5 Limpeza 58 Carca a d...

Page 53: ...s e se est equipado com uma liga o terra 1 Se desejar eliminar o aparelho separe a carca a a ele tr nica e os cabos e elimine todos os componentes de acordo com as normas de elimina o v lidas 2 A emba...

Page 54: ...carater stica direcional cardi ide e por isso mais sens vel para sons que chegam de frente da boca A carca a do microfone com o transdutor de condensador est unida ao bra o do microfone por meio de u...

Page 55: ...29 L na tomada mini XLR do cabo de conex o do MPA V L ou no co netor de entrada do emissor de bolso A ficha bloqueia se autom ticamente Para tirar o cabo pressione o bot o de destrava no conetor mini...

Page 56: ...cisne de tal maneira que o microfone fique em frente da comissura dos l bios 3 Busque a melhor posi o durante o soundcheck Se ouvir ru dos de pop p e t exagerados posicione o microfone um pouco mais...

Page 57: ...livre fixe o paravento de material esponjoso inclu do na embalagem no microfone 1 Coloque o paravento na cabe a do microfone 2 Tire o paravento at sobre o canto exterior da c psula mi crof nica Se o a...

Page 58: ...Paravento Limpe a carca a do microfone com um pano molhado em gua Lave o paravento de material esponjoso com uma solu o n o agressiva de detergente Pode us lo imediatamente depois de ter secado C 544_...

Page 59: ...ou o regulador do n vel total na mesa de mixa gem ou no amplificador ao n vel desejado 3 Ligar o microfone mesa de mixagem ou ao amplificador 4 Ligar o plugue do cabo mais uma vez 5 Controlar o cabo...

Page 60: ...so ou alimenta o fantasma universal entre 9 e 52 V atrav s do adaptador MPA V L Consumo de corrente aprox 2 mA Condi es clim ticas temperatura 20 C a 60 C umidade relativa a 20 C 99 Materiais arco de...

Page 61: ...7 Especifica es C 544 61 Resposta de frequ ncia Diagrama polar C 544_F031107_E1 31 03 2011 11 54 Uhr Seite 61...

Page 62: ...Notizen Notes Notes Note Notas Notas 62 C 544 C 544_F031107_E1 31 03 2011 11 54 Uhr Seite 62...

Page 63: ...Notizen Notes Notes Note Notas Notas C 544 63 C 544_F031107_E1 31 03 2011 11 54 Uhr Seite 63...

Page 64: ...o Componentes ac sticos Microfones Fones de ouvido Microfones s fios Fones de ouvido s fios Microfones de cabe a Componentes ac sticos Technische nderungen vorbehalten Specifications subject to change...

Reviews: