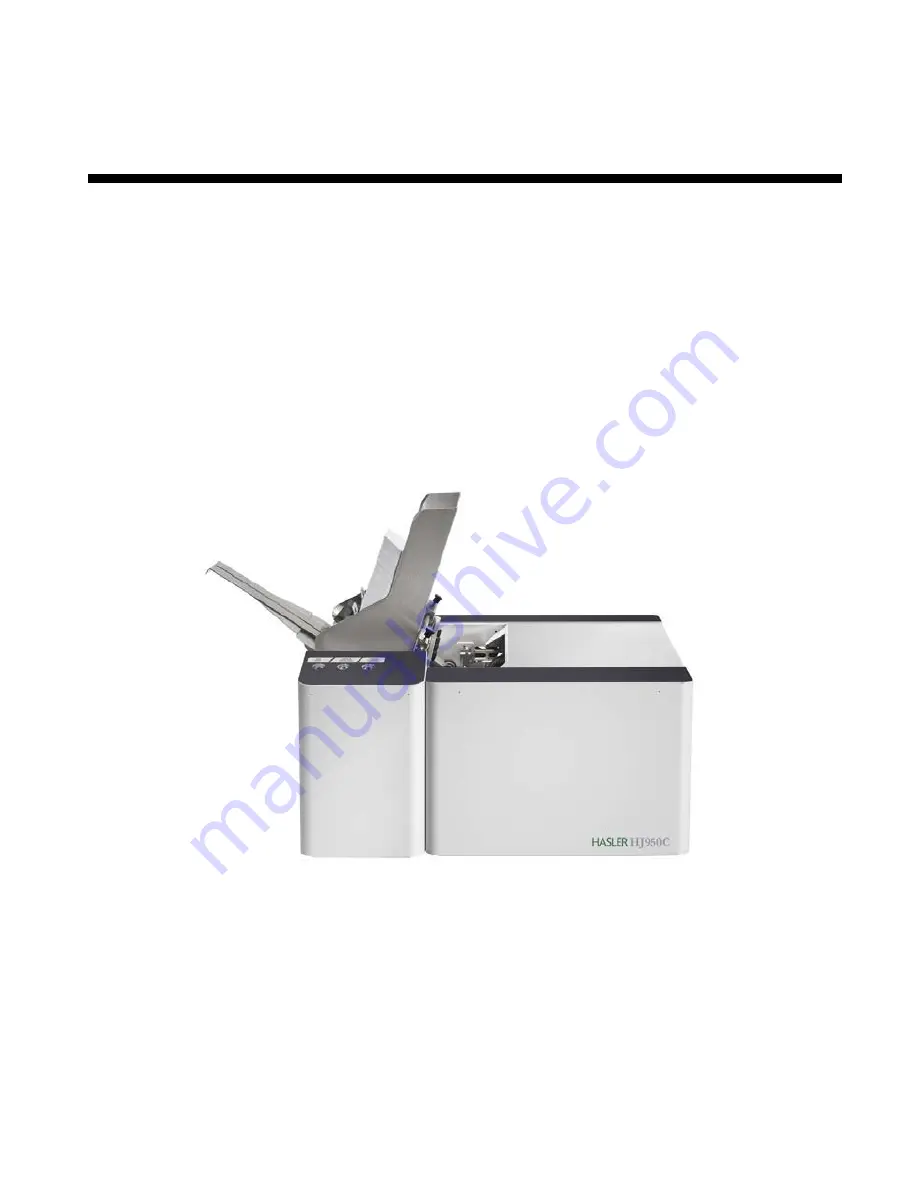
background image

Operating Guide


HASLER

America’s better choice

®


Mailing Systems 
And Solutions


H

J950C Addressing System


Summary of Contents for HJ950C

Page 1: ...Operating Guide HASLER America s better choice Mailing Systems And Solutions HJ950C Addressing System ...

Page 2: ...s document may be reproduced or distributed in any form or by any means without the express written permission of an authorized representative of Neopost USA This document and all information contained herein are confidential and may only be disclosed as necessary to support customer use of the equipment Limitations of this Document The information presented herein is subject to change Neopost USA...

Page 3: ...INK TANKS 19 Ink Tank Anatomy 19 PROCEDURE Installing the Ink Tanks 20 INSTALLING THE PRINTHEAD CARTRIDGE 22 Printhead Cartridge Protective Packaging 22 Procedure Installing the Printhead 23 SECTION 3 OPERATING THE PRINTER 27 CONTROL PANEL FUNCTIONS 27 Printer Status Light Indicators 28 SETTING UP THE FEED 31 PRINTER DRIVER AND TOOLBOX FEATURES 34 Printer Driver Properties 34 Using the M Series To...

Page 4: ...NG THE INK WASTE TRAY 58 REPLACING THE SHEET SEPARATORS 59 SECTION 5 TROUBLESHOOTING GUIDE 61 PRINT QUALITY ISSUES 61 THE PRINTHEAD CARTRIDGE 62 THE PRINTER 63 ERROR S AND WARNINGS 64 Alert Window Messages 64 Toolbox System Status Messages 65 APPENDIX A HASLER HJ950C SPECIFICATIONS 67 APPENDIX B SUPPLIES AND OPTIONAL HARDWARE 68 APPENDIX C PREPARING PRINTER FOR TRANSPORT 70 LOCAL RELOCATION 70 REM...

Page 5: ...itches or shared with other equipment 9 Make sure there is no strain on the power cord caused by jamming between the equipment walls or furniture 9 DO NOT remove covers Covers enclose hazardous parts that should only be accessed by a qualified service representative Report any damage of covers to your service representative 9 This machine requires periodic maintenance Contact your authorized servi...

Page 6: ...nst the separation area Narrow and wide wedges are provided with the printer to accommodate different media widths 6 Adjustable Media Side Guide Adjusts to hold the media against the Media Registration Side Guide 7 Media Registration Side Guide All media is registered against this guide It has two positions Inner position for media measuring 3 to 8 5 in width Outer position for media measuring 8 6...

Page 7: ...rt Connection USB 2 0 The USB cable attaches to the printer here 3 Network Connection Ethernet The network cable plugs in here 4 Sheet Separators Used to separate a single piece of media from the stack There are four sheet separators on this printer 5 Feed Rollers Delivers the bottom piece of media from the stack through the separation area and under the forwarding rollers There are eight feed rol...

Page 8: ...eaning cycle Insert a non conductive tool i e plastic pen into the opening provided and lightly press the button Additional levels of cleaning can be enabled from the M Series Driver services 4 Ink Couplings These devices connect the ink tubes to the printhead cartridge The printhead latch is used to engage or disengage these devices from the printhead cartridge 5 Printhead Latch Release Button Th...

Page 9: ...aged 2 Ink Tanks Five Ink Tanks are used in the printer Cyan C Yellow Y Magenta M Black K Black K 3 Ink Waste Tray The purpose of this tray is to catch any waste ink produced by the system This tray is filled with absorbent material The tabs located at the left and right sides of the tray secure the tray to the print engine frame Please be sure the tabs click into the frame to secure the tray s po...

Page 10: ...hip the printer Before shipping please refer to the appendix section Preparing the Printer for Transport Tools Needed Knife and scissors to open packaging 2 Philips head Screwdriver Carpenters Level recommend using 18 or longer level Protective gloves should be worn to avoid getting ink on hands when removing protective packaging materials from the ink coupling areas the Ink Tank areas and when in...

Page 11: ...rials may vary slightly from what is shown below Please save the packaging in a safe place for possible future use Two people will be required to safely lift the printer and place it onto a sturdy level work table IMPORTANT WORK TABLE SURFACE MUST BE LEVEL LEVEL Save the Packaging for possible future use 1 2 3 4 5 6 ...

Page 12: ...ide Media Support Wedge mounting hardware attached to item C 1 F Narrow Media Support Wedge mounting hardware attached to item C 1 G Media Registration Side Guide mounting screws attached to printer 1 H Adjustable Media Side Guide mounting screws attached to printer 1 I USB Cable 1 J Power Cord 1 K HJ950C Operation CD contains printer software and pdf manual Note Ink Tanks and Printhead Cartridges...

Page 13: ...ed to attach the side guides to the printer are located under the shipping tape in their respective positions 1 Begin by installing the Media Registration Side Guide using the two screws 1 provided 2 Next install the Adjustable Media Side Guide using the two screws 2 provided ...

Page 14: ...de or greater Narrow Media Support Wedge 6 For media that is less than 8 inches wide The Anchor Plate 7 fits into the slot from the underside of the Rear Media Support Guide Position the Media Support Wedge so the upper and lower holes fit onto the two tabs from the Anchor Plate The washer 8 goes between the Thumb Screw 9 and the Media Support Wedge The Thumb Screw is inserted down through the was...

Page 15: ...puter through the USB port 2 A Network Ethernet port 3 is provided for operation in a network environment NOTE At the time of this manuals publication information on connecting the printer via the Network Ethernet port was not available Please contact your support representative for network connection help IMPORTANT Do NOT connect the printer to the computer until prompted to do so during the prin...

Page 16: ...iper roller cleans the Printhead nozzles of excess ink and debris Printing Purging This area acts as a base to support media during printing It also contains a purging area which captures and absorbs ink that is purged to help keep nozzles clear Capping This area seals and protects the printhead nozzles when not in use PROCEDURE 1 Make sure the printer is powered OFF If the printer is not powered ...

Page 17: ...n the Service Station Circuit Board as shown below 7 Insert the Ribbon Cable blue side up into the space under the Cable Securing Latch 1 Make sure the ribbon cable is pushed in all the way and is NOT crooked Then close the Cable Securing Latch 2 CAUTION Make sure latches on the Wiper Roller are fully latched before installing the Service Station Closed Opened Open Close 1 2 Check the latch at eac...

Page 18: ...t into the Service Station Slot until it stops The Service Station fits into the slot immediately above the Ink Tank slots NOTE The Ink Tank Door must be open to perform this procedure 9 Look down through open area of the Printhead Cartridge compartment in the top of the Print Engine to make sure the Service Station is aligned with the Bar as shown IMPORTANT Service Station must perfectly aligned ...

Page 19: ...vice Station the rest of the way in NOTICE If the Service Station should get jammed during this process you hear motor stall noise or gear slipping noise immediately turn OFF the printer s Main Power Switch This is one of the only exceptions for turning off the printer using the main power switch before properly powering down the print engine Remove the Service station by turning the Large Gear co...

Page 20: ...Insert the CD supplied with the printer into your CD drive If the Launch Menu window does not automatically open in your browser Locate and run the MENU_LAUNCH htm file located on the root directory of the CD 3 When the HJ950C Operation CD Launch Menu window opens on the computer screen Click Install Printer Software NOTE If you receive a Windows security or authorization warning click on YES or C...

Page 21: ...oments the Connect your device now window will appear Turn the printer s Main Power Switch ON then press the control panel s ON OFF button Wait about 45 seconds for the Print Engine to power up ON OFF button will illuminate Then connect the USB cable Don t click on the Back or Cancel buttons The software will automatically begin installing once it recognizes that the printer has been connected 7 Y...

Page 22: ...ons displayed show No Reboot and Reboot then make sure all other programs have been closed and click Reboot The M Series Driver should now be available in your Printer and Faxes or Devices and Printers folder Tip After you have completed printer setup service station installed ink tanks installed printhead cartridge installed media feed setup it is a good idea to print a test page from the printer...

Page 23: ...tridges and ink tanks out of reach of children Discard unwanted printhead cartridges and empty ink tanks immediately Install the Ink Tanks The HJ950C printer uses five Ink Tanks two Black one Cyan one Magenta and one Yellow The Ink Tank is a delicate precision device Handle with extreme care to avoid damage Ink Tank Anatomy ...

Page 24: ...reen you will see information about the System Status and Ink levels With no Ink Tanks installed all Ink status levels will all be displayed with a question mark below each color position Tip If you receive a Printer not responding message in your browser check to be sure the printer is turned on and the USB cable is connected Then click on Retry NOTE If you receive warning that Windows Firewall h...

Page 25: ...minate 9 Refresh your web browser window Watch the Toolbox screen on your computer you will see the ink colors fill in as the Ink Tanks are recognized Tip If the Toolbox utility does not respond verify that the printer is powered on and that the USB cable is connected Then try closing and opening the Toolbox utility again Tip If an ink color does not fill in after a few minutes reseat the Ink Tank...

Page 26: ...mediately Installing the Printhead Cartridge The HJ950C printer uses a single Memjet printhead cartridge The Printhead Cartridge is a delicate precision device Handle with extreme care to avoid damage and issues that could degrade print quality Printhead Cartridge Protective Packaging NOTE Discard protective tape once it is removed Do NOT reuse protective tape Keep all other packaging to store dis...

Page 27: ...d turn the Main Power Switch ON Then press the control panel s ON OFF button Wait about 45 seconds for the print engine to power up ON OFF button will illuminate 2 Open the Top Cover 3 If the Printhead Latch 2 is closed press the Printhead Latch Release button 1 as shown Use a non metallic item example plastic pen to reach through the hole and lightly press the button The printer will run a routin...

Page 28: ...CAUTION DO NOT touch the ink couplings printhead nozzle surface or electrical contacts B Remove protective strip from the Printhead Electrical Contacts Dispose of the removed strip immediately CAUTION DO NOT allow removed strip to touch the electrical contacts DO NOT try to re apply the removed strip C Remove protective strip from the Printhead Nozzles Hold the Printhead by the handle with one han...

Page 29: ...open air is pulled in through the printhead nozzles causing the priming process to fail printer is unable to create a vacuum to pull ink into the cartridge By wetting the printhead nozzles this creates a temporary water seal which prevents air from getting sucked into the printhead during the priming process 8 Carefully insert the printhead cartridge into the compartment at an angle with the print...

Page 30: ...n re wet the nozzles and repeat the priming process After the Printhead is primed you can re install the original Ink Tank s to use up any remaining ink Please refer to the section titled Replacing the Ink Tanks 12 When the printer stops processing and all the fields in System Status are black the printer is ready for use When the printer is ready for use you will also observe the following printe...

Page 31: ...process is not followed ink color mixing and printhead nozzle clogging may result PAPER RESUME PAPER Paper Feed Test Before sending data to the printer you can perform a paper feed test by pressing and holding this button for 4 seconds The printer will feed a single page RESUME If an out of paper condition is detected reload media and press this button to resume printing If the printer was paused ...

Page 32: ...teady or Flashing once per second or Fast Flash twice per second fast or fast Description POWER PAPER RESUME PAUSE CANCEL Simultaneous Flash once per second Simultaneous Fast Flash twice per second fast fast Alternating Flash once per second Alternating Fast Flash twice per second fast fast Power Down Cycle Sequential Flash Right to Left R2L R2L R2L Power down Sequence Please see the Status Light ...

Page 33: ... was canceled manually clear job from the computer s print queue Errors can also be cleared using Toolbox Interface fast No Tilt Error Toolbox TILT_ERROR Verify that table is level front to back and left to right If just powered on wait a few minutes tilt readings may settle into normal range Then error can be cleared using CANCEL button or by using the Clear Error feature in the Toolbox Contact t...

Page 34: ...ar the job from the computer s print queue Paper Jam Printer has detected that one of the media sensors is blocked interrupted Toolbox PAPERPATH_PRINTZONE_BLOCKED or PAPERPATH_PAPERJAM Paperpath Entry Yes Exit Yes or Paperpath Entry No Exit Yes or Paperpath Entry Yes Exit No Clear the paper path of media and close the print engine The System Status message in red should go away The toolbox Paperpa...

Page 35: ...t Guide using the mounting hardware 4 provided Wide Media Support Wedge For media that is 8 inches wide or greater Narrow Media Support Wedge For media that is less than 8 inches wide 2 Loosen the locking knob and move the Media Registration Side Guide into the desired position Then tighten the locking knob to secure the guide Select the appropriate position for the Media Registration Side Guide T...

Page 36: ...en the locking screw Repeat for each sheet separator 6 Loosen the locking knob and reposition the Adjustable Media Side Guide so that it is about 1 32 inch from the side of the media Tighten the locking knob on the side guide Tip If the right edge of the media is damaged during transport through the print engine try repositioning both of the media side guides so the Adjustable Media Side Guide is ...

Page 37: ...ser to the separators then the top pieces Tip When loading an empty hopper Place one piece of media so it is directly against the tips of the separators Then place the fanned stack of media on top of this single piece NOTE The amount of media that can be stacked on the printer is determined by the weight of the material The feeder may not feed larger and heavier media when the stack is full If thi...

Page 38: ... this box is selected so the job starts printing from the last page The entire job will be queued before printing starts Large jobs may take some time to finish being queued before they start printing Un checking this box prints the job starting with the first page Collate When collate is selected and copies is set to two or more the printer will print all pages of the document in their proper seq...

Page 39: ...the paper selected Print on Lets you specify the particular size of paper that you want to print on regardless of the size of the original document Checking Scale to Fit automatically resizes the document to fit on the new page size Printing Adjustments Allows you to make minor positioning changes to the print area in relation to the media if needed NOTE Only works on jobs using less than the full...

Page 40: ...t a plus or minus number Inches Not available Millimeters Not available Pixels value in dots very small Top of form indicator Please be sure None is selected or the printer will not operate properly The other choices are not valid for this printer model Page Cutting Please be sure neither of these boxes are checked off or the printer may not operate properly These choices are not valid for this pr...

Page 41: ... 3 Runs the cleaning routine multiple times for the most thorough flushing and cleaning of the printhead Wipe Printhead wipes cleans the printhead Printhead Release Use this feature to prepare the printer for the installation or removal of the Printhead Cartridge This feature pumps some of the ink back into the Ink Tanks and then it releases opens the Printhead Latch Same as using the Printhead La...

Page 42: ...ke sure the print engine is powered up ON OFF button lit and then reopen the Toolbox utility To open the Toolbox Click Start from the Windows taskbar go to All Programs open the Memjet folder select the M Series Driver folder and then click on Toolbox When the Toolbox utility opens you will find a series of options you can click on at the lower left of the screen NOTE The Toolbox utility uses your...

Page 43: ...allation or removal of the Printhead Cartridge This feature pumps some of the ink back into the Ink Tanks and then it releases opens the Printhead Latch Same as using the Printhead Latch Release Button See Installing Printhead Cartridge or Replacing Printhead Cartridge for more details System Deprime Use this feature to prepare the printer for service or transport to a remote location This feature...

Page 44: ...creen you can see the current status of your printer You can also Print Sample Page Prints type and color bands to check print quality Print Configuration Page Shows the current configuration of the printer including firmware version network connection printer serial number and more Print Diagnostic Page Shows basic printer information memory Network Settings Event Log and RAM partitions Print Dem...

Page 45: ...emo page color bands on the printer Tip You can use the Color Purge PDF available from the HJ950C Operation CD Menu instead of the Print Demo Page feature from the printer driver 7 Once the demo page has finished printing send it again Repeat this process until you are satisfied with the output You should notice that each time you print another demo page the image quality and color will improve It...

Page 46: ...ord 2003 Before you begin laying out the document make sure the M Series Driver has been selected as your default printer or make sure you have select the M Series Driver for your document in MS Word Letter 8 5 x 11 The following procedure assumes that the printer has been setup to feed 8 5 wide x 11 long media Don t forget to position the Media Registration Side Guide to the inner position 1 Clic...

Page 47: ... type a name for this new size Example Custom 10 8 5Wx4 13H Then Click on the Save button 8 Click on OK to exit the Custom Media Size window 9 Click on OK to exit from the M Series Driver Properties window 10 Click on Close to close the Print window to save changes without printing Tip Do not press OK or you will send blank document to the printer 11 Click on File Page Setup 12 Click on the Paper ...

Page 48: ...rtrait 1 Click on File Page Setup 2 Click on the Paper Tab 3 Under Paper size select Env Com10 4 1 8 x 9 in 4 Click on the Margins Tab 5 Under Orientation select Landscape 6 Under Margins set margins to minimum values or to your desired values 7 Click on OK Tip If you should get a warning that one or more margins are set outside the printable area of the page Click on the Fix button 8 Insert the i...

Page 49: ...t from Bulk Mailer 5 0 on 10 envelopes 10 Envelope Feeding Flap First 1 Open Bulk Mailer 5 From the Home tab select double click on the mailing of your choice 2 Select the Print Mail tab left side of screen 3 From the Print Mail screen double click on the Print Mail Wizard which will guide you through the template layout setup process 4 When the Welcome screen appears click on Next 5 The Print Mai...

Page 50: ... window 10 The Address Block Options window will open Select your Address Block option example Add a basic address block with barcode Select your Barcode Type option POSTNET or Intelligent Mail Click Next 11 The Summary window will open Under Template Options select Preview labels based on settings and Save settings as a new template Type a name example 950C 10 Flap First Template for your new tem...

Page 51: ...de IMB will not be displayed or printed unless you have cleaned up the mailing using the Address Quality Address Correction CASS feature in Bulk Mailer Your Bulk Mailer subscription must be current for this feature to work Tip If you need to change the layout Click on the Go to Designer Mode icon to return to the designer screen 15 Click on the printer icon to open the Mail Print Setup dialog box ...

Page 52: ...s per second Copies etc Then Click on OK to close this window 19 In the Mail Print Setup window select all pages or the range of addresses you want to send to the printer 20 When ready to print make sure the printer is ready ON OFF button is illuminated then click on the Print button Note The Intelligent Mail Barcode IMB will not be displayed or printed unless you have cleaned up the mailing list ...

Page 53: ... Series Driver from the Printer pull down list Then select Laser or Inkjet Click on Next 7 The Envelope Options window will open Select 10 Envelope 4 1 8 H x 9 W from the list Click Next 8 The Address Block Options window will open Select your Address Block option example Add a basic address block with barcode Select your Barcode Type option POSTNET or Intelligent Mail Click Next 9 The Summary win...

Page 54: ...nvelope preview will be displayed Note The Intelligent Mail Barcode IMB will not be displayed or printed unless you have cleaned up the mailing using the Address Quality Address Correction CASS feature in Bulk Mailer Your Bulk Mailer subscription must be current for this feature to work Tip If you need to change the layout Click on the Go to Designer Mode icon to return to the designer screen 13 C...

Page 55: ...n the Mail Print Setup window select all pages or the range of addresses you want to send to the printer 16 When ready to print make sure the printer is ready ON OFF button is illuminated then click on the Print button Note The Intelligent Mail Barcode IMB will not be displayed or printed unless you have cleaned up the mailing list using the Address Quality Address Correction CASS feature in Bulk ...

Page 56: ... the Ink Tanks if you are installing all new Ink Tanks NOTE We recommend the use of disposable gloves for this process 1 Plug in the printer Turn the printer s Main Power Switch ON then press the control panel s ON OFF button Wait about 45 seconds for the print engine to power up ON OFF button will illuminate 2 Open the M Series Toolbox Go to All Programs select the Memjet folder select the M Seri...

Page 57: ...ection with the system Insert the Ink Tank firmly Then pull the Ink Tank back out about an inch Then push the Ink Tank back in firmly 10 Close and lock the Ink Tank Securing Latches A Make sure both sides of the Latch are engaged at the bottom 11 Turn the printer s Main Power Switch ON then press the control panel s ON OFF button Wait about 45 seconds for the print engine to power on ON OFF button...

Page 58: ...mperatures higher than 60 ºC 140 ºF Allow printhead cartridges to acclimate to ambient temperature before using in your printer Cleaning the Printhead Cartridge The Printhead Cartridge is cleaned automatically each time the printer is turned ON periodically during the print job and when a User Maintenance Level routine is performed by the operator From the M Series Driver User Maintenance Levels c...

Page 59: ...cing down and gently wipe the printhead nozzle area from end to end in one direction and in one fluid motion You can repeat this process a few times but only wipe in one direction NOTE The use of deionized water reference ASTM D5127 90 Type E II Electronic Grade Water is preferred however it is acceptable to use distilled water if deionized water is not available Do NOT use tap water or paper towe...

Page 60: ...amage will result Contact technical support Tip You can perform this same function from your computer by clicking Printhead Release from the Services tab of the M Series Driver properties or the User Interface screen of the M Series Toolbox utility 4 Open the Printhead Latch fully to disengage the ink couplings from the printhead cartridge 5 Remove the old printhead as shown below Rotate the cartr...

Page 61: ...ls through the printer Removing Jammed Media Clearing a jam depends on where the jam occurred From the Feed Section Remove media stack Loosen and lift the sheet separators to clear the jam Then re adjust the sheet separators as described in this manual Under the Antistatic Brush Assembly If necessary remove the Antistatic Brush Assembly A to access jammed material Unlatch the two latches one on ei...

Page 62: ...lt 2 Unplug the power cable from the printer 3 Open the Ink Tank door 4 The Ink Waste Tray is secured to the print engine frame by two tabs One tab is located at the left side of the tray and one at the right side Simultaneously push the two tabs in towards the tray while pulling the tabs out towards you The Ink Waste Tray should release from the frame and begin sliding towards you 5 Slide the Ink...

Page 63: ...or mixing and printhead nozzle clogging may result 2 Unplug the power cable from the printer 3 To gain access to the separators loosen the Side Guide Locking Knobs and move the both Media Side Guides to their maximum outer positions 4 Loosen the Separator Locking Screws then raise and lock each sheet separator at its upper position 5 Remove the screw A and the separator cover B Then remove the sep...

Page 64: ...e WARNING If this power down process is not followed ink color mixing and printhead nozzle clogging may result 2 Unplug the power cable from the printer 3 Interior Use a vacuum with a soft brush attachment to help loosen dust particles Take care not to damage the PC Boards or electrical wiring 4 Exterior Wipe clean with a lint free cloth using any standard nonabrasive household cleaner that does n...

Page 65: ...tilled water and the cartridge reinstalled Please refer to the appropriate sections in this manual for removing and installing the printhead cartridge Try removing air bubbles from printhead and system using the Printhead Cartridge Conditioning routine or Toolbox utility feature Circulate Ink Note Do not run the Circulate Ink feature more than twice in a row Replace the Printhead Cartridge General...

Page 66: ...e the Printhead Irregular or Jagged vertical line s of missing color Air in the system Air bubbles blocking nozzle s Print Engine was opened to angle greater than 60º Refer to Printhead Cartridge Conditioning Do NOT open Print Engine to angle greater than 60º Black smudge marks Media is making contact with the printhead surface Manually clean the printhead Run the media in a different orientation ...

Page 67: ...orted Improper cabling connection Reboot printer Close and reopen Toolbox utility Install Update Java to version 6 or higher Use proper cable check connection Feeding problems Double feeding overlapping or skewing media Media is not compatible Check readjust the sheet separators and media guides Use compatible media Job is sent but printer does not feed or print Printer not turned on Printer not c...

Page 68: ...ssing Insert missing Ink Tank Clean electrical contacts and re seat Ink Tank Multiple Ink Tanks are missing Insert missing Ink Tanks Clean electrical contacts and re seat Ink Tanks Printhead Latch Open Ensure printhead cartridge has been inserted properly then closer the printhead latch so it locks Excessive Tilt Error See details under Toolbox System Status Messages section Load Paper Load paper ...

Page 69: ...top section of the print engine is open Verify that the print engine is closed and securely latched at both sides DATA_PATH_UNDERRUN Printer was paused by the user pressing the PAUSE button Press the RESUME button to continue printing Press the CANCEL button to cancel the job and then manually clear the job from the computer s print queue X_INK_LOW Example CYAN_ INK_LOW X Color One or more Ink Tan...

Page 70: ...hed color tubes TILT_ERROR or EXCESSIVE_TILT_ERROR The printer s electronics have detected that the print engine is too far out of level Tilt sensor needs to be re calibrated If just powered on wait a few minutes error may clear by itself Once Tilt level drops to 0 5 or less you can clear the error using the Clear Error feature in the Toolbox Make sure printer is placed on sturdy level worktable D...

Page 71: ...ml Yellow 250 ml Magenta 250 ml Black 500 ml PRINT AREA 8 5 W x 17 L 215 9 mm W x 43 81 mm L COLOR MATRIX Up to 16 8 million colors FEEDER Top Loading Friction Feeder Built In PC INTERFACE USB Ethernet FIRMWARE UPDATE Electronic Download via PC connection TRANSPORT Pressure roller system with Star Rollers FEATURES Full color inkjet fixed head design high capacity ink tanks automatic printhead clea...

Page 72: ...Y250 H Black Ink Tank 250 ml printer requires two M5K250 H Cartridge Wipes 100 pack use with deionized or distilled water 2023 H Waste Ink Absorber Absorbent material for Ink Waste Tray 123 10005 Optional Hardware Conveyor Stacker Drop Tray NOTE The use of a HJCSD3 conveyor with the HJ950C printer is highly recommended For this application please be sure to order the Riser Legs for the HJCSD3 part...

Page 73: ...ort for your printer To locate the Hasler dealer in your area please log onto the Hasler website www haslerinc com Service should only be performed by a qualified Hasler service person In addition you may wish to log onto the Hasler web site www haslerinc com and click on the support link This area contains many useful resources ...

Page 74: ...s considered a remote relocation When transporting your printer to a remote location your printer will need to be disassembled and repackaged as set out below NOTE This procedure should be performed by a qualified technician We suggest the use of protective gloves during this process 1 Plug in the printer Turn the printer s Main Power Switch ON then press the control panel s ON OFF button Wait abo...

Page 75: ...ries side guides rear media support guide from unit before re boxing 13 Re package the printer in the original packaging material keeping the printer level at all times WARNING To help avoid damage in transit the printer should only be shipped in approved factory packaging See Unpacking section for help with re boxing Follow the sequence in reverse 14 Ensure transport labels on the exterior box cl...

Page 76: ...ling 52 Ink Tanks 5 8 Ink Waste Tray 5 58 Inspecting the Ink Waste Tray 58 Installation Choosing the Location 6 Installation Connecting Computer 11 Installation Connecting Power 11 Installation Tools Needed 6 Installation Unpacking 7 Installing Ink Tanks 19 Installing Media Guides 9 Installing Printhead Cartridge 22 Installing Service Station 12 K Knob Rear Media Support Guide 3 Knob Side Guide Lo...

Page 77: ...ing Media Jams 57 Replacing the Ink Tanks 52 Replacing the Ink Waste Tray 58 Replacing the Printhead Cartridge 56 Replacing the Sheet Separators 59 S Safety Precautions 1 Satori Bulk Mailer 45 Service 69 Service Station 8 Service Station Installation 12 Setup Feed 31 Setup Sheet Separators 32 Sheet Separators 3 Specifications 67 Supplies 68 Support 69 T Table of Contents i Thumb Screw Media Suppor...

Page 78: ...Copyright 2011 All rights reserved 06 20 2011 Hasler 478 Wheelers Farms Road Milford CT 06461 www haslerinc com ...

Reviews: