background image

Length: 

9.0 in [229mm]

Width: 

1.6 in [41mm]

Height: 

3.0 in [76mm]

Rotor Span 

7.9 in [200mm]

Flying Weight: 

1.8 oz [51.3g]


(with supplied


flight battery)

Length: 

8.0 in [205mm]

Width: 

1.6 in [40mm]

Height: 

5.1 in [130mm]

Rotor Span 

6.9 in [175mm]

Flying Weight:  1.85 oz [52.6g]
 

(with supplied


flight battery)

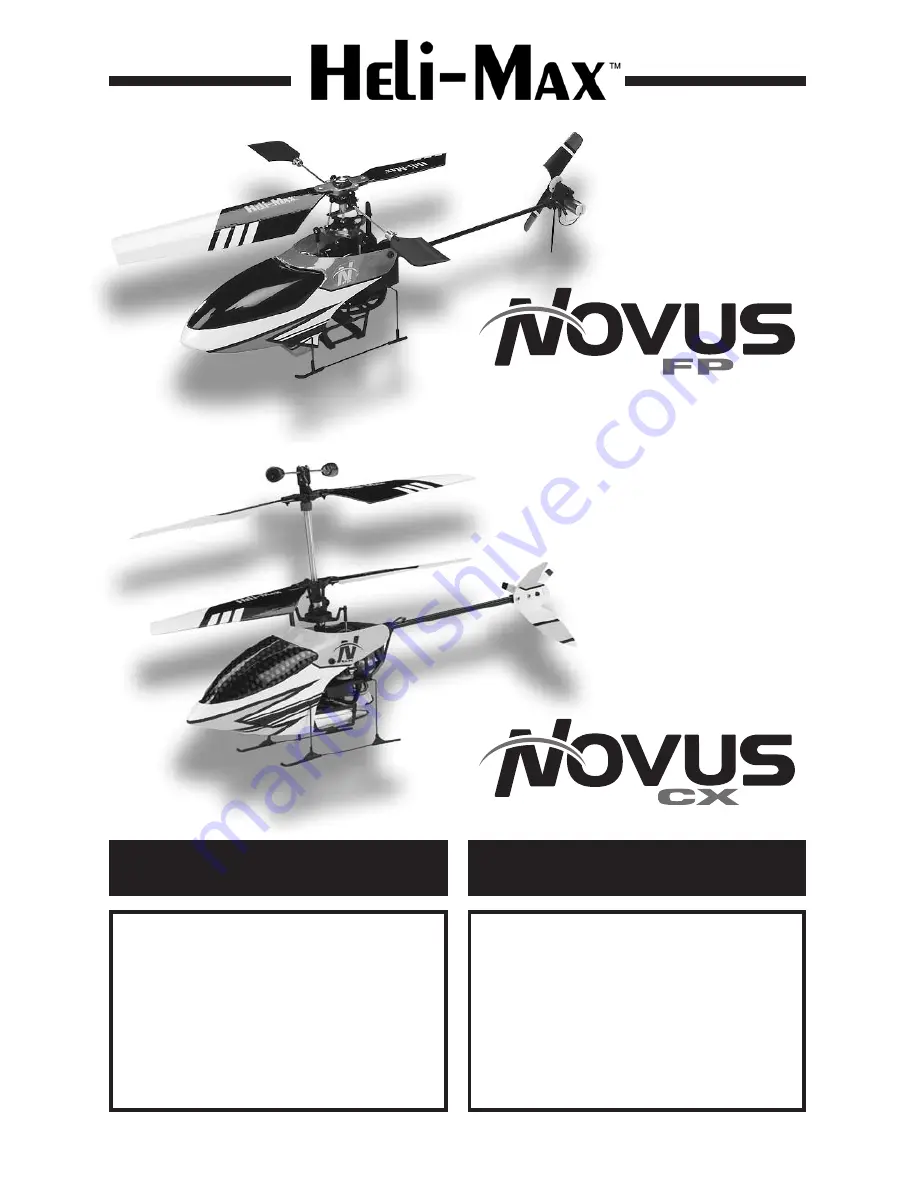
Novus FP Specifications

Novus CX Specifications

Entire Contents © Copyright 2009  

HMXE0802/0803MNL01

Summary of Contents for Novus CX

Page 1: ...ng Weight 1 8 oz 51 3g with supplied flight battery Length 8 0 in 205mm Width 1 6 in 40mm Height 5 1 in 130mm Rotor Span 6 9 in 175mm Flying Weight 1 85 oz 52 6g with supplied flight battery Novus FP Specifications Novus CX Specifications Entire Contents Copyright 2009 HMXE0802 0803MNL01 ...

Page 2: ...ever charge at currents greater than 1C Always charge in a fireproof location Never trickle charge Never allow the battery temperature to exceed 150 F 65 C Never disassemble or modify pack wiring in any way or puncture cells Never discharge below 2 75V per cell Do not allow water moisture or foreign objects into the charger Do not block the air intake holes which could cause the charger to overhea...

Page 3: ... the user accepts all resulting liability If the buyer is not prepared to accept the liability associated with the use of this product the buyer is advised to return this kit immediately in new and unused condition to the place of purchase To make a warranty claim send the defective part or item to Hobby Services at this address Hobby Services 3002 N Apollo Dr Suite 1 Champaign IL 61822 USA Includ...

Page 4: ...o com For the latest technical updates or manual corrections to the Novus Helicopter visit the Heli Max web site at www helimax rc com Open the Helicopters link and then select the Novus CX or Novus FP link If there is new technical information or changes to this model a tech notice box will appear in the upper left corner of the page safety precautions Failure to follow these safety precautions m...

Page 5: ...ectly on the ground and in the air 4 You must check the operation of the model before every flight to insure that all equipment is operating and that the model has remained structurally sound Be sure to check linkages or other connectors often and replace them if they show any signs of wear or fatigue 5 If you are not an experienced pilot or have not flown this type of model before we recommend th...

Page 6: ...piration date for payment Mail parts orders and payments by personal check to Hobby Services 3002 N Apollo Drive Suite 1 Champaign IL 61822 Be certain to specify the order number exactly as listed in the Parts List Payment by credit card or personal check only no C O D If additional assistance is required for any reason contact Product Support by e mail at helihotline hobbico com or by telephone a...

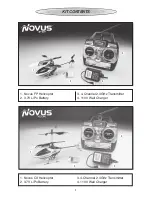
Page 7: ...tents 1 Novus FP Helicopter 2 3 7V LiPo Battery 3 4 Channel 2 4GHz Transmitter 4 110V Wall Charger 1 Novus CX Helicopter 2 3 7V LiPo Battery 3 4 Channel 2 4GHz Transmitter 4 110V Wall Charger 7 1 1 2 3 4 2 3 4 ...

Page 8: ...le check the polarity of each battery before placing the battery box back into the transmitter and replacing the battery cover o Turn on the transmitter using the power switch as shown above and verify that the indicator illuminates Turn the transmitter off for now If the indicator did not illuminate remove the battery box from the transmitter and verify that the batteries were installed correctly...

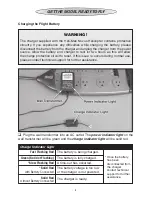
Page 9: ...rmal use please contact technical support for further assistance o Plug the wall transformer into an AC outlet The power indicator light on the wall transformer will be green and the charge indicator light will be solid red The battery is being charged The battery is fully charged A time out has occurred The battery voltage is too low or the charger is not powered The charger is ready Fast Flashin...

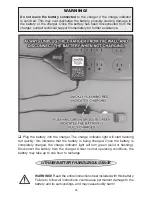
Page 10: ...arge indicator light will start flashing red quickly this indicates that the battery is being charged Once the battery is completely charged the charge indicator light will turn green solid or flashing Disconnect the battery from the charger Under normal operating conditions the battery may take up to one hour to recharge lithium battery handling usage WARNING Read the entire instruction sheet inc...

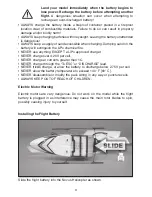
Page 11: ...ery will extinguish the LiPo chemical fire NEVER use anything EXCEPT a LiPo approved charger NEVER charge over 4 20V per cell NEVER charge at currents greater than 1C NEVER charge through the To ESC or DISCHARGE lead NEVER trickle charge or allow the battery to discharge below 2 75V per cell NEVER allow the battery temperature to exceed 140 F 60 C NEVER disassemble or modify the pack wiring in any...

Page 12: ...ansmitter The helicopter must be left still for 5 seconds so the gyro can perform the initialization process The Novus Helicopter is now ready for flight Always step 15 feet 4 5m away from the Novus Helicopter before operating the throttle Do not hold the model while operating the throttle A safe start is built into the Novus Helicopter that prevents the motor from activating unless the collective...

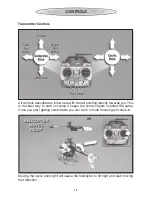
Page 13: ...ting directly towards you This is the best way to start out since it keeps the control inputs oriented the same Once you start getting comfortable you can work on side hovering and nose in Moving the cyclic stick right will cause the helicopter to tilt right and start moving that direction ...

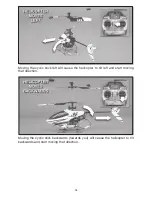
Page 14: ...cyclic stick left will cause the helicopter to tilt left and start moving that direction Moving the cyclic stick backwards towards you will cause the helicopter to tilt backwards and start moving that direction 14 ...

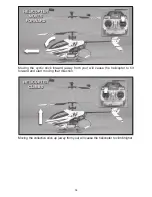
Page 15: ...oving the cyclic stick forward away from you will cause the helicopter to tilt forward and start moving that direction Moving the collective stick up away from you will cause the helicopter to climb higher ...

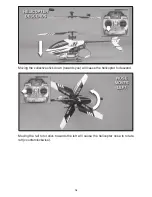
Page 16: ...16 Moving the collective stick down towards you will cause the helicopter to descend Moving the tail rotor stick towards the left will cause the helicopter nose to rotate left counterclockwise ...

Page 17: ...no obstacles Both the Novus CX and Novus FP are extremely lightweight and do not fly well in ground effect air disturbance when the model is hovered below 1 foot 30cm Both models should be flown at a minimum altitude of 1foot 30cm to avoid the ground effect Crashing We already know that crashing is going to occur Once you realize the model is going to collide with something or crash into the groun...

Page 18: ...copter settles onto the ground Basic Maneuvers Once you get comfortable with hovering at different orientations and landing it s time to move on to more advanced maneuvers Slow Pirouettes Add a small amount of tail rotor left or right and try rotating the helicopter slightly sideways and see if you can hold it there If you feel uncomfortable then bring the tail back toward you Once you start getti...

Page 19: ...s a guide to performing these steps NOVUS FP MAIN ROTOR BLADE REPLACEMENT Remove the blade bolt using a 00 phillips screwdriver After the blade bolt has been removed slide the rotor blade out of the blade grip Reinstall the new blade ensuring that the holes within the blade and blade grip are aligned properly Reinstall the blade bolt NOVUS FP MAIN ROTOR GRIP REPLACEMENT Remove both blade bolts and...

Page 20: ...out on the flybar and tighten the flybar paddle collar screws NOVUS FP REPLACING THE MAIN GEAR Remove the lower retaining pin from the main gear using needle nose pliers Remove the old main gear from the model and install the new main gear Align the hole in the main shaft with the hole in the main gear and press the small pin back through the hole NOVUS FP REPLACING THE MAINSHAFT Remove the lower ...

Page 21: ...slowly slide the tail boom out of the frame and off the tail motor wires If you notice any damage to the tail motor wires it will be necessary to replace the tail motor wire harness Slide the tail motor wires into the tail boom and reinstall the tail boom onto the helicopter On the old tail boom remove the lower tail motor retention screw and remove the tail motor gear box assembly Run the tail mo...

Page 22: ...plug the motor connector back into the E Board NOVUS FP E BOARD CONNECTIONS In addition to the connections there is an adjuster located on the other side of the E Board This adjuster is used to increase or decrease the total servo throw This is set at the factory for the optimum setting After you have become accustomed to the model feel free to make adjustments to suit your flying style ...

Page 23: ...oth blade bolts and main rotor blades If working on the upper rotor remove the flybar and linkage The only way to remove the blade grip is to cut the grip on both sides as shown Remove the two halves Remove the two metal pivot pins from the head block Slide the two metal pivot pins from the center of each grip into the blade grip Press these pins in until they are flush Align the new blade grip on...

Page 24: ...l the flybar weights onto the new flybar and slide the flybar pivot back onto the head block Reinstall the flybar linkage NOVUS CX REPLACING THE MAIN GEAR The Novus CX uses an inner solid main shaft and a hollow outer main shaft Remove the lower main gear retaining screw The lower gear will simply drop down off the main shaft If you need to replace the upper main gear slide it down off the main sh...

Page 25: ...s Slide the inner shaft and upper rotor head from the outer main shaft by pulling upwards If you need to remove the lower shaft disconnect the servo linkages from the swashplate and pull upwards Transfer necessary parts from the old shaft to the new shaft and install following the reverse order listed above NOVUS CX REPLACING THE TAIL SHAFT AND TAIL ROTOR Remove the tail rotor retaining screw Repl...

Page 26: ...used to attach the tail fin to the tail assembly Slide the tail boom into the main frame Ensure that the tail fin is vertically aligned with the main shaft and tighten the front tail boom screw NOVUS CX REPLACING A MOTOR The Novus CX uses two separate drive motors The upper blade motor is located on the left side when looking at the bottom of the helicopter with the nose facing upwards The lower b...

Page 27: ... E Board This adjuster is used to set the gyro gain The factory setting is the optimum value Due to different climates it may be necessary to make slight adjustments If you notice the tail does not remain still try increasing the gain If you notice that the tail constantly oscillates back and forth decrease the gain ...

Page 28: ...28 Heli Max Novus CX Exploded View ...

Page 29: ...543 Swashplate AntiRotation Stay Novus CX 14 HMXE7944 Main Frame Novus CX 15 HMXE7943 Battery Tray Novus CX 16 HMXE8829 Ball Bearing Set Novus CX 17 HMXE7329 Complete Screw Set Novus CX 18 HMXE8429 Rear Subframe Novus CX 19 HMXE8544 Locking Sleeve Assembly Novus CX 20 HMXG8008 Main Drive Motors Upper and Lower Novus CX 21 GPMP0408 1S LiPo 400 mAh Battery Novus CX FP 22 HMXP2019 1S LiPo Charger Nov...

Page 30: ...30 Heli Max Novus FP Exploded View ...

Page 31: ... Tail Boom Novus FP 19 HMXE7947 Main Frame Novus FP 20 HMXE8033 Main Gear Novus FP 21 HMXE7395 Printed Canopy Novus FP 22 HMXE9537 Tail Motor Wire Novus FP 23 HMXE8830 Bearing Set Novus FP 24 HMXE7330 Complete Screw Set Novus FP 25 HMXM2023 Digital 3g Nano Servos 2 Novus FP 26 HMXG8009 Main Drive Motor Novus FP 27 HMXG8010 Tail Rotor Motor w Pinion Novus FP 28 GPMP0408 1S LiPo 400 mAh Battery Novu...

Page 32: ...ptional products available for the Novus CX CNC Main Blade Grips Upper Lower HMXE7468 CNC Head Block W Inner Rotor Shaft HMXE7470 Outer Shaft w CNC Retainer Collar HMXE7469 CNC Swashplate Assembly HMXE7471 ...

Page 33: ...cts available for the Novus FP Brushless ESC HMXM3005 RX2400BL Brushless Version HMXM3006 Brushless Upgrade Kit RX ESC Tail Motor BL Motor HMXG8016 Brushless Motor HMXG8013 Tail Motor Upgrade For Brushless Kit HMXM8014 ...

Page 34: ...Other fine products avai Heli Max Axe EZ EP Mini RTF HMXE05 Heli Max Novus CX HMXE0803 Heli Max AXE CPv3 Micro RTF HMXE07 Heli Max Axe CX Micro Coaxial RTF HMXE09 ...

Page 35: ...ucts available from Heli Max Novus FP HMXE0802 Heli Max Kinetic 50 ARF HMXE0250 Heli Max AXE 400 3D RTF HMXE0800 Heli Max AXE 400 3D RxR HMXE0801 ...

Page 36: ......

Reviews: