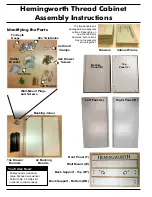

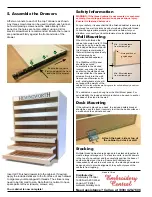
The thread cabinet is
packaged in two separate
cartons. Depending on
how the cabinet is
delivered, both cartons
may not necessarily
arrive together.
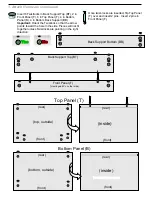
Top
Panel (T)
Hemingworth Thread Cabinet
Assembly Instructions
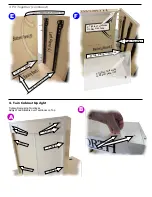
Identifying the Parts
Cabinet Frame
Drawers
2x Backing
Boards
Backing Joiner
Wall-Mount Plugs
and Screws
14x Drawer
Runners
12x Dowels
22x Pins
Safety
Bracket
4x Small
Clamps
42x Drawer
Screws
22x Twistlocks
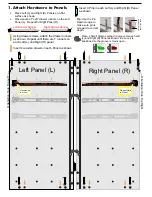
Right Panel (R)
Bottom
Panel (B)
Left Panel (L)
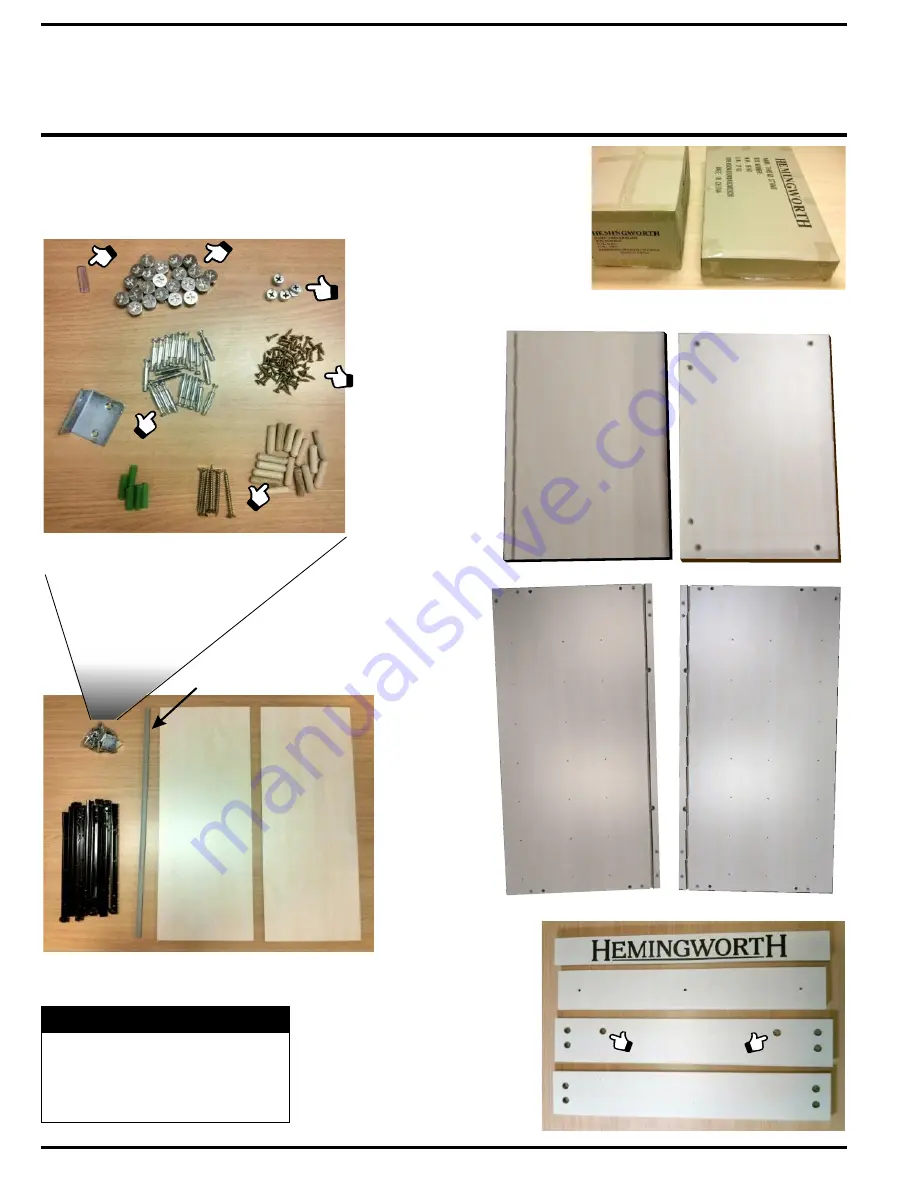
Back Support - Top (BT)
Back Support - Bottom (BB)
Wall Mount (W)
Front Panel (F)
You’ll Also Need:
- Phillips head screwdriver
- Large flat-head screwdriver
- Drill with No. 2 Phillips bit
(optional, recommended)
Pin Depth
Guage