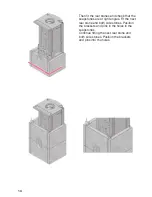
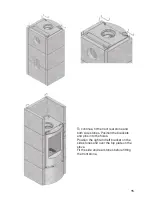
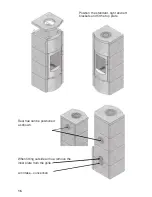
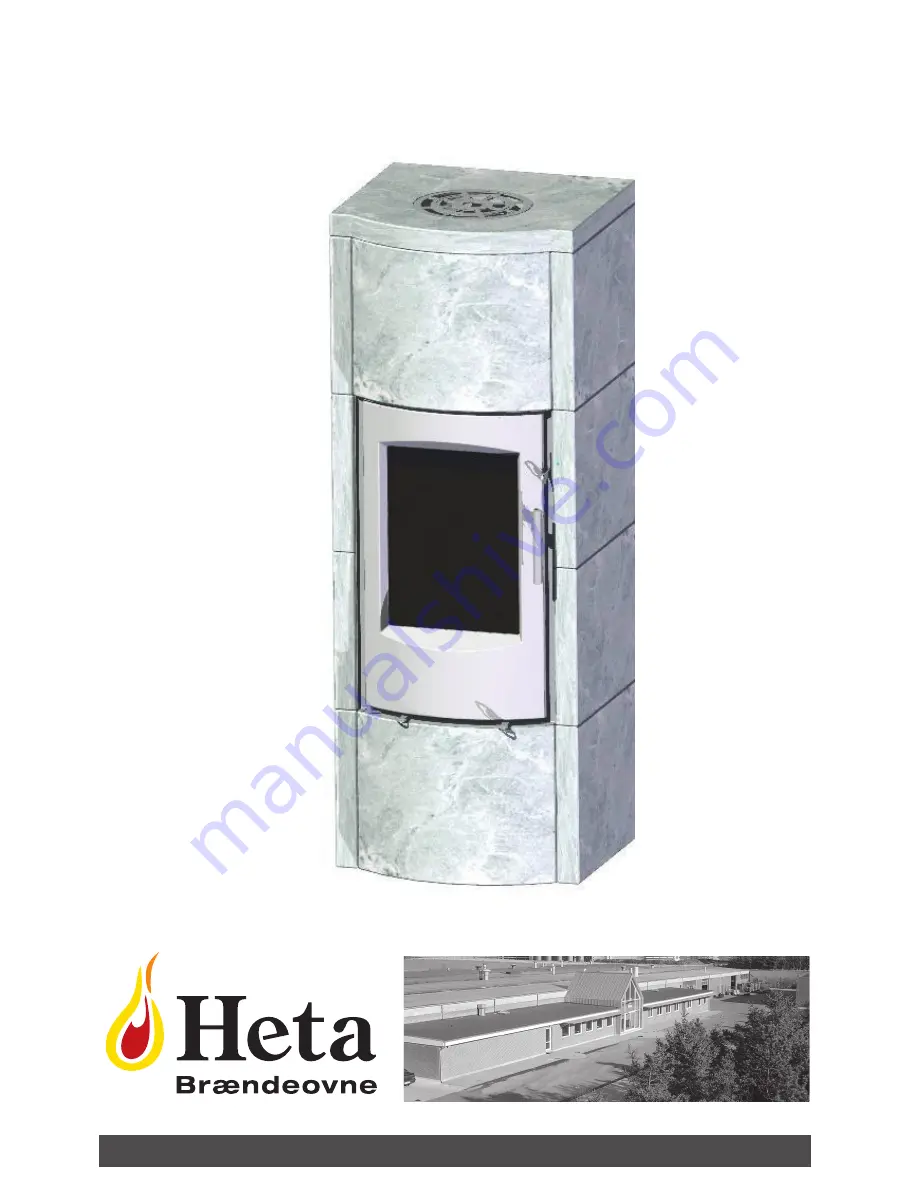
background image

1

www.heta.dk

Scan-Line 70

OP

e

R

a

T

in

in

STRU

c

T

iO

n

S

GB

www.heta.dk

Summary of Contents for Scan-Line 70

Page 1: ...1 www heta dk Scan Line 70 OPERATING INSTRUCTIONS GB www heta dk ...

Page 2: ...ocal regulations However the area of the opening should never be less than 175 cm2 which corresponds to a diameter of 150 mm If a damper is fitted in the flue gas pipe there must al ways be at least 20 cm2 of free passage ded to ensure that the materials used are of good quality that the stove does not adversely affect the environment and hat it is economical to use With your new stove you should ...

Page 3: ...e weight may damage the stove Draft conditions Poor draft may result in smoke being emitted from the stove when the door is opened The minimum chimney draft to ensure satisfactory combustion in stoves of this kind is 12 PA However there will still be a risk of smoke emission if the firing door is opened during power ful firing The flue gas temperature at nominal output is 237 C when expelled to an...

Page 4: ...mes so the room must be very well ventilated During the first firing which should be carried out using approximatly 1 kg of wood the stoking door must be left slightly open and must not be closed until the stove is cold This is to prevent the sealing rope sticking to the stove Fuel Your new stove is EN approved for firing with wood fuel You must therefore only burn clean dry wood in your stove Nev...

Page 5: ...ust the secondary airflow to the level required For no minal operation 4 kW the secondary air supply should be 50 open When firing take care not to place the pieces of fuel too close ly together as this will result in poor combustion and insuf ficient exploitation of the fuel Please note that the start up mechanism must not remain open during normal operation of the stove as this may lead to overh...

Page 6: ...rmally occur within 30 to 60 seconds A risk of explosion can possibly arise if too much wood is placed in the stove This may result in the production of large volumes of gas and this gas can explode if the intake of primary and secondary air is insufficient It is an advantage always to leave some ash lying in the bottom of the comb stion chamber Take care when emptying the ash pan as cinders can c...

Page 7: ...g covered in soot This soot can be easily and effectively removed by using proprietary stove glass cleaner Door sealing It is recommened at least once a year to check the sealing of the door to see if it is intact and correctly fitting See figure 2 The model Scan Line 70 stoves are subjected to stringent quality control procedures both throughout the produc tion process and immediately before deli...

Page 8: ...ey and replacing the stones Fig 6 10 Emptying the ash pan fig 3 5 The stove is prepared for a fresh air intake Warning Any unauthorised modification of the stove and any use of non original spares will void the guarantee 3 4 5 6 10 9 8 7 ...

Page 9: ...9 12 04 2010 0037 1305 Changing to back smoke outlet Fig 11 18 12 13 15 16 17 18 11 14 ...

Page 10: ...ust be level To adjust turn the adjusting screws on the base up down We recommend installation of the soapstones is carried out by two people A standard set of brackets and pins are provided for installation of the soapstones Refer to the overview on the next page to see how many brackets pins are required If required lubricate the pin holes with a small amount of silicon Can also be ap plied betw...

Page 11: ...11 10 x standard brackets 4 x left brackets 4 x right brackets 18 x pins ...

Page 12: ...l accumulating stones are also available for Scan Line 70 Up to two accumulating stones can be installed in this stove The accumulating stones must be laid after the soapstones have been laid and the stove firebox has been adjusted ...

Page 13: ...t stone up against the stove base leg and secure with 1 x right and 1 x left bracket Fit both side stones positioning the rear brackets under the soapstones When fitting the right and left brackets onto the front and side soapstones tip the stove backwards right Left ...

Page 14: ...the soapstones are at right angles Fit the next rear stone and both side stones Position the brackets and pins in the holes in the soapstones Continue fitting the next rear stone and both side stones Position the brackets and pins into the holes ...

Page 15: ... rear stone and both side stones Position the brackets and pins into the holes Position the right and left bracket on the side stones and over the top plate on the stove Fit the side and rear stones before fitting the front stone ...

Page 16: ...16 When fitting outside air flue remove the inner plate from the grille Air intake convection Position the standard right and left brackets and fit the top plate Rear flue can be positioned as shown ...

Page 17: ...the handle on the side of the stove Convection open Handle up Convection closed Handle down If the stove has a top flue break off the inner ring NB There is a 3 mm gap between the front and top stones to allow for stove firebox expansion during use ...

Page 18: ...18 ...

Reviews: