GENERAL INFORMATION
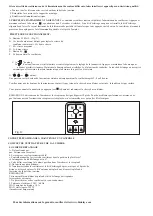
This wall remote control is designed to separately control your ceiling fan speed and light brightness.
The fan button will control the fan speed. (Hi, Medium, Low)
The light buttons will control the lights, brightness dimmer and off.
The red indicator on the transmitter will light when the button is pressed.
INSTALLATION AND OPERATING INSTRUCTIONS
1. HANDHELD TRANSMITTER
NOTE:
This unit is equipped with an automatically learned type remote control. There are no frequency switches on the receiver and
transmitter; the receiver unit will automatically scan the frequency from the handheld remote if any changes are made. This unit has 65,000
different code combinations.
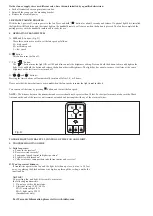
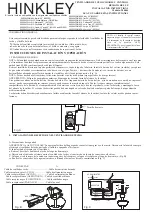
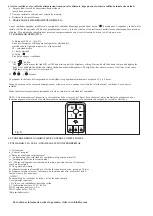
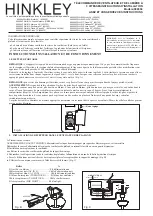
Remove the set screw on the back of transmitter, take out the battery cover. Insert the 3 volt battery (included) and make sure they are seated
correctly in each recess with the Po sign facing up. When remove or insert the batteries, use a suitable screwdriver to loosen or tighten
the screws and open the back cover. (Fig. A)
NOTE:
To prevent damage to the transmitter, remove these batteries if not used for long periods of time (months).
WARNING:
Chemical Burn Hazard. Keep batteries away from children.
This product contains a lithium button/coin cell battery. If a new or used lithium button/coin cell battery is swallowed or enters the body, it can
cause severe internal burns and can lead to death in as little as 2 hours. Always completely secure the battery compartment. If the battery
compartment does not close securely, stop using the product, remove the batteries, and keep it away from children. If you think batteries might
have been swallowed or placed inside any part of the body, seek immediate medical attention.
The batteries shall be disposed of properly, including keeping them away from children; Even used cells may cause injury.
2. INSTALLING RECEIVER IN THE CEILING FAN
A.
Safety precautions:
WARNING: HIGH VOLTAGE!
Household electrical power can cause serious injury or death. Disconnect the source of electrical power
to the ceiling fan by removing the fuse or switching off the circuit breaker.
B.
Installing receiver in fan.:
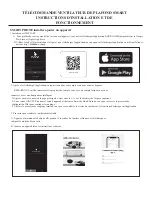
a. Remove the ceiling fan canopy from the mounting bracket.
b. Disconnect the existing wiring between the ceiling fan and supply at the electrical junction box.
c. Lay the black antenna wire on top of the receiver, and put the receiver in the mounting bracket. (Fig. B)
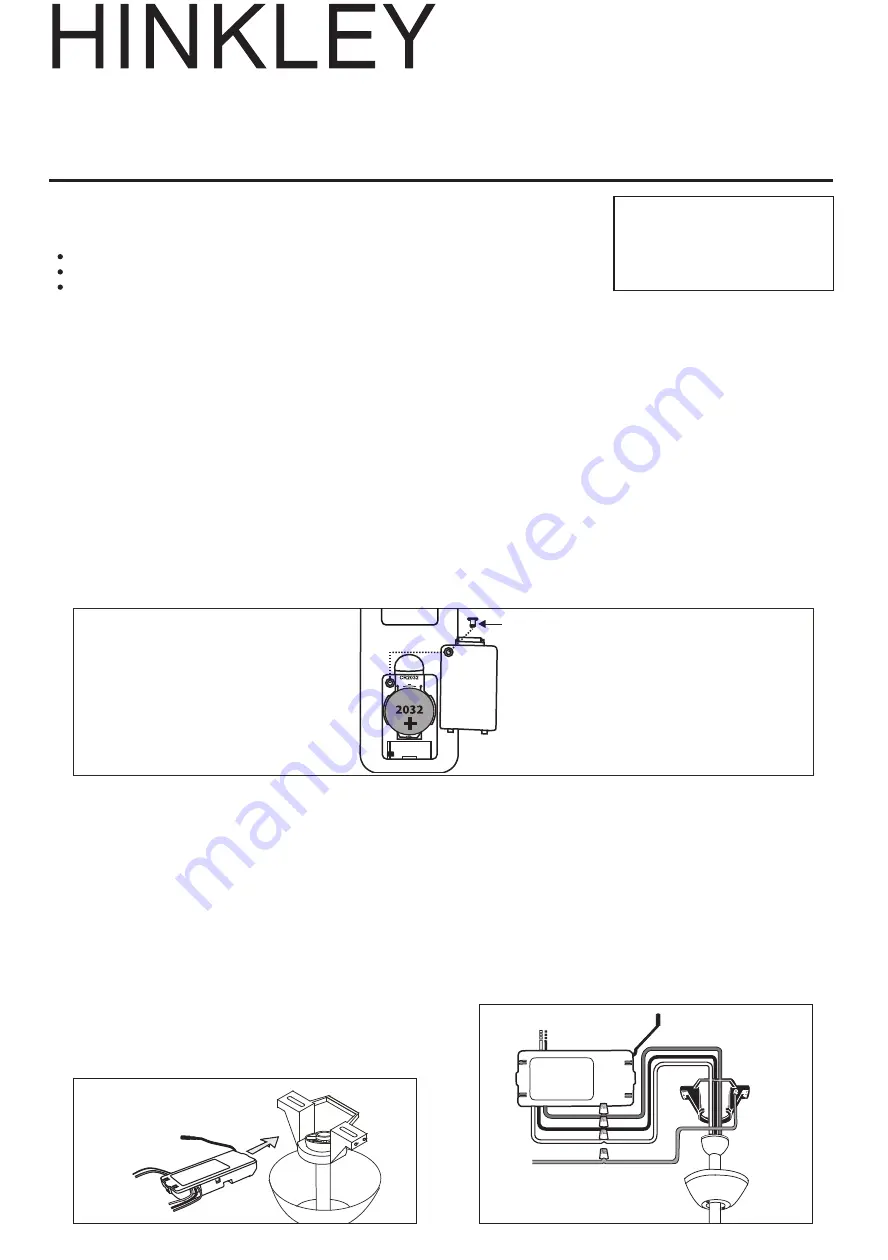
d. Make the connections as follows, using the wire nuts supplied: (Fig. C)
CONNECT TO
Green fan wire...........................................Bare supply wire
Black receiver wire (AC IN L)..................Black supply wire
White receiver wire(AC IN N)..................White supply wire
White receiver wire (TO MOTOR N).......White fan wire
Black receiver wire (TO MOTOR L)........Black fan wire
Blue receiver wire(FOR LIGHT)..............Blue light wire
Fig. A
Fig. B
RECEIVER
Fig. C
AC SUPPLY
BLACK
WHITE
BARE
GREEN
WHITE
WHITE
BLUE
BLUE
BLACK
BLACK
RECEIVER
NOTE:
When installing the remote
control, be sure your fan control or
pull chain switch are in the "
HIGH
SPEED
" position and the light
control or switch is set to "
ON
".
3 SPEED FAN & LIGHT
REMOTE CONTROL
INSTALLATION INSTRUCTIONS
Model: 980004
READ AND SAVE THESE INSTRUCTIONS
Set screw
Control is only compatible with the following Hinkley fans
9800
04
FWH-002:Bimini
60" (900
2
6
0)
9800
04
F
WH-013L
:Grand
Marquis
(GMRP-BN
)
9800
04
FWH-013:Marquis 52" (901352)
9800
04
FWH-015:Windward 52" (901552)
9800
04
FWH-016:Oasis 52" and 60" (901
6
52
and 901660
)
9800
04
FWH-0097:Indy
7
2"
(900972)
980004FWH-0095:Indy 56" (900956)
980004FWH-020:Tier 54" (902054)
980004FWH-017: Propel 52" (901752)
980004FWH-018: Cabana 36" (901836)
980004FWH-022: Vera Cruz 52" (902252)
980004FWH-023: Verge 52" (902352)
980004FWH-028: Ventus 44" (902844)


