background image

Color Plasma Display

Model Name

42PD8800TA

55PD8800TA

USER MANUAL

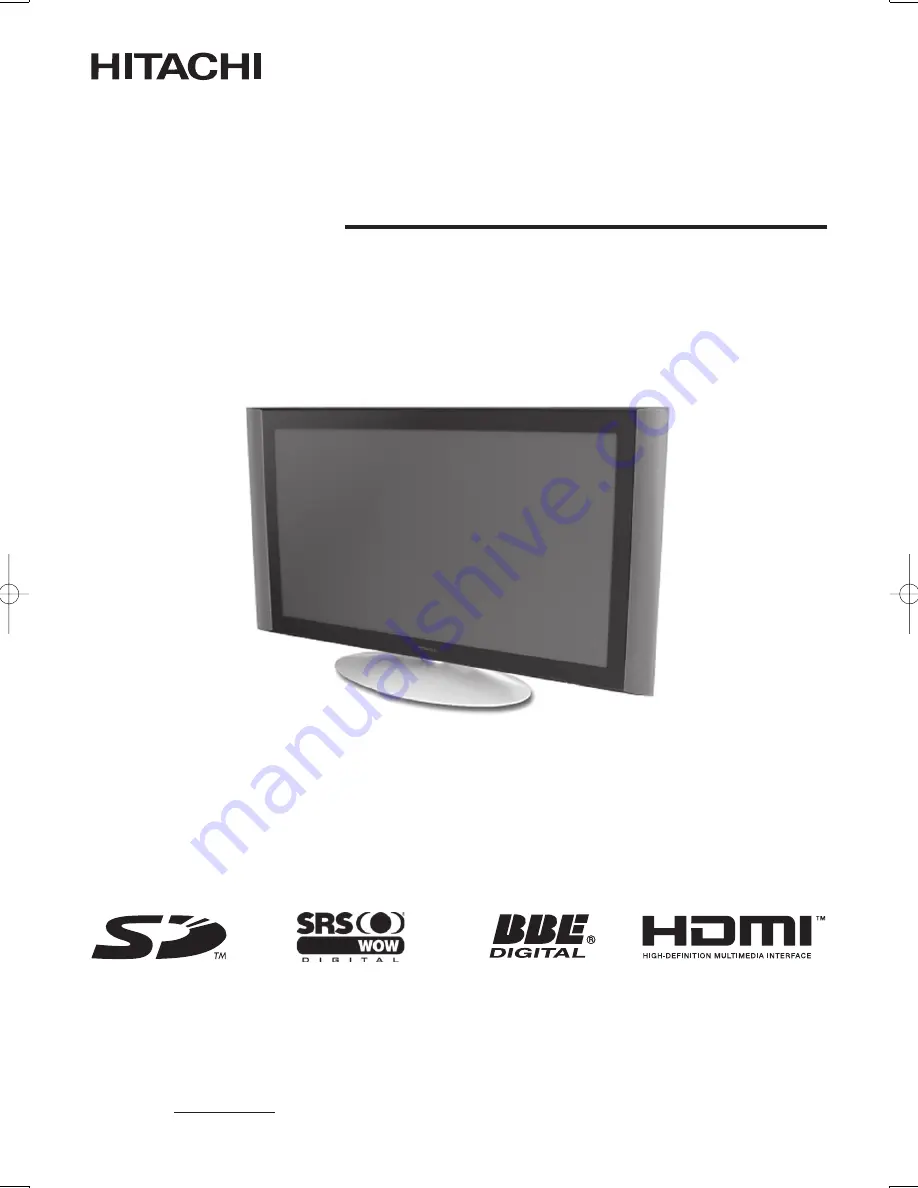
This is the image of the model 42PD8800TA.
Desktop stand shown above is optional.

READ THE INSTRUCTIONS INSIDE CAREFULLY.
KEEP THIS USER MANUAL FOR FUTURE REFERENCE

For future reference, record the serial number of your monitor.
SERIAL NO.                           

This serial number is located on the rear of the monitor.

PW3-3rd̲H1.indd   1

PW3-3rd̲H1.indd   1

2005/11/02   10:58:55

2005/11/02   10:58:55

Summary of Contents for 42PD8800

Page 1: ... image of the model 42PD8800TA Desktop stand shown above is optional READ THE INSTRUCTIONS INSIDE CAREFULLY KEEP THIS USER MANUAL FOR FUTURE REFERENCE For future reference record the serial number of your monitor SERIAL NO This serial number is located on the rear of the monitor ...

Page 2: ... RGB mode 32 Audio Menu 34 Timer Menu 35 FUNCTION 36 Power Swivel 36 About Teletext 37 Size Switching 38 Multi Picture Mode 40 Picture Freezing 44 Photo Input Function 45 Audio Switching 51 Power Save Mode 52 DVD Player STB Selection 53 TROUBLESHOOTING 54 When Following Messages Appear on the Screen 54 Symptom and Check List 54 PRODUCT SPECIFICATIONS 57 Signal Input 58 Recommended Signal List 59 I...

Page 3: ...for any loss damage or injury as a result of misuse Reproduction copying use modification and or transmission in whole or in part of this manual are prohibited without any prior written permission All other products and company names used in this manual are trademarks or registered trademarks of their respective owners Trademark Credits VGA and XGA are trademarks of International Business Machines ...

Page 4: ...circle with illustration is intended to constrain the users to follow the indicated actions when handle the product Each illustration within this symbol specifies the contents in detail The figure on the left is an example WARNING There is a risk of fire electric shock or serious injury Unplug the power cord immediately when serious problems happen Serious problems such as Smoke abnormal odor or soun...

Page 5: ...twist forcibly bend heat or pull excessively the Power Cord Do not place heavy objects including the unit itself on top of the Power Cord If the Power Cord is damaged contact your dealer for repairs or exchange Use only with designated power supply voltage To prevent the risk of fire and electrical shock operate this product only with the power supply voltage indicated on the unit Beware not to dro...

Page 6: ... the partial discoloration or blurring of the image on the CRT based television Please install it away from the speakers of the unit Disconnect all of the external connection cables and detach the anti tumble measures before moving the unit It may cause fire electrical shock or personal injuries Connect the power plug securely Improper connection will cause overheat and may result in fire Do not tou...

Page 7: ... unit It is because of the communication failure Please note that this is not malfunction When you dispose this product at the end of its life follow the regulations at your residential area For more information contact the local authority or the dealer where you purchased the product Cleaning and Maintenance Please make sure to unplug the power cord before cleaning the unit How to clean the plasm...

Page 8: ...age retention by displaying a completely white screen for about 1 2 hours In addition Luminance Manager function works in case of displaying such images on the four corners as TV station logos and clock display Use in combination with moving images Since the entire screen has relatively even degradation of the phosphor in moving images it can avoid the partial image retention We recommend to use t...

Page 9: ...igh definition Plasma screen New Photo Input function with selectable Background Music SD Card Slot installed Easy to use On Screen Display system operating with Remote control Low power consumption with Power Saving feature Motorized Power Swivel feature Desktop stand is optional SUPPLIED ACCESSORIES Check the supplied accessories before installation In case of missing or damaged please contact th...

Page 10: ...Board External Device Connection r Power Cord Socket t Control Panel see below for details Please refer to 13 17 for the detailed information for the connections Control Panel including Card Slot q SD Memory Card Slot w Sub Power button e Channel UP button r Channel DOWN button t Volume UP button y Volume DOWN button u Input Select OK button i Menu Return button q w e t y r OK P P SD MEMORY CARD P...

Page 11: ...ex g Time Cancel Pressing this button can indicate the time by On Screen display when receiving a TV program on the screen h TV Text TV Text This switches between the TV mode and the Teletext mode j Zoom Text TV Text Press this button to change picture size k Recall Pressing this button shows the input signal status l Return You can use this to return to the previous menu 1 Picture Mode Picture mo...

Page 12: ...battery compartment cover To close the battery compartment cover slide the cover in the direction of an arrow till it clicks shut CAUTION It could cause corrosion or battery leakage and may result in physical injury and or property damage including fire Never mix used and new batteries in the device Replace all the batteries in a device at the same time Remove the batteries if the remote control is...

Page 13: ...increasing the internal temperature and keep safety while using swivel function Make sure not to block any ventilation holes Do not install the unit in the small space such as inside the rack closet or the box Leave more than 10cm of clearance from each side of monitor and 30cm from the top of unit to wall Without Swivel function Leave at least 10cm of clearance behind rear unit With Swivel functi...

Page 14: ...In Socket marked 3 Connect the RF cable from the equipment Out to the other equipment In 4 Then connect from the equipment Out to ANT on the plasma screen Socket on marked VCR STB IN OUT IN OUT OK P P SD MEMORY CARD PUSH EJECT PH35814 INPUT AV5 R L MONO AUDIO VIDEO S VIDEO PH35826 Licensed by BBE Sound Inc under USP5510752 and 5736897 BBE and BBE symbol are registered trademarks of BBE Sound Inc W...

Page 15: ...jacks into PB or PR If your external device has a Component terminal COMPONENT connection is recommended for higher quality picture AV3 can be connected to the equipment with an S Video output and Composite output If your external device has a S video terminal S VIDEO connection is recommended for higher quality picture AV4 can be connected to the equipment with composite output VCR DVD player Set...

Page 16: ... the HDMI DVI connect to audio terminal besides HDMI Information HDMI High Definition Multimedia Interface is next generation multimedia I O interface Only one cable is used to transmit all video audio control signals which creates easy connection Moreover those digital signals can produce high quality data without any degradation You are provided two HDMI terminals one of the most remarkable featu...

Page 17: ... be adjusted from Audio Menu on page 35 The audio from the speaker will be muted when connecting the headphone to this terminal Photo Input terminal can be connected to digital still camera or USB card reader with USB cable For details refer to the Photo Input function shown on 45 50 SD Memory Card slot can be used for the Photo Input function with the SD or MMC card memory containing pictures For...

Page 18: ...ake sure that the cord is properly grounded If you use a power source converter plug use an outlet with a ground terminal and screw down the ground line Ensure that both ends of power cord are easily accessible If you have to change the power cord please use the certified power cord that meets your region s safety standard How to fasten the band To tighten To loosen Pull the band in the direction o...

Page 19: ...ndicating Lamp Status Power Status Power Switch Status Off Off Main power Off Red Standby mode Main power On Sub Power button Off Green On Main power On Sub power button On Orange Power Save mode Main power On Sub Power button On About Power Save mode see Power Save Mode and When Following Messages Appear on the Screen on 52 and 54 for details NOTE If the image does not appear on the screen at all...

Page 20: ...hift right 2 To decrease the sound volume press button on the remote control or Volume Down button on the control panel The Volume Indicator value on the screen will shift left Mute 1 To mute the sound press button on the remote control The sound of the unit is temporarily turned Off The color of the Volume Indicator will turn into magenta while muting the volume 2 To turn the sound back press but...

Page 21: ...g mode by following order TV AV1 AV2 AV3 AV4 AV5 HDMI 1 HDMI 2 RGB 3 To directly go back to TV mode pressing channel Up Down buttons on either remote control or the control panel Also you can use the numeric buttons on the remote control Input Signal Screen Display The input signal status can be displayed on the screen by pressing the button of the remote control The display will go out in approxi...

Page 22: ... options Press OK button to set your selection 6 To exit from the menu press MENU button NOTE The OSD menu screen will be closed automatically when no operation has been made for about one minute Language Menu Select the language from the list so that you can display the OSD menu in the selected language How to set Language 1 Enter the Language menu from the Main Menu 2 Select the appropriate lang...

Page 23: ...0 or channel number C or S Frequency When Auto Tuning Mode is set to position search the frequency by using buttons When Auto Tuning Mode is set to Direct this function is not available grayed out Name 1 Move the cursor to the first digit and select the letters with buttons 2 Move to the next digit with button 3 Press OK button again when you finish inputting all the letters The selectable letters a...

Page 24: ...ta for the main tuner Decrease the frequency data for the main tuner Sort You can change the order of channels as follows 1 Move the cursor to the Channel row you want to change order and then press OK button 2 The color of the letters on the designated line will be turned into green bracket and with 3 Move the designated row by using buttons 4 Press OK button to fix the position This function is n...

Page 25: ...n case that the input signal has too much noise the signal level is too low or the operation is unstable in Auto select the system according to the color system of the input signal Composite and S video input only PAL SECAM NTSC4 43 NTSC3 58 System 2 Auto NTSC M PAL M PAL N Video Input AV1 AV2 Auto Select the colorimetry depending on the input signal Generally select Auto In case that the input si...

Page 26: ...orizontal Position 63 63 Adjust the display position horizontally When the position exceeds the possible range the display color will turn into Magenta Vertical Position 31 31 Adjust the display position vertically When the position exceeds the possible range the display color will turn into Magenta Horizontal Clock 31 31 Minimize the vertical stripes on the screen Clock Phase 0 63 Minimize the bl...

Page 27: ...l Refer to Recommended Signal List on 59 On WXGA Mode Off This function is available only for WXGA signal Refer to Recommended Signal List on 59 1280x768 1366x768 Vertical Filter Off Reduce the flickers on the screen when set to On On Frequency Mode PC Select Movie when you see the moving image on PC Movie Information The items indicated by can be automatically stored the setting depending on the s...

Page 28: ...o Input function On Video Power Save Off During AV input this helps to reduce power consumption when there is no video signal In case of selecting AV input terminal which does not have signal input it changes the power status to power save mode in AV1 AV2 and standby mode in other AV input See 52 in details On Freeze Mode Split This is the useful function to watch the program in both still and act...

Page 29: ... Input function Switch the pattern of background See details on 49 2 Slide Effect Off This is available only for Photo Input function You can select the method of switching slides during slide show See details on 47 1 2 Slide Interval 5Sec This is available only for Photo Input function You can select the interval time for switching slides during slide show See details on 47 10Sec 30Sec Slide Musi...

Page 30: ...t the value less than 31 Brightness 31 31 With this function black is adjusted to change the overall brightness by using Color 31 31 It can adjust color density based on your preference by using Sharpness 15 15 Preferred sharpness can be adjusted by pressing button for Softer image or button for Sharper image Tint 31 31 Pressing button enhances red and weakens green while pressing button weakens r...

Page 31: ...ie film and faithfully reproduces the original film images Off Set to Off if the image does not look natural during turning on On 3D Comb Filter Off This is available only when receiving NTSC PAL composite signal This reduces the dot and color blurring in minute scales so that it can reproduce purer color Low High LTI Off Adjusts the sharpness of the picture signals Low Middle High CTI Off Adjusts t...

Page 32: ...the 4 Color Temperature modes Off Remains as default setting Red Yellow Green Cyan Blue Off Color Decoding RGB R G B This can adjust R G B level and tint to make the color appear naturally for the user s appearance First select RGB multiple color screen or R G B single color screens to check the color decoding effects while adjusting Then you can adjust the level of color red and green color inten...

Page 33: ...than 31 Brightness 31 31 With this function black is adjusted to change the overall brightness by using Color 31 31 It can adjust color density based on your preference by using Tint 15 15 Pressing button enhances red and weakens green while pressing button weakens red and enhances green The setup hint is adjusting for the realistic skin color Picture Enhancement Off You can select the preferred s...

Page 34: ...arts Cut off subdue the following colors on the darker parts Off Remains as default setting Red Green Blue Cut off Red Green Blue Off Reset Each item on this menu screen can be restored to the original factory settings by pressing OK button Information There is a useful function to automatically store the setting on menu in almost every item so that you do not have to reset every time Furthermore ...

Page 35: ...reference Normal Wide TruBass Off TruBass gives you the enchanced bass sound Select it depending on your preference Low High BBE Off BBE High Definition Sound restores clarity and presence for better speech intelligibility and musical realism Select it depending on your preference Low High Perfect Volume Off It will automatically adjust the volume to its average level each time you change the chann...

Page 36: ...when the image from the RGB or Photo Input is on the screen Information There is a useful function to automatically store the setting on menu in almost every item so that you do not have to reset every time Furthermore the following items can be stored more specifically The items indicated by can be stored the setting for each of Audio Mode Timer Menu This allows the unit to turn Off Standby mode o...

Page 37: ...during the Swivel operation and could cause the breakage of the objects and or the stand To operate the Swivel function correctly place the monitor on the stable surface When you use the unit as wall mounting disconnect the stand cable from the monitor before installation SWIVEL button Information About Swivel terminal connection CAUTION When you install the Desktop stand follow the Instructions o...

Page 38: ...le service broadcasting Subtitle To display Hidden text ex The answers of the Quiz or the Game page Press again to close the revealed answer Reveal To return to actual broadcast temporarily while searching for the Teletext page you request When the search is done the designated page will be displayed on the upper left of the screen Press again to return to Teletext page X Cancel To access the link...

Page 39: ...ding vertically In some case slight blanking may remain at the top and bottom Squeeze Full Play a 4 3 image faithfully in the standard vertical size and horizontally squeezed Information Aspect ratio represents horizontal vertical ratio on screen For example vista image is 16 9 in 4 3 image Position Adjustment Vertical picture position can be adjusted for Panoramic Zoom and Cinema mode as follows ...

Page 40: ...s Use 4 3 mode to view the image reflecting original intention FUNCTION continued Size Switching continued RGB signal input You can select suitable size depending on the resolution Normal Full Zoom1 Zoom3 Zoom2 Real Display Area Selection Diagram Resolution Full display Circular display Display Full Normal Real Zoom1 Zoom2 Zoom3 640 X 480 VGA 800 X 600 SVGA 1024 X 768 XGA 1280 X 1024 SXGA 1600 X 12...

Page 41: ...1 5 or change channels only on the side with Speaker icon 1 To shift the speaker icon press button The speaker icon will be shifted from A to B back and forth 2 To change the channel on the selected picture press P 3 To select the Input mode on the selected picture press Input Select buttons on the remote control NOTE In TV mode you cannot select the same channels on both sides simultaneously You ...

Page 42: ...nal equipments at the same time NOTE The audio comes out ONLY from side A You can change the channels or change Input modes on the side with red triangle mark 1 To switch the location Press buttons on the remote control The mark will shift to side A and side B back and forth 2 To change the channel Make sure that mark is located on the side you want to make changes Side A Press P to select channel...

Page 43: ...s 2 4 12 button The 12 picture mode is displayed on the screen 12 picture mode You can check 12 different live broadcast channels on one screen The channels that are preset in advance up to 200 channels will automatically appear in certain intervals NOTE This mode is available only in TV mode 1 To EXIT from the Multi Picture mode press Next time you press to activate the Multi Picture Mode it will...

Page 44: ...ocated on the Sub screen Press P to select channels 3 To change the Input mode of the Sub screen Make sure that the speaker icon is located next to the Input mode indication of the Sub screen lower Press Input Select buttons on the remote control AV1 5 are available 4 To change the location of the Sub screen Press buttons The Sub screen will move up and down 5 To exit from the Multi Picture mode p...

Page 45: ...plays 2 pictures from the same source One is active left while the other is still picture right This is very useful in order to avoid missing or take note necessary information such as ingredients in cooking Strobe It displays 12 pictures from the same source 11 of them are still while the last picture is active This can be used to check such movement as swinging of golf club and baseball bat This...

Page 46: ...cated near the slot 3 Connect the USB cable to the input terminal as shown Right side or insert the SD card MMC into the slot Left side 4 Turn ON the TV after the USB cable is connected or the SD card MMC is inserted 5 Press button on the remote control to activate Photo Input mode Then turn ON the DSC Refer to the user manual of your DSC for the timing 6 Each time button is pressed you can switch...

Page 47: ...tton is pressed the picture is rotated in the sequence of the following 4 8 12 16 3 7 11 15 2 6 10 14 1 5 9 13 20 24 28 32 19 23 27 31 18 22 26 30 17 21 25 29 20 24 28 32 19 23 27 31 18 22 26 30 17 21 25 29 No 23 28 05 03 1600x1200 No 24 28 05 03 1600x1200 Photo Index 1st Page Photo Index 2nd Page Move to next page Photo Index 2nd Page Select the file Full size File 23 is displayed Full size File ...

Page 48: ...g MENU button Press it again to return to the Photo Input page Refer to Table 1 as below NOTE Contrast will decrease automatically to reduce Image Retention if stationary images such as still photos are left on the screen for more than 3 minutes Please note that it is not malfunction Table 1 Slide Show Adjustment Function Menu Selection Description Slide Effect Off 1 2 Select Slide Switching Metho...

Page 49: ...or directly rather than USB 2 If your DSC is PictBridge compatible and has a function to switch between PTP and Mass Storage connection change your setting to Mass Storage and then connect to Photo Input terminal so that it can be available on both Still and Movie pictures PTP connection can display still pictures but not movie pictures 3 If your DSC does not support SD card MMC or Mass Storage co...

Page 50: ...ding Files Loading Normal no message Not insert USB SD MMC No Connection Not available format No Connection Abnormal No Connection No File No File The message Loading starts to blink automatically if it is displayed on the screen more than 5 seconds Specification Application q Digital Still Camera corresponding to DCF standard w USB Card Reader with the memory containing pictures had taken by q ca...

Page 51: ...or more than 3 minutes The OSD message No Connection is displayed in case of the incomplete connection with USB cable or SD card MMC and connection to a digital still camera or USB card reader without the memory card The menu items other than Picture Function and Audio are not available with grayed out display The functions of the multi picture CH selection freeze mode aspect mode display and so o...

Page 52: ...received sound mode display appears in yellow as shown Also when receiving NICAM signals NICAM display will appear Each time button is pressed the display is switched in the sequence of following Sound multiplex signal received Yellow NICAM signal received Yellow Green Yellow Green NICAM NICAM Yellow I Main language Primary Sound II Sub language Secondary Sound force mono This selects main languag...

Page 53: ...Lamp AV1 AV2 HDMI1 HDMI2 Power Save Orange Turns On automatically AV3 AV5 Standby Red Remains as Standby mode When the RGB input is selected When this unit is connected to a VESA DPMS computer the Power Save mode Operation mode Off can be set to be activated automatically when the computer is not being used to reduce power consumption by this unit RGB sync signal Horizontal Yes No Yes No Vertical ...

Page 54: ...onfirm the setting After setting the maker and type press the SUB POWER button on the remote control If the DVD does not switch ON repeat step 1 and 2 using other maker types as listed DVD Selection Makers of DVD Player Set Maker Set type Makers of DVD Player Set Maker Set type HITACHI q q e RCA p q FUNAI w q Mitsubishi q Pioneer e q y ONKYO RED q e Panasonic r q r ZENITH GREEN q TOSHIBA t q r THOM...

Page 55: ...eck the Indicating lamp status Off Red Green or Orange Check the connection of the Power Cord and or other cables Check if the Main Power of the unit or external equipments is ON Check if the TV mode is selected Check if the TV is in Standby mode or Power Save mode Adjust the values in Picture menu and Audio menu 13 16 18 23 52 Snowy picture poor sound Check the antenna connection and direction Th...

Page 56: ...on 57 59 Image cannot be displayed in the correct position Press button to check if the input signal of the displayed image is compatible with the specification of the monitor 25 57 59 When the VCR is in special playback features Fast Forward or Rewind the screen gets dark and cannot see the image at all It could happen when the VCR is connected to Component output such as 480i This is not malfunct...

Page 57: ...r vertical resolution with this action 26 When the characters are displayed on the whole screen the vertical stripes appear and some of the characters are blurred PC input mode only ABCDEFGHIJ abcdefgABCDEFGabcd ABCDEFGHIJ abcdefgABCDEFGabcd Try Auto Adjust If the display condition is not improved with Auto Adjust adjust Horizontal Clock 25 When the letter string is displayed in full screen all of...

Page 58: ... L R audio input terminal RCA AV3 5 composite video input terminal RCA S video input terminal L R audio input terminal RCA AV4 composite video input terminal RCA L R audio input terminal RCA HDMI 1 2 HDMI input terminal Audio input terminal 3 5mm Stereo Mini Jack Photo Input Photo Input terminal SD card slot Input signals Composite video PAL SECAM NTSC3 58 NTSC4 43 PAL60 Component video 480i 576i ...

Page 59: ... Data2 11 TMDS Clock Shield 2 TMDS Data2 Shield 12 TMDS Clock 3 TMDS Data2 13 CEC 4 TMDS Data 1 14 Reserved N C on device 5 TMDS Data1 Shield 15 SCL 6 TMDS Data1 16 SDA 7 TMDS Data0 17 DDC CED Ground 8 TMDS Data0 Shield 18 5V Power 9 TMDS Data0 19 Hot Plug Detect 10 TMDS Clock When different kinds of input signals are simultaneously input to the monitor via a graphics board or the like the monitor...

Page 60: ...56 48 75 00 14 1024 X 768 75 03 60 02 78 75 15 1024 X 768 85 00 68 68 94 50 16 1152 X 864 75 00 67 50 108 00 17 1280 X 1024 60 02 63 98 108 00 18 1280 X 1024 75 03 79 98 135 00 19 1280 X 1024 85 02 91 15 157 50 20 1600 X 1200 60 00 75 00 162 00 21 1600 X 1200 75 00 93 75 202 50 22 1600 X 1200 85 00 106 25 229 50 23 Macintosh 640 X 480 66 67 35 00 30 24 24 832 X 624 74 55 49 72 57 28 25 1024 X 768 ...

Page 61: ...CAM NTSC3 58 4 43 AV1 AV2 576i 576p 480i 480p 720p 50 60 1080i 50 60 Available 4 Picture 2 Picture 1080i Input terminal AV1 AV5 AV1 AV2 TELE TEXT Main Sub TV PAL SECAM NTSC3 58 NTSC4 43 576i 576p 480i 480p 720p 50 720p 60 1080i 50 1080i 60 TV AV1 AV5 PAL SECAM NTSC3 58 4 43 AV1 AV2 576i 576p 480i 480p 1080i 50 60 720p 50 60 Available With Picture Freezing Function Split Strobe TV PAL SECAM NTSC3 5...

Page 62: ...QR65402 Printed in Japan ...

Reviews: