background image

SERVICE MANUAL

SPECIFICATIONS AND PARTS ARE SUBJECT TO CHANGE FOR IMPROVEMENT

Digital Media Division,Yokohama

DVD VIDEO CAMERA/RECORDER

2005

TK

    No. 0511E

DZ-GX20MA
DZ-MV780MA
DZ-MV750MA

DO NOT RESELL OR DIVERT IMPROPERLY

DZ-GX20MA

DZ-MV780MA

DZ-MV750MA

June

Summary of Contents for DZ-GX20MA

Page 1: ...NS AND PARTS ARE SUBJECT TO CHANGE FOR IMPROVEMENT Digital Media Division Yokohama DVD VIDEO CAMERA RECORDER 2005 TK No 0511E DZ GX20MA DZ MV780MA DZ MV750MA DO NOT RESELL OR DIVERT IMPROPERLY DZ GX20MA DZ MV780MA DZ MV750MA June ...

Page 2: ...Diagnosis 4 27 4 6 1 Trouble diagnosis flowchart 4 27 4 6 2 Reassembly to enable service position 4 39 4 7 Procedure for Removing Disc from Faulty DVD Video Camera Recorder 4 43 4 7 1 Items to be checked 4 43 4 7 2 How to remove disc 4 43 4 8 System Resetting Resetting Camera Functions 4 44 4 8 1 List of items to be reset 4 44 4 8 2 System reset procedure 4 46 4 8 3 Procedure for resetting camera ...

Page 3: ...6 2 6 1 2 Power Supply and Materials for Creating Reference Data 6 3 6 1 3 Connections when Creating Reference Data 6 3 6 1 4 Settings when Creating Reference Data 6 5 6 1 5 Copying or Deleting Adjustment Program 6 6 6 1 6 Starting and Terminating Reference Data Creation Program 6 6 6 1 7 Creating Reference Data 6 10 6 2 Setups for Adjustment 6 12 6 2 1 Checking Reference Data 6 12 6 2 2 List of J...

Page 4: ... 11 AEL S 9 S 12 CAMERA DSP MAN S 10 S 13 CODEC MAN S 11 S 14 REG MAN S 12 S 15 PLUG MAN S 13 S 16 LENS DRIVE MAN S 14 S 17 IC BLOCK 1 2 S 15 S 18 IC BLOCK 2 2 S 16 iii C Circuit Board Diagrams C 1 C 1 GSL H C 1 C 2 GSL M C 1 C 3 GSL L C 1 C 4 FRT H FRT M FRT L C 2 C 5 AVJ H AVJ M AVJ L C 2 C 6 DRF H DRF M DRF L C 2 C 7 SHE H C 3 C 8 SHE M C 3 C 9 AEL C 4 C 10 MAN C 5 B Block Diagrams B 1 B 1 Vide...

Page 5: ...ACHI Service Manual A subscription to or additional copies for HITACHI Service Manual may be obtained at a nominal charge from HITACHI SALES CORPORATION PRODUCT SAFETY NOTICE CAUTION There is a high voltage section inside the DVD video camera recorder When repairing or inspecting it take great care to prevent electric shock Use an isolating transformer wear gloves etc CLASS 1 LASERPRODUCT CAUTION ...

Page 6: ...observe the following cautions 1 Do not subject optical pickups to any severe vibrations or impact during movement installation or disassembly 2 When performing repair work do not perform disassembly any further than that described in this manual 3 Never turn the semi variable resistors for adjustment in optical pickup or DVD drive 4 NEVER look into the objective lens in optical pickup or directly...

Page 7: ...20 C Point to be soldered Surface mounted chip parts other than those shown below Surface mounted chip parts for DVD cameras cellular phones only Discrete parts Chassis metal shield etc Tip temperature 320 30 C heating time less than 5 seconds 350 10 C heating time less than 3 seconds 380 30 C 420 30 C 3 Lead free solder for servicing Use the following lead free solder for servicing Recommended le...

Page 8: ... 1 Before using lead based solder remove the lead free solder completely from the point to be soldered 2 For additional soldering for repair set the soldering iron tip temperature for lead free solder mix lead based solder and lead free solder sufficiently Do not perform any repair using the bare soldering iron tip without adding solder since it will cause secondary failure due to lack of strength...

Page 9: ...rance Power capacitance Indication No indication K k M M No indication 5 All tolerances other than 5 are indicated in schematic diagrams No indication 1 8W 1 16 W for leadless resistors with no indication All capacitances other than the above are indicated in schematic diagrams Item Value Dielectric strength Indication No indication µF P pF No indication 50V All dielectric strengths other than 50 ...

Page 10: ...LA and VM D875LA VM D975LA D875LA D975LA D875LA 2 If there is no difference in models going to different destinations the indication of destination is omitted Example When indicating DZ MV350E AU and DZ MV350E SW DZ MV350E 5 Differences in parts between schematic and circuit board diagrams If parts differ between models asterisks are attached to circuit numbers See parts difference tables in diagr...

Page 11: ... for DZ MV780MA Parts Name Disc drive unit Lens unit EVF unit LCD unit AEL circuit board AVJ H AVJ L AVJ M circuit board DRF H DRF L DRF M circuit board 1 FRT H FRT L FRT M circuit board GSL H GSL L GSL M circuit board MAN circuit board SHE H SHE M circuit board 1 Film type board that connects MAN circuit board and disc drive unit Servicing method Unit replacement Which incorporates the DRV and HD...

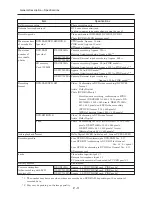
Page 12: ...Focus Zoom Required minimum illumination Viewfinder LCD monitor Image Stabilizer Shutter speed Specifications 1 3 6 inch interlaced 1 4 5 inch interlaced 1 6 inch interlaced Approx 2 120 000 Approx 1 330 000 Approx 680 000 Video Approx 1 230 000 Photo Approx 1 920 000 Video Approx 690 000 Photo Approx 1 100 000 Video Approx 340 000 Photo Approx 340 000 F1 8 2 2 f 3 16 1 3 4 4 5 45 mm F1 8 2 3 f 1 ...

Page 13: ... format DZ GX20MA 1600 1200 pixels DZ MV780MA 1280 960 pixels DZ MV750MA 640 480 pixels and DVD video recording DVD VR format 704 480 pixels JPEG of external input 640 480 pixels Video Conforming to DVD video format Audio Dolby Digital Photo Conforming to JPEG DZ GX20MA 1600 1200 pixels DZ MV780MA 1280 960 pixels DZ MV750MA 640 480 pixels format External input 640 480 pixels Dolby Digital MPEG Aud...

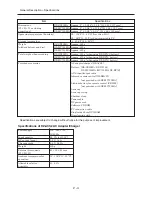
Page 14: ...BP7S AV S input output cable Infrared remote control DZ RM4W not provided with DZ MV750MA Lithium battery for remote control CR2032 not provided with DZ MV750MA Lens cap Lens cap string Shoulder strap Power cable DC power cord Software CD ROM PC connection cable Single sided 8cm DVD RAM Disc cleaning cloth Specifications are subject to change without notice for the purpose of improvement Specifica...

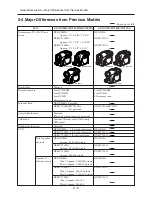
Page 15: ... Video Approx 1 230 000 pixels Photo Approx 1 920 000 pixels DZ MV780MA Video Approx 690 000 pixels Photo Approx 1 100 000 pixels DZ MV750MA Video Approx 340 000 Photo Approx 340 000 2 4 Major Differences from Previous Models Same as on left General Description Major Differences from Previous Models Item Dimensions W H D and shape Disc holder Recording media Internal flash Assist light funtion 16 ...

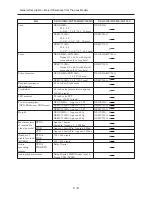
Page 16: ...0 g DZ MV750MA Approx 450 g Approx 18 min Variable Approx 3 10 Mbps Approx 30 min Fix Approx 6 Mbp Approx 60 min Fix Approx 3 Mbps 704 480 pixels 352 480 pixels Dolby Digital Dolby Digital MPEG Audio layer 2 Linear PCM LPCM General Description Major Differences from Previous Models DZ GX20MA MV780MA MV750MA DZ GX20A MV780A MV730A Lens Zoom Filter diameter Required minimum illumination Viewfinder L...

Page 17: ...tery CR2032 1 Not provided with DZ MV750MA DZ GX20MA MV780MA MV750MA DZ GX20A MV780A MV730A Item General Description Major Differences from Previous Models Maximum number of recordable photos Number of pixels for JPEG photo during camera recording Number of pixels for JPEG photo during line input recording Number of pixels for MPEG photo during camera line input recording PHOTO button Quick Menu b...

Page 18: ...A MV780MA MV750MA can be played using other Hitachi DVD video camera recorders 2 even if it is not finalized However do not use other Hitachi DVD video camera recorders 2 to record or finalize a DVD R recorded on DZ GX20MA MV780MA MV750MA Doing so will make the DVD R unplayable on other DVD video camera recorders DVD players etc A DVD R recorded on other Hitachi DVD video camera recorders 2 can be...

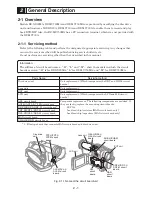
Page 19: ...uid crystal display inside 15 Viewfinder 16 Diopter control To adjust the focus of image appearing in the viewfinder Pull out the viewfinder 17 ACCESS PC indicator Will blink or light when the disc in DVD video camera recorder is accessed write or read is executed or the DVD video camera recorder is connected to PC 18 PHOTO button 19 DISC EJECT button Press down and release this button to open the...

Page 20: ...m the factory 36 DISPLAY Screen display button Press this button to display the details of image being played back or camera setting status or switch the display off 37 CARD ACCESS indicator 38 Volume control buttons VOL buttons To adjust the volume of sound from speaker etc 39 Card insertion block 40 BLC backlight compensation button Press this button when subject is being lighted from rear 41 bu...

Page 21: ...lies to DVD Video DVD R and DVD RW Video recording playback standard that applies to DVD RAM and DVD RW This allows versatile editing functions differing from the DVD Video Format See DVD Video Recording Format Exchangeable image file format File format used for recording photos on digital cameras See IEEE1394 Frame Noise Reducer This function or circuit automatically recognizes noise that randoml...

Page 22: ...tion See Secure MultiMediaCard Also referred to as SecureMMC This compact memory card has multimedia card specifications to which an advanced copyright protection function is added This function writes the protect information to DVD RAM disc to prevent accidental erasure Software Disc Protect is included in DVD RAM disc specifications defined by DVD Forum Super Twisted Nematic Liquid Crystal Displ...

Page 23: ... only the DZ MV780MA being different Only for DZ MV780MA the shapes of L case R case front case and lens cover are different and their assembly method is different too 2 Accessory shoe The accessory shoe of DZ GX20MA MV780MA has a power control terminal but the accessory shoe of DZ MV750MA doesn t and so the DZ MV750MA does not have an SHE H SHE M circuit board 3 Camera block The size and shapes o...

Page 24: ...erminal The DZ MV750MA does not use the SHE H SHE M circuit board because it does not have a control terminal for the accessory shoe 2 Comparison between new models and DZ GX20A MV780A and DZ MV730A There are no differences Fig 3 1 2 Configuration of circuit boards and their mounting locations LCD circuit board in the LCD unit EVF unit MR circuit board in the LCD unit Disc drive unit FRT H FRT L F...

Page 25: ... RW DVD RW DVD ReWritable is a DVD format that adds a rewritable function to DVD R The format is certified by the DVD Forum The format of DVD RW attaches a high value to compatibility of playback on DVD recorders players DVD ROM drives etc in the same way as with DVD R Here it is the same as that of one layer DVD ROM and DVD R except for the reflectance ratio Information From the viewpoint of form...

Page 26: ...n the Remarks and Memo columns referring to Table 4 8 1 List of items to be reset These notes will be necessary not only for reset but for checking any defects that occur under the particular setting conditions Troubleshooting 1 Messages and error codes will appear on LCD monitor or in viewfinder Fig 4 1 1 Check phenomenon No message appears 1 Message appears 1 Display of Error Codes and Restricti...

Page 27: ...sing the DVD video camera recorder where the temperature is low A fully charged battery may be discharged sooner than usual at low temperatures Keep extra batteries on hand Battery may be dead Replace with a new one The performance of battery will deteriorate if it is used for an extended period of time or frequently The battery may be over discharged Continue charging The CHARGE indicator will ch...

Page 28: ...PC image cannot be recorded on the DVD video camera recorder Has brightness of LCD screen been adjusted Stop recording and adjust the brightness Is the DVD video camera recorder being used outdoors Use the viewfinder When using LCD monitor adjust angle so that LCD screen is not exposed to direct sunlight Did you press the LCD monitor or the area around it If the LCD monitor is pressed some unevenn...

Page 29: ...as the image input from analog VCR VHS 8 mm and recorded The problem may be improved if a VCR equipped with TBC time base corrector circuit is used for playback Was recording of external input made with Frame specified Specify Field for PHOTO Input in record mode settings Is the TV volume control set correctly Adjust volume control on TV Did the image recorded from AV input output jack have noise ...

Page 30: ...re of the DVD video camera recorder is too high due to continuous operation Disconnect the DVD video camera recorder from PC remove the disc from the DVD video camera recorder set the power switch to OFF and then leave it as is until the temperature decreases After checking that the temperature has gone down use a brand new disc and restart operation The USB terminal of PC may be faulty Connect th...

Page 31: ...nalized Making sure the ACCESS PC indicator on the DVD video camera recorder goes out turn the PC off and then unplug the PC connection cable from the DVD video camera recorder If your PC uses Windows 2000 Professional the problem may be solved it you install Windows 2000 Service Pack 3 or later Make sure that you have already installed the driver provided with the USB2 0 card You will need to ins...

Page 32: ...ure for Removing Disc from Faulty DVD Video Camera Recorder and then refer to 4 6 Trouble Diagnosis Is the remote control pointed at the infrared receiver on the DVD video camera recorder Point it at the infrared receiver on the DVD video camera recorder Is the infrared receiver on the DVD video camera recorder exposed to direct sunlight or strong fluorescent light The remote control cannot operat...

Page 33: ...g of only video scenes is possible Appears when combining one scene was attempted Appears when user performed deletion at the upper limit of 999 scenes registered 1 Appears when combining or moving scenes was instructed with Category VIDEO or PHOTO specified Troubleshooting Replace with a charged battery or use the AC adapter charger Stop trying to combine scenes or create a play list containing t...

Page 34: ...he remaining number of recordable photos has reached less than 10 during recording Appears when a card initialized on PC etc or a card whose initialization was interrupted before is loaded Appears when a damaged card is initialized Appears when an error occurred during editing of video files Appears when the card cannot be recognized because its terminals are dirty Also appears when data other tha...

Page 35: ...turned off by mistake during video recording or editing and an abnormality in part of the file is recognized Appears when reading writing of recorded files cannot be performed because the disc is dirty If the message appears immediately after recognition of a loaded recorded disc was finished first check for dirt on disc Appears if writing to file cannot be completed normally because power was tur...

Page 36: ...e care with the following when repairing video file a If any message appears when the power switch was moved from OFF to Video or Disc Photo with the disc left loaded after camera recording choose repair b If recording and playback are possible with another disc which is free from condensation or dirt choose repair c Be sure to connect the AC adapter charger The specifications state that repair is...

Page 37: ... of disc has reached the limit during editing of video file Appears when playback or editing is attempted using the Disc Navigation function with no scene recorded on disc Appears if switching of play list is selected with no play list registered Refer to 4 4 4 Cleaning disc and optical pickup and clean the disc Or replace the disc Set the power switch to OFF and reconnect the AC adapter charger t...

Page 38: ... loaded Appears when an unformatted DVD RAM DVD RW or one initialized other UDF2 0 on PC is loaded Also appears if user rejects partial repair or total repair of video file Appears when a brand new DVD RW DVD R was loaded Release the write protect using the device that has the software write protect function for program units or choose YES and designate it to delete the scenes Release the write pr...

Page 39: ... after a disc is formatted the specifications state that the video quality or wide mode used for the first recording will be held on the DVD RW VF mode DVD R Appears if the disc recordable capacity has reached the limit during recording Appears when the last image of scene was selected to divide the scene The specifications state that dividing a scene at its end is not possible Also appears when r...

Page 40: ... if no disc is loaded Appears when a disc that cannot be used on the DVD video camera recorder has been loaded Appears when the disc was not properly attached to the turntable If any of the above does not apply the DVD video camera recorder may be faulty Appears during user operation all recorded scenes have been deleted and cleared The specifications stipulate that a play list with no scene on it...

Page 41: ...r of scenes will exceed 999 by moving a scene Refer to 1 page 4 8 This message appears during operation process It will appear when user interrupted any process by pressing the stop cancel button when processing multiple scenes etc Appears when only multiple locked scenes were selected using the Disc Navigation function and deleting them was attempted Appears when a card other than SD memory card ...

Page 42: ...nits by software disc protect function is loaded or if an attempt is made to record on write protected disc Format the disc deleting all recorded data or replace the disc Refer to 4 4 4 Cleaning disc and optical pickup and clean the disc Or replace the disc Terminate the Disc Navigation function set the power switch to OFF with the disc loaded remove the battery and then connect the AC adapter cha...

Page 43: ...rate the DVD video camera recorder while watching the LCD monitor or viewfinder screen a Both disc and card are loaded VIDEO or CARD PHOTO b Only disc is loaded VIDEO c Only card is loaded CARD PHOTO d Neither disc nor card is loaded VIDEO 3 When a disc or card or both are loaded press the DISC NAVIGATION button to display the thumbnail screen If neither disc nor card is loaded this step is not ne...

Page 44: ...are likely to frequently appear and appropriate troubleshooting If error codes other than those listed in Table 4 4 1 appear check with the factory for troubleshooting Table 4 4 1 Major Error Codes and Troubleshooting Error code 0200 0280 0400 0401 040D 1001 1100 2881 3105 3122 Contents of problem Optical pickup failed to move Recognition of disc failed Optical pickup was faulty No disc DVD RW DVD...

Page 45: ...nd is not blocking the disc insertion block Remove the disc referring to 4 7 Procedure for Removing Disc from Faulty DVD Video Camera Recorder and then refer to 4 6 Trouble Diagnosis With the disc left loaded set the power switch to OFF and then leave the DVD video camera recorder in a dry place until condensation disappears for at least 1 2 hours Clean the optical pickup referring to 4 4 4 Cleani...

Page 46: ... Yes Check the disc loaded status Is a single sided disc used Is disc loaded with the recording surface facing the optical pickup Load the disc with the recording surface facing the optical pickup Is disc properly attached to the turntable Push the disc onto the turntable until a click is heard Is there a foreign object in the vicinity of turntable Remove the foreign object Is disc usable on the D...

Page 47: ... cleaners and cleaning cloths generally available are also usable a KS2424 X00 Toraysee cleaning cloth only produced by Toray b LF K200DCJ1 DVD RAM PD disc cleaner cleaning cloth and cleaning liquid produced by Panasonic c OC CS MO disc cleaner cleaning cloth and cleaning liquid produced by Hitachi Maxell 2 Cleaning optical pickup Note Do not clean the optical pickup needlessly The optical pickup ...

Page 48: ...nd Updating The DVD video camera recorder stores in flash memory the five types of firmware program shown in Table 4 5 1 These firmware programs can be updated whenever necessary to improve performance Check to see whether any defects in the DVD video camera recorder can be eliminated by updating any firmware programs If improvement is likely update them Information The information on how to upgra...

Page 49: ...sion or information display screen using the following button operation Simultaneously press the SELECT REC and buttons Information The display contents on version and detail screens are identical except for the titles at the top left of screen The version screen is a version check screen used when either disc or card is loaded or when both disc and card are loaded The detail display screen is a v...

Page 50: ... power switch to OFF and then use the AC adapter charger to power the DVD video camera recorder A battery cannot be used to do this because it may interrupt power of DVD video camera recorder during updating 3 Insert the disc card for updating 4 Set the power switch to VIDEO when using a disc for updating or to CARD PHOTO when sing a card for updating 3 Details of information display version scree...

Page 51: ...he disc card for updating Fig 4 5 2 Example of Display on Updating Firmware Same Version Screen Updating Start Screen Firmware Update Start Firmware update Firmware Update System Update Screen Firmware Update Updating system Do not turn off power Drive Main Update Screen Firmware Update Updating drive Main Please wait about 1 minutes Do not turn off power Drive Core Update Screen Firmware Update U...

Page 52: ...ck in disc drive unit and take great care that the reflected laser beam does not strike your eye Doing so could cause serious vision damage 4 6 1 Trouble diagnosis flowchart Interpreting the trouble diagnosis flowchart 1 If removing any component is stated in the flowchart remove that component referring to 5 Disassembly and Reassembly 2 If Solder a lead wire to check point is stated solder a lead...

Page 53: ...oes image appear on the LCD monitor Refer to No image appears on LCD monitor No Yes Yes No Yes No No video signal from AV S input output jack Is either camera recorded image or playback image output Replace the MAN circuit board Does image appear in viewfinder or on LCD monitor Is playback image output Refer to Camera recorded image is abnormal Replace IC6301 Replace the MAN circuit board Block no...

Page 54: ... Replace the MAN circuit board Replace the LCD unit Set to service position B Does backlight turn on Replace the LCD unit Replace D0510 TL0525 C8 5V 8 5V DC Remove the MAN circuit board and solder a lead wire to check points TL0525 MAN A TL8030 AEL A List of check points Symptom Circuit board side Location on circuit board Lead wire soldered or not 1C Need not 1B Need Troubleshooting Trouble Diagn...

Page 55: ...001 CCD image sensor Replace IC2001 TL2009 V3 TL2010 V4 TL2012 V2 TL2013 V1 Pulses 0 15 7 0 7 V1 V3 pulses V2 V4 pulses H1 H2 pulses 0 RG pulse 10 0 13 3 3 3 1 12 V DC for DZ GX20MA 15 V DC for other models Remove the MAN circuit board and solder a lead wire to check points List of check points Symptom Circuit board side Location on circuit board Lead wire soldered or not 3B 4C Need 3B Need not 3B...

Page 56: ... Autofocus does not operate Does manual focus operate Replace the MAN circuit board Reconnect the flat cable of lens block to the GSL H GSL M GSL L circuit board Does autofocus normal operate Replace the lens unit and GSL H GSL M GSL L circuit board END ...

Page 57: ...d Does SELECT button function TL8004 KEY1 Does the voltage vary 3 Button faulty Replace the L case Set to service position B TL8006 KEY2 Does the voltage vary 3 Remove the L block Replace the MAN circuit board Replace the MAN circuit board Replace the MAN circuit board Button faulty Replace the L case 3 When the do not function button is pressed TL8002 AEL A TL8003 AEL A TL8004 AEL A TL8006 AEL A ...

Page 58: ...tom Circuit board side Location on circuit board Lead wire soldered or not TL7005 MAN B 5D Need not No Yes No Yes No Yes No Yes PHOTO button focus lock does not function TL7010 FOCUS_LOCK 0V 2 1 When PHOTO button is pressed all the way Set to service position A Does autofocus operate Refer to Autofocus does not operate Does focus lock when PHOTO button is pressed halfway TL7011 SHUTTER 0V 1 PHOTO ...

Page 59: ...cuit board side Location on circuit board Lead wire soldered or not TL7001 MAN B 5D Need not Troubleshooting Trouble Diagnosis No Yes Yes No Zoom lever does not operate Can zoom be operated by remote control Zoom lever faulty Replace the rear case Reconnect the flat cable of lens block to the GSL H GSL M GSL L circuit board Does zoom level normal operate END Replace the lens unit and GSL H GSL M G...

Page 60: ...ion on circuit board Lead wire soldered or not 3B TL0523 MAN A TL7002 TL7003 TL7004 F0501 0504 IC0501 33 1B TL0525 MAN A IC0502 30 31 Need Need TL0508 TL0509 TL0510 TL0511 TL0512 TL0514 TL0515 TL0516 TL0517 TL0522 TL0524 IC0502 32 33 IC0501 30 IC0502 27 IC0501 31 IC0501 32 IC0502 26 5D Need not MAN B 5E Need not MAN B 1F Need MAN A 1F Need MAN A 1E Need MAN A 6E Need not MAN B 5D Need not MAN B 2A...

Page 61: ...eplace Q0503 1 TL0515 LEN3V 3 6V DC IC0502 27 7V DC Replace IC0502 Replace Q0510 TL0517 D3V 3 2V DC IC0501 31 7V Replace IC0501 Replace Q0504 2 TL0511 C1 5V 1 5V DC Replace IC0503 TL0516 D1 5V 1 5V DC Replace IC0504 TL0512 C3V_SYS C3V_SYS2 3 2V DC IC0502 30 31 7V DC Replace IC0502 Replace Q0508 or Q0509 Troubleshooting Trouble Diagnosis ...

Page 62: ... IC0501 32 7V DC Replace IC0501 Replace Q0505 TL0523 C15 12V 12V or 15V DC 2 TL0525 C8 5V 8 5V DC Replace D0508 or D0509 3 2 12 V DC for DZ GX20MA 15 V DC for other models IC0502 26 7V DC Replace Q0511 3 Replace D0508 for DZ GX20MA D0509 for other models 2 4 When power switch is set to VIDEO 5 When power switch is set to DISC PHOTO 6 When power switch is set to CARD PHOTO Power switch faulty Repla...

Page 63: ...er of disc insertion block is opened or closed Set to service position A Does the voltage at R7003 DOOR_SW vary 1 Replace the lock unit Replace the MAN circuit board List of check points Symptom Circuit board side Location on circuit board Lead wire soldered or not R7003 MAN B 4E Need not Message Disc is not formatted Format the disc now appears even if a formatted disc is loaded Replace the disc ...

Page 64: ...position Cautions 1 The DZ GX20MA incorporates a high voltage flash unit Use countermeasures to prevent electric shock such as wearing gloves and take great care during work The flash unit Keeps its high voltage even if the power supply AC adapter charger battery etc is removed 2 Laser light striking the eye may cause your eyesight to be lost For safety be sure to remove any power supply AC adapte...

Page 65: ...screws A to secure the rear block Fig 4 6 2 Setting to Service Position A A M1 7 4 Black E M1 7 3 Silver 3 Screws E MAN circuit board 6 Screw A 6 Screw A 1 3 5 4 DRF H DRF M DRF L circuit board GSL H GSL M GSL L circuit board 2 6 Screw A Rear block Frame Frame R block MAN circuit board 2 Setting to service position B Service position B is used to diagnose trouble in the system of operation buttons...

Page 66: ...his time 3 Use the three screws E to secure the AEL circuit board 4 With DZ GX20MA MV780MA connect the SHE H SHE M circuit board to AEL circuit board The SHE H SHE M circuit board is not mounted in DZ MV750MA 5 Connect the flat cable of EVF unit to the AEL circuit board 6 Attach the front block to R block 7 Connect the AVJ H AVJ M AVJ L and FRT H FRT M FRT L circuit boards to AEL circuit board Fig...

Page 67: ...iagnosis 8 Connect the two flat cables on L block and the connector of speaker cable to the AEL circuit board Fig 4 6 5 Fig 4 6 5 Setting to Service Position B 2 2 8 Connector of speaker cable 8 8 2 1 1 Insert 2 Lock R block L block ...

Page 68: ...g the procedure in this section Cautions Laser light striking the eye may cause your eyesight to be lost For safety be sure to remove any power supply AC adapter charger battery etc from the DVD video camera recorder before starting work Information 1 The DZ GX20MA is used for explanation in this section Although the shapes of parts are slightly different for each model the procedure is identical ...

Page 69: ...ICK MENU button at this time Pressing the QUICK MENU button will not allow you to check the settings 4 Operate the buttons to display the screens for the record function setup date function setup EVF LCD setup and initial setup in sequence making sure of the settings At this time the items on photo quality external photo input and self timer will not appear since they are related to photo recordin...

Page 70: ...ng range Auto Sports Portrait Spotlight Sand Snow Low Light Auto Set Outdoor Indoor 1 Indoor 2 On Off 240 40 Off On Off Auto On Off XTRA FINE STD FINE NORM ECO On Off CAMERA LINE S LINE Frame Field On Off On Off 17 00 D M Y 5 00PM M D Y PM5 00 Y M D Remarks Displayed only in the VIDEO mode Except for DZ MV750MA Maximum 40x in PHOTO mode even if set to 240x Displayed only in the VIDEO mode Displaye...

Page 71: ...onds Item LCD Brightness EVF Brightness Color Level EVF Display Beep Power Save Record LED Language Demo Mode System reset Yes Yes Yes Yes Yes Yes Yes Yes Yes Camera function reset Yes Yes Yes Yes Yes Yes Yes Yes Yes Default at factory Center Center Center Auto On Off On English Auto Setting range Auto On On Off On Off On Off English French Spanish German Italian Auto Off Start Remarks Memo Fig 4 ...

Page 72: ...era function setup screen 4 Use the buttons to choose Initial Setup and then press the button 5 Use the buttons to choose Reset and then press the button The screen for verifying reset will appear 6 Use the buttons to choose YES and then press the button Reset will be executed 7 After reset press the MENU button to close the camera function setup screen ENTER RETURN Beep Power Save Language Demo M...

Page 73: ...c could become unusable 2 Make sure that the DVD RAM DVD RW to be initialized is free from dirt or scratch If the disc is dirty or scratched normal initialization may be impossible 3 Insert the DVD RAM DVD RW to be initialized 4 After the disc is recognized operate the following buttons to display the disc formatting screen Fig 4 9 1 Hold down the SELECT REC and plus buttons simultaneously for at ...

Page 74: ...not to scratch the cover or L case with screwdriver 2 Connect the DVD video camera recorder jig tool and power supply as shown in Fig 4 9 2 Refer to 6 1 1 List of Jigs and Tools used when Creating Reference Data for details on jig tool and power supply in the figure 3 Copy the adjustment program to HDD of PC Refer to 6 1 5 Copying or Deleting Adjustment Program for copying 4 Start the adjustment p...

Page 75: ...face jig No 7099448 Halcyon connector No TP14391 3 Backup method 1 Choose DATA INITIALIZE on the ADJUST MENU screen 2 Click the EXECUTE button on ADJUST MENU screen to proceed with the DATA INITIALIZE MENU screen ADJUST MENU screen MANUAL ADJUSTMENT PROGRAM for SERVICE STATION MODEL NAME DATA INITIALIZE EXECUTE RETURN CONNECTION ADJUST MENU SAMPLING PULSE AUTO IRIS CONTROL MATRIX CHROMA GAIN AUTO ...

Page 76: ...irmed using the PROGRESS STATUS dialog 7 When backup is complete the BACKUP FINISHED dialog will appear Click the OK button in dialog to restore the DATA INITIALIZE MENU screen 8 Then click the RETURN buttons on each menu screen to restore the MODEL SELECT screen and click the EXIT button on MODEL SELECT screen to exit the adjustment program 9 Disconnect the DVD video camera recorder jig tool and ...

Page 77: ...rogress status can be confirmed using the PROGRESS STATUS dialog 7 When writing is complete the INITIALIZATION FINISHED dialog will appear Click the OK button in dialog to restore the DATA INITIALIZE MENU screen 8 Click the RETURN button on DATA INITIALIZE MENU screen to restore the ADJUST MENU screen and then perform adjustment according to 6 3 2 List of Adjustments Needed After Replacing Major C...

Page 78: ... eyesight to be lost For safety be sure to remove any power supply AC adapter charger battery etc from the DVD video camera recorder before starting work 5 2 Order of Disassembly 1 Refer to the disassembly flowcharts in Figs 5 2 1 and 5 2 2 for the order of removing each component The disassembly flowcharts are different for each model Be sure to follow the disassembly flowchart for the correspond...

Page 79: ...Crystal Filter Lens Frame 5 3 28 LCD case B 5 3 24 Cushion F Cushion R 5 3 3 L cover 5 3 13 5 3 17 Flash unit 2 R cover 5 3 19 R case 5 3 20 Lock unit 5 3 21 Microphone Front case Adjustment cover 5 3 22 5 3 31 Lens frame Lens unit 5 3 32 CCD image sensor GSL L circuit board For DZ GX20MA For DZ MV750MA For DZ MV750MA 1 The SHE H circuit board is not mounted in DZ MV750MA 2 The flash unit is not m...

Page 80: ...ep numbers of disassembly procedures and letters in brackets show the types of screw Fig 5 3 1 Disassembly and Reassembly Disassembly 1 Lens Hood DZ GX20MA MV780MA MV750MA 1 Turn the lens hood a in the direction of the arrow to remove it a 1 2 Top Cover DZ GX20MA MV780MA MV750MA 1 Remove the screw B 2 Remove the top cover a in the direction of the arrow B M1 7 2 5 Black 1 B 2 a Fig 5 3 2 a Lens Ho...

Page 81: ...1 7 2 5 Black 1 B a 2 Disassembly and Reassembly Disassembly 1 Move the lock slider c in the direction of the arrow to open the disc insertion block 2 Use tweezers etc to remove cushions F a and R b from the R case d taking care not to scratch the R case or disc drive unit e Cautions during disassembly and reassembly 1 Make sure that there is no dust or remaining cushioning material on the R case ...

Page 82: ... b are not disconnected 5 Unplug the connector of speaker cables c 6 Disconnect the two flat cables Caution during disassembly and reassembly Securely plug in the connector of speaker cable and connect the two flat cables Fig 5 3 5 1 A 4 Push 2 B Top side Rear side Bottom side Front left side 3 C C M1 7 4 Silver A M1 7 4 Black B M1 7 2 5 Black 1 A 5 c 4 6 6 1 A 2 B 2 B 3 C 1 2 1 Unlock 2 Remove b ...

Page 83: ... block b are not disconnected 5 Unplug the connector of speaker cable c 6 Disconnect the two flat cables Caution during disassembly and reassembly Securely plug in the connector of speaker cable and connect the two flat cables Fig 5 3 6 2 B Top side Rear side Bottom side 3 C 4 Push 1 A C M1 7 4 Silver A M1 7 4 black B M1 7 2 5 Black 1 A 4 6 1 A 2 B 3 C 1 A 1 2 1 Unlock 2 Remove 5 c a b Disassembly...

Page 84: ...AVJ L circuit board d from AEL e circuit board in the direction of the arrow 5 Remove the front block a in the direction of the arrow C M1 7 4 Silver A M1 7 4 Black H M1 7 5 Silver 1 A 2 H For DZ GX20MA 1 A 1 A b a 4 5 3 e c d 2 C For DZ MV750MA Fig 5 3 7 Front right side DZ GX20MA of front right side 2 H DZ MV750MA of front right side 2 C Disassembly and Reassembly Disassembly a Front cover b Jac...

Page 85: ... circuit board d from AEL circuit board f in the direction of the arrow 6 Remove the AVJ M circuit board e from AEL circuit board in the direction of the arrow 7 Remove the front block b in the direction of the arrow A M1 7 4 Black C M1 7 4 Silver L M1 7 3 Silver 4 C 3 L 7 3 A c b 5 f d e 6 5 2 1 L a Good Tab of the lens cover No good Tab of the lens cover Fig 5 3 8 Disassembly and Reassembly Disa...

Page 86: ...it board a from the MAN circuit board b in the direction of the arrow The AEL and MAN circuit boards are directly joined via the connector Removing the AEL circuit board in a direction other than that of the arrow could damage the connector Caution during disassembly and reassembly Securely connect the AEL and MAN circuit boards Fig 5 3 9 E M1 7 3 Silver 3 E a b 4 1 c For DZ GX20MA MV780MA 3 E 2 D...

Page 87: ...board since the heat sink rubbers g of board will stick to the frame 7 Disconnect the two flat cables Note Do not scratch the surface of IC4003 which is a silicone substrate silicone wafer made of semiconductor Scratching it could cause a fault Caution during disassembly and reassembly Be sure to paste the two heat sink rubbers to the MAN circuit board Neglecting this could cause a fault 2 A 2 A 1...

Page 88: ... F 2 Remove the screw F taking care because the spring c of battery release button b may pop out 3 Remove the hand strap a in the direction of the arrow and then pull out the pin d 13 L Cover DZ GX20MA MV780MA MV750MA 1 Remove the five screws F 2 Release the tab and then remove the L case b in the direction of the arrow Fig 5 3 12 F M1 7 4 Black b c a 3 d 1 F 2 F 3 Fig 5 3 13 F M1 7 4 Black 1 F 1 ...

Page 89: ...board from the circuit board block of flash unit d in the direction of the arrow 3 Remove the screw B 4 Remove the screw A 5 Remove the screw accessory shoe a together with SHE H circuit board in the direction of the arrow 6 With DZ GX20MA remove the SHE H circuit board from the accessory shoe in the direction of the arrow Fig 5 3 14 A M1 7 4 Black B M1 7 2 5 Black 4 A 4 A 3 B 5 Tabs a a 6 1 2 5 c...

Page 90: ...nit to any impact however slight could result in a fault Fig 5 3 15 C M1 7 4 Silver B M1 7 2 5 Black 1 B b 1 B a 2 C For DZ GX20MA 16 Camera Block DZ MV780MA 1 Remove the screw B Note Take great care when handling the camera block The camera block contains the lens unit which is a precision component Subjecting the lens unit to any impact however slight could result in a fault Fig 5 3 16 B M1 7 2 ...

Page 91: ...it is a component with the flash and circuit board blocks connected 1 Remove the screw F and then remove the flash block 2 Remove the screw A and then remove the circuit board block Caution during disassembly and reassembly Secure the cables of flash unit between the flash and circuit board blocks as shown in the figure Fig 5 3 17 F M1 7 4 Black A M1 7 4 Black c a 1 F 2 A b a Flash block of flash ...

Page 92: ... in the direction of the arrow B M1 7 2 5 Black L M1 7 3 Silver a a 2 1 B c c 3 1 L b 18 Accessory Shoe and SHE M Circuit Board DZ MV780MA Fig 5 3 18 19 R Cover DZ GX20MA MV780MA MV750MA 1 Remove the screw F 2 Move the R cover a in the direction of the arrow to release the boss 3 Remove the R cover in the direction of the arrow Fig 5 3 19 F M1 7 4 Black 1 F a 2 Boss 2 Boss 2 3 a Accessory shoe b S...

Page 93: ...rcuit board in disc drive unit c in the direction of the arrow Note The disc drive unit is a precision component Take great care when handling it Do not subject the disc drive unit to any impact Doing so could cause a fault Caution during disassembly and reassembly Be sure to paste the heat sink rubber e Neglecting this could cause a fault Fig 5 3 20 A M1 7 4 Black F M1 7 4 Black G M1 7 1 8 Silver...

Page 94: ...lack 3 B 3 B 2 a c b 1 F 1 F c 3 B Right side 22 Adjustment Cover L Case and LCD Unit DZ GX20MA MV780MA MV750MA 1 Remove the two screws J taking care not to lose the LCD ground plate d which will be detached at this time 2 Insert a fine tipped flat bladed screwdriver e into the groove in adjustment cover a and remove the cover from L case b in the direction of the arrow Be very careful not to scra...

Page 95: ...ached at this time 4 Release the connection between the LCD circuit board e and MR circuit board d 5 Remove the MR circuit board in the direction of the arrow The MR circuit board is a film like board Do not forcibly fold or bend it 6 Disconnect the flat cable 7 Remove the fulcrum unit in the direction of the arrow Fig 5 3 23 C M1 7 4 Silver 3 Tabs 2 C 2 C 7 5 1 90 3 4 d b 6 e a 1 1 2 c 2 1 3 Tabs...

Page 96: ...ing them Adherence of any dust foreign object fingerprint etc to them or any scratches or impact could result in a fault 2 If the LCD circuit board mirror sheet light guide plate diffusion sheet prism sheets monitor sheet or LCD panel become detached from the LCD frame assemble them as shown below Fig 5 3 24a a 1 i b i g e f d c White surface Silver surface A B C A B C h b Fig 5 3 24b a LCD case B...

Page 97: ...cuit board a from jack holder b in the direction of the arrow F M1 7 4 Black c b d 2 a 1 F e d c 26 FRT H FRT M FRT L Circuit Board DZ GX20MA MV780MA MV750MA 1 Release the connection between the microphone and FRT H FRT M FRT L circuit board a 2 Remove the screw F F M1 7 4 Black c a 2 F 1 b Fig 5 3 26 a AVJ H AVJ M AVJ L circuit board b Jack holder c Ground plate d Microphone e Front case a FRT H ...

Page 98: ... and Reassembly Disassembly 27 Microphone and Front Case DZ GX20MA MV780MA MV750MA 1 Remove the screw F and then remove the microphone a from the front case b Fig 5 3 27 F M1 7 4 Black b a 1 F a Microphone b Front case ...

Page 99: ... filter are precision components Take great care when handling them Adherence of any dust foreign object fingerprint etc to them or any scratches or impact could cause a fault 2 Never use metal tweezers to handle the crystal filter Doing so could damage it Cautions during disassembly and reassembly Take care with the orientation of crystal filter when assembling it Incorrect orientation of the cry...

Page 100: ...the crystal filter Doing so could damage it Caution during disassembly and reassembly Take care with the orientation of crystal filter when assembling it Incorrect orientation of the crystal filter could cause a fault 30 CCD Image Sensor and GSL M Circuit Board DZ MV780MA Fig 5 3 29 E M1 7 3 Gold M M1 7 3 5 Silver H M1 7 5 Silver 5 H e b d c 2 E 4 M 3 a 1 Lens side CCD image sensor side Colored Tr...

Page 101: ... disassembly and reassembly Take care with the orientation of crystal filter when assembling it Incorrect orientation of the crystal filter could cause a fault 32 CCD Image Sensor and GSL L Circuit Board DZ MV750MA Fig 5 3 31 N M1 7 4 Black H M1 7 5 Silver 1 N 3 H a b f e d c 2 1 2 1 Unlock 2 Pull out Lens side CCD image sensor side Colored Transparent 1 Unsolder the 14 points at the CCD image sen...

Page 102: ...tc c When performing adjustment using a C12 light balancing filter that is different from that used when the reference data was created d When deleting the folder containing the adjustment program from HDD Restrictions If the same model with normal camera block as the one to be adjusted is not available the reference data can be created by the following procedure However reference data created thi...

Page 103: ...r 25 pin straight type Generally available Check the number of pins of RS 232C terminals on PC and DSP R jig and the shapes male female before purchasing AV S input output or output cable Accessory Parts No EW12525 DZ ACS2 AC adapter charger Accessory 2 Power cable for AC adapter charger Accessory 2 DC power cord Accessory Parts No EV11011 1 The adjustment program used on DVD video camera recorder...

Page 104: ...rm any work with the DVD video camera recorder disassembled since the DVD video camera recorder has a laser emitting block and high voltage circuits Do not remove any parts other than the adjustment cover 1 Setting of light box 1 Use a light box whose color temperature is controlled with no flickering Using an inappropriate light box will interference with work 2 Setting and disassembly of DVD vid...

Page 105: ...ector after powering the DVD video camera recorder could cause a fault 1 1 1 Printed White Yellow Black Black Red RS 232C cable DSP R Jig No 7099448 PC DZ ACS2 Power cable To AC outlet DC power cord Light box Front section AV S input output cable 30 50cm Tripod Color Monitor To VIDEO IN Yellow RESET button Halcyon connector No TP14391 RD Pin 28 GND Pin 26 SD Pin 29 DC power supply 5V 1A Adjustment...

Page 106: ...bove procedure to operate the buttons and set Demo Mode in the Initial Setup menu to Off Forgetting to set it to Off will cause a problem during creation of reference data 8 Press the MENU button to restore the normal display Information The following table shows the menu status after the above settings The settings for Date Setup are not shown in the table below since they do not have any meaning...

Page 107: ...reated during storage Adjustment Creating Reference Data 6 1 6 Starting and Terminating Reference Data Creation Program Make sure that the connections are correct the power switch on DVD video camera recorder is set to VIDEO and the DC power supply for DSP R jig is turned on The reference data creation program will not start unless the connections for creating reference data are correct and the DV...

Page 108: ...is supplied to the reference data creating device or DSP R interface jig Clicking the OK button will finish the program After solving the problem restart the program When the communication port error dialog appears There was a mistake in selecting communication port Check the communication port Clicking the OK button will finish the program Select the communication port again after restart MANUAL ...

Page 109: ...NDLE ERROR dialog appears when the correct model has been chosen obtain download the newest adjustment program and then start over again If the FILE HANDLE ERROR dialog still appears with the newest adjustment program check with the factory MODEL SELECT screen MANUAL ADJUSTMENT PROGRAM for SERVICE STATION MODEL SELECT ENTER EXIT CONNECTION 6 7 SETUP MENU screen MANUAL ADJUSTMENT PROGRAM for SERVIC...

Page 110: ...m does not work perform the following procedure 1 Set the power switch of reference data creating device to OFF 2 Turn off the DC power supply of DSP R jig 3 Simultaneously press the Ctrl Alt and Delete keys on PC keyboard to restart the PC 4 After the PC restarts set the power switch of reference data creating device to VIDEO and turn on the DC power supply of DSP R jig again 5 Restart the refere...

Page 111: ...tup Remove the C12 light balancing filter from the lens of DVD video camera recorder and then click the OK button in REMOVE THE FILTER dialog After that the ATTACH THE FILTER dialog and REMOVE THE FILTER dialog may occasionally appear Reattach the C12 light balancing filter and remove it each time 5 When setup is complete the SETUP FINISHED dialog will appear Click the OK button in dialog to resto...

Page 112: ...e to execute all items at the same time If you click the RETURN button on the SETUP MENU screen with an unfinished item the EXECUTE OTHER ITEMS dialog will appear Click the OK button in EXECUTE OTHER ITEMS dialog and then execute the unfinished items SETUP MENU screen MANUAL ADJUSTMENT PROGRAM for SERVICE STATION Matrix EXECUTE RETURN SETUP MENU White Balance Abs White Balance 8 9 10 ALL SETUP FIN...

Page 113: ...the reference data created in the past to perform adjustment Yes No Create the reference data referring to section 6 1 No Yes Does the map05w folder exist on HDD of PC used to create the reference data Copy the map05w folder from the PC on which you created the reference data Will you use the same light box as when you created the reference data Did you perform maintenance on the light box after c...

Page 114: ...s very dangerous to perform any work with the DVD video camera recorder disassembled since the DVD video camera recorder has a laser emitting block and high voltage circuits Do not remove any parts other than the adjustment cover 1 Setting of light box 1 Use the same light box as when the reference data was created Its color temperature and illuminance are strictly controlled and free from flicker...

Page 115: ...creation of reference data 5 Be sure to connect the video output of DVD video camera recorder to the video input jack of color monitor which is usually terminated by 75 ohm If the video output is not terminated by 75 ohm the video output value cannot be measured correctly Note Always connect the Halcyon connector before connecting the DC power cord to the DVD video camera recorder Connecting the H...

Page 116: ...uttons to choose YES and then press the button 7 When reset is complete use the above procedure to operate the buttons and set Demo Mode in the Initial Setup menu to Off Forgetting to set it to Off will cause a problem during creation of reference data 8 Press the MENU button to restore the normal display Information The following table shows the menu status after the above settings The settings f...

Page 117: ... may have to be set See the instruction manual of test equipment for details 1 Oscilloscope a Probe 10 1 b TIME DIV 10 or 20 µs except where some other designation is given c VOLTS DIV Change depending on the measurement object d TRIGGER SOURCE CH1 except where some other designation is given e AC DC GND AC 2 Vectorscope a SATURATION 75 Adjustment Setups for Adjustment ...

Page 118: ...button on the COMMUNICATION PORT SETTING screen and then proceed with the MODEL SELECT screen Note If the dialogs on right appear perform the following troubleshooting When the power or connection error dialog appears A connection is incorrect or power is not turned on Make sure that all connections are correct and that power is supplied to the reference data creating device or DSP R interface jig...

Page 119: ...he OK button and then choose the correct model Note If the FILE HANDLE ERROR dialog appears when the correct model has been chosen obtain download the newest adjustment program and then start over again If the FILE HANDLE ERROR dialog still appears with the newest adjustment program check with the factory MANUAL ADJUSTMENT PROGRAM for SERVICE STATION MODEL SELECT ENTER EXIT CONNECTION 6 7 MODEL SE...

Page 120: ...ata creating program does not work perform the following procedure 1 Set the power switch of DVD video camera recorder to OFF 2 Turn off the DC power supply of DSP R jig 3 Simultaneously press the Ctrl Alt and Delete keys on PC keyboard to restart the PC 4 After the PC restarts set the power switch of DVD video camera recorder to VIDEO and turn on the DC power supply of DSP R jig again 5 Restart t...

Page 121: ...SERVICE STATION LCD ADJUSTMENT MENU PLL EXECUTE RETURN CONNECTION LCD ADJUSTMENT MENU CONTRAST BRIGHT WHITE BALANCE Data Initialize Initial Data Write EXECUTE RETURN CONNECTION FILE MENU Original Data Backup Backup Data Write LINEARITY Communication Port Setting Model Select AUTO IRIS CONTROL SAMPLING PULSE MATRIX CHROMA GAIN AUTO FOCUS SPOT NOISE VIDEO LEVEL BURST LEVEL LCD PLL LCD BRIGHT LCD CON...

Page 122: ...ard or IC2005 1 EEPROM data backup disabled 2 1 Be sure to perform 4 9 2 EEPROM data backup and write before replacing the MAN circuit board 2 EEPROM data backup disabled refers to when the backup of EEPROM data from the MAN circuit board to be replaced could not be properly executed due to some fault such as the DVD video camera recorder not being turned on etc 3 DZ GX20MA only 4 The following th...

Page 123: ...e to perform these adjustments as a set with the three items and in the order stated LCD contrast 1 LCD bright LCD contrast 2 Item Initial Data Write Video Level Burst Level Autofocus Auto Iris Control Sampling Pulse Linearity 3 Matrix Chroma Gain Spot Noise LCD PLL LCD Contrast 1 4 LCD Bright 4 LCD Contrast 2 4 LCD White Balance IC1301 Lens Unit Major Components ...

Page 124: ...m Initial Data Write Video Level Burst Level Autofocus Auto Iris Control Sampling Pulse Linearity Matrix Chroma Gain Spot Noise LCD PLL LCD Contrast 1 LCD Bright LCD Contrast 2 LCD White Balance 6 3 3 Purpose of Adjustments and Incompleted Phenomenon Incompleted Phenomenon The picture becomes dark or whitish Focus is lost during zooming It takes time until a subject is brought into focus or correc...

Page 125: ...utton on ADJUST MENU screen to proceed with the DATA INITIALIZE MENU screen 3 Choose Initial Data Write on the DATA INITIALIZE MENU screen 4 Click the EXECUTE button on DATA INITIALIZE MENU screen to start writing of initial data The progress status can be confirmed using the PROGRESS STATUS dialog 5 When writing is complete the INITIALIZATION FINISHED dialog will appear Click the OK button in dia...

Page 126: ...e that clicking the RETURN button will restore the ADJUST MENU screen to the status before the adjustment was performed 5 When save is complete the ADJUSTMENT FINISHED dialog will appear Click the OK button in dialog to restore the ADJUST MENU screen ADJUST MENU screen VIDEO LEVEL ADJUSTMENT screen Fig 6 4 1 MANUAL ADJUSTMENT PROGRAM for SERVICE STATION MODEL NAME EXECUTE RETURN CONNECTION ADJUST ...

Page 127: ... sure to click the SAVE button Note that clicking the RETURN button will restore the ADJUST MENU screen to the status before the adjustment was performed 5 When save is complete the ADJUSTMENT FINISHED dialog will appear Click the OK button in dialog to restore the ADJUST MENU screen ADJUST MENU screen MANUAL ADJUSTMENT PROGRAM for SERVICE STATION MODEL NAME EXECUTE RETURN CONNECTION ADJUST MENU D...

Page 128: ...djustment 3 When adjustment is complete the ADJUSTMENT FINISHED dialog will appear Click the OK button in dialog to restore the ADJUST MENU screen If the AF ADJUSTMENT ERROR dialog appears click the OK button in dialog perform the following troubleshooting and then execute readjustment a Increase the illumination b Set the distance between the backfocus chart and lens surface precisely to 1500mm 5...

Page 129: ...ill appears after the corrective action the lens unit may be faulty a Turn the light box off and then make sure that no surrounding light reflects on glass surface of light box If any surrounding light does reflect on it perform adjustment in a place where no surrounding light will affect the adjustment b Widen or shorten the distance between the light box and DVD video camera recorder ADJUST MENU...

Page 130: ...ter leaving the DVD video camera recorder for at least one hour at normal temperature and then starting within 90 seconds after turning it on Unstable circuit operation will cause improper adjustment Preparation Cap the lens of DVD video camera recorder Procedure 1 Choose SAMPLING PULSE on the ADJUST MENU screen 2 Click the EXECUTE button on ADJUST MENU screen to start adjustment 3 When adjustment...

Page 131: ... still appears after the corrective action the lens unit may be faulty a Turn the light box off and then make sure that no surrounding light reflects on glass surface of light box If any surrounding light does reflect on it perform adjustment in a place where no surrounding light will affect the adjustment b Widen or shorten the distance between the light box and DVD video camera recorder ADJUST M...

Page 132: ...log may occasionally appear Reattach the C12 light balancing filter and remove it each time 5 When adjustment is complete the ADJUSTMENT FINISHED dialog will appear Click the OK button in dialog to restore the ADJUST MENU screen ADJUST MENU screen MANUAL ADJUSTMENT PROGRAM for SERVICE STATION MODEL NAME EXECUTE RETURN CONNECTION ADJUST MENU DATA INITIALIZE SAMPLING PULSE AUTO IRIS CONTROL MATRIX C...

Page 133: ...he mark changes to a steady light 3 Press the STOP CANCEL button on DVD video camera recorder 4 Insert the color bar chart into light box and point the DVD video camera recorder at the chart so that it fills the screen Adjustment Adjustment Procedure MANUAL ADJUSTMENT PROGRAM for SERVICE STATION MODEL NAME EXECUTE RETURN CONNECTION ADJUST MENU DATA INITIALIZE SAMPLING PULSE AUTO IRIS CONTROL MATRI...

Page 134: ...pprox 2 second intervals while checking any increase or decrease in vector or level 9 After step 8 is complete be sure to click the SAVE button Note that clicking the RETURN button will restore the ADJUST MENU screen to the status before the adjustment was performed 10 When save is complete the ADJUSTMENT FINISHED dialog will appear Click the OK button in dialog to restore the ADJUST MENU screen 1...

Page 135: ... easily be judged by capping the lens Use a CRT color monitor for this check Procedure 1 Choose SPOT NOISE on the ADJUST MENU screen 2 Click the EXECUTE button on ADJUST MENU screen to start adjustment When SPOT NOISE starts the DVD video camera recorder will automatically turn on again 3 When adjustment is complete the ADJUSTMENT FINISHED dialog will appear Click the OK button in dialog to restor...

Page 136: ...g the PROGRESS STATUS dialog 3 When the DVD video camera recorder has shifted to the test mode the LCD screen will be black and white see Fig 6 4 7 and the LCD ADJUSTMENT MENU screen will appear on the PC monitor screen ADJUST MENU screen MANUAL ADJUSTMENT PROGRAM for SERVICE STATION MODEL NAME EXECUTE RETURN CONNECTION ADJUST MENU DATA INITIALIZE SAMPLING PULSE AUTO IRIS CONTROL MATRIX CHROMA GAI...

Page 137: ...4 After step 3 is complete be sure to click the SAVE button Note that clicking the RETURN button will restore the LCD ADJUSTMENT MENU screen to the status before the adjustment was performed 5 When save is complete the ADJUSTMENT FINISHED dialog will appear Click the OK button in dialog to restore the LCD ADJUSTMENT MENU screen LCD ADJUSTMENT MENU screen MANUAL ADJUSTMENT PROGRAM for SERVICE STATI...

Page 138: ...s while checking any increase or decrease in level A 4 After step 3 is complete be sure to click the SAVE button Note that clicking the RETURN button will restore the LCD ADJUSTMENT MENU screen to the status before the adjustment was performed 5 When save is complete the ADJUSTMENT FINISHED dialog will appear Click the OK button in dialog to restore the LCD ADJUSTMENT MENU screen Fig 6 4 8 Wavefor...

Page 139: ...he SAVE button Note that clicking the RETURN button will restore the LCD ADJUSTMENT MENU screen to the status before the adjustment was performed 5 When save is complete the ADJUSTMENT FINISHED dialog will appear Click the OK button in dialog to restore the LCD ADJUSTMENT MENU screen LCD ADJUSTMENT MENU screen MANUAL ADJUSTMENT PROGRAM for SERVICE STATION LCD ADJUSTMENT MENU PLL EXECUTE RETURN CON...

Page 140: ... A 4 After step 3 is complete be sure to click the SAVE button Note that clicking the RETURN button will restore the LCD ADJUSTMENT MENU screen to the status before the adjustment was performed 5 When save is complete the ADJUSTMENT FINISHED dialog will appear Click the OK button in dialog to restore the LCD ADJUSTMENT MENU screen LCD ADJUSTMENT MENU screen MANUAL ADJUSTMENT PROGRAM for SERVICE ST...

Page 141: ...ecrease in level a 4 After step 3 is complete be sure to click the NEXT button and then proceed with the SUB BRIGHT RED ADJUSTMENT screen Note that clicking the RETURN button will restore the LCD ADJUSTMENT MENU screen to the status before the adjustment was performed 5 Use the same procedure as in step 3 to equalize levels c and d of the waveform 6 After step 5 is complete be sure to click the NE...

Page 142: ... is complete be sure to click the SAVE button 12 When save is complete the ADJUSTMENT FINISHED dialog will appear Click the OK button in dialog to restore the LCD ADJUSTMENT MENU screen 13 Click the RETURN button in LCD ADJUSTMENT MENU to restore the ADJUST MENU screen SUB BRIGHT BLUE ADJUSTMENT screen MANUAL ADJUSTMENT PROGRAM for SERVICE STATION NEXT RETURN SUB BRIGHT BLUE ADJUSTMENT UP DOWN CON...

Page 143: ... 903 906 906 906 906 906 906 902 902 902 902 902 902 902 901 906 903 903 906 902 902 902 906 906 902 910 910 902 901 901 902 902 001 AEL Circuit Board Component Replacement SHE H Circuit Board Component Replacement FRT H FRT L Circuit Board Component Replacement DRF H DRF L Circuit Board Component Replacement AVJ H AVJ L Circuit Board Component Replacement 007 MAN Circuit Board Component Replaceme...

Page 144: ... 3E 4E 1E 2F 3F 4F 1F 4 3 2 1 A B C D E F A B C D E F 4 3 2 1 7 1 2 DZ GX20MA Camera 7 1 3 DZ MV750MA Camera 7 2 148 GSL H Circuit Board Component Replacement 908 602 603 604 601 918 918 602 GSL L Circuit Board Component Replacement 908 603 604 601 148 ...

Page 145: ...6 906 902 902 902 902 902 902 902 901 902 910 910 906 906 902 902 901 901 901 902 902 902 001 AEL Circuit Board Component Replacement SHE M Circuit Board Component Replacement FRT M Circuit Board Component Replacement DRF M Circuit Board Component Replacement AVJ M Circuit Board Component Replacement 007 MAN Circuit Board Component Replacement 008 Disc Drive Unit Unit Replacement 148 601 602 603 6...

Page 146: ...G0501 PG9501 PG9302 PG9101 PG9301 PG2301 PG2302 PG6003 AEL DRF H DRF L DRV MAN AVJ H AVJ L GSL H GSL L SHE H HDL 5 LENS UNIT LENS UNIT LCD UNIT For GX20MA For GX20MA For GX20MA For MV750MA MICROPHONE SPEAKER L COVER OPERATION SWITCH EVF UNIT CARD SLOT FLASH UNIT To ACCESSORY SHOE FOR ADJUSTMENT LOCK UNIT BATTERY TERMINAL REAR COVER POWER SWITCH REC BUTTON ZOOM PHOT DISC EJECT DISC DRIVE UNIT CN015...

Page 147: ...A PG1001A PG2001 PG7001 PG7002 PG7004 PG9001 PG0501 PG9501 PG9302 PG9101 PG9301 PG2301 PG2302 PG6003 AEL DRF M DRV MAN AVJ M GSL M SHE M HDL 5 SPEAKER L COVER OPERATION SWITCH MICROPHONE LENS UNIT LCD UNIT FOR ADJUSTMENT CARD SLOT EVF UNIT BATTERY TERMINAL REAR COVER POWER SWITCH REC BUTTON ZOOM PHOT DISC EJECT LOCK UNIT To ACCESSORY SHOE DISC DRIVE UNIT 4 3 2 1 A B C D E F A B C D E F 8 7 6 5 4 3...

Page 148: ... 8E 1E 2F 3F 4F 5F 6F 7F 8F 1F GSL H MI MI U U CM JPN MA CM JPN MB 5H To CAMERA DSP MAN PG2001 To LENSE UNIT LF PART NAME ENC 03MA 05 ENC 03MB 05 2SC5383 T11 1F 2SC4627J XP4501 MA132K CODE CM JPN MA CM JPN MB LF U 5H MI CCD IMEGE SENSOR GYRO DET 4 3 2 1 A B C D E F A B C D E F 8 7 6 5 4 3 2 1 8 7 6 5 S 3 S 3 GSL H ...

Page 149: ... 4F 5F 6F 7F 8F 1F GSL M PART NAME ENC 03MA 05 ENC 03MB 05 2SC5383 T11 1F 2SC4627J 2SC4626J XP4501 DTC114YE MA132K CODE CM JPN MA CM JPN MB LF U V 5H 64 MI To CAMERA DSP MAN PG2001 U V MI 64 CM JPN MA CM JPN MB 5H LF To LENSE UNIT GYRO DET CCD IMEGE SENSOR 4 3 2 1 A B C D E F A B C D E F 8 7 6 5 4 3 2 1 8 7 6 5 S 4 S 4 GSL M ...

Page 150: ...F 4F 5F 6F 7F 8F 1F GSL L PART NAME ENC 03MA 05 ENC 03MB 05 2SC5383 T11 1F 2SC4626J XP4501 MA132K CODE CM JPN MA CM JPN MB LF V 5H MI To CAMERA DSP MAN PG2001 MI CM JPN MA CM JPN MB 5H 39k 39k LF 220 220 V C1001B 10p To LENSE UNIT GYRO DET CCD IMEGE SENSOR 4 3 2 1 A B C D E F A B C D E F 8 7 6 5 4 3 2 1 8 7 6 5 S 5 S 5 GSL L ...

Page 151: ...AVJ L To MICROPHONE EXTERNAL MICROPHONE JACK To AEL PG6001 To AEL PG6002 P9 1ZS LF REMOTE CONT RECEIVER RECORDING INDICATOR WB IR RECEIVER PART NAME 2SC5383 T11 2SD2345JSL DAP222 CODE LE 1ZS P9 FLC181Z16SMMZ 22k JK1901 AV INPUT OUTPUT JACK PC CONNECTOION TERMINAL F 4 3 2 1 A B C D E F A B C D E F 8 7 6 5 4 3 2 1 8 7 6 5 S 6 S 6 FRT H FRT M FRT L F S 7 AVJ H AVJ M AVJ L S A ...

Page 152: ...1C 2D 3D 4D 5D 6D 7D 8D 1D 2E 3E 4E 5E 6E 7E 8E 1E 2F 3F 4F 5F 6F 7F 8F 1F SHE H SHE M To ACCESSORY SHOE CN0153 To SHASSIS To FLASH UNIT To AEL PG8004 To AEL PG8004 To ACCESSORY SHOE 1000p 4 3 2 1 A B C D E F A B C D E F 8 7 6 5 4 3 2 1 8 7 6 5 S 7 S 8 SHE H S 9 SHE M S ...

Page 153: ...A 3A 4A 1A 2B 3B 4B 1B 2C 3C 4C 1C 2D 3D 4D 1D 2E 3E 4E 1E 2F 3F 4F 1F 4 3 2 1 A B C D E F A B C D E F 4 3 2 1 S 8 S 10 DRF H DRF M DRF L DRF H DRF M DRF L PG2301 PG2302 To PLUG MAN PG7002 To DRV PG9501 ...

Page 154: ... 1K 24MHz ZD8001 EDZTE6113B Not Provided FOR ADJUSTMENT To PLUG MAN PG7001 BATTERY BA7001 7D CL P5 P5 N5 3X N5 CL CL CORE CL MI AY AY P5 CL CL CL N2 N2 CL CL CL CL VF BLM15AG700SNID BLM15AG700SNID PART NAME 2SA1980EF AY 2SC5343E CL RTR020P02TL RT1N241U T11 1 RT1N144U T11 1 RT1P144U T11 1 MUN5214DW1T1 SUT483J MA132K CODE AY CL TX N2 N5 P5 7D 3X MI To EVF UNIT To L CASE To LCD UNIT To CARD INSERTION...

Page 155: ...C2018 1 Not Provided 1 C2020 22 Not Provided Not Provided C2038 33p Not Provided Not Provided C2041 10p 10p Not Provided C2042 10p Not Provided Not Provided C2090 10 Not Provided Not Provided C2092 1 Not Provided Not Provided D2004 RB521S 30 C Not Provided RB521S 30 C IC2001 SN74ALVC04PWR SN74LVC04APWR ZF SN74ALVC04PWR IC2003 HD49343HNP Not Provided Not Provided IC2008 NJM2872AF34 Not Provided Not...

Page 156: ...B 20B 30D 24D 25D 26D 27D 28D 29D 2H 9H 8H 7H 6H To REG 6H 10H To REG 1H 2H 1E To LENS DRIVE 1E To PLUG 6D 14D 1D 2D 3D 4D 5D 15D 16D 17D 18D 19D 20D 21D 22D 23D 51D 52D 53D 54D 55D 56D 57D 58D 59D 60D 61D 62D 63D 64D 65D 66D 67D 68D 69D 70D 71D 72D 73D 74D 75D 5B 4B 3B 2B 1B To PLUG 1D 5D 15D 23D To PLUG 30D 50D 76D 85D To PLUG 24D 29D To PLUG 51D 75D To CAMERA DSP 1B 5B To CAMERA DSP 6B 31B PART...

Page 157: ... 3H 8H 4G 7H 3G 10H 8G 11J 5F 4J 2G 1G 2J 3J 6J 7J 1J 9G 6G 8J 14J 13J 1F 3F 2F 5J 4F 12J 15J 10J 9J 4H 5H 6H 9H 5G 7G To CODEC 1H 10H To CAMERA DSP 3G 9G To CAMERA DSP 1G 2G To PLUG 8J 15J To PLUG 1J 7J To LENS DRIVE 1F 5F PART NAME MCH3310 TL MCH3408 RB491D MA132WK 1SS388 SBS004 MCH3414 CODE JK KH D2E MU S3 5C KP PWM PWM D3V REG D5V REG 5V REG C1 2V REG C1 8V REG 3V REG LEN3V REG C 7V REG C1 5V ...

Page 158: ...1J 7J To REG 8J 15J 6C 15J 14J 13J 12J 11J 9J 8J 10J 5C 4C 15C 14C 13C 17C 16C 12C 1C 2C 3C 10C 9C 7C 11C 8D 7D 6D 5D 10D 9D 1D 2D 3D 4D 76D 78D 77D 79D 80D 81D 82D 83D 85D 1J 2J 3J 4J 5J 6J 7J 84D 14D 30D 39D 40D 41D 42D 43D 44D 45D 46D 47D 16D 17D 18D 19D 20D 23D 50D 49D 71D 75D 72D 73D 74D 15D 12D 11D 31D 32D 33D 34D 35D 36D 37D 38D 13D 28D 29D 26D 25D 24D 27D 22D 21D 51D 52D 53D 54D 55D 56D 57...

Page 159: ...4R TE1 Not Provided NJM13404R TE1 IC1307 NJM3414AV TE1 Not Provided NJM3414AV TE1 IC1308 MB88347PFV Not Provided MB88347PFV Q1302 2SB1705TL XW Not Provided 2SB1705TL XW Q1305 2SC5343E CL CL Not Provided 2SC5343E CL CL R1303 180k 100K 180k R1308 390 220 330 R1310 82k 120K 100K R1313 0 Jumper 0 Jumper 0 Jumper 0 Jumper 0 Jumper 0 Jumper 0 Jumper 0 Jumper 0 Jumper 0 Jumper 0 Jumper 0 Jumper Not Provi...

Page 160: ...h DRIVE1 1 DRIVE1 2 Nch PWM COMP 1 CH1 DEAD TIME 1 23V 1µA 30 OUT2 2 DRIVE1 2 Nch 2 1 3 INE2 CS2 FB2 4 DTC2 35 DTC2 31 OUT2 1 VREF ERROR AMP2 Pch DRIVE2 PWM COMP 2 CH2 1 23V 1µA 18 19 17 INE3 CS3 FB3 16 DTC3 27 OUT3 VREF ERROR AMP3 Pch DRIVE3 PWM COMP 3 CH3 1 23V 1µA 21 20 22 INE4 CS4 FB4 23 DTC4 24 INS 15 CSCP 7 CTL1 8 CTL2 9 12 13 11 14 RT CT VREF GND 6 5 CTL VCC CTL3 10 CTL4 26 OUT4 29 GND01 28...

Page 161: ...E CIRCUIT VDD DETECTOR RESET INTERRUPTS BUS INTERFACE REAL TIME CLOCK SRAM 2k Bits LED DRIVER CONTROL SW CONTROL I O CONTROL 2k GATES VOLTAGE DETECTOR USER LOGIC 17 4 32 22 31 20 19 1 2 3 23 24 25 28 11 16 I O PORT OUT1 RESET1 DO3 DO2 DO1 5 8 VCAP VDDL VDD VBK SW1 4 EJECT FLRSTI SW5 VI1 VDDL 32 768kHz CLK CE DI DO XG XD IC4006 RX 5411LD IC4009 S 814A33AMC ON OFF V IN V OUT ON OFF VSS SHORT PROTECT...

Page 162: ... 4E E 4E 4E 4E 4 5E 6E 7E 7 8E 1E 2F 3F 4F 5F 6F 7F 8F 1F PATTERN No JD1189 7 PATTERN No JD1195 4 PATTERN No JD1196 2 GSL H SIDE A GSL H SIDE B GSL M SIDE A GSL M SIDE B GSL L SIDE A GSL L SIDE B IC1001 9 10 18 1 7 1 8 14 IC1001A 1 7 8 14 IC1001B PG1301B 1 24 C1001B 4 3 2 1 A B C D E F A B C D E F 8 7 6 5 4 3 2 1 8 7 6 5 C 1 C CIRCUIT BOARD DIAGRAMS D C 1 GSL H C 2 GSL M GS C 3 GSL L ...

Page 163: ...5 AVJ H PATTERN No JD1189 7 AVJ M PATTERN No JD1195 4 AVJ L PATTERN No JD1196 5 DRF H PATTERN No JD1189 7 DRF M PATTERN No JD1195 4 DRF L PATTERN No JD1196 5 FRT H FRT M FRT L SIDE A AVJ H AVJ M AVJ L SIDE A DRF H DRF M DRF L SIDE A DRF H DRF M DRF L SIDE B AVJ H AVJ M AVJ L SIDE B FRT H FRT M FRT L SIDE B 4 3 2 1 A B C D E F A B C D E F 8 7 6 5 4 3 2 1 8 7 6 5 C 2 C 4 FRT H FRT M FRT L F C 5 AVJ ...

Page 164: ...C 7C 8C 8C 1C 2D 3D 4D 5D 6D 7D 8D 1D 2E 3E 4E 5E 6E 7E 8E 1E 2F 3F 4F 5F 6F 7F 8F 1F SHE H SHE M SIDE A SHE M SIDE B PATTERN No JD1195 4 PATTERN No JD1189 7 CN0151 1 8 CN0151 CN0153 8 1 4 3 2 1 A B C D E F A B C D E F 8 7 6 5 4 3 2 1 8 7 6 5 C 3 C 7 SHE H C 8 SHE M ...

Page 165: ...0 Jumper 0 Jumper 0 Jumper 0 Jumper 0 Jumper R5002 R5003 5 6k 1 R5004 1M R5005 1K R6027 560 Not Provided R6031 100k Not Provided R6032 100k Not Provided R6033 2 2k Not Provided R6035 Not Provided 100k R6036 Not Provided 100k R6037 Not Provided 1k R6039 1 5k Not Provided R6041 1 5k Not Provided R8001 1k Not Provided R8002 1k Not Provided R8003 1k Not Provided R8004 Not Provided R8005 470k Not Provi...

Page 166: ...9 Not Provided 1SS388 S3 1SS388 S3 D2004 RB521S 30 C Not Provided RB521S 30 C IC1305 NJM13403V TE1 Not Provided NJM13403V TE1 IC1306 NJM13404R TE1 Not Provided NJM13404R TE1 IC1307 NJM3414AV TE1 Not Provided NJM3414AV TE1 IC1308 MB88347PFV Not Provided MB88347PFV IC2001 SN74ALVC04PWR SN74LVC04APWR ZF SN74ALVC04PWR IC2003 HD49343HNP Not Provided Not Provided IC2008 NJM2872AF34 Not Provided Not Prov...

Page 167: ...ITE PSW CD DAT3 PG8061 CARD INSERTION BLOCK CD CARD D S 21 24 97 101 MCDX MWP MCLK MCMD MDAT0 3 21 24 97 101 MCDX MWP MCLK MCMD MDAT0 3 LD8061 CARD ACCES 101 101 PG0151 19 20 9 10 12 FLASH UNIT 9 10 12 CN0151 6 7 1 8 9 STB_OSCI STB_RDY STB_FANA 11 11 10 STB_ON STB_OSCI STB_RDY STB_FANA STB_ON 36 36 IC2005 EEPROM SDI_TC SDO_TC SDO SCK_TC CS_EE_TC S Y S C VIDEO AUD L R IC6101 MIC AMP 2 3 12 13 1 14 ...

Page 168: ... 48 ND DRIVER ND DRIVER 27 28 43 44 56 45 46 BL7004 PG7002 41 42 BL7005 32 33 38 39 16 20 2 1 16 BL8003 39 39 15 42 15 42 IC1001 CCD IMAGE SENSOR 6 8 7 12 R1007 29 IC1001 CCD IMAGE SENSOR 14 7 R1003 LENS UNIT LCD UNIT 7 18 C3V_CAM C3V_SYS 4 VDD EVF UNIT F0504 PG3701 1 IC3701 2 5V REG 5 1 3 15 16 B_HOTSHOE B_HOTSHOE 6 8 6 8 PG0152 6 7 FLASH UNIT PG7001 56 PG8001 56 L0151 Q8001 SHOE REG PG8004 4 5 P...

Page 169: ...IC9702 EEPROM L9516 L9501 L9302 L9301 Q9108 Q9109 SW BL9106 L9514 L9515 L9503 L9504 17 75 12 27 57 70 79 89 L9101 L9102 L9517 L9502 8 56 185 45 46 32 53 173 188 213 128 IC9001 LASER DET IC9002 LASER DRIVE IC9003 FRONT MONITOR DET IC9004 IC9005 PHOTO SENSOR 6 BL9001 26 27 Q9106 Q9107 SW L9105 26 27 14 1 1 4 35 36 L9107 35 36 BL9002 7 4 49 51 49 51 14 16 19 BL9003 1 82 88 90 91 99 100 PG9101 14 PG90...

Page 170: ...A 008 UA12612 DVD DRIVE UNIT For MV780MA 101 MC10621 HEAT SINK For GX20MA MV750MA BX31A 101 MC10621 HEAT SINK For MV780MA 102 MC10624 HEAT SINK For GX20MA MV750MA BX31A 102 MC10624 HEAT SINK For MV780MA 103 MC10623 HEAT SINK For GX20MA MV750MA BX31A 103 MC10623 HEAT SINK For MV780MA 104 MN20271 SHEET LCD For GX20MA MV750MA BX31A 104 MN20271 SHEET LCD For MV780MA 105 MK13791 SCREW M1 7X3 106 DP1037...

Page 171: ...28 MC10622 HEAT SINK For MV780MA 129 NA34742 FRAME MECHA For GX20MA MV750MA BX31A 129 NA34742 FRAME MECHA For MV780MA 130 QD40592 CASE SIDE R For GX20MA 130 QD41583 CASE SIDE R For MV750MA BX31A 130 QD41572 CASE SIDE R For MV780MA 131 NX27101 LOCK UNIT For GX20MA MV750MA BX31A 131 NX27101 LOCK UNIT For MV780MA 137 QD40771 COVER R For GX20MA 137 QD41623 COVER R For MV750MA BX31A 137 QD41611 COVER R...

Page 172: ...SSY For MV780MA 603 MN20361 SPACER For GX20MA 603 MN20381 SPACER For MV750MA BX31A 603 MN20371 SPACER For MV780MA 604 DT10592 CRYSTAL For GX20MA 604 DT10591 CRYSTAL For MV750MA BX31A 604 DT10591 CRYSTAL For MV780MA 605 NA34771 SPACER For MV750MA BX31A 901 MK14202 SCREW 1 7X2 5 902 MK13782 SCREW 1 7X4 903 MK14206 SCREW 1 7X4 906 MK14205 SCREW 1 7X4 908 MK11911 SCREW 1 7X5 910 MK14291 SCREW M1 7W 91...

Page 173: ...7UF 20 6 3V C1401A AA00966R CHIP CAPACITOR 4 7UF 20 6 3V C1401B AA00966R CHIP CAPACITOR 4 7UF 20 6 3V C1402 AA00966R CHIP CAPACITOR 4 7UF 20 6 3V C1402A AA00966R CHIP CAPACITOR 4 7UF 20 6 3V C1402B AA00966R CHIP CAPACITOR 4 7UF 20 6 3V C1403 0893225 CERAMIC CHIP 0 1UF 80 20 16V C1403A 0893225 CERAMIC CHIP 0 1UF 80 20 16V C1403B 0893225 CERAMIC CHIP 0 1UF 80 20 16V C1404 0893225 CERAMIC CHIP 0 1UF ...

Page 174: ...IC CHIP 0 01UF 10 16V C5014 0893333 CERAMIC CHIP 0 01UF 10 16V C6001 0893333 CERAMIC CHIP 0 01UF 10 16V C6002L 0893324 CERAMIC CHIP 2200PF 10 50V C6002R 0893324 CERAMIC CHIP 2200PF 10 50V C6003L AA01111R CERAMIC CHIP 1UF 6 3V C6003R AA01111R CERAMIC CHIP 1UF 6 3V C6004L AD10991R CHIP CAPACITOR 22UF 4V C6004R AD10991R CHIP CAPACITOR 22UF 4V C6005L AA01111R CERAMIC CHIP 1UF 6 3V C6005R AA01111R CERA...

Page 175: ...0 6 3V C6317 0893333 CERAMIC CHIP 0 01UF 10 16V C6318 AD10891R CHIP CAPACITOR 100UF 20 6 3V C6319 AA01113R CHIP CAPACITOR 2 2UF 10 6 3V C6320 AA00968R CERAMIC CAPACITOR 10UF 20 6 3V C6322 AA01113R CHIP CAPACITOR 2 2UF 10 6 3V C6323 AD10891R CHIP CAPACITOR 100UF 20 6 3V C6324 0893333 CERAMIC CHIP 0 01UF 10 16V C6327 AA10872R CHIP CAPACITOR 0 1UF 10 10V C6328 0893333 CERAMIC CHIP 0 01UF 10 16V C6329...

Page 176: ...M13404R TE1 IC1307 CK49841R IC NJM3414AV TE1 IC1308 CK18021R IC MB88347PFV IC1401 FU10795R GYRO SENSOR IC1401A FU10795R GYRO SENSOR IC1401B FU10795R GYRO SENSOR IC1402 FU10796R GYRO SENSOR IC1402A FU10796R GYRO SENSOR IC1402B FU10796R GYRO SENSOR IC1403 CK49921R IC NJU7018V TE1 IC1403A CK49921R IC NJU7018V TE1 IC1403B CK49921R IC NJU7018V TE1 IC1801 CE10291R SENSOR REMOTE RS 771 IC2001 CK43292R IC...

Page 177: ...7R COIL 10UH For MV780MA MV750MA BX31A L2004 BA10577R COIL 10UH L2005 BA10577R COIL 10UH L2007 BA10155R COIL L2008 BA10143R COIL 10UH L2009 BA10142R COIL L2012 BA10577R COIL 10UH L3701 BA10577R COIL 10UH L3702 BA10581R COIL L4002 BA10577R COIL 10UH L4004 BA10577R COIL 10UH L4005 BA10577R COIL 10UH L6021 BA10149R COIL 33UH L6101 0773004 COIL 100UH L6301 BA10584R COIL 100UH L6302 BA10577R COIL 10UH ...

Page 178: ...1A CA14061R TRANSISTOR 2SC4627J Q1001B CA13472R TRANSISTOR 2SC4626J Q1002 CA14061R TRANSISTOR 2SC4627J Q1002A CA13472R TRANSISTOR 2SC4626J Q1003A 1323279 TRANSISTOR DTC114YE Q1302 CA14151R TRANSISTOR 2SB1705TL Q1303 CA14441R TRANSISTOR RT1N144U Q1305 CA14091R TRANSISTOR 2SC5343E CL Q1401 1323252 TRANSISTOR XP4501 Q1401A 1323252 TRANSISTOR XP4501 Q1401B 1323252 TRANSISTOR XP4501 Q1402 CA12504R TRAN...

Page 179: ...024 CHIP RESISTOR 100 OHM 5 1 16W R1005A 0790064 CHIP RESISTOR 100KOHM 5 1 16W R1006 0790036 CHIP RESISTOR 820 OHM 5 1 16W R1006A 0790015 CHIP RESISTOR 22 OHM 5 1 16W R1007 0790007 CHIP RESISTOR 5 6 OHM 5 1 16W R1010 0790064 CHIP RESISTOR 100KOHM 5 1 16W R1401 0790045 CHIP RESISTOR 3 9KOHM 5 1 16W R1401A 0790045 CHIP RESISTOR 3 9KOHM 5 1 16W R1401B 0790045 CHIP RESISTOR 3 9KOHM 5 1 16W R1402 07900...

Page 180: ...SISTOR 39KOHM 5 1 16W R1420 0790046 CHIP RESISTOR 4 7KOHM 5 1 16W R1420A 0790046 CHIP RESISTOR 4 7KOHM 5 1 16W R1420B 0790046 CHIP RESISTOR 4 7KOHM 5 1 16W R1803 0104084 CHIP RESISTOR 2 2MOHM 5 1 16W R1805 0790071 CHIP RESISTOR 330KOHM 5 1 16W R1806 0790046 CHIP RESISTOR 4 7KOHM 5 1 16W R1807 0790041 CHIP RESISTOR 1 8KOHM 5 1 16W R1811 AQ10344R CHIP RESISTOR 10MOHM 5 1 16W R1814 0790019 CHIP RESIS...

Page 181: ...04R 0790236 CHIP RESISTOR 150KOHM 5 1 16W R6105L 0790228 CHIP RESISTOR 39KOHM 5 1 16W R6105R 0790228 CHIP RESISTOR 39KOHM 5 1 16W R6106L 0790236 CHIP RESISTOR 150KOHM 5 1 16W R6106R 0790236 CHIP RESISTOR 150KOHM 5 1 16W R6107L 0790221 CHIP RESISTOR 10KOHM 5 1 16W R6107R 0790221 CHIP RESISTOR 10KOHM 5 1 16W R6108L 0790221 CHIP RESISTOR 10KOHM 5 1 16W R6108R 0790221 CHIP RESISTOR 10KOHM 5 1 16W R610...

Page 182: ...HM 5 1 16W R8006 0790068 CHIP RESISTOR 220KOHM 5 1 16W R8042 0790181 CHIP RESISTOR 10 OHM 5 1 16W For GX20MA MV780MA R8043 0790181 CHIP RESISTOR 10 OHM 5 1 16W For GX20MA MV780MA R8044 0790181 CHIP RESISTOR 10 OHM 5 1 16W For GX20MA MV780MA R8042 0790207 CHIP RESISTOR 1KOHM 5 1 16W For MV750MA BX31A R8043 0790207 CHIP RESISTOR 1KOHM 5 1 16W For MV750MA BX31A R8044 0790207 CHIP RESISTOR 1KOHM 5 1 1...

Page 183: ...Copyright Hitachi Ltd 2005 All rights reserved I Digital Media Division Yokohama TK No 0511E DZ GX20MA DZ MV780MA DZ MV750MA ...

Reviews: