background image


HITACHI INVERTER 


NE-S1 SERIES 


Quick Reference Guide 


Read through this Quick Reference Guide, and keep it handy for future reference.

NT3411DX 


Summary of Contents for NES1-002LB

Page 1: ...HITACHI INVERTER NE S1 SERIES Quick Reference Guide Read through this Quick Reference Guide and keep it handy for future reference NT3411DX ...

Page 2: ...hose products Note that this Quick Reference Guide and the manual for each optional product to be used should be delivered to the end user of the inverter Handling of this Quick Reference Guide The contents of this Quick Reference Guide are subject to change without prior notice Even if you lose this Quick Reference Guide it will not be resupplied so please keep it carefully No part of this Quick ...

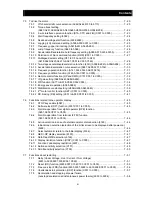
Page 3: ...lation 4 1 Precautions for installation 4 1 Chapter 5 Wiring 5 1 Precautions for Wiring 5 1 5 2 How to attach and remove the front cover 5 2 5 3 How to attach the Exclusive operator NES1 OP 5 3 5 4 Wiring and terminal description 5 4 5 5 Mains wiring 5 7 5 6 Wiring of the control circuit 5 12 5 7 Connection with the programmable controller PLC 5 14 5 8 Notes on using multiple inverters 5 15 Chapte...

Page 4: ...o C005 7 6 7 2 2 Run command source setting A002 A202 C001 to C005 F004 7 7 7 2 3 Keypad Run key routing F004 7 7 7 2 4 Rotational direction restriction b035 7 7 7 2 5 Stop mode selection b091 F003 F203 b003 b007 b008 7 8 7 2 6 Acceleration deceleration time setting F002 F202 F003 F203 A004 A204 C001 to C005 7 8 7 2 7 Base frequency setting A003 A203 A082 A282 7 9 7 2 8 Using the AVR Functions A08...

Page 5: ... A086 7 39 7 5 20 Stabilization constant setting H006 H206 A045 b083 7 39 7 5 21 2nd motor control function SET C001 to C005 7 40 7 5 22 DC braking DB setting A051 to A059 C001 to C005 7 41 7 6 Functions related to the operator display 7 45 7 6 1 STOP key enable b087 7 45 7 6 2 Software lock SFT function b031 C001 to C005 7 45 7 6 3 Forcible operation from digital operator OPE function A001 A002 C...

Page 6: ...act signal FR C021 C026 7 72 7 8 15 Heat sink overheat warning signal OHF C021 C026 C064 7 72 7 8 16 Low current indication LOC signal C021 C026 C038 C039 7 73 7 8 17 Inverter ready signal IRDY C021 C026 7 73 7 8 18 Forward rotation signal FWR C021 C026 7 73 7 8 19 Reverse rotation signal RVR C021 C026 7 74 7 8 20 Major failure signal MJA C021 C026 7 74 7 8 21 Window comparators WC detection of te...

Page 7: ... Inspections 11 2 11 3 Ground Resistance Test with a Megger 11 3 11 4 Withstand Voltage Test 11 3 11 5 Methods of Measuring the Input Output Voltages Current and Power 11 4 11 6 Capacitor Life Curves 11 5 Chapter 12 Specifications 12 1 Specifications 12 1 12 2 Dimensions 12 2 12 3 Derating Curves 12 3 Chapter 13 Option 13 1 Digital Operator 13 1 13 2 Top cover for exclusive use of NE S1series NES1...

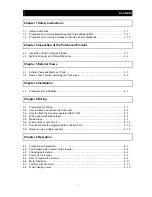
Page 8: ...nstructions This chapter describes the Safety instructions 1 1 Safety Instructions 1 1 1 2 Precautions Concerning Electromagnetic Compatibility EMC 1 5 1 3 Precautions Concerning Compliance with UL and cUL Standards 1 10 ...

Page 9: ......

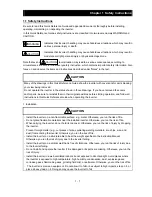
Page 10: ...ide when operating the inverter 1 Installation CAUTION Install the inverter on a non flammable surface e g metal Otherwise you run the risk of fire Do not place flammable materials near the installed inverter Otherwise you run the risk of fire When carrying the inverter do not hold its top cover Otherwise you run the risk of injury by dropping the inverter Prevent foreign matter e g cut pieces of ...

Page 11: ...nect AC power supply to any of the output terminals U V and W Otherwise you run the risk of injury or fire NE S1 series inverter do not have terminals for braking resistor Do not connect the resistor Otherwise there is a risk of fire Connect an earth leakage breaker to the power input circuit Otherwise you run the risk of fire Use only the power cables earth leakage breaker and magnetic contactors...

Page 12: ...key of the integrated operator and or the optional operator Otherwise there is a danger of injury If an operation command has been input to the inverter before the inverter enters alarm status the inverter will restart suddenly when the alarm status is reset Before resetting the alarm status make sure that no operation command has been input While power is supplied to the inverter do not touch any...

Page 13: ...or more of the power OFF Otherwise there is a danger of electric shock and or injury Commit only a designated person to maintenance inspection and the replacement of parts Be sure to remove wristwatches and metal accessories e g bracelets before maintenance and inspection work and to use insulated tools for the work Otherwise you run the risk of electric shock and injury 5 Others WARNING Never mod...

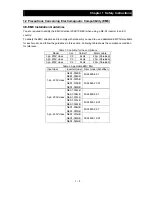
Page 14: ...able shows the compliance condition for reference Table 1 Condition for the compliance Model Cat Carrier f Motor cable 1 ph 200V class C2 2kHz 20m Shielded 3 ph 200V class C3 2kHz 20m Shielded 3 ph 400V class C3 2kHz 20m Shielded Table 2 Applicable EMC filter Input class Inverter model Filter model Schaffner 1 ph 200V class NES1 002SB FS24828 8 07 NES1 004SB NES1 007SB FS24828 27 07 NES1 015SB NES...

Page 15: ...nce between the systems we recommend connecting the shield of the control lines only at the end connecting to the adjustable frequency inverter If possible route the other end of the control lines directly to the cable entry section of the supervisory controller or host computer The shield conductor of the motor cables always must connected to ground PE at both ends To achieve a large area contact...

Page 16: ...justable frequency inverter An HF ground connection via metal contact between the housings of the filter and the adjustable frequency inverter or solely via cable shield is not permitted as a protective conductor connection The filter must be solidly and permanently connected with the ground potential so as to preclude the danger of electric shock upon touching the filter if a fault occurs To achi...

Page 17: ...0 3 2 and IEC61000 3 4 from the harmonic current point of view even conducted emission and radiated emission passed without the input choke Shielded cable Power supply 1 ph 200V M U V W Metal plate earth Earth line is connected to the heatsink of the inverter or PE terminal for bigger models PE EMC filter Foot print Cable clamp The filter is a footprint type so it is located between the inverter a...

Page 18: ... a filter designed for NE S1 inverter Refer to the instruction of the applicable external EMC filter 3 Wiring Shielded wire screened cable is required for motor wiring and the length must be 20 meter or less If the motor cable length exceeds the value shown above use output choke to avoid unexpected problem due to the leakage current from the motor cable The carrier frequency setting must be 2 kHz...

Page 19: ...degree 2 environment h Branch circuit short circuit protection can use fuse or circuit breaker only For models 200V class Branch circuit short circuit protection can use fuse only For models 400V class i Use 60 75ºC CU wire only j Tightening torque and wire range as shown in the table below Model No Required Torque N m Wire Range AWG NES1 002S 004S 0 8 1 0 16 14 NES1 007S 1 8 14 12 NES1 015S 1 8 1...

Page 20: ... Inspection of the Purchased Product This chapter describes the inspection of the purchased product the product warranty 2 1 Inspection of the Purchased Product 2 1 2 2 Method of Inquiry and Product Warranty 2 2 ...

Page 21: ......

Page 22: ... during transportation 2 Basic manual English and Japanese are packed together with the product 3 The product is the one you ordered check with the specification label Restricted Distribution C China E Europe None Other Standard 002SB 200 240 200 240 3 1 1 4 2616200716000001 1206 001 Example of the specification label Model name NES1 002SB example Manufacturing number Freq Input Voltage Phase Curr...

Page 23: ... one year warranty period any examination and repair of the product will be accepted at your charge Even during the warranty period examination and repairs of faults subject to the above scope of the warranty disclaimer will be available at charge To request a repair at your charge contact your supplier or local Hitachi Distributor The Hitachi Distributors are listed on the back cover of this Inst...

Page 24: ...Chapter 3 Exterior Views This chapter describes the exterior views and the names of parts 3 1 Exterior Views and Names of Parts 3 1 3 2 Name of each portion removing the front cover 3 2 ...

Page 25: ......

Page 26: ...ior Views and Names of Parts The figure below shows an exterior view of the inverter model NES1 002 004 SB LB 007 LB model NES1 007 SB 015 022SB 004 007 015 022HB 040HB a Cooling Fan Cover d Case b Cooling Fan e Front Cover c Heat sink f Backing plate W D H W D H c d e f c d e f b a ...

Page 27: ...more In case of wiring maintenance or else be sure to check that this lamp is turned OFF after waiting 10 minutes of power OFF Note 1 Refer to section 6 5 How To Operate the Inverter Note 2 Position of 10 charge lamp depends on the model Refer to page 2 11 for the details Note 3 Pay attention when operating by PC via 7 RS422 RS485 port because the operation can also be done from the panel of the i...

Page 28: ...Chapter 3 Exterior Views 3 3 ...

Page 29: ...Chapter 4 Installation This chapter describes how to install the inverter 4 1 Precautions for installation 4 1 ...

Page 30: ......

Page 31: ... injury due to the inverter falling Install the inverter on a vertical wall that is free of vibrations Otherwise you run the risk of injury due to the inverter falling Do not install and operate the inverter if it is damaged or its parts are missing Otherwise you run the risk of injury Install the inverter in a well ventilated indoor site not exposed to direct sunlight Avoid places where the inver...

Page 32: ...tor Derating curve is shown on section 12 3 4 Do not install the inverter in such places as high temperature high humidity or easy to condensate Use the inverter within the allowable humidity range 20 90 RH described in standard specifications Especially please use it in place where no dew condensation occurs If dew condensation occurs and beading is generated inside the inverter electronic parts ...

Page 33: ...tallation into the cabinet Please pay attention to the location of the ventilation holes of the inverter and the cabinet in case of side by side installation and using ventilation fan cooling performance of the inverter highly depends on the location of the holes Please pay high attention to the ambient temperature of the inverter to be less than the specified value 8 Watt Loss 1 ph 3 ph 200V clas...

Page 34: ...or Wiring 5 1 5 2 How to attach and remove the front cover 5 2 5 3 How to attach the Exclusive operator NES1 OP 5 3 5 4 Wiring and terminal description 5 4 5 5 Mains wiring 5 7 5 6 Wiring of the control circuit 5 12 5 7 Connection with the programmable controller PLC 5 14 5 8 Notes on using multiple inverters 5 15 ...

Page 35: ......

Page 36: ...ries inverter do not have terminals for braking resistor Do not connect the resistor Otherwise there is a risk of fire Connect an earth leakage breaker to the power input circuit Otherwise you run the risk of fire Use only the power cables earth leakage breaker and magnetic contactors that have the specified capacity ratings Otherwise you run the risk of fire Do not use the magnetic contactor inst...

Page 37: ...dow alternatively The window cannot be restored if it is once opened Please use commercially supplied RJ45 connector cap or the like if necessary 3 How to attach Press the front cover to the main body until there is a click sound Do not tighten the screw too much 1 Loosen up the screw 2 remove the cover by pressing the bottom side of the cover to the direction shown below 3 Move the wiring plate l...

Page 38: ...ve operator NES1 OP 5 Figure of installation NES1 OP 1 Remove the front cover from main body 2 Cut the standard operator panel by in thin blade nipper and take it off 3 The connector of the exclusive operator NES1 OP connect to the connector on the circuit board And attach it to put the circuit board 4 Attach the front cover Cut 6 points ...

Page 39: ...3 4 Intelligent input terminal 11 CM2 Relay contacts AL0 AL1 AL2 L DC10V 10mA Max 4 7kΩ 4 7kΩ L FM L Pulse train output L L PD 1 Refer to P5 13 when using external equipment for source logic output and or external power supply Short circuit bar Short circuit bar DCL Remove the jumper wire when using DCL DC link choke ELB 1kΩ 2kΩ L1 N Approx 250Ω O OI SW6 Motor U T1 V T2 W T3 M Power source 3 phase...

Page 40: ...nce apprx 10kΩ Allowable range 0 3 12VDC Analog current Use SW6 for changeover Frequency set via 0 20mA Parameter adjustment should be done in case of 4 20mA Input impedance apprx 250Ω Allowable range 0 20mA Digital Power supply L Common for dig Inputs Common for internal control power supply digital inputs analog inputs outputs Sink terminal P24 Power supply for dig inputs DC24V power supply for ...

Page 41: ...resistive 0 2A inductive AL2 AL0 AC250V 1A resistive 0 2A inductive Min contact capacity AC100V 10mA DC5V 100mA Pulse train FM Digital pulse train output Pulse frequency MAX 3 6kHz Pulse voltage DC0 10V output Max allowable current 2mA Symbol Name Description SW4 Termination resistor changeover switch Select able disable of the termination resistor of RS485 port RJ45 OFF left side Termination resi...

Page 42: ...rcurrent or will result in a damage of the inverter DC bus capacitor will be charged even under phase loss and it is dangerous Refer to 1 Cautions for wiring for the wiring There is a risk of breakdown of the internal converter module and or shortening drastically the lifetime of DC bus capacitors due to an increase of the ripple current Especially if high reliability is required on the system use...

Page 43: ...e motor The thermal relay may go off too early depending on the cable length If this occurs connect an AC reactor to the output of the inverter 3 DC reactor connection terminals PD 1 and P Use these terminals to connect the optional DC power factor reactor DCL As the factory setting terminals P and PD 1 are connected by a jumper Remove this to connect the DCL The cable length between the inverter ...

Page 44: ...kW Three phase 200V 0 2 to 0 75kW Single phase 200V 0 75 to 2 2kW Three phase 200V 1 5 2 2kW Three phase 400V 0 4 to 4 0kW Single phase type Three phase type From source To motor L1 N P PD 1 W T3 V T2 U T1 R L1 T L3 P PD 1 W T3 V T2 U T1 S L2 Charge lump Three phase type Single phase type L1 N PD 1 P U T1 W T3 V T2 R L1 T L3 S L2 W T3 V T2 U T1 PD 1 P From source To motor Charge lump Ground termin...

Page 45: ...ic waves or when the imbalance of power supply voltage is 3 or more when the power supply capacity is 500 kVA or more or when the power voltage may change rapidly This reactor also improves the power factor b Noise filter for inverter NF XXX Note11 This noise filter reduces the conductive noise that is generated by the inverter and transmitted in cables Connect this noise filter to the primary sid...

Page 46: ... 1 25 M4 10 1 4 EX 50C 5A HS10 10A 0 75 007HB AWG16 1 25 M4 10 1 4 EX 50C 10A HS10 10A 1 5 015HB AWG16 1 25 M4 10 1 4 EX 50C 10A HS10 10A 2 2 022HB AWG14 2 0 M4 10 1 4 EX 50C 15A HS10 15A 4 0 040HB AWG14 2 0 M4 10 1 4 EX 50C 15A HS10 15A Note 1 The peripheral equipment described here is applicable when the inverter connects a standard Hitachi 3 phase 4 pole squirrel cage motor Note 2 Select breake...

Page 47: ...an intelligent input terminal use a relay contact e g crossbar twin contact in which even a very low current or voltage will not trigger any contact fault 6 When connecting a relay to an intelligent output terminal also connect a surge absorbing diode in parallel with the relay 7 Do not connect analog power supply terminals H and L or interface power supply terminals P24 and L to each other Otherw...

Page 48: ...on by voltage surge 3 Switching the input control logic In the factory setting and intelligent input terminals is the sink logic To switch the input control logic to the source logic remove the jumper connecting terminals P24 and PLC on the control circuit block and then connect terminals PLC and L with the jumper 1 Sink logic 2 Souce logic Short circuit bar PLC P24 L FM CM2 11 1 2 Short circuit b...

Page 49: ...nk logic Source logic 2 Connecting a programmable controller to intelligent output terminals Sink logic Source logic PLC Inverter P24 DC24V L 1 DC24V S COM Output module EH YTP etc 5 Inverter Output module EH YTP etc DC24V DC24V COM S P24 PLC L 1 5 CM2 11 COM Inverter Input module EH XD etc DC24V Inverter 11 Input module EH XD etc CM2 COM DC24V DC24V Inverter Output module EH YT etc Short circuit ...

Page 50: ... as ON in spite of OFF In this case please put a diode rated 50V 0 1A as shown in the figure to prevent 1 Sink logic The input is recognized as ON in spite of OFF without Diode Providing a diode instead of the short circuit bar so that the current flowing is prevented Additional diode P24 PLC L 1 short circuit bar P24 PLC L 1 SW OFF Power ON Power OFF Input ON P24 PLC L 1 P24 PLC L 1 Power OFF Inp...

Page 51: ...er OFF Input ON P24 PLC L 1 P24 PLC L 1 SW OFF Power OFF short circuit bar short circuit bar Power ON Input OFF The input is recognized as ON in spite of OFF without Diode Providing a diode instead of the short circuit bar so that the current flowing is prevented Additional diode ...

Page 52: ... the digital operator 6 1 Precautions of Operation 6 1 6 2 Confirmation before power up the inverter 6 2 6 3 Changing parameters 6 2 6 4 Power up the inverter 6 3 6 5 How To Operate the Digtal Operator 6 4 6 6 Motor Operation 6 11 6 7 Conduct a test run of the motor 6 17 6 8 When tripping occurs 6 19 ...

Page 53: ......

Page 54: ...he stop key of the integrated operator and or the optional operator Otherwise there is a danger of injury If an operation command has been input to the inverter before the inverter enters alarm status the inverter will restart suddenly when the alarm status is reset Before resetting the alarm status make sure that no operation command has been input Otherwise there is a danger of injury While powe...

Page 55: ... on NE S1 series inverters 1 Dedicated operator NES1 OP The operator NES1 OP is used with integration onto the inverter It is not possible to use the operator external with cable 2 Digital operator OPE SRmini OPE S SR SBK Digital operator can be used with connector cable ICS 1 3 and connected to the RS422 RS485 port RJ45 in the inverter Turn the changeover switch to the operator side OFF side in t...

Page 56: ...ll be the one set by b038 Initial display selection 0 00 output frequency monitor will be displayed under default condition 3 Refer to section 6 5 and set required parameters And then refer to section 6 6 Motor operation Note 1 It will take around 1 5 seconds for the inverter to be ready each LED emits Please take into account this delay in case of an application which this delay will be important...

Page 57: ... key is set default and it can be made invalid by the key sensitivity selection C151 to no It restores from the trip state if the inverter is in trip state If the ModBus communication is selected it can be temporary changed to a external operator mode if the inverter is powered up with pressing the RUN STOP RESET key and keep it pressing 5seconds and take off from the key Changeover switch must be...

Page 58: ...peration command is non operator Stop key is valid Stop key can be disabled in the settings b087 Reset the inverter when it is in trip situation 9 Escape key Go to the top of next function group when a function mode is shown Cancel the setting and return to the function code when a data is shown Moves the cursor to a digit left when it is in digit to digit setting mode Pressing for 1 second leads ...

Page 59: ...ed before Power ON In case of Modbus communication it is necessary to set the changeover switch and parameter C070 Display of NES1 OP will be according to the parameter set of b150 continuiously if the external operator is connected while the dedicated operator NES1 OP is integrated Note1 Note 1 Connecting work on RJ45 jack must be done during the inverter power off ...

Page 60: ...al time synchronizing Saves the data and returns to func code display SET ESC Group A Func code display SET SET ESC SET ESC Data display When data is changed the display starts blinking which means that new data has not been activated yet Saves the data and returns to func code display Cancels the data change and returns to func code display SET ESC Group b Group C Group H ESC Func code display Ju...

Page 61: ... code but blinking digit will move again to the left end digit A A B B Move cursor to left Move cursor to right or set the func code data lowest digit only While in Single digit edit mode single digit is blinking 2nd digit will be blinking Use up down keys to change the value of the digit 3rd digit will be blinking Use up down keys to change the value of the digit 4th digit will be blinking Use up...

Page 62: ...s back to the function code SET key Move on to the data display Fix and sets the data and moves back to the function code key Increase function code Increase data value key Decrease function code Decrease data value Display is solid lighting 1 Data of will be shown on the display after the first power ON 2 Press ESC key to show the function code 3 Press ESC key to move on to the function group 4 P...

Page 63: ...when operator shows the func code display Operator displays the d001 when it hold down a FUNC key for over a second even any state NES1 and OPE SR mini combination Reference Conventional inverter model and OPE SR mini combination STR STR FUNC Return without change Return with change Move to data display Move to func group NE S1 For the conventional model OPE SR mini FUNC FUNC RUN STOP STR STR FUNC...

Page 64: ...xed value such as 20 40 60Hz Accel Decel time is 10 seconds If you don t need to change such as Accel Decel time optional Operator is not required To set the Freq setting use the Multi speed frequency setting 1 60Hz 2 40Hz 3 20Hz Setup Function Name Code Data Note Input 3 function C003 02 CF1 Default Input 4 function C004 03 CF2 The initial value of Acceleration Deceleration time is 10sec Please c...

Page 65: ... A001 01 Control circuit terminals Default The initial value of Acceleration Deceleration time is 10sec Please change the following parameters as needed Function Name Code Setting Range Note Acceleration time F002 0 00 to 3600 sec default 10 sec Deceleration time F003 0 00 to 3600 sec default 10 sec One of the following is required when changing parameters on NE S1 series inverters a Dedicated ope...

Page 66: ...Control circuit terminals Default Input 1 function C001 00 FW Default Input 2 function C002 01 RV The initial value of Acceleration Deceleration time is 10sec Please change the following parameters as needed Function Name Code Setting Range Note Acceleration time F002 0 00 to 3600 sec Default 10 sec Deceleration time F003 0 00 to 3600 sec Default 10 sec One of the following is required when changi...

Page 67: ...uency default is 0 00Hz Keypad RUN key routing F004 00 Forward 01 Reverse Can not be changed during operation The initial value of the acceleration and deceleration time is 10 seconds Please change the following parameters as necessary Function Name Code Setting Range Note Acceleration time 1 F002 0 00 to 3600 seconds Initial value 10 00 seconds Deceleration time 1 F003 0 00 to 3600 seconds Initia...

Page 68: ...Please change the following parameters as necessary Function Name Code Setting Range Note Acceleration time 1 F002 0 00 to 3600 seconds Initial value 10 00 seconds Deceleration time 1 F003 0 00 to 3600 seconds Initial value 10 00 seconds SW6 must be set to the current Refer to 5 4 When used with 4 to 20mA you need to change the following parameters Function Name Code Data Note O OI input active ra...

Page 69: ...r 6 Operation 6 16 This wiring diagram is an example of using the built in power inverter Refer to Section 5 6 when you use an external power supply Operation Please be operated in accordance with section 6 7 ...

Page 70: ...3 The initial value is set 60Hz 7 After checking the operation push RUN STOP RESET key Motor starts to slow down The RUN lump while driving turns off when the motor is stopped In case of input operation command and frequency command from control circuit terminal block 3 Check that the the input value is zero to O OI of the frequency command The only one on the an intelligent input terminal 1 FW or...

Page 71: ...ns off when the motor is stopped 1 Operator refers to Dedicated operator NES1 OP external digital operator OPE S SR SBK OPE SR mini 5 line LCD operator WOP point to be checked Whether there is any trip in the middle of acceleration and deceleration Frequency meter and check whether the correct number of revolutions When an overcurrent trip or overvoltage trip occurs during the test run please make...

Page 72: ... the RUN STOP RESET key to cancel the trip If reset is assigned to an intelligent input terminal please reset input ON to OFF However depending on the cause of trip may not be able to cancel the trip by reset In this case the power is turned off and turned on again Before reset execution please review the various input signals such as operation command Please note that If operation command signal ...

Page 73: ...Chapter 6 Operation 6 20 Overview of the operation at the time of trip Run command FW RV Motor rotation speed RS reset input AL output trip signal free run Trip occurs ...

Page 74: ...er settings can be changed using the ProDriveNext 7 1 Monitoring the data 7 1 7 2 Using the basic functions 7 6 7 3 Setting the intelligent I O terminal function 7 12 7 4 Using the analog terminal 7 16 7 5 To drive the motor 7 20 7 6 Functions related to the operator display 7 45 7 7 Functions about restarting 7 51 7 8 Set functions related to protection and warning each output signal 7 60 7 9 Ini...

Page 75: ......

Page 76: ...rrent monitoring When the output current monitoring function d002 is selected the inverter displays the output current The inverter displays 0 0 when the current output is stopped Display 0 0 to 655 3 in steps of 0 1 A 7 1 3 Rotation direction monitoring When the rotation direction monitoring function d003 is selected the inverter displays the motor operation direction The RUN lamp lights up while...

Page 77: ...ample to change the unit of a value e g motor speed on display Value displayed by function d007 output frequency monitor d001 x frequency scaling conversion factor b086 The frequency scaling conversion factor b086 can be set within the range 0 01 to 99 99 in steps of 0 01 Example Displaying the speed of a 4 pole motor Speed N min 1 120 x f Hz pole f Hz x 30 As the result of the above calculation w...

Page 78: ...STR key You can also clear the cumulative power data at an intelligent input terminal by assigning function 53 KHC cumulative power clearance to the intelligent input terminal When the cumulative input power display gain setting b079 is set to 1000 the cumulative power data up to 999000 kW h can be displayed Display 0 0 to 999 9 in steps of 1 kW h or the unit set for function b079 1000 to 9999 in ...

Page 79: ...displays the trip history data The last six protective trips the inverter made can be displayed Select the trip monitoring 1 d081 to display the data on the most recent trip Display contents 1 Factor of tripping one of E01 to E41 1 2 Output frequency at tripping Hz 3 Output current at tripping A 2 4 Main circuit DC voltage at tripping V 3 5 Cumulative inverter running time until tripping h 6 Cumul...

Page 80: ...the actual DC voltage of the inverter changes Display 0 0 to 999 9 in steps of 0 1 V 7 1 19 Electronic thermal overload monitoring When the electronic thermal overload monitoring function d104 is selected the inverter displays the electronic thermal overload If the electronic thermal overload exceeds 100 the inverter will trip because of the overload protection error code E05 Display 0 0 to 100 0 ...

Page 81: ...ou can set the inverter output frequency with this function F001 only when you have specified 02 for the frequency source setting A001 If the setting of function A001 is other than 02 function F001 operates as the frequency command monitoring function The frequency set with function F001 is automatically set as the Multispeed frequency setting A020 To set the second and third multispeed s use the ...

Page 82: ...minal is assigned to an intelligent input terminal the settings made with functions A001 and A002 will be invalidated when the said intelligent input terminal is turned on and those methods to input frequency setting and operation commands which are specified for the said terminal will be enabled Note 2 On the remote operator WOP being used to operate the inverter pressing the REMT remote key enab...

Page 83: ...ng the 1st and 2nd settings assign function 08 SET to intelligent input terminals Use the SET signal for switching Item Function code Range of data Description Acceleration 1 time setting F002 F202 0 00 to 3600 s Set the length of time to accelerate the motor from 0 Hz to the maximum frequency Deceleration 1 time setting F003 F203 0 00 to 3600 s Set the length of time to decelerate the motor from ...

Page 84: ...200 215 220 230 240 Selectable on 200 V class inverter models 380 400 415 440 460 480 Selectable on 400 V class inverter models 7 2 8 Using the AVR Functions 1 What s the AVR function The AVR function maintains the correct voltage output to the motor even when the voltage input to the inverter fluctuates The output voltage maintained by this function is based on the voltage specified by the motor ...

Page 85: ...on 400 V class inverter models AVR filter time constant A083 0 000 1 000 s See diagram below 2 AVR deceleration gain A084 50 200 See diagram below 2 1 Disabling the AVR function at motor deceleration increases the energy loss on the decelerated motor and decreases the energy regenerated on the inverter which results in a shorter deceleration time 2 Operate regardless of the A081 A281 Output voltag...

Page 86: ...ction A082 A282 Item Function code Range of data Description Maximum frequency setting A004 A204 base frequency 1st 2nd motors to 400 Hz The maximum output frequency is set 7 2 10 Carrier frequency setting The carrier frequency setting function b083 allows you to change the carrier frequency of the PWM waveform output from the inverter Increasing the carrier frequency can lower the metallic noise ...

Page 87: ...ction 7 66 13 USP Unattended start protection Unattended start protection function 7 57 15 SFT Software lock control circuit terminal block Software lock function 7 45 18 RS Reset Reset 7 55 20 STA Starting by 3 wire input 3 wire input function 7 23 21 STP Stopping by 3 wire input 22 F R Forward reverse switching by 3 wire input 23 PID PID disable PID function 7 34 24 PIDC PID reset 27 UP Remote c...

Page 88: ...signals 7 68 02 FA2 Set frequency overreached 03 OL Overload notice advance signal Overload restriction overload notice advance signal 7 63 04 OD Output deviation for PID control PID function 7 37 05 AL Alarm signal Protective functions 06 FA3 Set frequency reached Frequency arrival signals 7 68 09 UV Undervoltage undervoltage 7 53 11 RNT Operation time over Operation time over signal 7 70 12 ONT ...

Page 89: ...f intelligent output terminal 11 Setting of C031 Power supply Output signal 00 a contact ON OFF ON OFF 01 b contact ON ON OFF OFF 2 Specifications of alarm relay terminal Example of operation as an alarm output terminal Setting of C036 Power supply Inverter status Output terminal state AL1 AL0 AL2 AL0 00 ON Error Closed Open Normal Open Closed OFF Open Closed 01 default ON Error Open Closed Normal...

Page 90: ...ch a problem by holding or delaying specific signal outputs To use this function set on delay and off delay times for individual output terminals a total of two terminals such as intelligent output terminals 11 and the alarm relay terminal Item Function code Range of data Description Output 11 on delay time C130 0 0 to 100 0 s Setting of on fot terminal 11 Output 11 off delay time C131 0 0 to 100 ...

Page 91: ...A016 The external analog input filter setting function allows you to set the input voltage input current sampling time to be applied when frequency commands are input as external analog signals You can use this filter function effectively for removing noise from the frequency setting circuit signal If the noise disables the stable operation of the inverter increase the setting Setting a larger val...

Page 92: ...data held immediately before power on or turning off the RS terminal will be used Item Function code Data Description Terminal 1 to 5 functions C001 to C005 65 AHD Analog command holding 7 4 4 Analog Input Adjustment C081 C082 This function can change the gain of the analog input Please use the fine adjustment of the analog input signal Please refer to 7 4 5 for the scale transformation Item Funct...

Page 93: ...rt frequency to the external frequency command 0 to 10 V 0 to 20 mA O OI L input VR active range end voltage A014 A164 0 to 100 Setting of the rate of the end frequency to the external frequency command 0 to 10 V 0 to 20 mA O OI L input start frequency enable A015 A165 00 Externally input start frequency The frequency set as A011 A161 is output as the output frequency while the start frequency rat...

Page 94: ...y See example 1 0 to maximum frequency Hz 08 Digital current monitoring See example 2 Refer to 3 10 Heat sink temperature See example 1 0ºC to 200ºC 0ºC is output when the motor temperature is 0ºC or less Example 1 When 00 01 04 05 06 07 or 10 is slected Cycle T Fixed 6 4 ms Duty t T Varied Example 2 When 03 or 08 us selected Cycle T Varied Duty t T Fixed 1 2 1 In case of C027 03 when b086 frequen...

Page 95: ...is used with equipment e g fan or pump that does not require a large torque at a low speed Since this control system reduces the output voltage at low frequencies you can use it to increase the efficiency of equipment operation and reduce the noise and vibrations generated from the equipment The V f characteristic curve for this control system is shown below Period While the output frequency incre...

Page 96: ... to free setting V f frequency 6 Hz Free setting V f frequency 4 b106 0 to free setting V f frequency 5 Hz Free setting V f frequency 3 b104 0 to free setting V f frequency 4 Hz Free setting V f frequency 2 b102 0 to free setting V f frequency 3 Hz Free setting V f frequency 1 b100 0 to free setting V f frequency 2 Hz Free setting V f voltage 7 b113 0 0 to 300 0 V Selectable on 200 V class inverte...

Page 97: ...ting H004 H204 2 4 6 8 poles Selection of the number of poles of the motor Voltage compensation gain setting for automatic torque boost A046 A246 0 to 255 See Item 2 Automatic torque boost Slippage compensation gain setting for automatic torque boost A047 A247 0 to 255 See Item 2 Automatic torque boost 1 Manual torque boost The inverter outputs the voltage according to the settings of the manual t...

Page 98: ...e compensation gain for the automatic torque boost step by step A047 A247 The motor speed increases when a load is applied to the motor Reduce the slippage compensation gain for the automatic torque boost step by step A047 A247 The inverter trips due to overcurrent when a load is applied to the motor 1 Reduce the voltage compensation gain for the automatic torque boost step by step A046 A246 2 Red...

Page 99: ...ion Start frequency adjustment b082 0 01 to 9 99 Hz Setting of the start frequency 7 5 5 Reduced voltage start function The reduced voltage start function enables you to make the inverter increase the output voltage gradually when starting the motor Set a small value for the reduced voltage start selection b036 if you intend to increase the start torque On the other hand setting a small value will...

Page 100: ...nabling jogging while the motor is operating and enabling free running when the motor is stopped 04 Enabling jogging while the motor is operating and enabling stopping after deceleration when the motor is stopped 05 See Note 2 Enabling jogging while the motor is operating and enabling DC braking when the motor is stopped Note 1 To perform the jogging operation always turn on the JG terminal before...

Page 101: ...uency When the O OI L terminal is used 7 5 8 Jump frequency function The jump frequency function allows you to operate the inverter so that it avoids the resonant frequency of the machine driven by the same Since the inverter avoids the motor operation with a constant output frequency within the specified range of the frequencies to jump when the jump frequency function is enabled you cannot set a...

Page 102: ...d frequency setting A069 0 00 to 400 0 Hz Setting of the frequency at which to stop acceleration Acceleration hold time setting A070 0 0 to 60 0 s Setting of the length of time to stop acceleration Deceleration hold frequency setting A154 0 00 to 400 0 Hz Setting of the frequency at which to stop deceleration Deceleration hold time setting A155 0 0 to 60 0 s Setting of the length of time to stop d...

Page 103: ...OFF OFF Speed 5 ON OFF ON Speed 6 ON ON OFF Speed 7 ON ON ON With multispeed binary operation mode you can use the multistage speed determination time setting C169 to specify a delay to be set until the relevant terminal input is determined time C169 10ms Use this specification to prevent the application of fluctuating terminal input before it is determined The input data is finally determined whe...

Page 104: ...ing A093 A293 0 00 to 3600 s See examples 1 and 2 Select method to switch to Acc2 Dec2 profile A094 A294 00 Changing the time by the signal input to the 2CH terminal See example 1 01 Changing the time at the two stage acceleration deceleration frequency See example 2 02 Valid only while the inverter is switching the motor between forward and reverse operations See example 3 Acc1 to Acc2 frequency ...

Page 105: ...eration deceleration 03 Inverted U curve acceleration deceleration Acceleration deceleration curve constants setting A131 A132 01 to 10 01 small degree of swelling 10 large degree of swelling 1 Acceleration deceleration pattern selection Select acceleration and deceleration patterns with reference to the following table Setting 00 01 02 03 Curve Linear S curve U curve Inverted U curve A097 accele ...

Page 106: ... connected 02 Input via the O OI terminal 04 Input via the Modbus communicationl Operator selection for frequency operation A143 00 Addition A141 A142 01 Subtraction A141 A142 02 Multiplication A141 x A142 Frequency source setting A001 10 Output of operation result PV source setting A076 10 Output of operation result Note 1 The 1 up and 2 down keys of the digital operator are ineffective when the ...

Page 107: ...specified this function is only effective when the analog command holding function AHD is enabled This function is ineffective when the external analog input has been specified for the frequency source setting A001 This function cannot be used to set frequencies for jogging operation When the UP or DWN terminal is on the 1st and 2nd acceleration deceleration time follows the settings of F002 F202 ...

Page 108: ... output voltage to the voltage 100 selected with the AVR voltage select function A082 If the motor operation is cranky try to decrease the gain setting Item Function code Range of data Description V f gain setting A045 A245 20 to 100 Setting of the rate of reducing the output voltage AVR voltage select 100 Base frequency Maximum frequency A045 A245 A082 A282 100 A082 A282 A045 A245 ...

Page 109: ...ale conversion A075 0 01 to 99 99 Scale for unit conversion of PID feedback data PV source setting A076 01 O OI L 0 to 10 V 4 20mA 02 Modbus communication 10 Operation result 1 Reverse PID action A077 00 Disabling the inverted output 01 Enabling the inverted output deviation polarity inverted PID variation range A078 0 0 to 100 0 Range of PID data variation with reference to the target value PID s...

Page 110: ...ue before conversion A075 d004 F001 A011 A012 A020 A220 A021 A022 A023 A024 A025 A026 A027 4 PV source setting Select the PV sorce to be used for the feedback signal with the PV source setting function A076 The targeted value is set by A001 When you specify the 02 Modbus communication for the PV source setting A076 transfer data as described below Write the setting data on the assumption that 1000...

Page 111: ...utput frequency because the feedback data is larger than the target value In such a case specify 01 for function A077 to invert the feedback deviation Then the inverter will increase the output frequency 6 Limitation on PID variation range You can limit the PID output to within a specific range with reference to the target value To use the PID variation limit function set the PID variation range A...

Page 112: ... When the PID deviation ε exceeds the level set as the level C044 the signal is output to an intelligent output terminal A value from 0 to 100 can be set as the level C044 The range of values corresponds to the range of target values from 0 to the maximum To use this output function assign function 04 OD to one of the terminal functions C021 or the alarm relay terminal function C026 10 Feedback co...

Page 113: ...output after the A157 If it returns within A157 PID sleep function doesn t work A158 should set higher than A156 Even if the PID function is disabled when the frequency command value is below the A156 it stop the output after A157 When the frequency command value is above A158 it start the output after A157 When using this function please do not use the terminal free run FRS ...

Page 114: ...A086 0 100 Slow Quick High Low 7 5 20 Stabilization constant setting The stabilization constant setting function allows you to adjust the inverter to stabilize the motor operation when the motor operation is unstable If the motor operation is unstable check the motor capacity setting H003 H203 and motor pole setting H004 H204 to determine whether the settings match the motor specifications If they...

Page 115: ...n gain setting for automatic torque boost A047 A247 Slippage compensation gain setting for automatic torque boost A061 A261 Frequency upper limit setting A062 A262 Frequency lower limit setting A081 A281 AVR function selection A082 A282 AVR voltage selection A092 A292 Acceleration 2 time setting A093 A293 Deceleration 2 time setting A094 A294 Select method to switch to Acc2 Dec2 profile A095 A295 ...

Page 116: ...tarting DC braking after the set braking time has elapsed or the DB terminal has been turned on DC braking force during deceleration DC braking force for starting A054 A057 0 to 100 0 specifies the smallest force zero current 100 specifies the largest force rated current DC braking time for deceleration A055 0 0 to 10 0 s This setting is valid for the external DC braking in edge mode or for the in...

Page 117: ...g will be restarted after the delay When setting the DC braking time with function A055 or for the DC braking operation via the DB terminal determine the length of time in consideration of the heat generation on the motor Select the braking mode by the DC braking edge or level detection for DB input A056 and then make any other necessary settings suitable for your system a Edge mode A056 00 b Leve...

Page 118: ...mand varies depending on the braking mode edge or level mode Edge mode The DC braking time setting A055 is given priority over operation commands and the inverter performs DC braking according to the setting of A055 When the output frequency reaches the setting of A052 the inverter performs DC braking for the time set for A055 Even if the stop command is input during DC braking DC braking continue...

Page 119: ...r more the inverter stops DC braking and restores its normal output See example 7 a If the frequency set by the frequency command is 0 Hz when the start command is input via an analog input terminal the inverter will start operation with DC braking because both the frequency set by the frequency command and current output frequency are 0 Hz See example 7 b If the operation command signal start com...

Page 120: ... SFT is off 01 ON OFF Disabling the rewriting of items other than b031 F001 A020 A220 A021 to A027 and A038 when SFT is on or enabling rewriting when SFT is off 02 Disabling the rewriting of items other than b031 03 Disabling the rewriting of items other than b031 F001 A020 A220 A021 to A027 and A038 10 The mode allowing changes during operation Run Mode Edit See Chapter 13 The following function ...

Page 121: ...iority Item Function code Data Description Terminal function C001 to C005 51 F TM Forcible terminal operation 7 6 5 Action selection in case of external operator disconnection b165 When the inverter detects a disconnection with the operator Operator communication is cut off for five seconds or more inverter operation is subject to b165 Item Function code Data Description Ex operator com loss actio...

Page 122: ...e displayed in NES1 OP Item Function code Data Description NES1 OP display selection b150 001 to 050 d001 to d050 corresponding to the monitor item 7 6 9 Data Read Write selection b166 This function is to choose whether to allow read write of data in the WOP Item Function code Data Description Data Read Write selection b166 00 Enable 01 Disable See section 7 6 2 7 6 10 Display limitation function ...

Page 123: ... condition Parameter displayed when the display condition is met 1 One of C001 to C005 08 F202 F203 A201 to A204 A220 A241 to A247 A261 A262 A281 A282 A292 to A296 b212 b213 b221 to b223 C241 H203 H204 and H206 2 A044 02 or One of C001 to C005 08 and A244 02 b100 to b113 3 b013 02 or One of C001 to C005 08 and b213 02 b015 to b020 4 A044 00 or 01 A041 to A043 A046 A047 5 One of C001 to C008 08 and...

Page 124: ... mode 18 b002 Allowable under voltage power failure time 19 b008 Selection of retry after trip 20 b011 Retry wait time after trip 21 b031 Softlock mode selection 22 b037 Function code display restriction 23 b083 Carrier frequency setting 24 b084 Initialization mode parameters or trip history 25 b130 Overvoltage suppression enable 26 b131 Overvoltage suppression level 27 b180 Initialization trigger...

Page 125: ...n the display data of the operator press and hold the UP or DOWN key Then the data update rate is faster Update rate can be adjusted by C152 Item Function code Data Description Operating speed scroll C152 1 to 20 1 Faster 20 Slower This function only works when connected to an operator ...

Page 126: ...me before motor restart for under voltage trip b003 0 3 to 100 s Time to wait until restarting the motor the selection of a trip after undervoltage in the stopped state 3 b004 00 Disabling the inverter from tripping 01 Enabling the inverter to trip 02 Disabling the inverter from tripping when the inverter is stopped or while the motor is being decelerated or stopped after the operation command has...

Page 127: ...if the cause of trip is not removed by the end of the retry wait time before motor restart b003 If this occurs prolong the retry wait time 5 Even when a retry operation is specified for the retry selection the inverter will trip if the undervoltage status continues for 40 seconds or more 6 when starting the motor with active matching frequency is selected inverter may restart suddenly by alarm res...

Page 128: ...er remains in the inverter Output of the alarms for undervoltage in the stopped state Examples 5 to 7 show the alarm output operations with standard settings Example 5 b004 00 Example 6 b004 01 Example 7 b004 02 Power supply Operation command Inverter output ALARM output t t Reset input Power supply Operation command Inverter output ALARM output t t Reset input Power supply Operation command Inver...

Page 129: ...d while keeping the current at the restart current level b028 and then restarts the motor If the inverter trips when it restarts the motor in this way reduce the setting of b028 After the inverter output has been shut off the digital operator continues to display until the inverter restarts the motor operation FW FRS b028 Output current Inverter output frequency Deceleration according to the setti...

Page 130: ... free running Reset mode selection C102 00 Resetting the trip when the RS signal is turned on See example 1 When operation is normal Shutting off the inverter output When an error has occurred Resetting the trip 01 Resetting the trip when the RS signal is turned off See example 2 When operation is normal Shutting off the inverter output When an error has occurred Resetting the trip 02 Resetting th...

Page 131: ...estart with active matching frequency See example 2 Retry wait time before motor restart b003 0 3 to 100 s Time to wait until restarting the motor Restart frequency threshold b007 0 00 to 400 0 Hz Setting of the minimum level for frequency adjustment Active frequency matching scan start frequency b028 0 20 x rated current to 2 00 x rated current Current limit for restarting with active matching fr...

Page 132: ...rate normally when an operation command is turned on after the inverter power is turned on See example 3 To use this function assign function 13 USP to one of the terminal 1 to 5 functions C001 to C005 This function is invalid with the standard operation panel RUN STOP RESET key When it is input a run command from the operator or Modbus within two seconds after the power supply injection the inver...

Page 133: ...e has occurred while the inverter is operating the motor and the output voltage falls to the DC bus voltage trigger level during power loss b051 or less the inverter reduces the output frequency by the initial output frequency decrease during power loss b054 once and then decelerates the motor for the deceleration time setting during power loss b053 If the voltage increases to an overvoltage level...

Page 134: ...s in operation according to the setting of b051 b050 b051 Operation 02 No restoration b052 Main circuit DC voltage at input power recovery Decelerating and stopping the motor DC voltage constant control Example 1 b052 Main circuit DC voltage at input power recovery Decelerating and stopping the motor Example 2 03 Restoration to be done b052 Main circuit DC voltage at input power recovery Decelerat...

Page 135: ...RS Part of the cause of trip can not be released by a reset In this case it is required a power cycle Trip signal 05 AL is assigned to the output terminal 11 C021 or Alarm relay C026 Initial data C026 05 AL Alarm relay contacts are 1c Refer to 7 3 5 Item Function code Data Description Output 11 function C021 05 AL Trip signal Alarm relay function C026 Terminal 1 to 5 functions C001 to C005 18 RS R...

Page 136: ...egrated with the value of b012 or b212 The cooling fan performance of a general purpose motor lowers when the motor speed is low So load current is decreased The reduced torque characteristic is designed to match the heat generation by Hitachi s general purpose motors Item Function code Data Description Electronic thermal characteristic b013 b213 00 Reduced torque characteristic 01 Constant torque...

Page 137: ...ic thermal warning level setting C061 To output the warning signal assign function 13 THM to one of the intelligent output terminal 11 C021 and the alarm relay terminal C026 And electronic thermal overload monitor is displayed on d104 Item Function code Data Description Electronic thermal warning level setting C061 0 Disabling the warning output 1 to 100 1 Setting of the threshold level to output ...

Page 138: ...cy to 0 Hz When this function operates during deceleration the acceleration time is prolonged over the set time If the value set as the deceleration rate at overload restriction b023 b223 b026 is too small the inverter automatically decelerates the motor even during acceleration because of the overload restriction and may trip because of the overvoltage caused by the energy regenerated by the moto...

Page 139: ...signal overload notice advance signal 7 8 4 Overcurrent restraint b027 The overcurrent restraint function allows you to restrain the overcurrent that can occur when the output current sharply increases because of rapid acceleration You can enable or disable the function by setting the overcurrent suppression enable b027 Item Function code Data or range of data Description Overcurrent suppression e...

Page 140: ...e suppression propotional gain b133 0 00 to 5 00 Overvoltage suppression propotional gain setting valid when b130 01 Overvoltage suppression integral time b134 0 0 to 150 0 s Overvoltage suppression integral time setting valid when b130 01 Example 1 When b130 is 01 Example 2 When b130 is 02 Note 1 When this function is enabled the actual acceleration time may be prolonged over the set time Note pa...

Page 141: ...ter the inverter trips with error code E12 displayed it will not be recovered from tripping even when the error signal from the external system is reset i e the EXT terminal is turned off To recover the inverter from tripping reset the inverter or turn the inverter power off and on Item Function code Data Description Terminal 1 to 5 functions C001 to C005 12 EXT External trip Note Do not turn on t...

Page 142: ...decreases to 5 lower than each reduction start level Carrier frequency reduction start level Restoration level Carrier frequency after reduction kHz Current dependence b089 01 Heat sink temperture dependence b089 02 Less than 60 of rated current Less than 45 C 15 0 60 55 of rated current 45 C 40 C 12 0 72 67 of rated current 55 C 50 C 9 0 84 79 of rated current 65 C 60 C 6 0 96 91 of rated current...

Page 143: ...t frequency overreached 06 FA3 set frequency reached The hysteresis of each frequency arrival signal is as follows When the signal is on set frequency 1 of maximum frequency Hz When the signal is off set frequency 2 of maximum frequency Hz The signal hysteresis at acceleration with function 06 FA3 set is as follows When the signal is on set frequency 1 of maximum frequency Hz When the signal is of...

Page 144: ...reached 06 FA3 The inverter outputs the signal only when the output frequency reaches the frequency specified by a frequency setting C042 or C043 FA3 foff fon Output frequency FA1 Set frequency fon 1 of maximum frequency foff 2 of maximum frequency Example Maximum frequency fmax 120 Hz Set frequency fset 60 Hz fon 120 x 0 01 1 2 Hz foff 120 x 0 02 2 4 Hz At acceleration the signal turns on when th...

Page 145: ...rminals 11 C021 and the alarm relay terminal C026 Specify the run power on warning time b034 2 Plug in time over ONT signal To use this signal function assign function 12 ONT to one of the intelligent output terminals 11 C021 and the alarm relay terminal C026 Specify the run power on warning time b034 7 8 11 0Hz speed detection signal ZS The inverter outputs the 0 Hz speed detection signal when th...

Page 146: ...quency overreached signal 02 FA2 as the logical output signal 1 LOG1 to the intelligent output terminal 11 Intelligent output terminal 11 C021 33 LOG1 Logical output signal 1 selection 1 C142 00 RUN Logical output signal 1 selection 2 C143 02 FA2 Logical output signal 1 operator C144 00 AND Item Function code Data or range of data Description Logical output signal selection 1 C142 Selection of 00 ...

Page 147: ... setting of the run command source setting A002 If the forward operation FW and reverse operation RV commands are input at the same time the inverter stops the motor operation Item Function code Data Description Terminal function C021 41 FR Starting contact signal Alarm relay terminal function C026 7 8 15 Heat sink overheat warning signal OHF C064 The inverter monitors the temperature of its inter...

Page 148: ...s frequency source setting A001 there is a case that inverter does not recognize the speed as constant value due to sampling In this case adjusting is to be made by setting C038 00 valid during operation or increasing analogue input filter A016 7 8 17 Inverter ready signal IRDY The inverter outputs the inverter ready IRDY signal when it is ready for operation i e when it can receive an operation c...

Page 149: ...e rotation signal Alarm relay terminal function C026 7 8 20 Major failure signal MJA The inverter outputs the major failure MJA signal in addition to an alarm signal when it trips because of one of the errors listed below No Error code Description 1 E08 Memory error 2 E10 Current detection error 3 E11 CPU error 4 E14 Ground fault protection 5 E19 Inverter thermal detection system error Item Functi...

Page 150: ...he same as those of WC respectively Item Function code Range of data Description Terminal 11 functions C021 C026 27 Dc Detection of analog input disconnection Alarm relay terminal function 54 WC Window comparator Maximum limit level of window comparators O OI b060 Minimum limit level hysteresis width 2 minimum of 0 to 100 Setting of maximum limit level Minimum limit level of window comparators O O...

Page 151: ...SET terminal of intelligent input is ON it output signal Item Function code Data Description Terminal 11 functions C021 60 SETM 2nd motor in operation Alarm relay terminal function C026 7 8 25 Ground fault detection C155 When the power is turned on then select whether to ground fault detection Ground fault detection might be detected when the power is turned while the motor is rotating Item Functi...

Page 152: ...he same as those of WC respectively Item Function code Range of data Description Terminal 11 functions C021 C026 27 Dc Detection of analog input disconnection Alarm relay terminal function 54 WC Window comparator Maximum limit level of window comparators O OI b060 Minimum limit level hysteresis width 2 minimum of 0 to 100 Setting of maximum limit level Minimum limit level of window comparators O O...

Page 153: ...U 8 1 Communication Specification 8 1 8 2 Connecting the Inverter to Modbus 8 2 8 3 Modbus setting procedure 8 3 8 4 Modbus Communication parameter 8 4 8 5 Modbus Protocol Reference 8 5 8 6 Explanation of function codes 8 9 8 7 Re calculate the internal variable 8 18 8 8 Modbus Data Listing 8 19 ...

Page 154: ......

Page 155: ...nt Transmits LSB first Electrical interface RS 485 differential transceiver Data bits 8 bit Modbus RTU mode Parity None even odd Stop bits 1 or 2 bits Startup convention One way start from host device Wait time for response 0 to 1000 msec Connections Station address numbers from 1 to 247 Connector Terminal connector Error check Overrun Framing block check code CRC 16 or horizontal parity Cable len...

Page 156: ...ble depending on a cable and the wiring situation to use for use environment of the inverter a communication line In that case please carry out follows not use the terminal resistance with a built in inverter and please get the terminal resistance that matched the characteristic impedance of the cable at the both ends of the communications cable the terminal resistance having built in to inverter ...

Page 157: ...r 7 The communications cable connected to bus line of Modbus 8 Inverter power ON and start Modbus communication 2 Changes from Modbus to an operator mode 1 Inverter power OFF and take off a communications cable of Modbus 2 Remove the front cover 3 Change RS485 communication operator switch SW5 to operator side OFF right side 4 Attach the front cover 5 Connect the connection cable of the remote ope...

Page 158: ...keypad or digital operator 03 Modbus network input C070 Selection of OPE Modbus 00 Operator 01 Modbus RTU C071 Communication speed 04 4800 bps 05 9600 bps 06 19 2k bps 07 38 4k bps C072 Modbus Address Network address range is 1 to 247 C074 Communication parity 00 No parity 01 Even parity 02 Odd parity C075 Communication stop bit Range is 1 or 2 C076 Communication error select 00 Trip Error code E6...

Page 159: ...ernal control equipment to the inverter Response A frame returned from inverter to the external control equipment The inverter returns the response only after the inverter receives a query from the external control equipment and does not output the response positively Each frame is formatted with commands as follows Frame Format Header silent interval Slave address Function code Data Error check T...

Page 160: ...tor 32 16 registers in bytes 0 5 h Write in Coil 2 1 coil in bits 0 6 h Write in Holding Register 2 1 register in bytes 0 8 h Loopback Test 0 F h Write in Coils 4 32 coils in bits 1 0 h Write in Registers 32 16 registers in bytes 1 7h Read Write Holding Registor 32 16 registers in bytes Error check Modbus RTU uses CRC Cyclic Redundancy Check for error checking The CRC code is 16 bit data that is g...

Page 161: ...onse when an error occurs When finding any error in a query except for a transmission error the inverter returns an exception response without executing anything You can check the error by the function code in the response The function code of the exception response is the sum of the function code of the query and 80h The content of the error is known from the exception code Field Configuration Sl...

Page 162: ...al to the slave address of the inverter When a time interval between data elements constituting a message is shorter than 3 5 characters When the data length of the query is invalid When the reception space is more than 1 5 characters in the frame When an error check cord of query is incongruous CRC error Note Provide a t imer in the master and make the master retransmit the same query when no res...

Page 163: ... high order 92 6 Number of coils low order 2 05 6 CRC 16 low order 17 7 CRC 16 high order 1C 8 CRC 16 low order 91 Note 1 Broadcasting is disabled Note 2 When 0 or more than 31 is specified as a number of coils error code 03h is returned Note 3 Data is transferred by the specified number of data bytes data size Note 4 The PDU Coils are addressed starting at zero Therefore coils numbered 1 86 are a...

Page 164: ...4 Register start address 3 low order 11 4 Register data 1 high order 00 5 Number of holding registers high order 00 5 Register data 1 high order 03 6 Number of holding registers low order 06 6 Register data 2 high order 00 7 CRC 16 high order 95 7 Register data 2 low order 04 8 CRC 16 low order CD 8 Register data 3 high order 00 9 Register data 3 low order 00 10 Register data 4 high order 00 11 Re...

Page 165: ...rder FFh 00h Change data low order 00h 00h An example follows note that to command the inverter set A002 03 Sending a RUN command to an inverter having slave address 8 This example writes in coil number 1 Query Response No Field Name Example Hex No Field Name Example Hex 1 Slave address 1 08 1 Slave address 08 2 Function code 05 2 Function code 05 3 Coil start address 2 high order 00 3 Coil start ...

Page 166: ...ion code 06 3 Register start address 2 high order 12 3 Register start address 2 high order 12 4 Register start address 2 low order 16 4 Register start address 2 low order 16 5 Change data high order 01 5 Change data high order 01 6 Change data low order F4 6 Change data low order F4 7 CRC 16 high order 6C 7 CRC 16 high order 6C 8 CRC 16 low order E5 8 CRC 16 low order E5 Note 1 No response is made...

Page 167: ...Field Name Example Hex 1 Slave address 1 01 1 Slave address 1 01 2 Function code 08 2 Function code 08 3 Test subcode high order 00 3 Test subcode high order 00 4 Test subcode low order 00 4 Test subcode low order 00 5 Data high order Any 5 Data high order Any 6 Data low order Any 6 Data low order Any 7 CRC 16 high order CRC 7 CRC 16 high order CRC 8 CRC 16 low order CRC 8 CRC 16 low order CRC Not...

Page 168: ...ow order 06 4 Coil start address 3 low order 06 5 Number of coils high order 00 5 Number of coils high order 00 6 Number of coils low order 05 6 Number of coils low order 05 7 Byte number 2 02 7 CRC 16 high order 75 8 Change data high order 17 8 CRC 16 low order 50 9 Change data low order 00 10 CRC 16 high order 83 11 CRC 16 low order EA Note 1 Broadcasting is disabled Note 2 The change data is a ...

Page 169: ...order 02 4 Start address 3 low order 02 5 Number of holding registers high order 00 5 Number of holding registers high order 00 6 Number of holding registers low order 02 6 Number of holding registers low order 02 7 Byte number 2 04 7 CRC 16 high order E5 8 Change data 1 high order 00 8 CRC 16 low order AD 9 Change data 1 low order 04 10 Change data 2 high order 93 11 Change data 2 low order E0 12...

Page 170: ...lding registers to read high order 00 5 Register Data 1 low order 00 6 Number of holding registers to read low order 02 6 Register Data 2 high order 13 7 Start address to write 3 high order 00 7 Register Data 2 low order 88 8 Start address to write 3 low order 00 8 CRC 16 high order F4 9 Number of holding registers to write high order 00 9 CRC 16 low order 71 10 Number of holding registers to writ...

Page 171: ...ction Code Query Exception Response 0 1 h 8 1 h 0 3 h 8 3 h 0 5 h 8 5 h 0 6 h 8 6 h 0 F h 8 F h 1 0 h 9 0 h 1 7 h 9 7 h Exception Code Code Description 0 1 h The specified function is not supported 0 2 h The specified function is not found 0 3 h The format of the specified data is not acceptable 2 1 h The data to be written in a holding register is outside the inverter 2 2 h The specified function...

Page 172: ...eeding the recalculation of the internal variable code Function name code Function name A003 A203 Base frequency H003 H203 Motor capacity A004 A204 Maximum frequency H004 H204 Motor poles setting A044 A244 V f characteristic curve A082 A282 AVR voltage select b112 Free V F setting freq 7 Note NE S1 series does not have a data store command register because the data of all parameters store at the t...

Page 173: ... input terminal 2 R W 1 ON 0 OFF 1 0009h Intelligent input terminal 3 R W 1 ON 0 OFF 1 000Ah Intelligent input terminal 4 R W 1 ON 0 OFF 1 000Bh Intelligent input terminal 5 R W 1 ON 0 OFF 1 000Ch to 000Eh Reserved 000Fh Operation status R 1 Run 0 Stop interlocked to d003 0010h Rotation direction R 1 Reverse rotation 0 Forward rotation interlocked to d003 0011h Inverter ready IRDY R 1 Ready 0 Not ...

Page 174: ...ected 0 No error 3 004Eh Reserved 004Fh Reserved 0050h WCO window comparator O R 1 ON 0 OFF 0051h to 0053h Reserved 0054h FREF FQ command source R 1 Operator 0 Others 0055h REF RUN command source R 1 Operator 0 Others 0056h SETM 2nd motor selected R 1 2nd motor selected 0 1st motor selected 0057h Reserved 0058h Reserved 0059h unused R inaccessible 1 The input terminal function can do ON OFF by Mod...

Page 175: ...ring units multiplied by a factor of 10 or 100 Network communications must use the listed range for network data The inverter automatically divides received values by the appropriate factor in order to establish the decimal point for internal use Likewise the network host computer must apply the same factor when it needs to work in engineering units However when sending data to the inverter the ne...

Page 176: ...ower on time high Cumulative power on time at tripping 1 h 002Fh Trip info 3 power on time low 0030h Trip info 4 factor d084 R See the list of inverter trip factors below 0031h Trip info 4 inverter status See the list of inverter trip factors below 0032h Trip info 4 frequency high 0 to 40000 0 01 Hz 0033h Trip info 4 frequency low 0034h Trip info 4 current Output current at tripping 0 01 A 0035h T...

Page 177: ...ing acceleration 3 Constant speed operation 3 Over current event during other conditions 4 Accelerating 4 Overload protection 5 Operating at zero frequency 5 Overvoltage protection 7 Starting 6 Memory error 8 DC braking 7 Undervoltage protection 9 Overload restricted 8 Current detection error 10 CPU error 11 External trip 12 USP error 13 Ground fault protection 14 Input overvoltage protection 15 I...

Page 178: ...etting V f frequency 7 b112 Fequency lower limit setting A062 38 Free setting V f frequency 7 b112 Output frequency setting F001 multispeed 0 A020 note 1 5 Frequency upper limit setting A261 Maximum frequency setting A204 6 Frequency lower limit setting A262 Maximum frequency setting A204 7 Output frequency setting F001 multispeed 0 A220 note 1 Maximum frequency setting A204 14 Output frequency se...

Page 179: ...le 1011h Output voltage monitor d013 R 0 to 6000 0 1 V 1012h Power monitor d014 R 0 to 1000 0 1 kW 1013h Watt hour monitor d015 high R 0 to 9999000 0 1 1014h d015 low 1015h Elapsed RUN time monitor d016 high R 0 to 999900 1 h 1016h d016 low 1017h Elapsed power on time monitor d017 high R 0 to 999900 1 h 1018h d017 low 1019h Heat sink temperature monitor d018 R 200 to 1500 0 1 c 101Ah to 1025h Rese...

Page 180: ... O OI input start frequency select A015 R W 0 external start frequency 1 0 Hz 1212h Analog input filter A016 R W 1 to 30 or 31 500 ms filter 0 1 Hz with hysteresis 1 1213h Reserved 1214h Reserved 1215h Multi speed operation selection A019 R W 0 binary 1 bit 1216h Reserved 1217h Multi speed freq 0 A020 R W 0 or start frequency to maximum frequency 0 01 Hz 1218h Reserved 1219h Multi speed freq 1 A02...

Page 181: ...nual torque boost frequency A043 R W 0 to 500 0 1 123Eh V F characteristic curve selection 1st motor A044 R W 0 VC 1 VP 2 free V f 123Fh V f gain A045 R W 20 to 100 1 1240h Voltage compensation gain setting for automatic torque boost 1st motor A046 R W 0 to 255 1 1241h Slippage compensation gain setting for automatic torque boost 1st motor A047 R W 0 to 255 1 1242h to 1244h Reserved 1245h DC braki...

Page 182: ...ation hold time A070 R W 0 to 600 0 1 s 125Fh PID Function Enable A071 R W 0 disabling 1 enabling 2 enabling inverted data output 1260h PID proportional gain A072 R W 0 to 2500 0 01 1261h PID integral time constant A073 R W 0 to 36000 0 1 s 1262h PID derivative gain A074 R W 0 to 10000 0 01 s 1263h PV scale conversion A075 R W 1 to 9999 0 01 1264h PV source A076 R W 1 input via O OI 2 external com...

Page 183: ...quency transition point A095 R W 0 to 40000 0 01 Hz 127Bh Reserved 127Ch Dec1 to Dec2 frequency transition point A096 R W 0 to 40000 0 01 Hz 127Dh Acceleration curve selection A097 R W 0 linear 1 S curve 2 U curve 3 inverted U curve 127Eh Deceleration curve setting A098 R W 0 linear 1 S curve 2 U curve 3 inverted U curve 127Fh to 12A4h Reserved 12A5h Acceleration curve constant A131 R W 1 smallest...

Page 184: ...nd A145 01 frequency command A145 12B6h to 12BCh Reserved 12BDh Reserved 12BEh Deceleration hold frequency A154 R W 0 40000 0 01 Hz 12BFh Deceleration hold time A155 R W 0 600 0 1 s 12C0h Reserved 12C1h PID sleep function triggering level A156 R W 0 40000 0 01 Hz 12C2h PID sleep function action delay time A157 R W 0 255 0 1 s 12C3h to 12C5h Reserved 12C6h Reserved 12C7h VR input active range start...

Page 185: ...0 to 10000 0 01 130Eh Electronic thermal characteristic b013 R W 0 reduced torque characteristic 1 constant torque characteristic 2 free setting 130Fh Reserved Inaccessible 1310h Free setting electronic thermal frequency 1 b015 R W 0 to 400 1 Hz 1311h Free setting electronic thermal current 1 b016 R W 0 to 10000 0 01 1312h Free setting electronic thermal frequency 2 b017 R W 0 to 400 1 Hz 1313h Fr...

Page 186: ...art time to 250 maximum reduced voltage start time 1327h Function code display restriction b037 R W 0 full display 1 function specific display 3 data comparison display 4 basic display 5 monitor display 1328h Initial display selection b038 R W 000 001 060 201 202 1329h to 1333h Reserved 1334h Controlled deceleration on power loss b050 R W 0 disabling 1 enabling 2 nonstop operation at momentary pow...

Page 187: ...h Stop mode selection b091 R W 0 deceleration until stop 1 free run stop 135Fh Reserved 1360h Reserved 1361h Initialization target data b094 R W 0 All parameter 1 expect terminal and communication 1362h to 1366h Reserved 1367h Free setting V f frequency 1 b100 R W 0 to free setting V f frequency 2 1 Hz 1368h Free setting V f voltage 1 b101 R W 200V 0 to 3000 400 V 0 to 6000 0 1 V 1369h Free settin...

Page 188: ...h Display ex operator connected b150 R W 1 to 60h BCD d001 to d060 exe 15h d015 139Ah to 13A2h Reserved 13A3h 1st parameter of Dual Monitor b160 R W 1 to 18h BCD d001 to d018 exe 15h d015 13A4h 2nd parameter of Dual Monitor b161 R W 1 to 18h BCD d001 to d018 exe 15h d015 13A5h Reserved 13A6h Freq set in monitoring b163 R W 0 disabling 1 enabling 13A7h Automatic return to the initial display b164 R...

Page 189: ... DWN remote control DOWN function 29 UDC remote control data clearing 31 OPE forcible operation 32 SF1 multispeed bit 1 33 SF2 multispeed bit 2 34 SF3 multispeed bit 3 39 OLR overload restriction selection 50 ADD trigger for frequency addition A145 51 F TM forcible terminal operation 53 KHC cumulative power clearance 65 AHD analog command holding 83 HLD retain output frequency 84 ROK permission of...

Page 190: ...REF 59 REF 60 SETM 255 no no assignment 1416h to 1419h Reserved 141Ah Alarm relay function C026 R W 141Bh FM terminal selection C027 R W 0 output frequency 1 output current 3 digital output frequency 4 output voltage 5 input power 6 electronic thermal overload 7 LAD frequency 8 digital current monitoring 10 heat sink temperature 141Ch reserved 141Dh reserved 141Eh Digital current monitor reference...

Page 191: ... level C064 R W 0 to 110 1 c 1445h to 1449h Reserved 144Ah Selection of OPE Modbus C070 R W 0 OPE 1 Modbus 144Bh Communication speed C071 R W 4 4800bps 5 9600bps 6 19 2kbps 7 38 4kbps 144Ch Modbus address C072 R W 1 to 247 144Dh Reserved 144Eh Communication parity C074 R W 0 no parity 1 even parity 2 odd parity 144Fh Communication stop bit C075 R W 1 1 bit 2 2 bits 1450h Selection of the operation...

Page 192: ... as the settings of C021 to C026 except those of LOG1 no 1493h Logic output 1 operand B C143 R W Same as the settings of C021 to C026 except those of LOG1 no 1494h Logical output 1 operator C144 R W 0 AND 1 OR 2 XOR 1495h to 149Ah Reserved 149Bh Button sensitivity selection C151 R W 0 to 250 no 255 149Ch Scroll sensitivity selection C152 R W 1 to 20 149Dh to 14A3h Reserved 14A4h Input 1 response t...

Page 193: ...o maximum frequency 2nd motor 0 01 Hz 2218h to 223Ah Reserved Inaccessible 223Bh Torque boost method selection 2nd motor A241 R W 0 manual torque boost 1 automatic torque boost 223Ch Manual torque boost value 2nd motor A242 R W 0 to 200 0 1 223Dh Manual torque boost frequency 2nd motor A243 R W 0 to 500 0 1 223Eh V F characteristic curve selection 2nd motor A244 R W 0 VC 1 VP 2 free V f 223Fh V f ...

Page 194: ...otor b212 R W 2000 to 10000 0 01 230Dh Electronic thermal characteristic 2nd motor b213 R W 0 reduced torque characteristic 1 constant torque characteristic 2 free setting 230Eh to 2315h Reserved 2316h Overload restriction operation mode 2nd motor b221 R W 0 disabling 1 enabling during acceleration and constant speed operation 2 enabling during constant speed operation 2317h Overload restriction l...

Page 195: ... error codes of the inverter error indications by the functions and troubleshooting methods 9 1 Indication of the error 9 1 9 2 Error Codes and Troubleshooting 9 3 9 3 Warning Codes for Digital operator 9 5 9 4 Other Display for Digital operator 9 6 ...

Page 196: ......

Page 197: ...LED Lighting Blinking ALM LED RUN LED Over current event Lighting Blinking Over voltage Note2 Blinking Same period Blinking Same period Under voltage Note3 Blinking Alternation Blinking Alternation Over load Lighting Lighting Major failure Note1 Lighting Lights out Others Note4 Blinking Lights out Note1 The Major fault When a Memory error Current detection error CPU error Ground fault Thermal dete...

Page 198: ...ail is not stored SET ESC Trip history 1 Latest Error code t o Trip history 6 Output frequency Output current DC bus voltage Elapsed RUN time Elapsed power ON time Trip cause Inverter status at trip point Note1 The above descriptions indicate the inverter status at the occurrence of tripping which may not correspond to the apparent operation of the motor Example When the PID control is used or the...

Page 199: ...rease in the energy regenerated by the motor or the input voltage during operation The inverter will trip if the DC voltage across the P and N terminals exceeds about 400 VDC in case of the 200 V class models or about 800 VDC in case of the 400 V class models Check whether the inverter has decreased the motor quickly Increase the deceleration time Check for a ground fault Check the output cables a...

Page 200: ...Check whether the inverter has failed Replace the inverter Temperature error If the main circuit temperature rises because of a high ambient temperature or for other reasons the inverter will shut off its output Check whether the inverter is installed vertically Check the installation Check whether the ambient temperature is high Lower the ambient temperature Driver error If instantaneous overcurr...

Page 201: ...5 A066 A067 A068 Multispeed 1 to 7 settings A021 to A027 Free setting V f frequency 7 b112 Frequency upper limit setting A061 Free setting V f frequency 7 b112 Fequency lower limit setting A062 Free setting V f frequency 7 b112 Output frequency setting F001 multispeed 0 A020 note 1 Frequency upper limit setting A261 Maximum frequency setting A204 Frequency lower limit setting A262 Maximum frequenc...

Page 202: ...iting retry after an instantaneous power failure or tripping Power off The inverter displays the code shown on the right when the inverter power is turned off Restricted operation command When an operation direction has been restricted by the setting of b035 the inverter will display the code shown on the right if the operation command specifying the restricted operation direction is input During ...

Page 203: ...Chapter 10 Troubleshooting This chapter describes the troubleshooting methods ...

Page 204: ......

Page 205: ... If RUN command source is terminal A002 01 set forward 00 FW or reverse 01 RV to any input terminals In case of 3 wire control set 3 wire start 20 STA 3 wire stop 21 STP and 3 wire FW RV 22 F R to any input terminals Multi speed input s 02 to 04 CF1 to CF3 is are set to input terminal s and active Deactivate the input s Both FWD and REV input are active If RUN command source is FWD REV input activ...

Page 206: ...ource is selected Check frequency source A001 02 51 F TM is set to input terminal and the input is active Deactivate the input 5 A part of function codes is not displayed Possible Cause s Corrective Action Function code display restriction b037 is enabled Set 00 all display to b037 86 DISP is set to input terminal and the input is active Deactivate the input 6 Operator keypad does not respond Poss...

Page 207: ...y slightly If resonating in accel deceleration use jump frequency function A063 68 to avoid machine frequency Over excitation Set base frequency A003 A203 and AVR voltage A082 A282 according to motor rating If not improved reduce V f gain A045 A245 slightly or change V f curve A044 A244 as free V f 13 Overload trip E05 Possible Cause s Corrective Action Improper electronic thermal level Check elec...

Page 208: ...ommunication wiring at SP SN 19 When inverter starts ECB Earth leakage Circuit Breaker trips Possible Cause s Corrective Action Leak current of inverter is excessive Reduce carrier frequency A083 Increase current sensor level of ECB or replace ECB with another one having higher current sensor level 20 DC braking doesn t work Possible Cause s Corrective Action DC braking force for deceleration A054...

Page 209: ...tive Action Poor contact of the inverter connector and NES1 OP Please reconnect the NES1 OP after power off 25 Output phase loss protection E34 is occur Possible Cause s Corrective Action Motor cable is disconnected or not connected Check the wiring Motor current is small Out phase loss set C157 sets 00 disable ...

Page 210: ... and inspection of the inverter 11 1 Precautions for Maintenance and Inspection 11 1 11 2 Daily and Periodic Inspections 11 2 11 3 Ground Resistance Test with a Megger 11 3 11 4 Withstand Voltage Test 11 3 11 5 Methods of Measuring the Input Output Voltages Current and Power 11 4 11 6 Capacitor Life Curves 11 5 ...

Page 211: ......

Page 212: ... found and 6 there are no unusual smells While the inverter is operating measure the inverter input power voltage with a multimeter to confirm that 1 the power supply voltage does not fluctuate often 2 the voltages between the power supply wires are balanced B Cleaning Always keep the inverter clean When cleaning the inverter wipe off dirt and stains on the inverter surface lightly with a soft clo...

Page 213: ...ngle click when switching ON or OFF Resistors Cracks or discoloring Visual Check Ohms of optional braking res Control circuit Function Voltage balance between phases Measure voltage between U V W Difference must be 2 or less Protection circuit e g Input Ex trip signal and check inverter behavior and alarm signal Functions properly Overall No odor discoloring corrosion Visual No abnormalities Capac...

Page 214: ...nce test Before the main circuit test with a megger and then connect terminals R L1 S L2 T L3 U T1 V T2 W T3 P and PD 1 by wires as shown in the figure below Subsequently carry out the test After the test using the megger remove the wires from terminals R L1 S L2 T L3 U T1 V T2 W T3 P and PD 1 Single phase input model is R L1 S L2 T L3 U T1 V T2 W T3 P and PD 1 11 4 Withstand Voltage Test Do not c...

Page 215: ...EOUT Across U V V W and W U EU EV and EW Method shown in the figure below or rectifier type voltmeter Effective value of fundamental wave Output current IOUT Current at U V and W IU IV and IW Moving iron ammeter Effective value of full waves Output power WOUT Across U V and V W W01 W02 Electrodynamometer type wattmeter Effective value of full waves 2 wattmeter method or 3 wattmeter method Output p...

Page 216: ...rter has a limited life because chemical reactions occur inside the capacitor during operation The capacitor Life is the above curve The curve is not the guaranteed lifespan but rather the expected design lifespan Note that the smoothing capacitor life will be shortened significantly if the inverter is used at a high ambient temperature or with a heavy load that requires a current beyond its rated...

Page 217: ...n the warranty period shall be charged to the purchaser a Malfunction or damage caused by mis operation or modification or improper repair b Malfunction or damage caused by a drop after purchase and transportation c Malfunction or damage caused by fire earthquake flood lightening abnormal input voltage contamination or other natural disasters 2 When service is required for the product at your work...

Page 218: ...Chapter 12 Specifications This chapter describes the specifications and external dimensions of the inverter 12 1 Specifications 12 1 12 2 Dimensions 12 3 12 3 Derating Curves 12 5 ...

Page 219: ......

Page 220: ...0 0 1 4 2 6 4 0 7 1 10 0 Cooling method Self cooling Force ventilation Self cooling Force ventilation Braking capacitive feedback Note3 Apprx 50 Apprx 20 to 40 Apprx 50 Apprx 20 to 40 Weight kg 0 7 0 8 0 9 1 2 1 3 0 7 0 8 1 0 1 2 1 3 lb 1 6 1 8 2 0 2 7 2 9 1 6 1 8 2 2 2 7 2 9 400V Class Item Three phase 400V class Specifications NES1 inverters 400V models Note8 004H 007H 015H 022H 040H Applicable ...

Page 221: ...n Operator ProDriveNext RS 485 RJ45 Connector Common with RS422 selecting it with a changeover switch Modbus RTU General specification Temperature Note6 Operating ambient 10 to 50 C Storage 20 to 65 C Humidity 20 to 90 humidity non condensing Vibration 5 9m s 2 0 6G 10 to 55 Hz Location Altitude 1 000m or less indoors no corrosive gasses or dust Standards Compliance UL CE c UL c tick Note1 The app...

Page 222: ...pter 12 Specifications 12 3 12 2 Dimensions Note changes by Restricted Distribution Model Note W mm H mm D mm D1 mm NES1 002S 68 128 76 7 NES1 004S 91 21 5 NES1 002L 76 7 NES1 004L 91 21 5 NES1 007L 115 46 ...

Page 223: ...tribution N ote changes by Restricted Distribution Model Note W mm H mm D mm NES1 007S 108 128 96 NES1 004H Model Note W mm H mm D mm NES1 015S 108 128 107 NES1 022S 125 NES1 015L 107 NES1 022L 125 NES1 007H 96 NES1 015H 111 NES1 022H 125 NES1 040H 135 007S 004H ...

Page 224: ... Graphs Ambient temperature 30 max Ambient temperature 40 max Ambient temperature 50 max Rated output current A Production after August 2012 2 4 6 8 10 12 16 14 0 Carrier frequency kHz 1 0 NES1 002SB 1 5 0 5 Output Current A Ambient 40 Ambient 50 2 4 6 8 10 12 16 14 0 1 0 Carrier frequency kHz 2 0 NES1 004LB 3 0 Output current A Ambient 40 Ambient 50 2 4 6 8 10 12 16 14 0 1 0 Carrier frequency kHz...

Page 225: ...tput current A 8 0 7 0 5 0 Ambient 50 Ambient 40 Note FFM installation Ambient temperature 50 Ambient 30 16 2 4 6 8 10 12 14 0 5 0 Carrier frequency kHz 8 0 NES1 022LB 10 9 0 Output current A Ambient 50 7 0 6 0 4 0 2 4 6 8 10 12 16 14 0 Carrier frequency kHz 1 5 NES1 004HB 2 0 1 0 Output current A A Ambient 30 Ambient 40 Ambient 50 16 2 4 6 8 10 12 14 0 4 0 Carrier frequency kHz 6 0 NES1 040HB 9 1...

Page 226: ... 2 4 6 8 10 12 16 14 0 1 0 Carrier frequency kHz 2 0 NES1 004LB 3 0 Output current A A Ambient 30 Ambient 40 Ambient 50 2 4 6 8 10 12 16 14 0 1 0 Carrier frequency kHz 2 0 NES1 004SB 3 0 Ambient 30 Ambient 40 Ambient 50 Output current A A 2 6 2 6 1 4 1 4 2 4 6 8 10 12 16 14 0 Carrier frequency kHz 2 0 NES1 007LB 4 0 3 0 1 6 Output current A A Ambient 30 Ambient 40 Ambient 50 2 4 6 8 10 12 16 14 0 ...

Page 227: ...urrent A A Ambient 30 Ambient 40 Ambient 50 7 1 7 1 16 2 4 6 8 10 12 14 0 5 0 Carrier frequency kHz 8 0 NES1 022LB 10 9 0 7 0 6 0 4 0 Output current A A Ambient 30 Ambient 40 Ambient 50 16 2 4 6 8 10 12 14 0 4 0 Carrier frequency kHz 6 0 NES1 022SB 9 0 10 8 0 7 0 5 0 Output current A A Ambient 30 Ambient 40 Ambient 50 2 4 6 8 10 12 16 14 0 4 0 Carrier frequency kHz 6 0 NES1 015LB 8 0 Output curren...

Page 228: ...Chapter 13 Option This chapter lists the data settings for the various functions of the inverter Illustrate by this chapter about options of NES1 ...

Page 229: ......

Page 230: ...00 Initialdata EU 200 400 Units d001 Output frequency monitoring 0 00 to 99 99 100 0 to 400 0 Hz d002 Output current monitoring 0 0 to 655 3 A d003 Rotation direction monitoring F forward rotation o stopped r reverse rotation d004 PID feedback monitoring 0 00 to 99 99 100 0 to 999 9 1000 to 9999 1000 to 9999 10000 to 99990 100 to 999 100000 to 999000 d005 Intelligent input terminal status d006 Int...

Page 231: ...b161 d080 Trip counter 0 to 9999 1000 to 6553 10000 to 65530 time d081 Trip monitoring 1 Factor frequency Hz current A voltage across P N V running time hours power on time hours d082 Trip monitoring 2 d083 Trip monitoring 3 d084 Trip monitoring 4 d085 Trip monitoring 5 d086 Trip monitoring 6 d090 Warning monitoring Warning code d102 DC voltage monitoring 0 0 to 999 9 1000 V d104 Electronic therma...

Page 232: ...s F001 Output frequency setting Standard default target frequency that determines constant motor speed range is 0 00 start frequency to maximum frequency A004 0 00 Hz F002 Acceleratio n time 1 Standard default acceleration range is 0 00 to 3600 seconds 10 00 s F202 Acceleratio n time 1 2 nd motor 10 00 s F003 Deceleratio n time 1 Standard default deceleration range is 0 00 to 3600 seconds 10 00 s ...

Page 233: ...rom the 2nd base frequency to 400 0 60 0 50 0 50 0 Hz A011 O OI input active range start frequency The output frequency corresponding to the analog input range starting point range is 0 00 to 400 00 0 00 Hz A012 O OI input active range end frequency The output frequency corresponding to the analog input range ending point range is 0 0 to 400 00 0 00 Hz A013 O OI input active range start voltage Th...

Page 234: ... 01 Controlled deceleration invalid during run 02 DC braking to stop invalid during run 03 Free run stop valid during run 04 Controlled deceleration valid during run 05 DC braking to stop valid during run 04 A041 Torque boost select Two options 00 Manual torque boost 01 Automatic torque boost 00 A241 Torque boost select 2nd motor 00 A042 Manual torque boost value Can boost starting torque between ...

Page 235: ...quency The frequency at which DC braking begins range is from the start frequency b082 to 60 00Hz 0 50 Hz A053 DC braking wait time The delay from the end of controlled deceleration to start of DC braking motor free runs until DC braking begins range is 0 0 to 5 0 seconds 0 0 s A054 DC braking force for deceleratio n Level of DC braking force settable from 0 to 100 50 A055 DC braking time for dece...

Page 236: ...r limit A261 0 00 setting is disabled 0 00 setting is enabled 0 00 Hz A063 A065 A067 Jump freq center 1 to 3 Up to 3 output frequencies can be defined for the output to jump past to avoid motor resonances center frequency Range is 0 00 to 400 0 Hz 0 00 0 00 0 00 Hz A064 A066 A068 Jump freq width hysteresis 1 to 3 Defines the distance from the center frequency at which the jump around occurs Range ...

Page 237: ...ngs 380 400 415 440 460 480 200 400 220 380 230 400 V A282 AVR voltage select 2nd motor 200 400 220 380 230 400 V A083 AVR filter time constant Define the time constant of the AVR filter range is 0 000 to 1 000 seconds 0 030 s A084 AVR deceleratio n gain Gain adjustment of the braking performance range is 50 to 200 100 A085 Energy sav ing operation mode Two option codes 00 Normal operation 01 Ener...

Page 238: ... options 00 linear 01 S curve 02 U curve 03 Inverse U curve 00 A098 Deceleratio n curve selection Set the characteristic curve of Dec1 and Dec2 options are same as above A097 00 A131 Acceleratio n curve constant Range is 1 to 10 2 A132 Deceleratio n curve constant Range is 1 to 10 2 A141 A input select for calculate function Seven options 00 Operator 01 VR 02 Terminal O OI input 04 RS485 00 A142 B...

Page 239: ... 0 00 to 400 00 Hz 0 00 Hz A157 PID sleep function action delay time Sets the delay time for the action set range 0 0 to 25 5 seconds 0 0 s A158 PID sleep function return threshhold A156 to 400 0 Hz 0 00 Hz A161 VR input active range start frequency The output frequency corresponding to the analog input range starting point range is 0 00 to 400 00 Hz 0 00 Hz A162 VR input active range end frequenc...

Page 240: ...tor restart Time delay after under voltage condition goes away before the inverter runs motor again Range is 0 3 to 100 0 seconds 1 0 s b004 Instantan eous power failure under vol tage trip alarm enable Three option codes 00 Disable 01 Enable 02 Disable during stop and decelerates to a stop 00 b005 Number of restarts on power failure under vol tage trip events Two option codes 00 Restart 16 times ...

Page 241: ...eri stic 2 nd motor 01 b015 Free setting electronic thermal freq 1 Range is 0 to b017Hz 0 Hz b016 Free setting electronic thermal current1 Range is 0 00 to inverter rated current Amps 0 00 A b017 Free setting electronic thermal freq 2 Range is b015 to b019Hz 0 Hz b018 Free setting electronic thermal current2 Range is 0 00 to inverter rated current Amps 0 00 A b019 Free setting electronic thermal f...

Page 242: ...cceleration and constant speed 02 Enabled for constant speed only 01 b025 Overload restriction level 2 Sets the level of overload restriction between 20 and 200 of the rated current of the inverter setting resolution is 1 of rated current Rated current x 1 50 A b026 Decelerat ion rate 2 at overload restriction Sets the deceleration rate when inverter detects overload range is 0 1 to 3000 0 resolut...

Page 243: ... voltage start selection Set range 0 disabling the function 1 approx 4ms to 250 approx 1s 3 b037 Function code display restriction Five option codes 00 Full display 01 Function specific display 03 Data comparison display 04 Basic display 05 Monitor display only 00 b038 Initial display selection 000 Func code that SET key pressed last displayed 001 060 d001 d060 displayed 201 F001displayed 202 B di...

Page 244: ...hour clearance Two option codes 00 OFF 01 ON press STR then clear 00 b079 Watt hour display gain Set range is 1 to1000 1 b082 Start frequency Sets the starting frequency for the inverter output range is 0 01 to 9 99 Hz 0 50 Hz b083 Carrier frequency Sets the PWM carrier internal switching frequency range is 2 0 to 15 0 kHz 2 0 kHz b084 Initializati on mode paramet ers or trip history Select initia...

Page 245: ...Free V F setting freq 1 Set range 0 value of b102 0 Hz b101 Free V F setting voltage 1 Setrange 0 0to300 0V 200Vclass 0 0 to 600V 400Vclass 0 0 V b102 Free V F setting freq 2 Set range value of b100 b104 0 Hz b103 Free V F setting voltage 2 Setrange 0 0to300 0V 200Vclass 0 0 to 600V 400Vclass 0 0 V b104 Free V F setting freq 3 Set range value of b102 b106 0 Hz b105 Free V F setting voltage 3 Setra...

Page 246: ...to 5 00 0 20 b134 Decel overvolt suppress integral time Integration time when b130 01 Range is 0 0 to 150 0 seconds 1 0 s b150 Display ex operat or connecte d When an external operator is connected via RS 422 port the built in display is locked and shows only one d parameter configured in 001 050 001 b160 1st paramete r of Dual Monitor Set any two d parameters in b160 and b161 then they can be mon...

Page 247: ...ard 200 400 Initialdata CHN 200 400 Initialdata EU 200 400 Units b166 Data Read Wri te select 00 Read Write OK 01 Protected 00 b180 Initializati on trigger This is to perform initialization by parameter input with b084 b085 and b094 Two option codes 00 Initialization disable 01 Perform initialization 00 ...

Page 248: ...or logic discrete outputs see next section 05 AL C027 FM terminal selection Pulse PWM output 9 programmable functions 00 Output frequency PWM 01 Output current PWM 03 Output frequency Pulse train 04 Output voltage PWM 05 Input power PWM 06 Electronic thermal load ratio PWM 07 LAD frequency PWM 08 Output current Pulse train 10 Heat sink temperature PWM 07 C030 Digital current monitor reference valu...

Page 249: ...econd stage output range is 0 0 to 100 0 0 C061 Electronic thermal warning level Set range is 0 to 100 Setting 0 means disabled 90 C063 Zero speed detection level Set range is 0 00 to 100 00Hz 0 00 Hz C064 Heat sink overheat warning Set range is 0 to 110 C 100 C C070 Selection of OPE Modbus 00 OPE 01 Modbus 00 C071 Communication speed Five option codes 04 4 800 bps 05 9 600 bps 06 19 200 bps 07 38...

Page 250: ...cel trip state at signal OFF transition stops inverter if in Run Mode 02 Cancel trip state at input ON transition no effect if in Run Mode 00 C103 Restart mode after reset Determines the restart mode after reset is given two option codes 00 Start with 0 Hz 01 Start with freq matching 00 C104 UP DWN clear mode Freq set value when UDC signal is given to the input terminal two option codes 00 0 Hz 01...

Page 251: ...put 4 response time 1 C164 Input 5 response time 1 C169 Multistage speed determination time Set range is 0 to 200 x 10ms 0 ms H Function Run Mode Edit Defaults Func Code Name Description Initialdata standard 200 400 Initialdata CHN 200 400 Initialdata EU 200 400 Units H003 Motor capacity Twelve selections 0 10 0 20 0 40 0 55 0 75 1 10 1 50 2 20 3 00 3 70 4 00 5 50 Specified by the capacity of each...

Page 252: ...rotation d004 PID FB PID feedback monitoring 0 00 to 10000 0 d005 Input Intelligent input terminal status 1 to 5 terminal LLLLL HHHHH d006 Output Intelligent input terminal status 1 RY terminal LL HH d007 Scaled FQ Scaled output frequency monitoring 0 00 to 40000 00 d013 Output Voltage Output voltage monitoring 0 0 to 600 0 V d014 Input Power Input power monitoring 0 0 to 999 9 kW d015 kW hour Cum...

Page 253: ...g 1 Factor frequency Hz current A voltage across P N V running time hours power on time hours d082 ERR2 Trip monitoring 2 d083 ERR3 Trip monitoring 3 d084 ERR4 Trip monitoring 4 d085 ERR5 Trip monitoring 5 d086 ERR6 Trip monitoring 6 d090 WARN Warning monitoring Warning code d102 DC Voltage DC voltage monitoring 0 0 to 1000 0 V d104 E Thermal Electronic thermal overload monitoring 0 0 to 100 0 ...

Page 254: ...requency that determines constant motor speed range is 0 00 start frequency to maximum frequency A004 0 00 Hz F002 Accel time1 Acceleration time 1 Standard default acceleration range is 0 00 to 3600 00 seconds 10 00 s F202 Accel time1 M2 Acceleration time 1 2nd motor 10 00 s F003 Decel time1 Deceleration time 1 Standard default deceleration range is 0 00 to 3600 00 seconds 10 00 s F203 Decel time1...

Page 255: ...Run key on keypad or digital operator 03 Modbus network input 01 A202 RUN cmd source M2 Run command source 2 nd motor 01 A003 Base Frequency Base frequency Settable from 30 0 Hz to the maximum frequency A004 60 0 50 0 50 0 Hz A203 Base Frequency M2 Base frequency 2 nd motor Settable from 30 0 Hz to the 2 nd maximum frequency A204 60 0 50 0 50 0 Hz A004 Max Frequency Maximum frequency Settable from...

Page 256: ... value 01 Use 0Hz 01 A016 Analog in filter Analog input filter Range n 1 to 31 1 to 31 2ms filter 31 8 31 Spl A019 Multispeed select Multi speed operation selection Select codes 00 Binary operation 8 speeds selectable with 3 terminals 01 Bit operation 4 speeds selectable with 3 terminals 00 A020 Multispeed 0 Multi speed freq 0 Defines the first speed of a multi speed profile range is 0 00 start fr...

Page 257: ...d during run 04 A041 TRQ boost sel Torque boost select Two options 00 Manual torque boost 01 Automatic torque boost 00 A241 TRQ boost sel M2 Torque boost select 2nd motor 00 A042 TRQ boost V Manual torque boost value Can boost starting torque between 0 and 20 above normal V f curve range is 0 0 to 20 0 1 0 3 0 1 0 A242 TRQ boost V M2 Manual torque boost value 2nd motor 1 0 3 0 1 0 A043 TRQ boost F...

Page 258: ...on gain for automatic torque boost 2 nd motor 100 A051 DB enable DC braking enable Three options select codes 00 Disable 01 Enable during stop 02 Frequency detection 00 A052 DB Frequency DC braking frequency The frequency at which DC braking begins range is 0 00to 60 00Hz 0 50 Hz A053 DB wait time DC braking wait time The delay from the end of controlled deceleration to start of DC braking motor f...

Page 259: ... A062 to maximum frequency A004 0 00 setting is disabled 0 00 setting is enabled 0 00 Hz A261 FQ upper limit M2 Frequency upper limit 2nd motor Sets a limit on output frequency less than the maximum frequency A204 Range is from frequency lower limit A262 to maximum frequency A204 0 00 setting is disabled 0 00 setting is enabled 0 00 Hz A062 FQ lower limit M2 Frequency lower limit Sets a limit on o...

Page 260: ...0 50 0 50 0 50 Hz A069 Accel hold FQ Acceleration hold frequency Sets the frequency to hold acceleration range is 0 00 to 400 00Hz 0 00 Hz A070 Accel hold time Acceleration hold time Sets the duration of acceleration hold range is 0 0 to 60 0 seconds 0 0 s A071 PID enable PID enable Enables PID function three option codes 00 PID Disable 01 PID Enable 02 PID Enable with reverse output 00 A072 PID P...

Page 261: ...01 AVR disabled 02 AVR enabled except during deceleration 02 01 02 A281 AVR select M2 AVR function select 2 nd motor 02 01 02 A082 AVR voltage sel AVR voltage select 200V class inverter settings 200 215 220 23 0 240 400V class inverter settings 380 400 415 440 460 480 200 400 220 380 230 400 V A282 AVR voltage sel M2 AVR voltage select 2 nd motor 200 400 220 380 230 400 V A083 AVR filter time AVR ...

Page 262: ...2 Dec2 profile 2nd motor 00 A095 Acc1 2 FQ Acc1 to Acc2 frequency transition point Output frequency at which Accel1 switches to Accel2 range is 0 00 to 400 00 Hz 0 00 Hz A295 Acc1 2 FQ M2 Acc1 to Acc2 frequency transition point 2 nd motor 0 00 Hz A096 Dec1 2 FQ Dec1 to Dec2 frequency transition point Output frequency at which Decel1 switches to Decel2 range is 0 00 to 400 00 Hz 0 00 Hz A296 Dec1 2...

Page 263: ...ons 00 ADD A input B input 01 SUB A input B input 02 MUL A input B input 00 A145 Add frequency ADD frequency An offset value that is applied to the output frequency when the ADD terminal is ON Range is 0 00 to 400 00 Hz 0 00 Hz A146 Add direction ADD direction select Two options 00 Plus adds A145 value to the output frequency setting 01 Minus subtracts A145 value from the output frequency setting ...

Page 264: ... frequency The output frequency corresponding to the analog input range starting point range is 0 00 to 400 00 Hz 0 00 Hz A162 VR end FQ VR input active range end frequency The output frequency corresponding to the current input range ending point range is 0 00 to 400 00 Hz 0 00 Hz A163 VR start VR input active range start The starting point offset for the current input range range is 0 to 100 0 A...

Page 265: ...power failure alarm Range is 0 3 to 25 0 sec If under voltage exists longer than this time the inverter trips even if the restart mode is selected 1 0 s b003 Retry wait time UV Retry wait time before motor restart Time delay after under voltage condition goes away before the inverter runs motor again Range is 0 3 to 100 0 seconds 1 0 s b004 UV trip on stop Instantaneous power failure under voltage...

Page 266: ...s 0 3 to 100 0 sec 1 0 s b012 E Thermal Level Level of electronic thermal Set a level between 20 and 100 for the rated inverter current Rated current for each inverter model 1 A b212 E Thermal Level M2 Level of electronic thermal 2nd motor A b013 E Thermal Character Electronic thermal characteristic Select from three curves option codes 00 Reduced torque 01 Constant torque 02 Free setting 01 b213 ...

Page 267: ...ng resolution is 1 of rated current Rated current x 1 50 A b222 OL restrict level M2 Overload restriction level 2nd motor Rated current x 1 50 A b023 Decel rate OL restrict Deceleration rate at overload restriction Sets the deceleration rate when inverter detects overload range is 0 1 to 3000 0 resolution 0 1 seconds 1 0 s b223 Decel rate OL rstr M2 Deceleration rate at overload restriction 2 nd m...

Page 268: ...rt FQ act F match Start freq of active freq matching Three option codes 00 freq at previous shutoff 01 start from max Hz 02 start from set frequency 00 b031 Softlock select Software lock mode selection Prevents parameter changes in five options option codes 00 all parameters except b031 are locked when SFT terminal is ON 01 all parameters except b031 and output frequency F001 are locked when SFT t...

Page 269: ...ge controlled 03 Decelerates to a stop with DC bus voltage controlled then restart 00 b051 DC Volt ctrld decel DC bus voltage trigger level of ctrl decel Setting of DC bus voltage to start controlled decel operation Range is 0 0 to 400 0 800 0 220 0 440 0 V b052 OV lvl ctrld decel Over voltage threshold of ctrl decel Setting the OV LAD stop level of controlled decel operation Range is 0 0 to 400 0...

Page 270: ...ters or trip history Select initialized data four option codes 00 Initialization disabled 01 Clears Trip history 02 Initializes all Parameters 03 Clears Trip history and initializes all parameters 00 b085 Initial data select Country for initialization Select default parameter values for country on initialization two option codes 00 Mode 0 01 Mode 1 03 Mode 3 00 03 01 b086 FQ scale factor Frequency...

Page 271: ...of b102 0 Hz b101 Free V F V1 Free V F setting voltage 1 Set range 0 0 300 0V 0 0 V b102 Free V F F2 Free V F setting freq 2 Set range value of b100 b104 0 Hz b103 Free V F V2 Free V F setting voltage 2 Set range 0 0 300 0V 0 0 V b104 Free V F F3 Free V F setting freq 3 Set range value of b102 b106 0 Hz b105 Free V F V3 Free V F setting voltage 3 Set range 0 0 300 0V 0 0 V b106 Free V F F4 Free V ...

Page 272: ...onal gain Proportional gain when b130 01 Range is 0 00 to 5 00 0 20 b134 Over V supp I gain Decel overvolt suppress integral time Integration time when b130 01 Range is 0 0 to 150 0 seconds 1 0 s b150 Disp ex ope connected Display ex operator connected When an external operator is connected via RS 422 port the built in display is locked and shows only one d parameter configured in 001 050 001 b160...

Page 273: ...or com loss action Five option codes 00 Trip 01 Trip after deceleration to a stop 02 Ignore 03 Coasting FRS 04 Decelerates to a stop 02 b166 Data R W select Data Read Write select 00 Read Write OK 01 Protected 00 b180 Initialize trigger Initialization trigger This is to perform initialization by parameter input with b084 b085 and b094 Two option codes 00 Initialization disable 01 Perform initializ...

Page 274: ...terminal 4 function 34 options see next section 03 CF2 C005 Input 5 Function Input 5 function Select input terminal 5 function 34 options see next section 18 RS C011 Input 1 actv state Input 1 active state Select logic conversion two option codes 00 normally open NO 01 normally closed NC 00 C012 Input 2 actv state Input 2 active state 00 C013 Input 3 actv state Input 3 active state 00 C014 Input 4...

Page 275: ...is 20 200 of rated current Rated current A C031 Output 11 actv state Output 11 active state Select logic conversion two option codes 00 normally open NO 01 normally closed NC 00 C036 Alarm RLY active state Alarm relay active state 01 C038 LOC out mode select Output mode of low current detection Two option codes 00 During acceleration deceleration and constant speed 01 During constant speed only 01...

Page 276: ...lowable PID loop error magnitude absolute value SP PV range is 0 0 to 100 3 0 C052 PID FBV high limit PID FBV output high limit When the PV exceeds this value the PID loop turns OFF the PID second stage output range is 0 0 to 100 100 0 C053 PID FBV low limit PID FBV output low limit When the PV goes below this value the PID loop turns ON the PID second stage output range is 0 0 to 100 0 0 C061 E T...

Page 277: ...trip 02 Disable 03 Free run stop coasting 04 Decelerates to a stop 02 C077 Comm timeout Communication error time out Sets the communications watchdog timer period Range is 0 00 to 99 99 seconds 0 00 disabled 0 00 s C078 Comm wait time Communication wait time Time the inverter waits after receiving a message before it transmits Range is 0 to 1000 m seconds 0 ms C081 O OI input adj O OI input span c...

Page 278: ...al ON transition stops inverter if in Run Mode 01 Cancel trip state at signal OFF transition stops inverter if in Run Mode 02 Cancel trip state at input ON transition no effect if in Run Mode 00 C103 Restart after reset Restart mode after reset Determines the restart mode after reset is given two option codes 00 Start with 0 Hz 01 Start with freq matching 00 C104 UP DWN clear mode UP DWN clear mod...

Page 279: ...ic function to calculate LOG output state Three options 00 LOG A AND B 01 LOG A OR B 02 LOG A XOR B 00 C151 Button sens Button sensitivity selection 0 to 250 no 10 C152 Scroll sens Scroll sensitivity selection 1 to 20 10 C155 Ground fault set Ground fault detection 00 OFF 01 ON 01 C157 Out phase loss set Out phase loss detection 00 OFF 01 ON 00 C160 Input 1 resp time Input 1 response time Sets res...

Page 280: ...cy output to motor 09 2CH 2 stage Acceleration and Deceleration ON Frequency output uses 2nd stage acceleration and deceleration values OFF Frequency output uses standard acceleration and deceleration values 11 FRS Free run Stop ON Causes output to turn OFF allowing motor to free run coast to stop OFF Output operates normally so controlled deceleration stop motor 12 EXT External Trip ON When assig...

Page 281: ...ut frequency set by and source of Run command set by is used 32 SF1 Multi speed Select Bit operation Bit 1 ON Bit encoded speed select Bit 1 logical 1 OFF Bit encoded speed select Bit 1 logical 0 33 SF2 Multi speed Select Bit operation Bit 2 ON Bit encoded speed select Bit 2 logical 1 OFF Bit encoded speed select Bit 2 logical 0 34 SF3 Multi speed Select Bit operation Bit 3 ON Bit encoded speed se...

Page 282: ... an alarm signal has occurred and has not been cleared OFF When no alarm has occurred since the last cleaning of alarm s 06 FA3 Frequency Arrival Type 3 Set frequency ON When output to motor is at the set frequency during accel and decel OFF When output to motor is OFF or is not at a level of the set frequency 09 UV Undervoltage ON Inverter is in Undervoltage OFF Inverter is not in Undervoltage 11...

Page 283: ...rrent is not less than the specified value 50 IRDY Inverter Ready Signal ON Inverter can receive a run command OFF Inverter cannot receive a run command 51 FWR Forward Rotation ON Inverter is driving the motor in forward direction OFF Inverter is not driving the motor in forward direction 52 RVR Reverse Rotation ON Inverter is driving the motor in reverse direction OFF Inverter is not driving the ...

Page 284: ...derating properties Effect to improve Capacitor life Effect not to let dust invade it from the upper part Effect to reduce an installation area at the time of plural mount installation Applicable model NES1 015 022SB LB 007 040HB Note Please do not be attached to the inverter which is not an applicable model There might be an injury the fire In addition cause the inverter discarding 13 2 1 Mountin...

Page 285: ...on 13 56 FFM Back side FFM Figure 2 Part shaded area to remove surgically Figure1 Mounting method of FFM FFM Back side Figure 4 After part shaded area to remove surgically Figure3 Part shaded area to remove surgically ...

Page 286: ...50 Ambient Temp 40 Ambient Temp 50 Figure6 Derating of NES1 022SB 16 2 4 6 8 10 12 14 0 4 0 6 0 9 0 10 0 Current A 8 0 7 0 5 0 Ambient Temp50 Ambient Temp40 If I use FFM use is possible at ambient temp 50 Ambient Temp30 Carrier frequency kHz Figure7 Derating of NES1 040HB 16 2 4 6 8 10 12 14 0 4 0 6 0 9 0 10 0 Current A 8 0 7 0 5 0 Ambient Temp50 Ambient Temp40 If I use FFM use is possible at ambi...

Page 287: ...ion as for the inverter of the NE S1 series it is in the structure that direct the dust from the top is hard to invade the products inside The dust from the top becomes hard to invade the inverter inside more by attaching optional FFM to an applicable model The detail refers to figure 9 Figure9 FFM installation state ...

Page 288: ... if a wiring duct in the upper part is installed Therefore can reduce requisite space at the time of the installation Refer to Figure 12 Figure10 Reduction of the inverter upper part space Figure11 Minimum clearance from front panel Figure12 Lower tooth space if I installed inverter many several Minimum clearance to be kept as indicated A as flollows 007H 2cm 015S L H 0 8cm 022S L H 0cm 040H 0cm A...

Page 289: ...Appendix Appendix A Appendix A 1 ...

Page 290: ......

Page 291: ...p the point that I ordered in a figure and flatter PCB and take off two places of nails of the operator to open it outside of inverter cf photograph A B If the nail of the right side surface comes off remove the left side surface equally next cf photograph C D Take off two places of picks of NES1 OPE to open it outside of inverter Pick up two places A Remove two places of screws B Right side Left ...

Page 292: ...Appendix Appendix 2 ...

Page 293: ...ant 7 30 deceleration hold time 7 27 deceleration hold frequency 7 27 deceleration overvoltage restraint 7 65 derating 12 4 detection of terminal disconnection 7 75 digital current monitoring 7 19 digital current monitor reference value 7 19 digital output frequency 7 19 DISP 7 47 display limitation function 7 47 DWN 7 32 down key 6 5 dual monitoring 7 4 Disassembly method of NES1 OP Appendix 1 E ...

Page 294: ... of retry on over voltage over current trip 7 51 O O OI terminal 5 5 7 16 OD 7 37 OHF 7 72 OL 7 63 OLR 7 63 operation time over signal RNT plug in time over signal ONT 7 70 OPE 7 45 operator selection for frequency operation 7 31 output active state 7 14 output current monitoring 7 1 output frequency monitoring 7 1 output frequency setting 7 6 output on delay 7 15 output off delay 7 15 output volt...

Page 295: ...7 72 stop mode selection 7 8 STP 7 23 switch for termination resistor 3 2 T termination resistors 8 2 Thermal warning 7 62 THM 7 62 tightening torque 5 12 3 wire interface operation function 7 23 torque boost 7 22 trip 6 19 7 60 trip counter 7 4 trip monitoring 7 4 troubleshooting 10 1 2 stage acceleration deceleration 7 29 2CH 7 29 U U curve acceleration deceleration 7 30 UDC 7 32 UL 1 10 unatten...

Reviews: