background image

Manual 3.1

English     

co_coco_BDA_de_engl_2.indd   1

18.09.2006   17:08:46

Summary of Contents for Cohedra

Page 1: ...Manual 3 1 English co_coco_BDA_de_engl_2 indd 1 18 09 2006 17 08 46 ...

Page 2: ...osed to vibrations during operation Keep away from moisture and dust where possible Do not place the unit near water baths wash basins kitchen sinks wet areas swimming pools or damp rooms Do not place objects containing liquid on the unit vases glasses bottles etc Ensure that the unit is well ventilated Any ventilation openings must never be blocked or covered The unit must be positioned at least ...

Page 3: ...ate un allacciamento alla rete di corrente utilizzando cassette di distribuzione sovraccariche La spina di corrente deve essere situata nelle vicinanze dell apparecchio e facilmente raggiungibile in qualsiasi momento Locali di collocamento Opportuno collocare l apparecchio su una superficie pulita e orizzontale Non sottoporre l apparecchio in funzione a scosse e vibrazioni Proteggere l apparecchio...

Page 4: ...nt A Die COHEDRA Technology 5 B COHEDRA Enclosures 10 B 1 COHEDRA Compact Enclosures 14 C COHEDRA Transport Solution 17 C 1 COHEDRA Compact Transport Solution 20 D Rigging and Curving COHEDRA Systems 22 D 1 Rigging and Curving COHEDRA Compact 36 E COHEDRA Setups with CAPS 48 F COHEDRA Controlling Concept 61 G Controller and Controller Software 63 H COHEDRA Power Racks 81 I Power Amp VX 2400 85 J P...

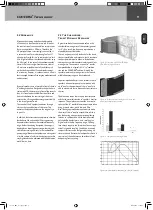
Page 5: ...iation in a line array 7 Fig 3 1 Extended line Array near field 7 Fig 4 Effect without gap red with evenly distributed gap blue and with unevenly distributed gap pink 7 Fig 5 Typical J shape 7 Fig 6 The COHEDRA acoustic lens mode of operation 8 Fig 7 The COHEDRA acoustic lens 8 Fig 8 Effect of the synthetic fiber fleece 9 Fig 9 Front view of the COHEDRA CDR 208 mid high enclosure 9 Fig 10 8 speake...

Page 6: ...ft outwards when the wave s impact excites inert molecules at its fringes The cylindrical wave front s keen edges are smoothed by degrees gradually transforming the cylindrical wave into a spherical wave front In mathematical terms this can be described as a sound vector pointing slightly outward at its fringes Because the velocity of propagation remains constant the cylindrical wave slowly tran s...

Page 7: ...t practical applications also mandate great flexibility rendering such a concept in feasible For these reasons every element is curved slightly Fig 3 c Due to the gaps between the elements which as stated above are inevitable anyway both ends of every element s wave fronts are reshaped in the same way A line source forms again at a certain distance Fig 3 1 Emphasized Radiation technolo gy is thus ...

Page 8: ... some thing approaching an organ pipe The only remedy is to connect a very large horn an option that for technical reasons is often infeasible A covering with a porous absorber is another possibility Desi gned to reduce the velocity jump in sound particle acceleration this covering must be acoustically very transparent To this end COHEDRA employs a special synthetic fiber fleece with defined aerod...

Page 9: ... Dynamic Response A great drawback of conventional woofers is the considerable moving mass of the speaker general ly 18 As a result low frequency reproduction is marred by dynamic distortion There is only way to satisfy the desire for the driest cleanest possible low end response that is to achieve the best possible impulse behavior By definition this requires a smaller speaker membrane with less ...

Page 10: ...gh Enclosures 11 1 2 CDR 210 Sub Subwoofer 12 1 3 CDR 210 F Sub Subwoofer 13 Index of Figures Fig 1 Cohedra CDR 208 T 11 Fig 2 Cohedra CDR 208 S 11 Fig 3 Cohedra CDR 210 Sub 12 Fig 4 Cohedra CDR 210 F Sub 13 Chapter B The COHEDRA Loudspeakers co_coco_BDA_de_engl_2 indd 10 18 09 2006 17 08 51 ...

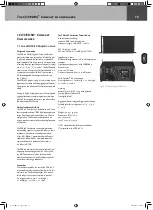
Page 11: ...ed under half space con ditions Maximum SPL measured under the same conditions at a distance of one meter is 139 dB at 10 THD The CDR 208 S T enclosures horizontal dispersion pattern is 80 Frequency response ranges from 88 Hz to 16 kHz 3 dB The CDR 208 S T enclo sures are thus able to provide sound reinforcement public address applications calling speech only without requiring a subwoofer Connecti...

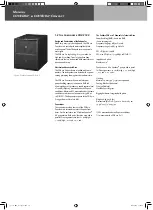
Page 12: ...quency response of the CDR 210 Sub ranges from 47Hz to fx dB Connections The connector panel on the rear of the CDR 210 Sub enclosure is recessed to protect the ports from harm On this enclosure you ll find two Speakon NL 4 connectors Both ports four pins are wired in parallel Pin assignments are pin 1 mid high 1 mid high 2 sub 2 sub 2 The Cohedra CDR 210 Sub Subwoofer s Technical Data Power handl...

Page 13: ...D Frequency response ranges from 47 Hz to fx dB Connections The connector panel on the rear of the CDR 210 F Sub is recessed to protect the ports from harm On these enclosures you ll find two Speakon NL 4 connectors Both ports four pins are wired in parallel Pin assignments are pin 1 mid high 1 mid high 2 sub 2 sub 2 The CDR 210 F Sub Enclosure s Technical Data Power handling RMS 600 watts Power h...

Page 14: ...es 15 1 1 The CDR 108 C Mid High Unit 15 1 2 The Subwoofer CDR 210 C 16 Index of Figures Figure 1 Cohedra Compact CDR 108 C 15 Figure 2 Cohedra Compact CDR 210 C 16 Chapter B 1 The COHEDRA Compact Loudspeakers co_coco_BDA_de_engl_2 indd 14 18 09 2006 17 08 53 ...

Page 15: ... 107 dB 1W 1m measured under half space conditions Maximum SPL measured under the same conditions at a distance of one meter is 136 dB at 10 THD The CDR 108 radiates at a horizontal angle of 100 Frequency response ranges from 88 Hz to 19 kHz 3 dB The enclosure is thus able to provide speech reinforcement for public address applicati ons without requiring a subwoofer Connections The connector panel...

Page 16: ...D The frequency response of the CDR 210 C ranges from 47Hz to fx dB Connections The connector panel on the rear of the CDR 210 C enclosure is recessed to protect the ports from harm On this enclosure you ll find two Speakon NL 4 connectors Both ports four pins are wired in parallel Pin assignments are pin 1 mid high 1 mid high 2 sub 2 sub The Cohedra CDR 210 C Subwoofer s Technical Data Power hand...

Page 17: ...Space 19 Index of Figures Fig 1 COHEDRA Mid High Case 18 Fig 2 COHEDRA Subwoofer Dolly 18 Fig 3 16 Mid High Cabinets and 16 Subwoofers 19 Fig 4 24 Mid High Cabinets and 24 Subwoofers 19 Fig 5 32 Mid High Cabinets and 32 Subwoofers 19 Fig 6 48 Mid High Cabinets and 48 Subwoofers 19 Chapter C COHEDRA Transport Solution co_coco_BDA_de_engl_2 indd 17 18 09 2006 17 08 54 ...

Page 18: ...s Bin Dollies Case for four CDR 208s or two CDR 210 F Sub Width 80 cm 31 1 2 Depth 74 cm 29 1 8 Height 131 cm 51 5 8 Weight approx 150 kg 330 lbs Four CDR 210 Subs with dolly and strap Height 148 cm 58 1 4 casters included Width 40 cm 15 3 4 Depth 110 cm 43 1 4 Weight 138 kg 304 lbs PR 16 lying Width 60 cm 23 5 8 Height 65 5 cm 25 3 4 depth when standing on casters Depth 95 cm 37 3 8 height when s...

Page 19: ...ns of COHEDRA cases racks and dollies were selected specifically to make the most of available truck space The diagrams below offer suggestions on how to load different COHEDRA systems into a truck with a width of 240 cm co_coco_BDA_de_engl_2 indd 19 18 09 2006 17 08 55 ...

Page 20: ...n 21 1 1 CDR 108 C Mid High Case 21 1 2 Dimensions and Weights 21 Index of Figures Fig 1 COHEDRA Compact Mid High Case 21 Fig 2 16 Mid High enclosures and 8 Subwoofers 21 Chapter C 1 COHEDRA Compact Transport Solution co_coco_BDA_de_engl_2 indd 20 18 09 2006 17 08 55 ...

Page 21: ...t standing on casters 70 cm 27 1 2 Weight without rigging frame approx 98 kg 215 lbs Weight with rigging frame approx 108 kg 238 lbs PR 16 lying Width 60 cm 23 5 8 Height 65 5 cm 25 3 4 Depth standing on casters 95 cm 37 3 8 Weight approx 125 kg 275 lbs PR 8 lying Width 60 cm 23 5 8 Height 38 5 cm 15 1 8 Depth standing on casters 95 cm 37 3 8 Weight approx 65 kg 143 3 lbs CDR 210 C Width 50 cm 19 ...

Page 22: ...g Curving the COHEDRA System Index of Figures Fig 1 12 COHEDRA mid high enclosures 26 Fig 2 Mid high enclosure with integrated flight attachments 26 Fig 3 Top rigging frame 26 Fig 4 Shackles for attaching motors straps 26 Fig 5 Bottom rigging frame 26 Fig 6 Lashing strap for curving the array 26 Fig 7 Quick release pin 26 Fig 8 The curvature between two COHEDRA mid high enclosures 27 Fig 9 Setting...

Page 23: ...nd repair of rigging frames unauthorized structural modifications performed on rigging frames unauthorized modification of the parameters indi cated in the operating manual inadequate or improper repairs 3 Important Notes on Safety Original COHEDRA rigging accessories have been certified as a complete and cohesive system by the safety standards authority TÜV The directions for use of the COHEDRA r...

Page 24: ...A Rigging Hardware Load carrying capacity of standard rigging frames 800 kg Test load 3 200 kg Ambient temperature when in operation min 10 C max 60 C 3 4 Maximum Permissible Number of Flown COHEDRA Mid High Units You may fly up to 32 mid high range enclosures in a stacked array You may fly up to 24 mid high enclosures in a stacked array when using the standard rigging frame If you want to fly up ...

Page 25: ...immediately below arrays of people before raising or lowering loads Lift and lower flown mid high enclosures smoothly avoiding abrupt stops or jerky motions Secure the flown mid high array in place with straps so that it remains immovable for example despite gusts of wind Use the eyelets in the bottom rigging frame to affix straps 3 8 Structural Modifications of COHEDRA Rigging Hardware No structu...

Page 26: ...g straps or chain hoists The top rigging frame also serves as the base for ground stacks a bottom rigging frame for attaching a lashing strap chain hoist or motor for curving the array a two part lashing strap for curving arrays of up to eight COHEDRA mid high enclosures integrated attachments on the side and back for flying COHEDRA mid high enclosures four quick release pins per mid high enclosur...

Page 27: ... Important notes on safety when curving the array with lashing straps and chain hoists When tighte ning the lashing strap or using a chain hoist ensure that just enough force is exerted to curve the array to the desired extent along the rear of the housings Use a chain hoist with a maximum load of 250 kg 8 m in length This also suffices for configurations with up to 24 Mid High units If possible c...

Page 28: ...om their re ceptacles on the top rigging frame and the top pin on the back of the top mid high range enclosure preferably CDR 208 S Set the top rigging frame on the topmost enclosure First attach the two front connectors Turn the connector component so that the rounded side of the component faces forward see Fig 12 a g Insert the pin of the top mid high enclosure through the slot on the connector ...

Page 29: ...nclosures from the case using the motor and roll the case off to the side Set the pins on the back of the top four mid high enclosures in accordance with the desired applicati on and curving angle This is also a good time to connect the speaker cables to the four mid high range enclosures which will later be the top cabinets in your array You can use the round pole on the top rigging frame to secu...

Page 30: ...rt both front pins first ensuring that they engage fully and securely You may have to shift the two enclosures slightly to ease the pins into position see Fig 17 b In order to attach the rear connector component you must swivel it out of the rail so that the round end faces up and the slot faces down see Fig 12 a g for details and Fig 17 c Tip Use the motor to slowly hoist the array creating a gap...

Page 31: ...her accordion style and thereby adjusted using a lashing strap chain hoist or motor attached at the back If no force is exerted the entire mid high array is suspended at a 0 angle meaning that the pin is easily repositioned Do not use powerful chain hoists with low gear ratios that is a powerful force action and a long lashing strap A chain hoist that exerts too much force relieves the load on the...

Page 32: ...ame to ensure a stable secure and level position Remove all three pins from the rigging frame and mount the mid high enclosures one after another The procedure is the same as for a flown system apart from the fact that enclosures are stacked upside down and due to the weight of the enclosures a lashing strap is not required for curving purposes Caution Always secure ground stacks with a suitable l...

Page 33: ...equency amplitude and typical low end drop outs 11 3 Bass Clusters in Blocks If you want to deploy many bass bins arraying them in blocks is a good option Note that it is important to maintain varying distances between individual blocks Advantages Different frequencies are cancelled or boosted The sum of the comb filters creates a relatively uniform soundscape This setup s horizontal directivity i...

Page 34: ... in line between CDR 210 blocks depending on the given requirements and application scenario 14 Operating the System We recommend the following procedure to help prevent errors and troubleshoot problems quickly The adverse affect of a mid high cabinet dropping out or an incorrect connection can seriously degrade a line array s performance 14 1 Connecting Speaker Cords or Multi core Cables Always e...

Page 35: ...guring the Control ler Network with the Audio Controller Software Once you have performed these tests you can configure the controller network The type and size of the configuration of course depends on the given sound reinforcement task PA left right center outfills etc Read the chapter G about the DFC software in the manual to learn more about networking controllers creating groups and setting d...

Page 36: ...ing the Controller Network Using Audio Controller Software 46 8 Tearing Down and Transporting the System 12 Index of Figures Fig 1 COHEDRA Compact Mid High case 37 Fig 2 16 COHEDRA CDR 108 C 40 Fig 3 CDR 108 C with integrated rigging attachments 40 Fig 4 COHEDRA Compact standard rigging frame 40 Fig 5 COHEDRA Compact lightweight rigging frame 40 Fig 6 Optional quick release pins for flying up to s...

Page 37: ...bility claims for personal injury and property damages are excluded if attributable to one or several of the following non compliance with operating manual instructions voiding product liability and warranty claims unintended use of rigging frames non compliance with operating manual instructions regarding transportation storage initial setup operation maintenance and repair of rigging frames unau...

Page 38: ...uctions Use original parts for this purpose Tighten screws and bolted connections whenever necessary Repair In the event that parts of the load carrying equip ment have been deformed it is up to the manufac turer to determine if they are repairable Solely the manufacturer is authorized to perform welding and repair jobs on load carrying equipment 2 3 Technical Specifications of COHEDRA Compact Rig...

Page 39: ... or lowering loads Lift and lower flown mid high enclosures smoothly avoiding abrupt stops or jerky motions Secure the flown array with straps to prevent it from moving for example in the event of wind 2 7 Structural Modifications of COHEDRA Compact Rigging Hardware No structural modifications may be made without the manufacturer s consent This also applies to welding work performed on supporting ...

Page 40: ...hing strap for curving the array in compression mode integrated rigging points on the side and back for flying COHEDRA Compact enclosures four quick release pins per CDR 108 C for connecting the enclosure to rigging frames Important note on pins Quick release pins serve to connect rigging hardware and speaker enclosures and their proper function must be tested and verified The pins must always eng...

Page 41: ... and 9 The rigging equipment is designed so that the splay can be adjusted when COHEDRA Compact arrays have been lifted How is this done The pin that determines the splay Set Angle is merely a predefined stop for the flexible connector component when the entire COHEDRA Compact array is compressed accordion style at the back and thereby adjusted using a lashing strap or chain hoist When no force is...

Page 42: ...u must attach one of the shackles on the rigging frame to the lashing strap or chain hoist that will later serve to pull back the ends of the array to curve out its front face Do this now Tip If you intend to rig additional CDR 108 C en closures it is recommended that you attach all the required speaker cords to the top rigging frame now because this task is made more difficult as the height of th...

Page 43: ...il it exerts enough force to curve the array as desired Once you have hoisted the COHEDRA Compact array secure it against gusts of wind or accidental twisting using two lashing straps or ropes 4 2 Fixed Mode To determine the splay between two enclosures in fixed mode you must insert one pin Set Angle and fix the connector component in place with the second pin To fix the selected angle insert the ...

Page 44: ... and lift the subwoofer Now you can rig additional CDR 210 C bins below this subwoofer To do this you need four connector components and eight pins for each subwoofer 1Set 5 3 In Combination with CDR 108 C Mid High Configuring subwoofers and mid high units together in a single array can be a viable option depending on application Subwoofers must be rigged on top of the flown array for this applica...

Page 45: ...f gravity inwards to make it more stable Use the two holes on the sides of the rigging frame to do this They are located about 70 mm inwards measured from the rear edge see Fig 24 a b What s more you can adjust the rigging frame s center connector component on the lowest CDR 108 C enclosure to tilt the stack 9 downwards To do this use the set angles in fixed mode The table below indicates which an...

Page 46: ...l Mid High Enclosures The best method of checking cabinets is to play a familiar song on a CD routing the signal into the mixer and out via the master channel Set the master level to a low to medium setting Turn up channel 1 s gain knob You will hear the signal rendered by the array s four top mid high cabinets The display of the DFC assigned to this pair should indicate incoming signal levels Imp...

Page 47: ...abinets cords 4 Set the Set Angle pins that are determining the array s curving to 0 This way the array will not buckle when lowering and setting it on the bottom of the case This also makes it easier to dismantle the four cabinet block 5 Always insert the front pins into the holes on the rigging connector to ensure they are not damaged or torn off when the array is lowered onto the case 6 Careful...

Page 48: ...y 57 5 4 Aligning Enclosures Using the Optimization Function 57 5 5 Viewing the Sound Level Envelope 59 5 6 Viewing the Dispersion Pattern 59 5 7 Viewing Delay Times Between Mid High Arrays and Stacked Subwoofers 60 6 Creating a Rigging Plan 60 7 Creating Horizontal Subwoofer Arrays 60 Index of Figures Fig 1 Simulation of a RT 112 F s directivity 42 Fig 2 Simulation of a CDR 208 s directivity 42 F...

Page 49: ...sure s vertical angle of radiation is quitesmall it throws sound energy a considerable distanceacross a relatively large field of the audience area A minor change in the enclosure s vertical angle 3 would not have a major impact in changing levels within the audience area Figure 2 in turn depicts a simulation of direct sound propagation using a COHEDRA CDR 208 enclosure as a source with spherical ...

Page 50: ...elds higher output levels The Peak calculation option serves this purpose The top units are supplied with the maximal permissible load without taking compression effects and limiters into account Accordingly these values are attainable for relatively brief periods only 1 2 2 EASE DLL SPL calculation in EASE has traditionally been somewhat different as it always operates under the assumption of ban...

Page 51: ...ailable on venues websites These sources can provide all the information required for a simulation 2 Installing and Launching CAPS 2 1 System Requirements A Windows computer with 600 MHz or higher processor 128 MB RAM Win 98 Win NT Win 2000 or Win XP OS 2 2 Installation Place the CD ROM containing CAPS into your computer s disk drive View the CD ROM s contents for example via the Windows Desktop o...

Page 52: ...ation of audience areas It s rarely feasible to directly measure the height of the last row in inclining audience areas Instead measure the distance from the reference point to the beginning of the inclining audience area Side 2 the distance from the reference point to the last row of the inclining audience area Side 1 and the length of the inclining audience area Side 3 If you enter the values yo...

Page 53: ...ous sound level peak sound level or the sound level of an individual frequency band within the audience areas In box 2 enter the position of the array and how many and or which components it consists of In box 3 adjust the vertical angle of the entire array as well as the angles between individual components until you achieve optimum results You can view sound level envelopes in the individual aud...

Page 54: ...t on the flight frame Adjust rigging fixtures to this angle and use this pick point when setting the system up 3 8 Sub Array Panel Use the Sub Array panel to configure horizontal subwoofer arrays It can calculate up to ten subwoofers or subwoofer blocks If a subwoofer block consists of several subwoofers be sure to stack these In box 1 indicate the distances between the individual subwoofer blocks...

Page 55: ...d here the calculated A weighted sound pressure levels achieved by the givenconfiguration at the FOH location 4 3 Entering Audience Areas Click the Audience Areas box to open a list from which you can select the number of audience areas up to 3 Then enter the coordinates for each audience area You have several mapping options The first is to type for the given audience area the first row s X and Y...

Page 56: ...ise in CAPS is that CDR 208 S and CDR 208 T enclosures are distributed equally On the one hand the COHEDRA array produces a higher sound level with a greater number of COHEDRA enclosures On the other a certain number of COHEDRA enclosures is necessary to achieve the required vertical angle of radiation and sufficient spread in the near field This means that for some projects you may require more C...

Page 57: ...ligned enclosures click the button with the open lock icon to ensure the configured COHEDRA array cannot be changed The lock on the button closes and the COHEDRA array can no longer be edited To unlock the configuration simply click the button again so that the lock opens 5 4 Aligning Enclosures Using the Optimization Function The higher the frequency the more pronounced the directivity of a COHED...

Page 58: ... manually configured array You may select these configurations successively in the Top configurations box in order to compare them Each selected configuration is shown in the view on the right of the optimization window You ll see the selected configuration s alignment in the side view shown on the Setup panel You ll also see that the diagram at the lower edge of this panel continues to show the s...

Page 59: ...side view you ll see a legend indicating the assignments of colors to sound level values Click Show Aiming Lines to also view the aiming lines running from the individual enclosures to the audience areas If you clicked Calculate Band to compute the array s dispersion pattern in the selected frequency band only and then select another frequency band CAPS calculates and indicates the new band s disp...

Page 60: ...ylindrical wave with a dispersion angle of nearly 0 And that in turn means that sound energy does not reach listeners located in front of the subwoofer array but outside the horizontal cylindrical wave s sound field For this reason it is usually necessary to adapt the horizontal subwoofer array s horizontal angle of radiation to suit the given sound reinforcement situation This is achieved by posi...

Page 61: ...on with the VX 2400 56 1 4 Specific Speaker Filters 56 Index of Figures Fig 1 Equalization at 100 Hz and 1 kHz 56 Fig 2 Resultant group time of IIR filter processing 56 Fig 3 Phase characteristic with and without phase equalization 56 Fig 4 The Overshoot Limiter s mode of operation 56 Chapter F COHEDRA Controlling Concept co_coco_BDA_de_engl_2 indd 61 18 09 2006 17 09 18 ...

Page 62: ...ory group time results of conventional digital controllers using IIR filter technology such as shown in the above example Figure 1 Equalization at 100 Hz and 1 kHz Figure 2 Resultant group time of IIR filter processing Figure 3 Phase characteristic with and without phase equalization Figure 4 The Overshoot Limiter s mode of operation 1 2 3 Way Virtual Crossover The crossover splits the input signa...

Page 63: ...he DFC 72 2 10 Adjusting Master Channel Strip Settings 72 2 11 Adjusting the Bass Mid and High Channels 72 2 12 Graphic EQ 73 2 13 Forming Groups 74 2 14 Working with Several Programs 75 2 15 Loading New Filters into DFCs 75 Index of Figures Fig 1 DFC front view 60 Fig 2 Rear view of the DFC 61 Fig 3 Selecting the serial interface 68 Fig 4 Loading stored programs 68 Fig 5 Loading and setting contr...

Page 64: ... with VX 2400 power amps The DFC features the following functionality PA Remote Management System Equalization Phase Correction Peak RMS Temperature and Overshoot Limiter EQ Delay The DFC is equipped with an analog input and a digital AES EBU input for patching in signals The DFC s analog input is electronically balanced Input impedance is 15 k ohms Input sensitivity is 0 dBV equals 1 V RMS the ma...

Page 65: ...tal AES EBU output to this three pin female XLR socket The input signal can be patched through via the parallel circuit s three pin male XLR port Pin assignments are pin 1 ground pins 2 and 3 signal Analog audio output LF Out This port carries the low frequency output signal in 3 way or 2 way configurations It is a male three pin XLR port Pin assignments are pin 1 ground pin 2 signal pin 3 signal ...

Page 66: ...r to load it to the DFC and return to the main menu Changing the controller number The controller number is factory set to Controller no 1 which is also the default after a hot reset HK AUDIO DFC PC Software can be used to assign numbers to DFCs automatically in the se quence in which they are looped or the controller number can be set manually on the DFC To do this press Menu to access the main m...

Page 67: ...ng the delay display mode The DFC can indicate delay settings in milliseconds ms or meters m To select the desired delay display mode press the Menu button to go to the main menu and the and buttons to go to the window for the option Delay Base press eight times Press Enter to access the Delay Display editing window and use the and buttons to se lect ms delay indicated in milliseconds or m delay i...

Page 68: ...s in the selected memory slot and return to the main menu 1 7 Disabling Buttons on the DFC The DFC offers a key lock option that safeguards it against tampering and accidental activation of functions To disable these buttons press the Menu button to go to the main menu and use the and buttons to go to the window for the option Lock Keys press three times First press Enter to access the editing win...

Page 69: ...emotely using a PC The DFC connects to the PC via a special HK AUDIO interface To this end all DFCs are connected in a loop starting at the dongle s Midi Out port from the dongle s Midi Out to the first DFC s Midi In from the first DFC s Midi Out to the second DFC s Midi In and so forth until the final DFC s Midi Out is connected to the dongle s Midi In The dongle connects to the PC via a serial i...

Page 70: ...or 3 pole non heating equipment connector Mains voltage 230 V to 253 V Mains frequency 50 60 Hz Power consumption 17 VA Remotes Midi Midi In port 3 pin XLR female Pin assign 1 ground 2 3 power circuit Midi Out port 3 pin XLR male Pin assign 1 ground 2 3 power circuit Remote port 9 pin D Sub for connecting a PB4 or PB5 A D D A Converter THD input voltage 83 dB Input analog 21 dBV 1 kHz Output analo...

Page 71: ...ftware 3_01 to the PC You can use the Windows Desktop or Windows Explorer to do this Once you have copied the file remove the CD ROM from the disk drive and open the folder named DFC Software 3_01 on the PC Important note Once you have done this be sure to deactivate write protection for the files HK InI BLK InI and SUB InI right click File Properties disable Write protected Not until write protec...

Page 72: ...opt to switch to offline mode the display reads Warning While working in offline mode the display shows wrong controller values The reason for this is that the PC and DFCs are not connected Check the Midi loop and re launch the DFC Software If there is a problem with the serial link between the PC and PC interface or the wrong COM port has been entered to the DFC Software the following window pops...

Page 73: ...ng message appears Warning Loading controller values will overwrite program Associations of controllers and groups will be lost This function can be executed automatically when creating a new program using the option New in the Program menu if the Online option in the Options menu is activated Group menu See figure 8 The option Add creates a new DFC group that you can assign individual DFCs to The...

Page 74: ... shows a graphical view of the individual controllers In edit mode the Editing Panel always displays all 32 potential Controller views If you are not working in edit mode and the connection between the PC and the DFCs is up and running it shows only the controllers connected to the PC DFC Controller Software Editing Panel See Figure 14 Temperature and Peak Limiter indicators appear on the left sid...

Page 75: ...the upper right edge of the Info window to close it Note in the event that you trouble viewing properties In order to view a given filter s properties this filter s Info file HKI must be stored in the DFC Software s Speaker folder If the DFC Software is unable to locate this file a window pops up indicating the following message Speaker connection info for not available 2 7 Selecting the Audio Inp...

Page 76: ...e Mute button again Click the Solo button in the master channel strip to mute all connected DFCs with the exception of the given DFC Solo In Place function When solo is activated the lettering on the Solo button changes from Off to On and its color from grey to red To deactivate solo click the Solo button again Note If you attempt to close the Adjustment for Controller window while solo is activat...

Page 77: ... and S cursor keys to move it Pressing the Pos 1 key selects the fader for the frequency band at around 31 5 Hz and pressing the End key selects the fader for the 16 kHz frequency band Adjusting gain settings Click one of the two buttons in the Gain display to adjust the graphic EQ for the given DFC This is done in 0 5 dB steps within a range of 12 dB to dB 12 Bypass and EQ Flat Click the Bypass b...

Page 78: ... button When selected the color of the Group button changes to red Then click the DFCs that you want to assign to the selected group using the right mouse button The color of the selected DFCs changes to green To revoke a DFC s group assignment click it again using the right mouse button Its color changes back to grey When a group is selected via a single click using the left mouse button the colo...

Page 79: ...tivate the desired program by clicking its listed program name 2 15 Loading New Filters into DFCs At HK AUDIO we constantly strive to develop speaker filters for numerous application scenarios and configurations of HK AUDIO speakers and power amps You can get these on CD ROM or down load them from out website www hkaudio com The DFC Software lets you load these new filters to the DFCs that you hav...

Page 80: ...y at the right of the Single Controller button The All Controllers button sends the filters in the Selection list to all connected DFCs Once filters have been transferred close the Add Equipment window by clicking the Close button The Selection list is retained Note The BLK InI file s write protection must be deactivated for the Selection list to be retained Otherwise an error message appears beca...

Page 81: ...HEDRA Power Rack 16 only 83 6 PS 32 Power Supply 84 6 1 Connections 84 6 2 L1 L2 L3 Circuit Breakers and Phase Indicators 84 6 3 Neutral Conductor Check 84 Index of Figures Fig 1 COHEDRA Power Rack 16 front view 82 Fig 2 COHEDRA Power Rack 16 rear view 82 Fig 3 1 COHEDRA Power Rack 8 front view 83 Fig 4 COHEDRA Power Rack 8 rear view 83 Fig 5 PS 32 84 Chapter H COHEDRA Power Racks co_coco_BDA_de_e...

Page 82: ...The COHEDRA Power Rack 16 comprises No Device Component Description found in 4x VX 2400 Power Amps Chapter I 2x Digital Field Controllers DFC Chapter G 2x PB5 Patchbays Chapter H 1x PS 32 Power Supply Section 6 1x FU4 Fan Unit Section 5 2 COHEDRA Power Rack 8 Depending on the PB 5 s rack configuration you can connect up to four Mid High cabinets and four CDR 210 Sub subwoofers to one COHEDRA Power...

Page 83: ...prox 65 kg 143 lbs PR 16 lying Width 60 cm 23 5 8 Height 65 5 cm 25 3 4 depth when standing on casters Depth 95 cm 37 3 8 height when standing on casters Weight approx 125 kg 275 lbs 4 Displays and Control Features Front Device Display or control feature DFC Menu Enter Reset Buttons LED indicators Limiter red and Input Level green yellow red LCD display VX 2400 Mains power switch Circuit breaker C...

Page 84: ... for each phase It lights up to indicate that a live load is connected and that a neutral conductor is available 6 3 Neutral Conductor Check 1 Connect the PS 32 to a 32 A CEE house mains outlet Switch circuit breaker 1 on If the check lamp does not light up the circuit lacks a phase or a neutral conductor Switch circuit breaker 1 off and repeat the procedure for circuit breaker 2 If the check lamp...

Page 85: ...Selector Switch 87 4 6 Limiter Switch 88 4 7 Ground switch 88 5 Connectors 88 5 1 Mains 88 5 2 Signal Input A Input B 88 5 3 Speaker Output A Output B 89 5 4 Speaker Output A B Bridge 89 6 Installation in a Rack 89 7 Technical Data 90 Index of Figures Fig 1 VX 2400 front view 86 Fig 2 Ports on the VX 2400 s rear panel 87 Chapter I Power Amp VX 2400 co_coco_BDA_de_engl_2 indd 85 18 09 2006 17 09 28...

Page 86: ...ull power always ensure the fan and ven tilation ducts remain uncovered and unobstructed ensuring sufficient ventilation and cooling 1 Protective Circuits The VX 2400 is equipped with circuits protecting it against DC voltage at the output excess current short circuits and thermal overload overheating The Protect LED lights up when a protective circuit activates see chapter 4 When a protective cir...

Page 87: ...Channel A Channel B Gain Knobs Twist these knobs to adjust the levels if the two power amp channels Both Gain knobs are detent potentiometers scaled in dB increments Twist the Channel A gain knob to adjust the level for the speaker connected to Output A twist the Channel B gain knob to adjust the level for the speaker connec ted to Output B 4 4 Circuit Breaker The circuit breaker is on the VX 2400...

Page 88: ...be lower than 4 ohms each Twist the Channel A gain knob to set the level for Channel A mid high range enclo sure twist the Channel B gain knob to set the level for Channel B subwoofer Important note The mode setting and the configuration of signal routing cables must always match If you operate VX 2400 power amps in combination with a DFC make sure your set their Mode selector switches to Stereo 4...

Page 89: ...ons If you want to plug several VX 2400s into one mains outlet make sure that all the connected cables and distributors are designed to handle the aggregate power Note Connect all cables first and then switch on all other devices in the audio signal chain before switching the power amp on When switching the system off proceed in reverse order that is switch the power amp off first 7 Technical Data...

Page 90: ...rs 93 2 1 Patch Cables for Connecting the VX 2400 and DFC 93 2 2 Power Supply 93 3 PB 5 Rack Configurations 94 3 1 Power Amp Channel Routing 94 3 2 Mid High Sub 94 3 3 Mid High only 94 3 4 Sub only 94 Index of Figures Fig 1 PB 5 front view with control features 91 Fig 2 PB 5 rear view with patch cables 92 Fig 3 Mid High Sub 93 Fig 4 Mid High only connected to Ch 1 4 Out 94 Fig 5 Mid High only conn...

Page 91: ... Speakon ports that depending on the given system configuration connect to the outputs of up two VX 2400 power amps The pin assignments of the NL 4 Speakon connectors are Pin 1 mid high Pin 1 mid high Pin 2 sub Pin 2 sub 1 4 Mid High and Sub Multi Outs The PB 5 is equipped with two NL 8 Speakon ports one for connecting the mid high multicore spea ker cable and one for connecting the subwoofer mult...

Page 92: ...signal In the 3 position pin assignments are pin 1 ground pin 2 signal pin 3 signal 1 7 Mid High Sub Switches These four switches configure the inputs and outputs of power amp channels 1 to 4 LEDs indicate the selected mode Mid High red Sub green Mid High setting The power amp s input is routed to the DFC s HF Out and the power amp channel s output is assigned to the NL 4 Speakon pins 1 and 1 that...

Page 93: ...t to the VX 2400 s speaker outs Amp 1 and Amp 2 Please refer to Figure 2 The Speakon connectors pin assignments are pin 1 pin 1 Patchbay PB5 3 PB 5 Rack Configurations 3 1 Power Amp Channel Routing for a PB 5 Top power amp Channel PB 5 output Amp 1 A Output Channel 1 Amp 1 B Output Channel 2 Bottom power amp Channel PB 5 output Amp 2 A Output Channel 3 Amp 2 B Output Channel 4 Use the Mid High Sub...

Page 94: ... all of Amp 1 and Amp 2 s NL 4 speaker outs are pin 1 mid high pin 1 mid high All LEDs light up red 3 4 Sub only Set all Mid High Sub switches to Sub mode This routes the DFC s LF Out low frequency signal to all four audio inputs In this configuration all power ramps in the rack deliver the low frequency signal to the subwoofers The pin assignments of all of Amp 1 and Amp 2 s NL 4 speaker outs are...

Page 95: ...8 Midrange Speaker 97 4 3 The Driver s Voice Coil 97 Index of Figures Fig 1 The VX 2400 s air intake 96 Fig 2 The COHEDRA Power Rack 16 s fan unit 96 Fig 3 Foam rubber and fleece 96 Fig 4 Service tools 97 Fig 5 CDR 208 S T without grille 97 Fig 6 CDR 208 S T rear view 97 Fig 7 CDR 208 S T rear view without crossover 97 Fig 8 DE 900 driver without voice coil 97 Index of Tables Table 1 Replacement p...

Page 96: ...e 3 Foam rubber and fleece Designation Replacement part no 10 Subwoofer E 994157 Speaker housing CDR 210 Sub E 400154 Connector plate CDR 210 Sub E 520088 Front grille CDR 210 Sub E 970577 Rubber foot CDR 210 Sub E 976009 Insert handle CDR 210 Sub E 974096 8 midrange speaker E 994158 Speaker housing CDR 208 S E 400152 Front grille CDR 208 S left side E 970575 Front grille CDR 208 S right side E 97...

Page 97: ...00 s voice coil Unfasten the mid high enclosure s rear rigging connector To do this loosen the four hex head bolts in the rail Unfasten and remove the eight Phillips cross headed screws holding the connector panel Remove the connector panel along with the attached crossover from the housing Unfasten the voice coil housing s four hex head bolts Be sure to use an Allan hexagonal socket wrench with a...

Page 98: ...nd Voice Coils 99 4 1 8 Midrange Speaker 99 4 2 The 1 Driver s Voice Coil 99 Index of Figures Fig 1 The VX 2400 s air intake 99 Fig 2 The COHEDRA Power Rack 16 s fan unit 99 Fig 3 Required service tools 99 Fig 4 CDR 108 C with grille and compression chamber removed 99 Fig 5 Rear view of the CDR 108 C with service panel removed 99 Chapter K 1 Service COHEDRA Compact co_coco_BDA_de_engl_2 indd 98 18...

Page 99: ...river s Voice Coil Caution Because COHEDRA voice coils are preselected their quality tolerances are narrower than those of standard DE 160 voice coils To make the most of CohedraTM Compact mid high cabinets perfor mance capability always use HK Audio voice coils Proceed as follows to replace the voice coil Remove the mid high unit s service panel the sheet metal cover on the left side To do this u...

Page 100: ... k Hz 8 kHz 10 kHz Cluster Height Near field Near field Near field Near field Near field Near field Near field Near field 4 Mid High 0 44 0 74 1 47 2 94 5 88 8 82 11 76 14 70 6 Mid High 0 99 1 65 3 30 6 61 13 23 19 80 26 47 33 00 8 Mid High 1 76 2 94 5 88 11 76 23 53 35 28 47 06 58 80 12 Mid High 3 97 6 61 13 23 26 47 52 94 79 38 105 88 132 30 16 Mid High 7 05 11 76 23 53 47 05 94 11 414 18 188 22...

Page 101: ...101 L co_coco_BDA_de_engl_2 indd 101 18 09 2006 17 09 36 ...

Page 102: ...Manual COHEDRA COHEDRA Compact co_coco_BDA_de_engl_2 indd 102 18 09 2006 17 09 36 ...

Page 103: ...F CDR208 8 100Hz 1 24 06 04 8x CDR 208 8 x CDR 210 CDR208 8 130Hz 1 24 06 04 12x CDR 208 w o Subwoofer CDR208 12 fullr 1 24 06 04 12x CDR 208 12 x CDR 210 F CDR208 12 100Hz 1 24 06 04 12x CDR 208 12 x CDR 210 CDR208 12 130Hz 1 24 06 04 16x CDR 208 w o Subwoofer CDR208 16 fullr 1 24 06 04 16x CDR 208 16 x CDR 210 F CDR208 16 100Hz 1 24 06 04 16x CDR 208 16 x CDR 210 CDR208 16 130Hz 1 24 06 04 24x C...

Page 104: ...COHEDRA Compact 3 CDR 208 S T Measurement Charts See figure 2 and 3 Abbildung 2 CDR 208 S T horizontal directivity Abbildung 3 CDR 208 S T vertical directivity 1 unit co_coco_BDA_de_engl_2 indd 104 18 09 2006 17 09 37 ...

Page 105: ... Str 8 66606 St Wendel Lothar Stamer Dipl Ing Managing Director St Wendel 07 21 04 This is to certify that HK AUDIO COHEDRA complies with the provisions of the Directive of the Council of the European Communities on the approximation of the laws of the Member States relating to electromagnetic compatibility EMC Directive 89 336 EEC and the low voltage Directive 73 23 EEC This declaration of confor...

Reviews: