background image

INSTRUCTIONS FOR USE

www.holystone.com

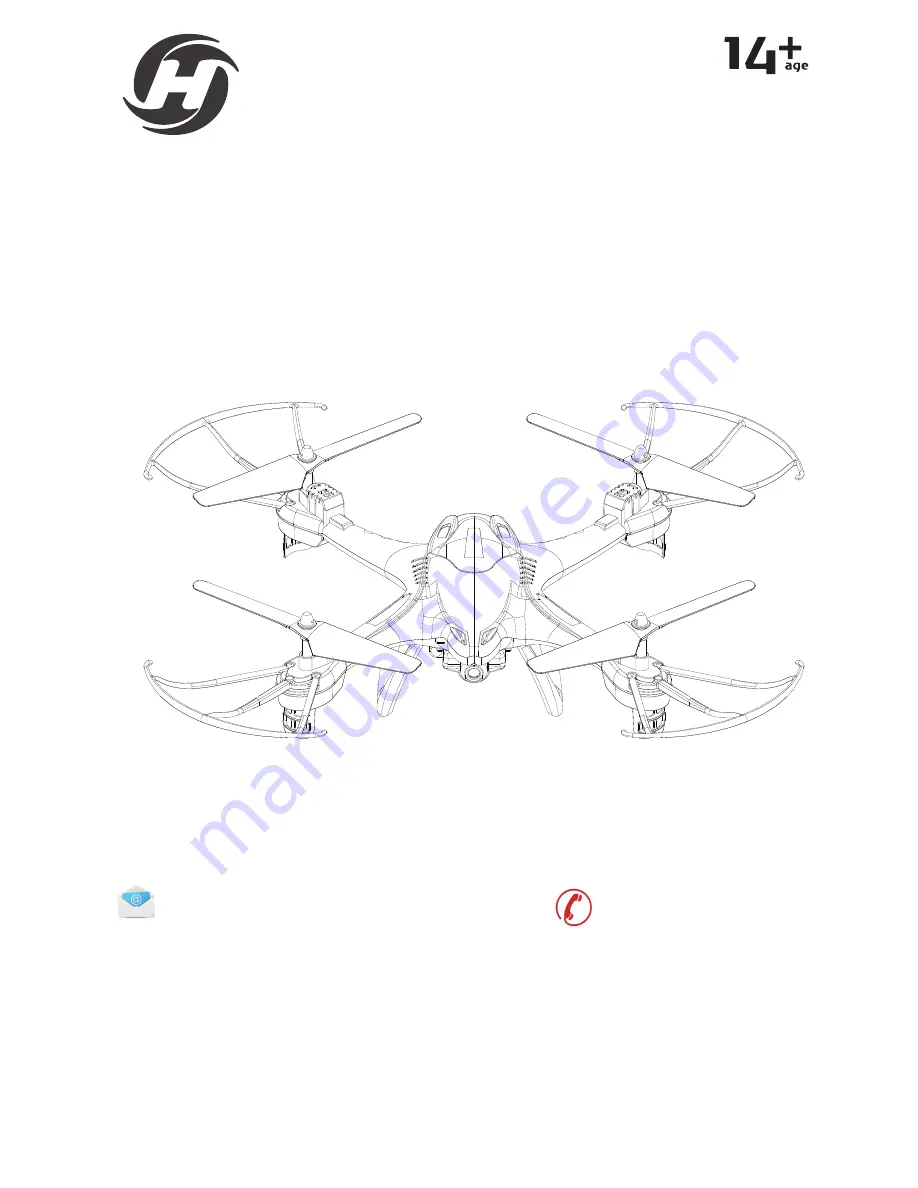
2.4GHz FPV real-time video and image transmitter drone

HS110/200

usa@holystone.com (America)
ca@holystone.com (Canada)

eu@holystone.com (Europe)
jp@holystone.com (Japan)

+1(855) 888-6699

Summary of Contents for HS110

Page 1: ...CTIONSFORUSE www holystone com 2 4GHz FPV real time video and image transmitter drone HS110 200 usa holystone com America ca holystone com Canada eu holystone com Europe jp holystone com Japan 1 855 888 6699 ...

Page 2: ...eries Installation 3 6 Drone s Details 4 7 Charging The Lithum Battery Of Drone 6 8 Specification 7 9 Flight 9 10 Emergency Stop 12 11 Headless Mode 13 12 Wi Fi Camera Function 16 13 First Person View Function 17 13 Spare Parts 18 14 Trouble Shooting 18 15 Contact Us 18 18 General Information 19 ...

Page 3: ...eather conditions a Keep clear of moisture fog ice and excessive wind b Fly in good weather conditions only 3 Use and maintain the product according to the instructions for use a Operate this device legally in accordance with instructions provided and with local laws and regulations b Always use original parts manufactured by Holy Stone for maintenance and repair 4 Do not operate the device alone ...

Page 4: ...argeable batteries always follow manual instructions for use and have adult supervision Do not leave charging batteries unsupervised and as batteries get hot when charging avoid any combustible material 19 Avoid short circuits by fitting the batteries incorrectly and do not crush or squash batteries as this carries a rish of explosion 20 Do not mix new and old batteries as this can lead to unpredi...

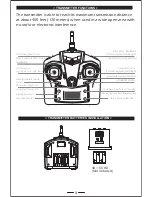
Page 5: ...g Press 2 Seconds RE SYNC High Speed switch Short Press Take Photo Press 2 Seconds Record Video Throttle Joystick Up Down Turn Left Right Headless Normal mode Switch Short Press Power ON Long Press Power OFF Low Speed switch The transmitter is able to reach its maximum transmission distance at about 400 feet 120 meters when used in a wide open area with no radio or electronic interference Double C...

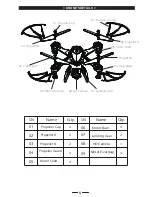
Page 6: ...Propeller B Propeller A Propeller Guard DRONE S DETAILS Drone Battery Please note that all propellers must be installed in the correct orientation Pay attention to the letter A or B printed on each propeller when installing Body Frame Front Motor Base ...

Page 7: ...03 Propeller B Propeller B 02 Propeller A Propeller A 05 Motor Shaft Motor Shaft 09 Motor Gear big Motor Gear big 07 Landing Gear Landing Gear 06 Motor Base Motor Base 01 Propeller A Propeller B 08 HD Camera HD Camera SN SN Name Name Qty Qty 01 02 03 04 05 06 07 08 09 4 4 4 4 4 2 2 2 1 ...

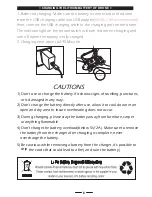
Page 8: ...1 Don t use or charge the battery if it shows signs of swelling punctures or is damaged in any way 2 Don t charge the battery directly after use allow it to cool down in an open and dry area to insure overheating does not occur 3 During charging please stay the battery away from furniture carpet or anything flammable 4 Don t charge the battery overload below 5V 2A Make sure to remove the battery f...

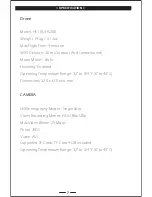
Page 9: ...d Motor Model 8616 Hovering Enabled Operating Temperature Range 32 to 104 F 0 to 40 C Dimensions 320 x 320 x 66 mm CAMERA Still Photography Modes Single Shot Video Recording Modes HD1280x720p Max Video Bitrate 25 Mbps Photo JPEG Video AVI Supported TF Cards TF Card 4 GB included Operating Temperature Range 32 to 104 F 0 to 40 C ...

Page 10: ...oltage 3 7 V Battery Type LiPo Energy 2 405Wh Net Weight 30 g 1 oz Charging Temperature Range 41 to 104 F 5 to 40 C Charging Time 60 90 mins USB CHARGING CABLE Voltage 5 V Rated Power 10 W APP LIVE VIEW Mobile App Deerc FPV Live View Working Frequency 2 4 GHz ISM Live View Quality 720P 20fps Latency Low Latency Video depend on conditions and mobile device Required Operating Systems iOS 8 0 or abov...

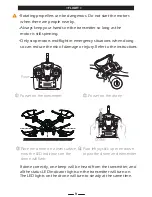
Page 11: ...tart the motors when there are people nearby Always keep your hands on the transmitter so long as the motor is still spinning Only stop motors mid flight in emergency situations when doing so can reduce the risk of damage or injury Refer to the instructions If done correctly one beep will be heard from the transmitter and all the status LED indicator lights on the transmitter will turn on The LED ...

Page 12: ...ound Hold a few seconds to stop the motors One Key Return Long press the One Key Return Function button to calibrate the gyro Press ONE KEY TAKE OFF the drone will fly up and hover about 1 5 meters above the ground When you want to make drone land press ONE KEY LANDING the drone will land slowly by itself until it touch the ground ...

Page 13: ...E The default flight control is known as Mode 2 The left stick controls the drone s altitude and heading while the right stick controls its forward backward left and right movements L R Sideward Fly Trim When the drone drifts to the left or the right side slide the trim button to the opposite direction to re balance the drone 11 UP Down T u r n R i g h t T u r n L e f t Forward Backward R i g h t ...

Page 14: ...trim button to the opposite direction to re balance the drone 11 12 Only stop motors mid flight in emergency situations when doing so can reduce the risk of damage or injury 12 Emergency Stop Long press or double click the Emergency Stop button the motors will stop immediately ...

Page 15: ...rehend the instructions for use Flying in Headless Mode without sufficient experience might result in loss or damage of the device 1 Place the drone in front of the pilot before pairing the drone to transmitter Make sure the head of the drone faces in the same direction as the pilot and the tail faces towards the pilot HEAD TAIL 13 ...

Page 16: ...de the forward direction is the direction the pilot faces when the pilot pairs the drone with the transmitter If the pilot pushes the direction joystick forward the drone will fly away from you If the pilot pushes the direction joystick backward the drone will flight towards him her If you move the right stick left or right then the drone will also move left or right relative to you It is very imp...

Page 17: ... Normal Mode The LED light NORMAL turns on Press the One Key Return button the drone would fly back to the direction where the tail of the drone pointed when the drone was paired Right Track Wrong Track In Headless Mode The LED light HEADLESS MODE is lit Press the One Key Return button the drone will fly back towards the direction where the tail of the drone pointed when the drone entered Headless...

Page 18: ...ra function as well as gravity sensor control function Please download the Deerc FPV App to use these functions QR code of Deerc FPV App for Apple iSOS system Please sacn this QR code to download the APP QR code of Deerc FPV App for Android system Please sacn this QR code to download the APP 16 ...

Page 19: ...on to record Video and click again to save Pic 2 Pic 1 Pic 2 Pic 5 Pic 4 Pic 3 Open the software HSS2 FPV Click PLAY icon Real time image or video will appear on the mobile screen 3 All the images and videos are saved in the phone and in the TF card make sure it is inserted into the camera see Pic 3 Press the TF card slightly to take it out then insert the card into the TF card reader and insert i...

Page 20: ...one and transmitter is not correct 2 Battery power is low 1 The propellers are assembled in wrong orientation 2 The propellers are distorted 1 Refer to the preparation for taking off and pair again 2 Recharge the battery 1 Replace the propellers according to the motors The trimmer button are all on but the drone still cannot keep balance 1 The propellers are distorted 2 The motor doesn t work prop...

Page 21: ...o guarantee that interference will not occur in a particular installation If this equipment does cause harmful interference to radio or television reception which can be determined by turning the equipment off and on the user is encouraged to try to correct the interference by one or more of the following measures Reorient or relocate the receiving antenna Increase the separation between the equip...

Page 22: ...ioélectrique subi meme si le brouillage est susceptible d encompromettre le fonctionnement mauvais fonctionnement de I appareil Cet appareil numériquie de la classe B est conforme à la norme NMB 003 du Canada CAN NMB 3 B RF Exposure Radiation Exposure Statement This equipment complies with IC radiation exposure limits set forth for an uncontrolled environment This equipment should be installed and...

Page 23: ...e battery could be damaged or ignite 6 Never charger on a flammable surface near flammable products or inside a vehicle perferably place the battery in a non flammable and non conductive container 7 Never leave the battery unattended during the charging process Never disassemble or modify the housing s wiring or puncture the cells Always ensure that the charger output voltage corresponds to the vo...

Page 24: ...CE HS110_HS200_EU_DOC pdf This product can be used across EU member states Caution 1 Risk of explosion if battery is replaced by an incorrect type Dispose of used batteries according to the instructions 2 The max operating of the EUT is 45 C and shouldn t be lower than 10 C 3 The device complies with RF specifications when the device used at 0mm form your body 4 Declaration of Conformity 22 14 The...

Reviews: