background image

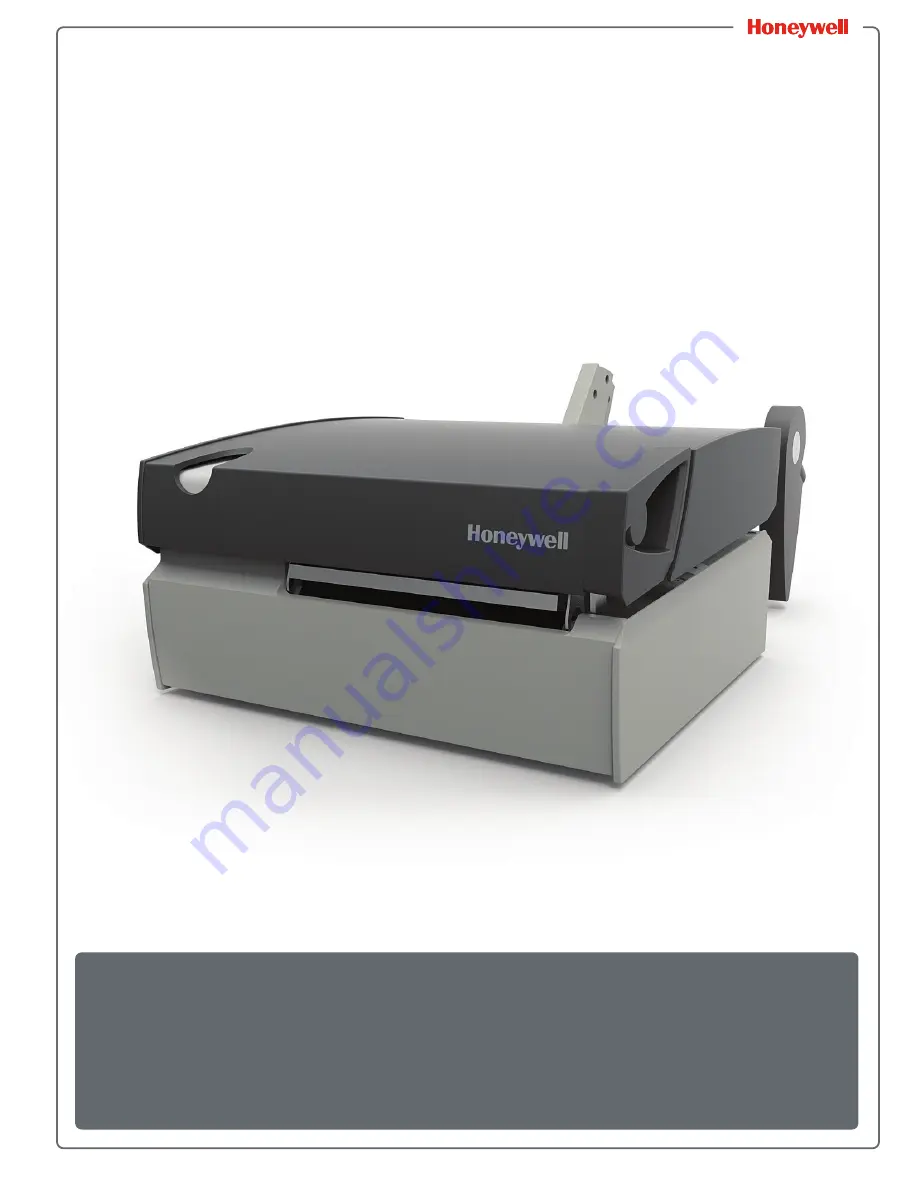
MP Nova Mark II

MP Nova4 DT, MP Nova4 TT, MP Nova6 DT & 
MP Nova6 TT

User Guide

Summary of Contents for MP Nova Mark II

Page 1: ...MP Nova Mark II MP Nova4 DT MP Nova4 TT MP Nova6 DT MP Nova6 TT User Guide ...

Page 2: ...to authorize or permit any other person or party to duplicate or copy the firmware or the information contained in the non volatile or programmable memory The firmware software is protected by applicable copyright laws and Licensor retains all rights not expressly granted In no event will licensor or its suppliers be liable for any damages or loss including direct incidental economic special or co...

Page 3: ...MP Nova Mark II User Guide iii ...

Page 4: ...ova6 TT 8 Identify the Parts of the Printer 9 MP Nova4 6 DT Printer Parts 9 MP Nova4 6 TT Printer Parts 10 Open and Close the Printer Cover 11 Open the MP Nova4 6 DT Cover 11 Close the MP Nova4 6 DT Cover 11 Open the MP Nova4 6 TT Cover 12 Close the MP Nova4 6 TT Cover 12 3 How to Set Up Your Printer 13 Printer Overview 14 MP Nova4 6 DT 14 MP Nova4 6 TT 15 Peel Off Overview 16 MP Nova4 6 DT Peel O...

Page 5: ...base Configuration Label and HEX Dump Mode 45 Media Positioning Sensor Settings 46 Printhead Adjustments 47 Printhead Position Adjustment 47 Printhead Pressure Adjustment 49 6 Printer Maintenance 51 Printhead and Roller Cleaning 52 Changeable Parts 54 Roller Replacement 54 Printhead Replacement 58 7 Troubleshoot Your Printer 63 Troubleshooting Tips 64 A Printer Specifications 67 MP Nova4 DT TT 68 ...

Page 6: ...vi MP Nova Mark II User Guide Consumables 74 General Media 74 ...

Page 7: ...ellaidc com locations For our latest contact information please check our website Product Service and Repair Honeywell International Inc provides service for all of its products through service centers throughout the world To find your service center go to www honeywellaidc com and select Support Contact Support Service and Repair Contact your service center to obtain a Return Material Authorizati...

Page 8: ...ipment has been tested and found to comply with the limits for a Class B digital device pursuant to part 15 of the FCC rules These limits are designed to provide reasonable protection against harmful interference in a residential installation This equipment generates uses and can radiate radio frequency energy and if not installed and used in accordance with the instructions may cause harmful inte...

Page 9: ...MP Nova Mark II User Guide ix VCCI Voluntary Control Council for Interference Japan Certification and Compliance Marks and Descriptions ...

Page 10: ...1 1 Safety Information Please read the following safety information prior to setting up or operating your printer ...

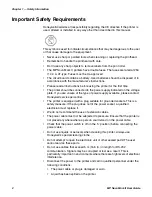
Page 11: ...are unsure of the type of power supply available please contact Honeywell service personnel The printer is equipped with a plug suitable for grounded sockets This is a safety measure If the plug does not fit the power socket a qualified electrician must replace it We do not recommend the use of extension cables The power cable must not be subjected to pressure Ensure that the printer is not placed...

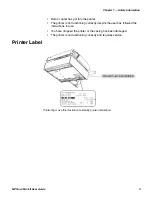
Page 12: ...The printer is not functioning correctly despite the user has followed the instructions for use You have dropped the printer or the casing has been damaged The printer is not functioning correctly and requires service Printer Label Printer Sign Use this illustration to identify printer information ...

Page 13: ...Chapter 1 Safety Information 4 MP Nova Mark II User Guide ...

Page 14: ...5 2 About the Printer Basics Use this chapter to learn about the MP Nova Mark II printer basic information including available models parts and open close functionality ...

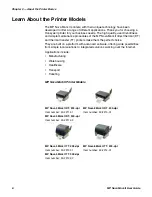
Page 15: ... TT printers make them the perfect choice They are built on a platform with advanced software offering wide possibilities from simple local solutions to integrated solutions working over the Internet Applications include Manufacturing Warehousing Healthcare Transport Ticketing MP Nova Mark II Printer Models MP Nova4 Mark II DT 203 dpi Item number 53 2211 01 MP Nova4 Mark II DT 300 dpi Item number ...

Page 16: ...y the Printer Box Contents MP Nova4 DT MP Nova6 DT The following items should be included in the box when you receive your new MP Nova4 DT or MP Nova6 DT printer 1 1 x MP Nova4 DT or MP Nova6 DT 2 1 x Communication cable Serial RS 232 3 1 x Power cable 4 1 x Accessories CD ...

Page 17: ...ser Guide MP Nova4 TT MP Nova6 TT The following items should be included in the box when you receive your new MP Nova4 TT or MP Nova6 TT printer 1 1 x MP Nova4 TT or MP Nova6 TT 2 1 x Communication cable Serial RS 232 3 1 x Power cable 4 1 x Accessories CD ...

Page 18: ...a4 6 DT Printer Parts m p 1 Print button 2 Status lamp LED 3 Cover 4 Media roll 5 Roll steering 6 Roll guide lock 7 Media track 8 Handle 9 Communication ports 10 Unroll shaft 11 Power connection 12 Power switch 13 Printhead 14 Print roll 15 Media Positioning Sensor MPS 16 Paper guide 17 Outer plate holder ...

Page 19: ...6 TT Printer Parts 1 Print button 2 Status lamp LED 3 Front cover 4 Rear cover 5 Media roll 6 Roll guide lock 7 Roll steering 8 Media track 9 Handle 10 Ink ribbon guide 11 Rewind spool 12 Unwind spool 13 Communication ports 14 Unroll shaft 15 Power connection 16 Power switch ...

Page 20: ...cs MP Nova Mark II User Guide 11 Open and Close the Printer Cover Open the MP Nova4 6 DT Cover 1 Pull the handle 2 Open the cover Close the MP Nova4 6 DT Cover 1 Push down to close the cover 2 Fold the handle Printhead will be engaged ...

Page 21: ...pen the MP Nova4 6 TT Cover 1 Open cover The inner cover slides automatically up together with the cover Close the MP Nova4 6 TT Cover 1 Close cover The inner cover slides automatically down together with the cover Note Make sure the handle is folded all the way down ...

Page 22: ...13 3 How to Set Up Your Printer Learn to use the printer features including how to insert the media and ink ribbon and connect to a power source ...

Page 23: ... 3 How to Set Up Your Printer 14 MP Nova Mark II User Guide Printer Overview MP Nova4 6 DT 1 Insert media MP Nova4 6 DT Refer to Insert Media on page 18 for detailed instructions 2 Connect the printer to a PC ...

Page 24: ...hapter 3 How to Set Up Your Printer MP Nova Mark II User Guide 15 MP Nova4 6 TT 1 Insert media Refer to Insert Media on page 18 for detailed instructions 2 Insert ink ribbon 3 Connect the printer to a PC ...

Page 25: ...Chapter 3 How to Set Up Your Printer 16 MP Nova Mark II User Guide Peel Off Overview MP Nova4 6 DT Peel Off 1 Insert peel off media See Peel Off Kit on page 22 2 Connect the printer to a PC ...

Page 26: ...Chapter 3 How to Set Up Your Printer MP Nova Mark II User Guide 17 MP Nova4 6 TT Peel Off 1 Insert peel off media See Peel Off Kit on page 22 2 Insert ink ribbon 3 Connect the printer to a PC ...

Page 27: ...nsert Media MP Nova4 6 DT TT 1 Undo the roll guide lock 2 Remove the roll guide from the media shaft 3 Pull handle to lift the printhead from the roller Note The pictures shown describe an MP Nova4 DT The process works just the same for the MP Nova6 DT and MP Nova4 6 TT ...

Page 28: ...into the printer s media track 5 Check that the media is aligned with the internal printer wall 6 Put the roll guide on the unroll shaft Push it against the roll for optimum control Note Make sure the outer roll guide suits the width of the media If necessary open the cover and adjust the outer roll guide Only necessary when changing media type ...

Page 29: ...urn the handle clockwise The roll steering should guide the roll but not be tight 8 Fold the handle the printhead folds automatically onto the roller Note If the roll guide lock cannot be properly tightened but not too tight lift the lock upwards rotate it back half a turn lower it and retighten ...

Page 30: ...Printer MP Nova Mark II User Guide 21 9 Press the print button a few times until the printer automatically finds the correct position of the media Note If necessary make a test printout and auto adjust the media positioning sensor ...

Page 31: ...rts in the same way as the media 1 Lift the handle and then pull 40 cm 15 8 in of the label roll out of the printer 2 Fold the handle 3 Remove all of the labels on the exposed section Note The pictures shown describe an MP Nova4 DT Peel Off The process works just the same for the MP Nova4 6 TT Peel Off and MP Nova6 DT Peel Off ...

Page 32: ...k II User Guide 23 4 Pull the backing paper under the printer 5 Fold 2 cm 0 79 in of the backing paper to make it slide more easily into the rewind unit slot 6 Open the rewind unit slot by turning the knob clockwise while holding the cylinder firmly ...

Page 33: ...g paper into the rewind unit slot 8 Close the rewind unit slot by turning the knob counter clockwise while holding the cylinder and backing paper firmly 9 Roll the backing paper around the rewind unit by turning the knob counter clockwise This increases the tension of the backing paper ...

Page 34: ...inter MP Nova Mark II User Guide 25 10 Press the print button a few times until the printer automatically finds the correct position of the media Note If necessary make a test printout and auto adjust the Media Positioning Sensor MPS ...

Page 35: ... User Guide Insert Ink Ribbon MP Nova4 6 TT 1 Undo the handle and open the cover 2 Remove the old ink ribbon 3 Slide the new ink ribbon onto the spool 4 Feed the ink ribbon under the printhead Note Check that the inked side of the ribbon is facing downward ...

Page 36: ...Nova Mark II User Guide 27 5 The ink ribbon must not pass under the MPS Media Positioning Sensor 6 Move the empty roll which will collect the used ink ribbon up and around the printhead 7 Slide the roll onto the takeup spool 8 Fold the handle ...

Page 37: ...hapter 3 How to Set Up Your Printer 28 MP Nova Mark II User Guide 9 Press the print button The ink ribbon will automatically wind around the rewind spool thus tensioning the ink ribbon 10 Close the cover ...

Page 38: ...29 4 Printer Configuration Please read the following chapter to learn about the available configuration tools for your printer ...

Page 39: ...re simple HTML pages that can be accessed with any web browser via the Ethernet port Easy to use Printer can be configured from any host connected to the network regardless of physical location or host operating system No additional software required Printer must be connected via Ethernet Depending on the complexity of the network initial connection may not be possible until network parameters are...

Page 40: ...uration Define and save optimal configurations for applications Saved configurations can be shared with other printers and sent via email Download files formats and fonts Query memory modules Note Be sure to use the NETira CT utility located on the Accessories CD that is included with your printer Older versions might not operate correctly with some printers For the latest version please visit our...

Page 41: ...ows driver as described in on Windows Driver on page 36 Then follow the steps below to set the driver settings 1 Open the list of installed printers on your PC Windows XP Click the Start button Settings Printer and Faxes Windows 7 Click the Start button Devices and Printers 2 Right click on the printer and select Properties from the drop down menu 3 In the driver Properties window click on the Adv...

Page 42: ...ter is turned on Connect the host to the printer a For serial connections Query the printer by using the Auto Detect button This will connect the printer and retrieve the setting currently stored in the printer b For USB connections Close the Open a configuration file dialogue box In the toolbar from the drop down menu select the appropriate port Next click on the Query Printer Icon ...

Page 43: ...e box In the toolbar click on the TCP IP Configuration icon In the TCP IP Configuration dialogue box enter the IP address of the printer port 9100 and click OK The IP address is displayed on the printer s Network Report and Configuration labels In the toolbar from the drop down menu select TCP_IP Next click on the Query Printer icon ...

Page 44: ...ategories and make any changes necessary to the printer configuration 4 Once complete send the new settings to the printer using the Send button Note When sending the changes to the printer only the changes displayed on the current page will be sent You must click the Send button for each page that has been modified ...

Page 45: ...l and click Install Driver from the menu Follow the instructions on the screen to install 3 When prompted select your printer from the list Continue to follow the on screen instructions to install the driver Note Be sure your printer s firmware version is 15 04_0001 or greater Firmware is available from our website For the latest version please visit our website at www honeywellaidc com Note Be su...

Page 46: ...atches the size of the label you are using If you cannot find a match for your label click New and enter the dimensions for your label Stock settings Options Tab Printer Speed and Printhead Temperature These two settings will have the greatest effect on print quality Some labels stocks will require more heat and slower print speeds to generate a quality image Optional printing preferences The Wind...

Page 47: ...Chapter 4 Printer Configuration 38 MP Nova Mark II User Guide ...

Page 48: ...39 5 Printer Operation Use this chapter to learn the functions on the front panel how to calibrate the media how the Media Position Sensor is set and how to adjust the printhead position and pressure ...

Page 49: ...een Orange Red Status LED 2 Control Button LED Indicators An LED indicator light provides a quick visual reference of printer operations and conditions as defined below LED Reference Table LEDs Color Green Orange Red Solid Ready to print Paused or present sensor is blocked TOF sensing error next TOF not found Flashing Processing busy Paused busy Out of stock labels or printer jam Off No power No p...

Page 50: ... seconds release when LED blinks orange Prints network report Cancels batch Press and hold for 10 seconds release when LED blinks green Performs the quick media calibration Press and hold for 15 seconds release when LED blinks red Resets the printer s parameters to the stored dealer settings Resetting the printer will clear the RAM of downloaded images fonts and label formats and remove temporary ...

Page 51: ... media proceed to the Manual Media Calibration on page 43 procedure Quick Calibration The Quick Media Calibration can be performed using the NETira CT configuration utility see Printer Configuration Utility NETira CT on page 31 for more information 1 Launch the NETira CT configuration utility and query connect to the printer 2 Click on the Sensor Calibration printer component 3 Install your media ...

Page 52: ... to perform a Quick Media Calibration after the Manual Media Calibration to further optimize the printer s sensor Sensor calibration is needed to set either the black mark or the gap value of the media sensor on the printer The Manual Media Calibration can be performed using the NETira CT configuration utility proceed to Printer Configuration Utility NETira CT on page 31 1 Launch the NETira CT con...

Page 53: ...off the backing and place back over the sensor Lower the cover and click OK 6 Remove the Stock by removing all media from the printer Lower the cover and click OK 7 NETira CT will display a message indicating the process has finished In case of any error a FAILED CALIBRATION message will be displayed and you must repeat the process ...

Page 54: ...e media 10 16 cm 4 in wide and ribbon if printing with a thermal transfer media 2 Turn the printer on 3 When the LED is solid red press and hold the control button until the LED turns solid green up to 60 seconds and then release The Database Configuration Label will then print 4 After the printer finishes printing the Database Configuration Labels the printer is in HEX Dump Mode Cycle printer pow...

Page 55: ...e of the media 2 Inner sensor mode detects label gaps about 5 mm 0 2 in from the edge of the media 3 Black mark sensor detects black marks on the reverse side of the media about 5 mm 0 2 in from the edge of the media 4 To change the settings proceed to the NETira CT menu Media Positioning Sensor Specifications Sensor Mode Approximate Sensor Reading Point from Edge of Media DPL 1 Outer default 16 m...

Page 56: ... fold the handle 2 Loosen the upper nut of the adjustment screw that is to be moved by turning it counter clockwise 3 Slide the adjustment screw into a new position and tighten the upper nut Pull the handle if sliding the adjustment screw past the finger nut Note These adjustments are only necessary when changing to media with a different thickness or width The pictures shown describe an MP Nova4 ...

Page 57: ...rinthead press evenly onto the media Make test prints to find the correct positions 6 For MP Nova4 DT only On the MP Nova4 DT the position of the printhead itself can be changed As default there is a 3 mm 0 12 in non printable area on the left side To be able to print all the way to the edge of the label the margin has to be set to 0 mm Pull the handle Loosen the finger nut and slide the printhead...

Page 58: ...User Guide 49 Printhead Pressure Adjustment 1 To increase the pressure on the printhead turn the lower nuts downwards clockwise This will tighten the spring 2 To decrease the pressure on the printhead turn the lower nuts upwards counter clockwise ...

Page 59: ...Chapter 5 Printer Operation 50 MP Nova Mark II User Guide ...

Page 60: ...51 6 Printer Maintenance This chapter describes how to preform routine maintenance on your printer including printer adjustments and replacements for the printhead and roller ...

Page 61: ...d Don t use any sharp object to remove labels from the print roller Remove all media before starting 1 Tear the bag 2 Pull out the cleaning cloth Only use cleaning cloths from Honeywell These are specifically designed for cleaning Honeywell thermal printers Proceed to Spare Parts on page 73 for correct type Note Frequent cleaning prevents printhead and roller damage and is especially important in ...

Page 62: ...e same way as inserting the media described in Insert Media on page 18 Fold the handle and press the print key 4 Keep the print key pressed and let the cloth pass through the printer This cleans the printhead Note If the roller is clogged with labels it can easily be removed for cleaning see Changeable Parts on page 54 ...

Page 63: ... and Close the Printer Cover on page 11 2 Pull the roller and the roller bearing support to the right use the rubber surface when pulling right 3 Lift the left hand end of the roller toward the interior of the printer 4 Lift out the right hand end of the roller Note The pictures shown describe an MP Nova4 DT The process is the same for all MP Nova Mark II printers ...

Page 64: ...er Maintenance MP Nova Mark II User Guide 55 5 Remove the entire roller from the printer 6 Pay careful attention to the drive belt when removing the left hand end of the roller from the printer 7 Unpack the new roller ...

Page 65: ...rinter Maintenance 56 MP Nova Mark II User Guide 8 Insert the left hand end of the roller the end with the cog wheel Check that it fits inside the drive belt 9 Insert the right hand end of the roller into position ...

Page 66: ...nd of the roller downward into the notch until the roller is parallel with the edge of the printer 11 Push the roller slightly to the left 12 Ensure that the left hand end slots are in the groove 13 Close the cover see Open and Close the Printer Cover on page 11 14 Turn on the printer ...

Page 67: ...current lateral position of the printhead 3 mm 0 12 in is the default position 3 Carefully push the printhead downward until the finger nut becomes visible Unscrew the finger nut Note The pictures shown describe an MP Nova4 DT The process is the same for all MP Nova printers Note Only adjustable on the MP Nova4 DT printer Note Take care not to lose the finger nut ...

Page 68: ...e the printhead 5 Carefully remove the cables from the back of the printhead 6 Unpack the new printhead and attach the cables to the new printhead Note There is a latch on top of the right cable Push the latch before removing the cable Remember to handle the printhead with care ...

Page 69: ...ter Maintenance 60 MP Nova Mark II User Guide 7 Carefully insert the printhead into position 8 Check that the lateral position has not changed 3 mm 0 12 in is the default position Note Only adjustable on MP Nova4 DT ...

Page 70: ...apter 6 Printer Maintenance MP Nova Mark II User Guide 61 9 Hold the printhead in place and tighten the finger nut 10 Close the cover see Open and Close the Printer Cover on page 11 11 Turn on the printer ...

Page 71: ...Chapter 6 Printer Maintenance 62 MP Nova Mark II User Guide ...

Page 72: ...hoot Your Printer Use this chapter to find answers to any problem situations you may encounter while using the printer Contact a qualified technician for problems that persist or problems not covered in this chapter ...

Page 73: ... on the inside cover of the printer The media is not calibrated Calibrate it see Media Calibration on page 42 The media sensor or sensor circuitry may be defective Call for service The ribbon does not advance the paper advances but ribbon does not The ribbon may be installed incorrectly Ensure that the inked side of the ribbon faces the labels With most ribbons this can be verified by rubbing pape...

Page 74: ...ubbing paper against the ribbon the ink should smudge the paper Or if using label stock the sticky side of a label will pull off the ink A mismatched ribbon paper combination is resulting in an insufficient amount of friction between paper and ribbon Ensure that the correct type of ribbon is being used with the media Label advances 30 5 cm 12 in before a fault indication The media may not be prope...

Page 75: ...Chapter 7 Troubleshoot Your Printer 66 MP Nova Mark II User Guide ...

Page 76: ...67 A Printer Specifications ...

Page 77: ...lded paper External diameter of roll maximum 215 mm 8 1 2 Inner core of roll minimum 37 mm 1 1 2 in diameter Ink ribbon TT Maximum width of roll 110 mm 4 1 3 Inner core diameter of roll 25 mm 1 Maximum length 300 m 328 yards CSI CSO maximum outer diameter of ribbon roll 300 mm 11 4 5 Connections 1 x RS 232 port up to 115 kBps USB port Ethernet port TCP IP LPD Typefaces 10 scalable typefaces 13 sca...

Page 78: ...ed paper External diameter of roll maximum 215 mm 8 1 2 Inner core of roll minimum 37 mm 1 1 2 in diameter Ink ribbon TT Maximum width of roll 174 mm 6 7 8 Inner core diameter of roll 25 mm 1 Maximum length 300 m 328 yards CSI CSO maximum outer diameter of ribbon roll 300 mm 11 4 5 Connections 1 x RS 232 port up to 115 kBps USB port Ethernet port TCP IP LPD Typefaces 10 scalable typefaces 13 scala...

Page 79: ...Appendix A Printer Specifications 70 MP Nova Mark II User Guide ...

Page 80: ...71 B Kits Parts Consumables ...

Page 81: ... is rolled up behind the printer Item number 533541 Nova4 533542 Nova6 LTS Label Taken Sensor The Label Taken Sensor LTS enables A new label is only printed once the previous label has been removed from the sensor Printing is controlled by a photocell It is often used in association with the Peel Off Kit Item number 533625 01 215 mm Kit The 215 mm Kit makes it possible to use media rolls with diam...

Page 82: ...i MP Nova4 DT Printhead 300 dpi MP Nova4 DT Printhead 203 dpi MP Nova4 TT Printhead 300 dpi MP Nova4 TT Printhead 203 dpi MP Nova6 DT Printhead 203 dpi MP Nova6 TT 533530 533636 Print roll MP Nova4 Print roll MP Nova6 533616 532089 MPS Media Positioning Sensor Media guide Lockable Cables 502542 000554 001464 001463 502543 Cable Serial RJ 45 Power cable Europe Power cable UK Power cable USA Canada ...

Page 83: ... them easier to tear after printing In order to start and stop the media during the print process the printer is equipped with a detector that senses any gaps or black marks For more detailed information about media and consumables we recommend you read Honeywell s Consumables document currently only available in English MP Nova4 DT Nova6 DT The MP Nova DT printers use direct thermal media such as...

Page 84: ......

Page 85: ...Honeywell www honeywellaidc com MP Nova Mark II User Guide P N 92 2744 01 P N 92 2744 01 ...

Reviews: