background image

ArcPad User Guide                                                                                                    MCAP Assessment 
 

NC Department of Transportation                                                              


State Road Maintenance Unit                                                                                                     Page - 1                                                                                                   


T

T

a

a

b

b

l

l

e

e

t

t


P

P

C

C


Summary of Contents for ArcPad

Page 1: ...ArcPad User Guide MCAP Assessment NC Department of Transportation State Road Maintenance Unit Page 1 T Ta ab bl le et t P PC C ...

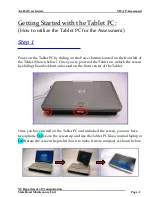
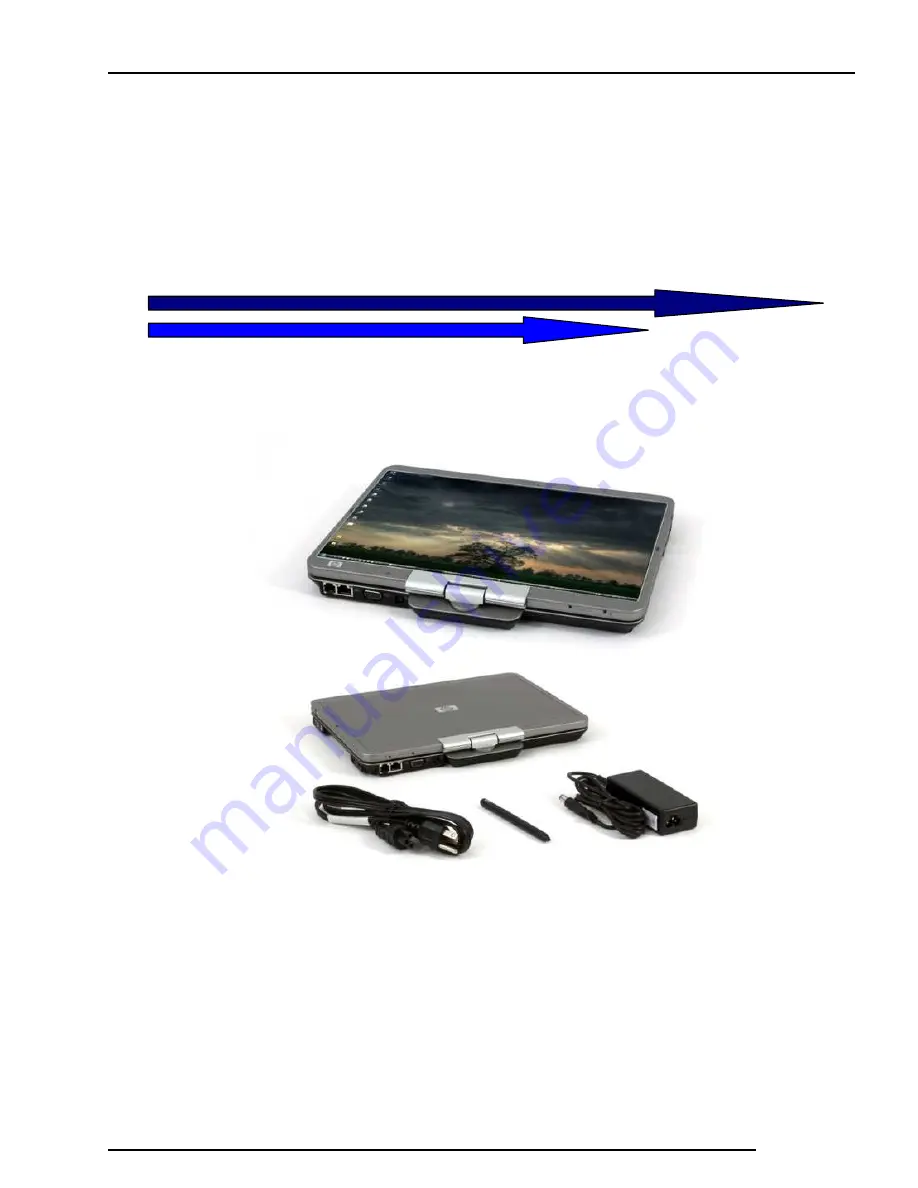
Page 2: ...iding on the Power button located on the front left of the Tablet Shown below Once you ve powered the Tablet on unlock the screen by sliding the unlock button located on the front center of the Tablet Once you have turned on the Tablet PC and unlocked the screen you now have two options 1 Leave the screen up and use the Tablet PC like a normal laptop or 2 Rotate the screen the push it down to make...

Page 3: ...3 S St te ep p 2 2 After you have the Tablet PC unlocked and Powered On Press Control Alt Delete By using either the Keypad or Touchpad If using the touchpad undock the pen which is located on the left side of the Tablet PC Login using the given username and password Username field Password DotSrmu1 ...

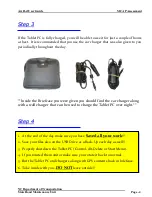
Page 4: ...efcase you were given you should find the car charger along with a wall charger that can be used to charge the Tablet PC over night S St te ep p 4 4 1 At the end of the day make sure you have Saved all your work 2 Save your files also on the USB Drive as a Back Up each day as well 3 Properly shutdown the Tablet PC Control Alt Delete or Start Menu 4 If you rotated the monitor make sure you rotate i...

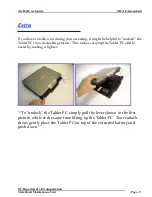
Page 5: ...sessing it might be helpful to undock the Tablet PC from its docking station This makes carrying the Tablet PC a little easier by making it lighter To undock the Tablet PC simply pull the lever shown in the first picture while at the same time lifting up the Tablet PC Too reattach them gently place the Tablet PC on top of the extended battery and push down ...

Page 6: ...ArcPad User Guide MCAP Assessment NC Department of Transportation State Road Maintenance Unit Page 6 G GP PS S D De ev vi ic ce e ...

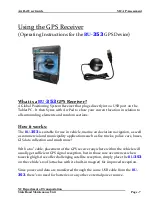
Page 7: ...able for use in vehicle marine and aviation navigation as well as commercial and municipality applications such as fire trucks police cars buses GIS data collection and much more With a 60 cable placement of the GPS receiver anywhere within the vehicle will usually get sufficient GPS signal reception but in those rare occurrences when towering high rises offer challenging satellite reception simpl...

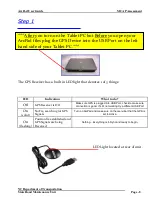
Page 8: ...built in LED light that denotes 1 of 3 things LED Indication What to do Off GPS Receiver is Off Make sure GPS is plugged into USB Port check to make sure connection is good If still not working try a different USB Port On solid No Fix searching for GPS Signals Turn on ArcPad and make sure on the menu bar that the GPS is set to Active On flashing Position fix established and GPS Signals are being R...

Page 9: ...roperly you need to be outside where satellites can pick up the signal from the receiver If you see a Flashing LED light on the device once you have the Tablet PC on the GPS Device plugged in ArcPad Open you are good to go Any other problem that occurs will be from the ArcPad software See the ArcPad section for details pertaining to GPS connection problems ...

Page 10: ...ArcPad User Guide MCAP Assessment NC Department of Transportation State Road Maintenance Unit Page 10 A Ar rc cP Pa ad d ...

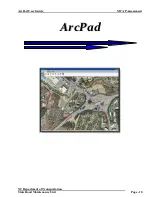
Page 11: ...yed to handheld and mobile devices ArcPad provides field based personnel with the ability to capture analyze and display geographic information without the use of paper maps What can ArcPad do Use existing GIS data Capture data in the field Query data Measure distances Navigate with GPS Edit data in the Field Need more information about ArcPad http www esri com software arcgis arcpad index html ...

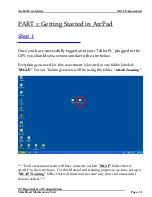
Page 12: ...u should see a screen similar to the one below Everything you need for this assessment is located in one folder labeled MCAP For our Training session we ll be using the folder MCAP Training Each assessment team will have contents in their MCAP folder that is specific to their sections For this Manual and training purposes we have set up a MCAP Training folder that will function the same way your r...

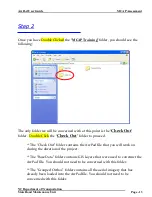
Page 13: ...e Check Out folder Double Click the Check Out folder to proceed The Check Out folder contains the ArcPad file that you will work on during the duration of the project The Base Data folder contains GIS Layers that were used to construct the ArcPad file You should not need to be concerned with this folder The Grouped Orthos folder contains all the aerial imagery that has already been loaded into the...

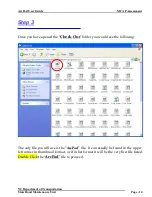
Page 14: ...4 S St te ep p 3 3 Once you have opened the Check Out folder you would see the following The only file you will use is the ArcPad file It can usually be found in the upper left corner in thumbnail format or if in list format it will be the very first file listed Double Click the ArcPad file to proceed ...

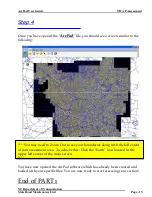
Page 15: ...imilar to the following You may need to Zoom Out to see your boundaries along with the full extent of your assessment area To achieve this Click the Earth icon located in the upper left corner of the main screen You have now opened the ArcPad software which has already been created and loaded with your specific files You are now ready to start assessing your section End of PART 1 ...

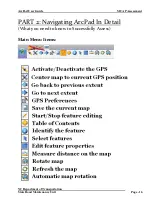
Page 16: ...ArcPad User Guide MCAP Assessment NC Department of Transportation State Road Maintenance Unit Page 16 PART 2 Navigating ArcPad In Detail What you need to know to Successfully Assess Main Menu Items ...

Page 17: ...o be assessed on the map This is done by using the Zoom tool which is located right below the Main Menu The 4 different Zoom tools are If using Zoom In or Zoom Out clicking on the screen will not work You will need to click and drag to make a box around the area you wish to view S St te ep p 1 1 To make sure your Sample Sections are Visible and Selectable open your Table of Contents and place a ch...

Page 18: ...ing Feature Tool This will open a drop down menu listing 4 selectable features The only one you will use is Sample Sections Simply select the Shapefile Icon beside the words Sample Sections and you will see a red box appear around it If there is already a red box around it you do not need to click it again Clicking it again will unselect it Example In the screen shot below the Sample Sections has ...

Page 19: ...re located As mentioned on Page 17 and shown below you will need to use the Zoom Tools to get in close to know when you are exactly are at the beginning and end of a Sample Section You may want to zoom in relatively close so you can see a few Sample Sections at a time This way you will know when you are approaching the next one so you can have plenty of time to slow down and find a good place to p...

Page 20: ...elation to Sample Sections Now you need to proceed to one of the Samples Your Sample Sections that need to be assessed will be shown in RED Each one starts out RED and during the assessment becomes either GREEN or BLACK The colors represent the following RED Incomplete NOT Assessed GREEN Successfully Assessed BLACK Section Skipped After you ve selected Start Stop Editing Feature tool you will then...

Page 21: ...k out at night to assess the markers and symbol This is no longer necessary All Assessing will be done during the Day If you arrive at a Sample Section you need to Double Click the Red Unassessed Section with either the pen or with the mouse This will open the following window You are looking at the criteria that needs to be looked at when assessing a Sample Section You will notice near the top of...

Page 22: ... check mark appears and type in the rater s name below it Lastly click the Green in the lower left corner of the window to close it This indicates to ArcPad that the given Sample Section has been assessed You should now see the section turn from Red to Green If you click the then your edits will NOT be saved When you have completed work for the day and you ve checked to make sure all your sections...

Page 23: ...folder on the USB Drive that is named MCAP_DivX click yes to all to Over Ride the existing file At the end of the day make sure you have saved all your work on both the Hard drive and on the USB flash drive Next shut down the Tablet PC and place it along with any items you ve pulled out of the PC Case and put back into the PC Case and store the equipment in a safe place You may want to charge the ...

Page 24: ...USB drive with a green arrow on top You will need to Left click this Icon After you have Left clicked the Icon you will see a window pop up asking which Drive would you like to remove You will need to select the drive that is labeled USB Mass Storage Device and Left Click After you have Left clicked the correct USB Drive to Safely remove you will see the following screen You should also notice tha...

Reviews: