background image

411.2 OMDD

411.2 OMDD

27WA

!

1.570.999.100 B
10/2011

Classic 411.2 OMDD

BETRIEBSANLEITUNG

MASCHINE ZUR VERNICHTUNG 
OPTISCHER DATENTRÄGER

OPERATING INSTRUCTIONS

OPTICAL MEDIA DESTRUCTION 
DEVICE

MANUALE OPERATIVO

APPARECCHIO PER LA DISTRU-
ZIONE DI SUPPORTI DATI OTTICI

INSTRUKCJA OBS

Ł

UGI

NISZCZARKA OPTYCZNYCH 
NO

Ś

NIKÓW DANYCH

https://www.monomachines.com/

https://www.monomachines.com/

Summary of Contents for Classic 411.2 OMDD

Page 1: ... MASCHINE ZUR VERNICHTUNG OPTISCHER DATENTRÄGER OPERATING INSTRUCTIONS OPTICAL MEDIA DESTRUCTION DEVICE MANUALE OPERATIVO APPARECCHIO PER LA DISTRU ZIONE DI SUPPORTI DATI OTTICI INSTRUKCJA OBSŁUGI NISZCZARKA OPTYCZNYCH NOŚNIKÓW DANYCH https www monomachines com https www monomachines com ...

Page 2: ... HSM Classic 411 2 OMDD 3 english Optical media destruction device HSM Classic 411 2 OMDD 11 italiano Apparecchio per la distruzione di supporti dati ottici HSM Classic 411 2 OMDD 19 polski Niszczarka optycznych nośników danych HSM Classic 411 2 OMDD 27 https www monomachines com https www monomachines com ...

Page 3: ...ahme der Maschine die Betriebsanleitung bewahren Sie sie für späteren Gebrauch auf und geben Sie die Anleitung an spätere Nutzer weiter Beachten Sie alle auf dem Aktenvernichter angebrachten Sicherheitshinweise WARNUNG Gefahren für Kinder und andere Personen Die Maschine darf nicht durch Personen einschließlich Kindern unter 14 Jahren mit eingeschränk ten physischen sensorischen oder geistigen Fäh...

Page 4: ...tim mungsgemäße Verwendung WARNUNG Gefährliche Netzspannung Fehlerhafter Umgang mit der Ma schine kann zu elektrischem Stromschlag führen Überprüfen Sie vor dem Einstecken des Netzsteckers dass Spannung und Fre quenz Ihres Stromnetzes mit den Anga ben auf dem Typenschild übereinstim men Achten Sie darauf dass der Netzstecker leicht erreichbar ist Vermeiden Sie dass Wasser in die Ma schine gelangt ...

Page 5: ...hine schaltet ein Schneidwerk läuft in Einzugs richtung Tür geöffnet rote Leuchtdiode Papierstau bzw Elektromotor überlastet rote Leuchtdiode Schnittgutsack voll rote Leuchtdiode Betriebsbereit grüne Leuchtdiode 3 Übersicht 11 10 12 1 4 5 6 9 7 8 0 I 2 3 4 Lieferumfang Maschine anschlussfertig in Karton ver packt Karton auf Europalette mit Verpackungs band umreift 5 Schnittgutsäcke 1 Flasche Schne...

Page 6: ... matisch ab und geht in Betriebsbereitschaft 0 I 5 Inbetriebnahme Öffnen Sie die Tür der Maschine Entnehmen Sie den Rahmen A und einen Schnittgutsack Setzen Sie den Schnittgutsack in den Rahmen ein und schlagen Sie den obe ren Rand ca 20 cm um A Schieben Sie den Rahmen Bügel B zur Schrankvorderseite zeigend wieder in die Führungsschienen ein B Schließen Sie die Tür der Maschine Stecken Sie den Net...

Page 7: ...ts Achtung Betätigen Sie die Einschalttaste und die Reversiertaste nicht wechselweise um die Blockierung zu beseitigen Dies führt zu Schäden am Gerät Ziehen Sie ddie CD DVD aus der Zuführöffnung heraus Wenn der Datenträger nicht vollständig ausgestoßen wur de Drücken Sie die Reversiertaste Schneidwerk läuft rückwärts Entnehmen Sie die CD DVD Führen Sie immer nur eine CD DVD zu Elektromotor überhit...

Page 8: ...rneuter In betriebnahme ca 15 20 min abkühlen ob die Lichtschranke verschmutzt ist Reinigen Sie die Lichtschranke in der Zufuhr mit einem trockenen Pinsel oder Tuch WARNUNG Gefährliche Netzspannung Schalten Sie die Maschine aus und ziehen Sie den Netzstecker Die Reinigung darf nur mit einem weichen Tuch und einer milden Seifenwasserlösung erfolgen Dabei darf kein Wasser in das Gerät eindringen 8 R...

Page 9: ...tehend be zeichnete Maschine HSM Classic 411 2 OMDD aufgrund ihrer Konzeption und Bauart in der von uns in Verkehr gebrachten Ausführung den grundlegenden Sicher heits und Gesundheitsanforderungen der nachfolgend aufgeführten EG Richtlinien entspricht Niederspannungsrichtlinie 2006 95 EG EMV Richtlinie 2004 108 EG Angewandte Normen und technische Spezifikationen EN 55014 1 2006 EN 61000 4 2 1995 A...

Page 10: ...ties scarves jewellery etc away from feed opening Ma terial with the tendency to form loops e g tapes strapping mate rial etc must not be shredded Before using the machine for the first time read the operating man ual and keep it for later use and to pass on to any subsequent users Observe all safety instructions on to the machine WARNING Dangerous for children and others The machine may not be us...

Page 11: ...n the rain Check the machine and cable regularly for damage Switch the shredder off if it is damaged or not working correctly or before relocating or cleaning it and dis connect it from the mains Keep the machine the plug and cable away from open fire and hot surfaces The ventilation slots must not be blocked or covered and there must be at least 5 cm space between the shredder and any wall or fur...

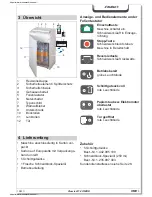
Page 12: ... on Cutting system runs in feed direction Front door opened red LED Paper jam electric motor overloaded red LED Cut material bag full red LED Ready for operation green LED 3 Machine components 11 10 12 1 4 5 6 9 7 8 0 I 2 3 4 Scope of delivery Shredder ready for connection in carton packing carton on pallet tied with strap ping tape 5 bags for shredded material Special cutting block oil Operating ...

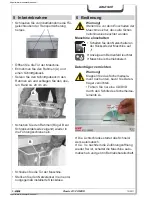
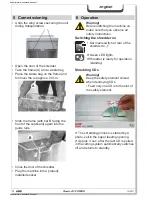
Page 13: ...lled in the cutting system automatically switches off and returns to standby 0 I 5 Commissioning Open the door of the shredder Take the frame A and a waste bag Place the waste bag on the frame and fold over the top approx 20 cm A Slide the frame with bar B facing the front of the cupboard again into the guide rails B Close the door of the shredder Plug the machine into a properly installed socket ...

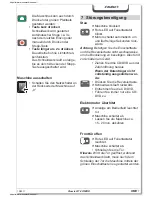
Page 14: ...tically Notice Do not press dashed arrow button and green arrow button alternately forwards and backwards Cutting unit can be damaged Pull CD out of the feeding open ing If CD is not completely pushed out then Press dashed arrow button CD is pushed out Feed only one CD DVD Electric motor overheated Red LED on membrane key board lights Shredder switches off automati cally Allow shredder to cool dow...

Page 15: ...utting system forwards and backwards several times without feeding CD DVD Dust and particles are shaken off 8 Cleaning and maintenance For all other malfunctions before calling customer service please check if the motor was overloaded Let the shredder cool down for approx 15 20 mins before using it again if the light barrier is soiled Clean the light barrier in the feed using a dry brush or cloth ...

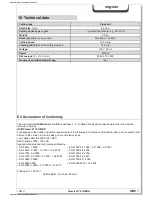
Page 16: ...ed to here as HSM Classic 411 2 OMDD corresponds to the health and safety requirements of the following EC directives listed below due to its conception and design of the version in which it was put into circulation by us Low voltage directive 2006 95 EEC EMC directive 2004 108 EC Frickingen 01 03 2011 Rolf Gasteier Technical Director Cutting type Cross cut Shred size mm 2 2 x 4 0 Cutting capacity...

Page 17: ...lla messa in funzione della macchina leggere le istruzio ni per l uso conservarle per poter le consultare in seguito e consegnarle agli altri utenti Osservare tutte le avvertenze per la sicurezza applicate sul distruggidocu menti AVVERTENZA Pericoli per bambini e altre per sone La macchina non deve essere utilizzata da persone compresi bambini sotto i 14 anni con ridotte capacità fisiche sensorial...

Page 18: ...neggiato o se non funziona correttamente non ché in caso di cambio di posto o durante la pulizia ed estrarre la spina di rete Tenere l apparecchio la spina di rete e il cavo di rete lontani da fiamme libere e superfici incandescenti Le feritoie di ventilazione non devono essere coperte e deve essere mantenuta una distanza min di 5 cm dalla parete o da mobili I lavori di assistenza devono es sere e...

Page 19: ...positivo di taglio inizia il trascinamento Pannello frontale o sportelli aperti Diodo luminoso rosso Inceppamento carta Sovraccarico del motore Diodo luminoso rosso Sacco di raccolta vuoto Diodo luminoso rosso Pronto per il funzionamento Diodo luminoso verde 3 Panoramica 11 10 12 1 4 5 6 9 7 8 0 I 2 3 4 Fornitura Apparecchio pronto all uso imballato in cartone cartone attacato sulla paletta con na...

Page 20: ... meccanismo di taglio si spegne automaticamente e passa alla modalità Pronto per il funzionamento 0 I 5 Messa in funzione Aprire lo sportello del distruggidocumenti Estrarre il telaio A ed un sacchetto per il cascame Disporre il sacchetto per il cascame nel telaio e ripiegarlo sul bordo superiore di ca 20 cm A Spingere nuovamente il telaio staffa B rivolta verso la parte anteriore del mobile nelle...

Page 21: ...p Carta inceppata Distruggidocumenti bloccato Il LED rosso sulla tastiera a membrana lampeggia Il distruggidocumenti marcia in dietro automaticamente Attenzione Non azionare il tasto freccia tratteggiato e il tasto freccia verde alternativamente in avanti ed indietro Il meccanismo di taglio può essere danneg giato Estrarre il CD dalla fessura di alimentazione Se non è stato espulso tutto il CD Pre...

Page 22: ... il distruggidocumenti per ca 15 20 min che la cella fotoelettrica non sia sporca per la presenza di polvere di carta Pulire la cella fotoelettrica nell alimenta zione della carta con un pennello o con un panno asciutto Applicare uno strato d olio al meccanismo di taglio in caso di riduzione delle prestazioni di taglio oppu re dopo ogni svuotamento del contenitore per mate riali di taglio Alzare s...

Page 23: ... sulla base della sua concezione e struttura nella versione messa sul mercato dalla nostra ditta soddisfa i requisiti di sicurezza e sulla salute delle direttive CE elencate qui di seguito Direttiva sulla bassa tensione 2006 95 CE direttiva sulla compatibilità elettromagnetica 2004 108 CE Frickingen 01 03 2011 Rolf Gasteier Direttore tecnico Tipo di taglio particelle Grandezza di taglio mm 2 2 x 4...

Page 24: ...m maszyny przeczytać instrukcję obsługi przechowywać instrukcję do póź niejszego użycia i przekazać ją kolejnemu użytkownikowi Przestrzegać wszystkich informacji bezpieczeństwa umieszczonych na niszczarce dokumentów OSTRZEŻENIE Zagrożenie dla dzieci i innych osób Urządzenia nie mogą obsługiwać osoby w tym dzieci poniżej 14 lat o ograniczonych zdolnościach fizycznych organoleptycznych i umysłowych ...

Page 25: ...czu Urządzenie i przewód należy re gularnie sprawdzać po względem uszkodzeń W razie uszkodzenia lub nieprawidłowego działania oraz przed przemieszczeniem lub czysz czeniem niszczarkę dokumentów należy wyłączyć i wyciągnąć wtyczkę sieciową z gniazda wtykowego Urządzenie wtyczkę sieciową i prze wód zasilający należy trzymać z dala od otwartego płomienia i gorących po wierzchni Otwory wentylacyjne mu...

Page 26: ...włączenia Niszczarka włącza się Me chanizm tnący przesuwa się w w kierunku otworu podajnika papieru Otwarte drzwi lub klapa leja czerwona dioda świetlna Stłoczenie papieru lub przeciążenie czerwona dioda świetlna Worek na ścinki pełen czerwona dioda świetlna Gotowość do eksploatacji zielona dioda świetlna 11 10 12 1 4 5 6 9 7 8 0 I 2 3 Niszczarka dokumentów w stanie go towym do podłączenia zapakow...

Page 27: ...y niszczarka wyłącza się auto matycznie i przechodzi w stan gotowości 0 I 6 Obsługa OSTRZEŻENIE Przed włączeniem maszyny należy się upewnić czy uwzględniono wszystkie wskazówki bezpieczeństwa 5 Uruchamianie Otworzyć drzwiczki niszczarki Wyjąć ramę A i worek na ścinki Włożyć worek na ścinki w ramę i zawinąć ok 20 cm jego górnej krawędzi A Ponownie wsunąć ramę pałąk B zwró cony w kierunku przodu sza...

Page 28: ...wstecz UWAGA Nie naciskać na przemian klawiszy Do przodu Wstecz aby usunąć blokadę Prowadzi to do uszkodzenia niszczarki dokumentów Wyciągnąć płytę CD DVD ze szczeliny wlotowej Jeśli nośnik danych nie został całkowicie usunięty Nacisnąć kreskowany przycisk ze strzałką Mechanizm tnący przesuwa się wstecz Wyciągnąć płytę CD DVD Wprowadzać zawsze tylko jedną płytę CD DVD Silnik elektryczny jest przeg...

Page 29: ...estygnie czy zapora świetlna jest zanieczyszczona pyłem papierowym Wyczyścić zaporę świetlną w podajniku papieru przy użyciu suchego pędzelka lub szmatki OSTRZEŻENIE Niebezpieczne napięcie zasila jące Przed czyszczeniem niszczarkę dokumentów należy wyłączyć i wyciągnąć wtyczkę sieciową z gniazda wtykowego Czyścić urządzenie tylko przy użyciu mięk kiej ściereczki z dodatkiem łagodnego roz tworu wod...

Page 30: ...2008 EN 61000 4 4 2004 EN 61000 3 2 2006 EN 61000 4 5 2006 EN 61000 3 3 1995 A1 2001 A2 2005 EN 61000 4 6 2007 EN 13849 1 2008 EN 61000 4 11 2004 EN 62233 2008 EN 50366 2003 A1 2006 EN 60950 1 2006 A11 2009 A1 2010 Frickingen 01 03 2011 Rolf Gasteier Kierownik ds technicznych Deklaracja o zgodności z normami WE Producent HSM GmbH Co KG Austraße 1 9 D 88699 Frickingen oświadcza niniejszym że opisan...

Reviews: