background image

Notice

Copyright © Huawei Technologies Co., Ltd. 
2009. All rights reserved.

1

No part of this document may be reproduced or 

transmitted in any form or by any means without 

prior written consent of Huawei Technologies 

Co., Ltd.

2

The product described in this manual may 

include copyrighted software of Huawei Technol-

ogies Co., Ltd and possible licensors. Customers 

shall not in any manner reproduce, distribute, 

modify, decompile, disassemble, decrypt, 

extract, reverse engineer, lease, assign, or subli-

cense the said software, unless such restrictions 

are prohibited by applicable laws or such actions 

are approved by respective copyright holders 

under licenses.

3

Trademarks and Permissions

4


HUAWEI, 

and


are trademarks or 

registered trademarks of Huawei Technologies 

Co., Ltd.

5

Other trademarks, product, service and 

company names mentioned are the property of 

their respective owners.

6

Notice

7

Some features of the product and its accessories 

described herein rely on the software installed, 

capacities and settings of local network, and 

may not be activated or may be limited by local 

network operators or network service providers, 

thus the descriptions herein may not exactly 

match the product or its accessories you pur-

chase.

8

Huawei Technologies Co., Ltd reserves the right 

to change or modify any information or specifica-

tions contained in this manual without prior 

notice or obligation.

9

NO WARRANTY

10

THE CONTENTS OF THIS MANUAL ARE PRO-

VIDED “AS IS”. EXCEPT AS REQUIRED BY 

APPLICABLE LAWS, NO WARRANTIES OF 

ANY KIND, EITHER EXPRESS OR IMPLIED, 

Summary of Contents for ETS1160

Page 1: ...rmissions 4 HUAWEI and are trademarks or registered trademarks of Huawei Technologies Co Ltd 5 Other trademarks product service and company names mentioned are the property of their respective owners 6 Notice 7 Some features of the product and its accessories described herein rely on the software installed capacities and settings of local network and may not be activated or may be limited by local...

Page 2: ... TECHNOLOGIES CO LTD BE LIABLE FOR ANY SPECIAL INCIDENTAL INDIRECT OR CONSEQUENTIAL DAMAGES OR LOST PROFITS BUSINESS REVENUE DATA GOODWILL OR ANTICIPATED SAVINGS Import and Export Regulations 12 Customers shall comply with all applicable export or import laws and regulations and will obtain all necessary governmental permits and licenses in order to export re export or import the product mentioned...

Page 3: ...e Power Adapter 4 Installing the Antenna 4 Connecting the Terminal 4 Viewing the Signal Strength 5 Mounting the FWT 6 General Functions 7 Booting the FWT 7 Making or Answering Calls 7 Adjusting the Voice Volume 7 Advanced Functions 9 Supplementary Services 9 Wireless Data Service 9 Security 10 Troubleshooting 11 Warnings and Precautions 12 1Table of Contents ...

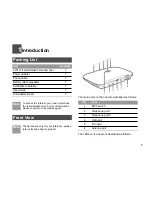
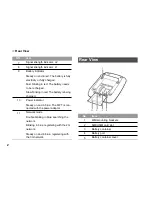
Page 4: ...ur reference please refer color and shape to product The main ports on the host are described as follows The LEDs on the host are described as follows Item Quantity FWT Fixed Wireless Terminal host 1 Power adapter 1 Phone cable 1 Battery Rechargeable 1 Certificate of Quality 1 User Guide 1 Antenna Optional 1 NO Item 1 FWT switch 2 Telephone port 1 3 Telephone port 2 4 Data port 5 DC input 6 Antenn...

Page 5: ...e recharged Slow blinking in red The battery is being charged 10 Power indicator Steady on and in blue The FWT is con nected with the power adapter 11 Network mode Double blinking in blue searching the network Blinking in blue registering with the 2G network Steady on and in blue registering with the 3G network No Item 1 Wall mounting brackets 2 SIM USIM card slot 3 Battery container 4 Battery por...

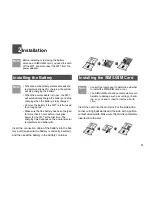
Page 6: ... for more than 8 hours before it supplies power for the FWT at the first time The charging time depends on the environmental temperature and battery life Insert the connection cable of the battery into the bat tery port make sure the battery is correctly inserted and then seat the battery in the battery container Installing the SIM USIM Card Note Consult the local agent to determine whether to ins...

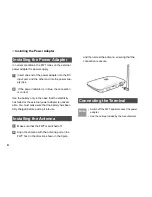
Page 7: ...only in the case that the electricity has failed or the external power adapter is unavail able You must make sure that the battery has been fully charged before putting it into use Installing the Antenna 1 Make sure that the FWT is switched off 2 Align the antenna with the antenna port on the FWT host in the direction shown in the figure and then screw the antenna ensuring that the connection is s...

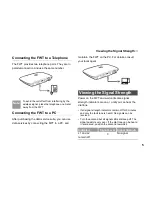
Page 8: ...ecting the FWT to a PC and maintain the FWT on the PC For details consult your local agent Viewing the Signal Strength Power on the FWT and wait until some signal strength indicators are on or until you can hear the dial tone If all signal strength indicators remain off for 5 minutes and only the fault tone is heard No signals can be received Turn the antenna but all signal LEDs still keep off The...

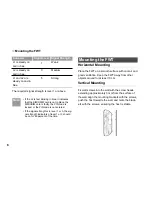
Page 9: ...he FWT Horizontal Mounting Place the FWT on a smooth surface with cool air and good ventilation Keep the FWT away from other objects around for at least 10 cm Vertical Mounting Fix wall screws into the wall with the screw heads extending approximately 3 mm from the surface of the wall align the mounting brackets with the screws push the host towards the wall and mate the brack ets with the screws ...

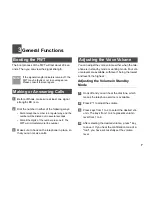
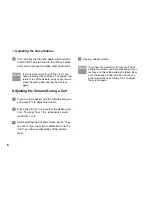
Page 10: ...The FWT will immediately dial the number 3 Make sure to hook on the telephone in place so that you can receive calls Adjusting the Voice Volume You can adjust the voice volume either when the tele phone is in standby mode or working mode Four vol ume levels are available with level 1 being the lowest and level 4 the highest Adjusting the Volume in Standby Mode 1 Hook off and you can hear the dial ...

Page 11: ...you are in a session with the remote party you can press 1 to adjust the volume 2 Press keys from 1 to 4 to select the desired vol umn The keys from 1 to 4 represents volumn level from 1 to 4 3 After selecting the desired volume press key to save it If you hear the confirmation tone of a toot you have successfully set the volume level 4 Keep in session mode Note If you hear the reject tone of toot...

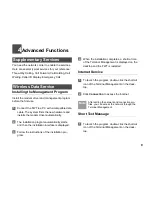
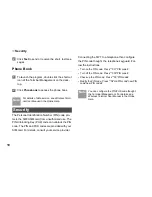
Page 12: ... automatically 2 The installation program automatically starts and then the installation interface is displayed 3 Follow the instructions of the installation pro gram 4 When the installation completes a shortcut icon of the Terminal Management is displayed on the desktop and the FWT is restarted Internet Service 1 To launch the program double click the shortcut icon of the Terminal Management on t...

Page 13: ...zed use The PIN Unblocking Key PUK code can unblock the PIN code The PIN and PUK codes are provided with your SIM card For details consult your service provider Connecting the FWT to a telephone then configure the PIN code thought the telephone keyguard Fol low the instructions Turn on the PIN code Press 031 PIN code Turn off the PIN code Press 030 PIN code Check up the PIN code Press 03 PIN code ...

Page 14: ... unstable and discontinuous Check how many signal indicators are on If less than 1 are on the network signal is weak Move the FWT to a position with stronger signal The signal strength may be led by environmental interference For details consult the carrier The volume is too loud or too low Following the Adjusting the Volume during a call The handfree function cannot be used If an FWT is connected...

Page 15: ...WT on the seat or other places where it can get loose in a sudden stop or collision Observe the rules and regulations of airline companies Power off your FWT before boarding an aircraft Operating Environment Do not place magnetic storage media such as magnetic cards and floppy disks near the FWT Radiation from the FWT may erase the information stored on them Do not put your FWT battery or other ac...

Page 16: ...e greater than 30cm Do not open the chassis in any case and the device should be maintained by a qualified maintenance department Without permission you are not allowed to modify the archi tecture and security design of FWT You must bear any con sequence resulted from the operation without permission Your FWT is designed to conform to the authoritative inter national radio frequency RF specificati...

Page 17: ...adapter from the socket before clean ing or maintaining it Otherwise electric shock or short circuiting of the battery or power adapter may result Ensure the plug of the power adapter is properly inserted into the power socket when charging the battery Improper insertion may result in electric shock fire or explosion Do not place any heavy object on the power cord of the power adapter Do not damag...

Page 18: ...ving antenna Increase the separation between the device and receiver Connect the device into an outlet on a circuit different from that to which the receiver is connected Consult the dealer or an experienced radio TV technician for help This device complies with part 15 of the FCC Rules Operation is subject to the following two conditions 1 This device may not cause harmful interference and 2 this...

Reviews: