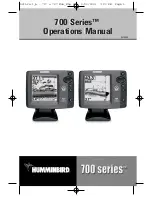
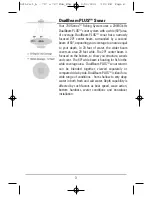
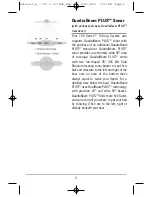
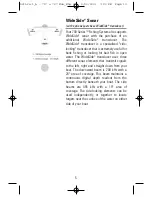
background image

700 Series™ 

Operations Manual

700 Series™

Operations Manual

531524-1

531524-1_A - 717 & 727 Man_Eng.qxp  9/30/2006  7:23 PM  Page 1

Summary of Contents for 717

Page 1: ...700 Series Operations Manual 700 Series Operations Manual 531524 1 531524 1_A 717 727 Man_Eng qxp 9 30 2006 7 23 PM Page 1 ...

Page 2: ...you to react Always operate the boat at very slow speeds if you suspect shallow water or submerged objects WARNING Disassembly and repair of this electronic unit should only be performed by authorized service personnel Any modification of the serial number or attempt to repair the original equipment or accessories by unauthorized individuals will void the warranty Handling and or opening this unit...

Page 3: ...83 kHz Split Sonar View 17 Big Digits View 18 Circular Flasher View 19 Side Beam View with optional purchase QuadraBeam PLUS transducer 20 WideSide View with optional purchase WideSide transducer 23 Key Functions 24 POWER LIGHT Key 24 VIEW Key 24 MENU Key 25 4 WAY Cursor Control Key 25 EXIT Key 26 Accessory Bus 27 Powering Up the Unit 28 The Menu System 29 Start Up Options Menu 31 Normal Operation...

Page 4: ...ect 46 Fish ID 47 Fish ID Sensitivity 48 Real Time Sonar RTS Window 48 Zoom Width 49 83 kHz Sensitivity Advanced 49 455 kHz Sensitivity Advanced with QuadraBeam PLUS transducer 50 WideSide Sensitivity Advanced with WideSide transducer 51 Depth Lines Advanced 52 Surface Clutter Advanced 53 Noise Filter Advanced 54 Max Depth Advanced 54 Water Type Advanced 55 Transducer Select 56 Alarms Menu Tab 57 ...

Page 5: ... Finding the Cause of Noise 75 700 Series Fishing System Accessories 76 Specifications 78 Glossary 81 Contact Humminbird 91 NOTE Entries in this Table of Contents which list International only are only available on products sold outside of the US by our authorized International Distributors To obtain a list of authorized International Distributors please visit our website at www humminbird com or ...

Page 6: ...avel from the surface to a depth of 240 ft 70 m and back again in less than 1 4 of a second It is unlikely that your boat can outrun this sonar signal SONAR is an acronym for SOund and NAvigation Ranging Sonar utilizes precision sound pulses or pings which are emitted into the water in a teardrop shaped beam The sound pulses echo back from objects in the water such as the bottom fish and other sub...

Page 7: ...typically used to achieve greater depth capability The power output is the amount of energy generated by the sonar transmitter It is commonly measured using two methods Root Mean Square RMS measures power output over the entire transmit cycle Peak to Peak measures power output at the highest points The benefits of increased power output are the ability to detect smaller targets at greater distance...

Page 8: ...The 20 center beam is focused on the bottom to show you structure weeds and cover The 60 wide beam is hunting for fish in the wide coverage area DualBeam PLUS sonar returns can be blended together viewed separately or compared side by side DualBeam PLUS is ideal for a wide range of conditions from shallow to very deep water in both fresh and salt water Depth capability is affected by such factors ...

Page 9: ...aped 35 455 kHz Side Structure locating sonar beams to spot fish bait and structure to the left and right of the boat over an area of the bottom that s always equal to twice your depth For a detailed view below the boat QuadraBeam PLUS uses DualBeam PLUS technology with precision 20 and wide 60 beams QuadraBeam PLUS finds more fish faster and can even tell you where to put your bait by showing if ...

Page 10: ...ide transducer uses three different sonar elements that transmit signals to the left right and straight down from your boat The downward beam is 200 kHz with a 24 area of coverage This beam maintains a continuous digital depth readout from the bottom directly beneath your boat The side beams are 455 kHz with a 16 area of coverage The side looking elements can be used independently or together to l...

Page 11: ...ctible composite shaft out of sight and out of harm s way with no clamps ties or exposed wires Universal Sonar 2 features new temperature sensing and the performance of DualBeam PLUS technology available with all Humminbird DualBeam PLUS models An expanded view and greater bottom detail gives you a totally new perspective of the water below along with optimal sonar performance to help you find fis...

Page 12: ...s can display the speed of the boat and can keep a Triplog of nautical or statute miles traveled Second Sonar Return when the sonar signal bounces between the bottom and the surface of the water and back again Use the appearance of the second return to determine bottom hardness Hard bottoms will show a strong second return while soft bottoms will show a very weak one or none at all Cursor Dialog B...

Page 13: ...s as a continuous band of many gray levels moving across the display at the same depth Structure where fish may be hiding Fish fish are displayed as arches and or fish icons and the unit can be set to alarm when a fish of a certain size is detected When a target is detected and Fish ID is on a Fish ID symbol with depth is displayed The size of the symbol shows the intensity of the sonar return The...

Page 14: ...hen you change any menu settings that affect the sonar the view will update immediately i e you don t have to exit the menu to apply the change to the screen For instance by switching between Inverse and Structure ID from the X Press Menu it is possible to quickly alternate between the two viewing methods NOTE Side Beam View and WideSide View require the purchase of the QuadraBeam PLUS transducer ...

Page 15: ...ow the bottom Depth Range is automatically selected to keep the bottom visible on the display although you can adjust it manually as well see Sonar X Press Menu Six Digital Readouts display information from optional purchase accessories These information boxes can be customized to show only the information desired see Setup Menu Tab Select Readouts NOTE If the Depth number is flashing it means tha...

Page 16: ...received by the control head and plotted on the display represents something that was detected by a sonar return at a particular time As both the boat and the targets fish may be moving the returns are only showing a particular segment of time when objects were detected not exactly where those objects are in relation to other objects shown on the display 531524 1_A 717 727 Man_Eng qxp 9 30 2006 7 ...

Page 17: ...fects of menu setting changes with Instant Image Update Pressing EXIT will exit Freeze Frame and the display will start to scroll Freeze Frame is available in Sonar Sonar Zoom and 200 83 kHz Split Sonar Views The Narrow RTS Window indicates the sonar intensity through the use of grayscale The grayscale used matches the bottom view grayscale setting used in the sonar history window i e Inverse Stru...

Page 18: ...lay A Soft Bottom such as mud or sand appears as a thicker line across the display Rocky Bottoms have a broken random appearance The sonar returns from the bottom structure and fish can be represented as either Inverse default WhiteLine Structure ID or Bottom Black See Sonar X Press Menu Bottom View for details on how to set the bottom view Bottom Contour Profile with RTS Window Temp Speed Accesso...

Page 19: ... the benefit of ensuring that weak signals will be clearly visible on the display Structure ID represents weak returns as light pixels and strong returns as dark pixels This has the benefit of ensuring that strong returns will be clearly visible on the display 531524 1_A 717 727 Man_Eng qxp 9 30 2006 7 23 PM Page 19 ...

Page 20: ...lay Bottom Black displays all pixels below the bottom contour as black regardless of signal strength This has the benefit of providing a high contrast between the bottom and other sonar returns on the display Any targets such as fish structure and thermoclines will be shown using the Structure ID method 531524 1_A 717 727 Man_Eng qxp 9 30 2006 7 23 PM Page 20 ...

Page 21: ...mage of the bottom The Zoom Preview Box shows where the zoomed view is in relation to the full range view The Zoom Level or magnification is displayed in the lower left corner and can be changed to suit conditions see Sonar X Press Menu Zoom Level Upper and Lower Zoom Depth Range numbers indicate the depth of the water which is being viewed Digital depth is displayed in the upper left hand corner ...

Page 22: ... the Split Sonar View to make side by side comparisons between the sonar returns from the 83 kHz wide beam and the 200 kHz narrow beam The digital readouts in the Split Sonar View cannot be customized therefore information such as water temperature and voltage are unavailable in the Split Sonar View 200 83 kHz Split Sonar View Depth 83 kHz Sonar History Window 200 kHz Sonar History Window Lower De...

Page 23: ...istance traveled average speed and time elapsed since the Triplog was last reset The digital readouts in the Big Digits View cannot be customized Big Digits View Depth Temperature Speed Timer shows the time elapsed since Triplog was last reset Distance is the distance traveled since the Triplog was last reset Voltage displays the battery voltage Average Speed shows the speed since the Triplog was ...

Page 24: ...View displays Real Time Sonar RTS data in the traditional flasher format Depth and temperature are always displayed The digital readouts in the Circular Flasher View cannot be customized 531524 1_A 717 727 Man_Eng qxp 9 30 2006 7 23 PM Page 24 ...

Page 25: ... available on the Sonar X Press menu when in Side Beam View the display will represent the same sonar data in one of the following three layouts Default Classic and Slanted Default layout The top portion of the display presents a historical log of sonar returns from the 200 kHz down looking sonar beam New information in the down beam panel scrolls from right to left The bottom portion of the displ...

Page 26: ...play presents a historical log of sonar returns from the 455 kHz right and left looking sonar beams New information appears at the top and scrolls down the display Side Beam View Classic Layout Depth Temperature Left Side 455 kHz Sonar History Window Right Side 455 kHz Sonar History Window 200 kHz Sonar History Window Water Surface Line for 455 kHz Sonar History Windows 531524 1_A 717 727 Man_Eng ...

Page 27: ...om contour structure and fish similar to the down looking beam but the area covered is to the left and right of the area shown in the down looking portion so you actually see more of the bottom The distance covered by the right and left beams is based on the depth setting for the down looking beam up to a maximum of 160 feet Side Beam View Slanted Layout Depth Temperature Right Side 455 kHz Sonar ...

Page 28: ...and Both The default view is Both Information from both the left and right beams are displayed simultaneously The depth of the water beneath the boat is always displayed A bottom contour may be present while bank fishing or fishing river channels When fishing in the open water a bottom contour will not be present and only sonar returns from either debris or fish will be displayed WideSide View Lef...

Page 29: ...t press the POWER LIGHT key to access the Light and Contrast menu Use the 4 WAY Cursor key to select Light or Contrast and then use the LEFT or RIGHT Cursor key to change the settings Press EXIT to exit the Light and Contrast menu Press and hold the POWER LIGHT key for 3 seconds to turn the unit off A message will appear telling you how many seconds there are until shutdown occurs Your Fishing Sys...

Page 30: ...n Menu Press the MENU key twice for the tabbed Main Menu System The Main Menu System is organized under tabbed headings to help you find a specific menu item quickly Alarms Sonar Setup Views and Accessories tabs are part of your tabbed Main Menu System Use the LEFT or RIGHT 4 WAY Cursor Control key to select a tab then use the DOWN or UP key to select the menu item and the LEFT or RIGHT key to alt...

Page 31: ...lected pressing EXIT will exit the menu mode and return to the view If a menu is active pressing EXIT will return to the previous level in the menu system Pressing EXIT will cycle through the available views in reverse order If Freeze Frame is active pressing EXIT will return to a scrolling display 531524 1_A 717 727 Man_Eng qxp 9 30 2006 7 23 PM Page 31 ...

Page 32: ...is plugged into the unit In addition multiple accessories can be attached simultaneously See Accessories Menu Tab and 700 Series Fishing System Accessories in this manual as well as your accessory s Operations Manual for additional details NOTE Accessories to enable WeatherSense GPS Functionality and the SmartCast Wireless Sonar Link require separate purchases You can visit our website at www humm...

Page 33: ...LIGHT key The Title screen is displayed until the Fishing System begins operation Your Fishing System will begin Normal or Simulator operation depending on the presence or absence of a transducer 727 Title Screen 28 531524 1_A 717 727 Man_Eng qxp 9 30 2006 7 23 PM Page 33 ...

Page 34: ...u are in Normal or Advanced User Mode Main Menu Tabs Less frequently adjusted menus are grouped into the Main Menu System The Main Menu system is organized under the following tab headings to help you find a specific menu item quickly Alarms Sonar Setup Views and Accessories Press the MENU key twice for the Main Menu then use the 4 WAY Cursor LEFT or RIGHT key to select a tab and use the DOWN or U...

Page 35: ...Advanced Mode Any changes made while in Advanced Mode will remain in effect after you switch back to Normal Mode See Setup Menu Tab User Mode for specific instructions on changing to Advanced User Mode Total Screen Update when you change any menu settings that affect the Sonar View the view will update immediately i e you don t have to exit the menu to apply the change to the screen For instance b...

Page 36: ...use with PC Connect Cable See the following paragraphs for more information about each of these choices Normal Operation Use Normal operation for on the water operation with a transducer connected In addition your Fishing System uses advanced transducer detection methods to determine if a transducer is connected If a functioning transducer is connected Normal operation will be selected automatical...

Page 37: ...ct Simulator manually from the Start Up Options menu as opposed to letting the Fishing System enter Simulator automatically as it will if a transducer is not connected and you do nothing during power up Manually selecting Simulator from the Start Up Options menu allows you to pre configure your Fishing System for on the water operation Any menu changes you make will be saved for later use A messag...

Page 38: ...ss the VIEW button when using System Status Self Test Accessory Test Self Test Self Test displays results from the internal diagnostic self test including unit serial number Printed Circuit Board PCB serial number software revision total hours of operation and the input voltage Self Test Screen 531524 1_A 717 727 Man_Eng qxp 9 30 2006 7 23 PM Page 38 ...

Page 39: ...PC Connect to update the control head software This feature requires the use of the PC Connect Cable Complete instructions are included with the PC Connect Cable accessory NOTE The PC Connect Cable requires a separate purchase For more information visit our website at www humminbird com or contact our Customer Resource Center at 1 800 633 1468 Exit PC Connect mode by powering the Fishing System of...

Page 40: ...ss the Sonar X Press Menu NOTE Upper Range only appears in Advanced User Mode when in Sonar Split Sonar Big Digits and Circular Flasher Views NOTE Zoom Level only appears in Sonar Zoom View NOTE Quad Layout only appears in Side Beam View with optional purchase QuadraBeam PLUS transducer Sonar X Press Menu 531524 1_A 717 727 Man_Eng qxp 9 30 2006 7 23 PM Page 40 ...

Page 41: ...ess menu when you are in WideSide view NOTE Side requires the purchase of the WideSide transducer You can visit our website at www humminbird com to order this accessory online or contact our Customer Resource Center at 1 800 633 1468 To adjust the Side 1 Make sure you are in WideSide Transducer Mode and that a WideSide transducer is connected then highlight Side on the Sonar X Press menu 2 Use th...

Page 42: ...r If Sensitivity is adjusted too low the display may not show many sonar returns that could be fish NOTE The Sensitivity setting is a global setting and will adjust the sensitivity of all sonar frequencies as compared to specific sensitivity adjustments such as 83 kHz Sensitivity 455 kHz Balance or Wideside Sensitivity which allow you to adjust the level of sensitivity for one specific beam at a t...

Page 43: ...he Upper Range 1 Make sure you are in Advanced Mode then highlight Upper Range on the Sonar X Press Menu 2 Use the LEFT or RIGHT 4 WAY Cursor Control keys to increase or decrease the Upper Range setting 0 to 990 feet for 717 models 0 to 1490 feet for 727 models or 0 to 327 meters for 717 models or 0 to 497 meters for 727 models International models only Default 0 For example if you are only intere...

Page 44: ... the Upper and Lower Range regardless of the manual settings entered To adjust the Lower Range 1 Highlight Lower Range on the Sonar X Press Menu 2 Use the LEFT or RIGHT 4 WAY Cursor Control keys to increase or decrease the Lower Range setting AUTO 10 to 1000 feet for 717 models 10 to 1500 feet for 727 models or 3 to 330 meters for 717 models or 3 to 500 meters for 727 models International models o...

Page 45: ...eSide see Sonar Menu Tab Transducer Select and can only be accessed from the WideSide view NOTE The Side Beam Range requires the purchase of the WideSide transducer You can visit our website at www humminbird com to order this accessory online or contact our Customer Resource Center at 1 800 633 1468 To adjust the Side Beam Range 1 Make sure you are in WideSide Transducer Mode and that a WideSide ...

Page 46: ...t 5 Bottom View Bottom View selects the method used to represent bottom and structure on the display Inverse represents weak returns as dark pixels and strong returns as lighter pixels This has the benefit of ensuring that weak signals will be clearly visible on the display Structure ID represents weak returns as light pixels and strong returns as dark pixels This has the benefit of ensuring that ...

Page 47: ... side looking beams plus the down looking beam to be presented on the Side Beam View and is only available when an optional purchase QuadraBeam PLUS transducer is attached and the Side Beam View is active Use Quad Layout to change the way the Side Beam View is displayed See Side Beam View for more information To adjust the Quad Layout 1 Highlight Quad Layout on the Sonar X Press menu 2 Use the LEF...

Page 48: ...s menu 2 Use the LEFT or RIGHT 4 Way Cursor Control keys to change the Quad Layout setting for the Side Beam View Standard Classic Slanted Default Standard Bottom Lock Sonar Zoom View only Bottom Lock changes the mode of the Zoomed view in the Sonar Zoom View Bottom Lock continuously graphs the bottom at a constant point on the display regardless of changes in depth This flattens out the bottom co...

Page 49: ...e large structure in deeper water It is possible to set the Bottom Range to be greater than the depth In this case you may see surface clutter in a wavy band that mirrors changes in the depth To adjust the Bottom Range 1 In the Sonar Zoom View highlight Bottom Lock on the Sonar X Press Menu 2 Use the LEFT or RIGHT 4 WAY Cursor Control keys to change the Bottom Lock setting to on 3 Once you turn on...

Page 50: ...d then press the RIGHT Cursor key to select the Sonar tab NOTE Menu choices will vary depending on system settings such as whether the unit is set for Advanced User mode or what transducer is currently selected Sonar Menu 531524 1_A 717 727 Man_Eng qxp 9 30 2006 7 24 PM Page 50 ...

Page 51: ...s from the 200 kHz narrow beam will be displayed in the Sonar View the Sonar Zoom View the Big Digits View and the Circular Flasher View The Split Sonar View will continue to display returns from both beams in their respective windows The RTS Window in the Sonar View will display the returns from the 200 kHz narrow beam When set to 83 kHz the returns from the 83 kHz wide beam will be displayed in ...

Page 52: ...em shows only the raw sonar returns on the display These returns will often result in arches forming on the display indicating potential targets Due to the transducer beam angle the distance to a fish decreases as the fish moves into the beam and then increases as it moves out again creating a Fish Arch when this distance change is shown on the display Boat speed chart speed and the position of th...

Page 53: ...ty setting 1 Highlight Fish ID Sensitivity on the Sonar main menu 2 Use the LEFT or RIGHT 4 WAY Cursor Control keys to change the Fish ID Sensitivity setting Low 1 High 10 Default 5 Real Time Sonar RTS Window RTS Window sets the RTS Window to either Wide or Narrow or turns it off in the Sonar View The RTS Window always updates at the fastest rate possible and only displays returns that are within ...

Page 54: ...y fewer weak returns The 83 kHz Sensitivity menu choice is only available when User Mode is set to Advanced see Setup Menu Tab User Mode NOTE 83 kHz Sensitivity is particularly useful for adjusting the sensitivity of the 83 kHz sonar returns in the 200 83 kHz Split Sonar View The 83 kHz sensitivity can be adjusted without affecting the sensitivity of the 200 kHz returns shown in the 200 kHz sonar ...

Page 55: ...ucer You can visit our website at www humminbird com to order this accessory online or contact our Customer Resource Center at 1 800 633 1468 NOTE 455 kHz Sensitivity is particularly useful for adjusting the sensitivity of the 455 kHz sonar returns in the Side Beam View The 455 kHz sensitivity can be adjusted without affecting the sensitivity of the 200 kHz returns shown in the 200 kHz sonar windo...

Page 56: ...deSide transducer You can visit our website at www humminbird com to order this accessory online or contact our Customer Resource Center at 1 800 633 1468 NOTE WideSide Sensitivity is particularly useful for adjusting the sensitivity of the 455 kHz sonar returns in the WideSide View The 455 kHz sensitivity can be adjusted without affecting the sensitivity of the other sonar frequencies To change t...

Page 57: ...or Off The Depth Lines menu choice is available when User Mode is set to Advanced see Setup Menu Tab User Mode To change the Depth Lines setting 1 Make sure you are in Advanced User Mode then highlight Depth Lines on the Sonar main menu 2 Use the LEFT or RIGHT 4 WAY Cursor Control keys to turn the Depth Lines setting On or Off Off On Default On Depth Lines Depth Lines 531524 1_A 717 727 Man_Eng qx...

Page 58: ...r menu choice is available when User Mode is set to Advanced see Setup Menu Tab User Mode To change the Surface Clutter setting 1 Make sure you are in Advanced User Mode then highlight Surface Clutter on the Sonar main menu 2 Use the LEFT or RIGHT 4 WAY Cursor Control keys to change the Surface Clutter setting Low 1 to High 10 Default 5 Surface Clutter 531524 1_A 717 727 Man_Eng qxp 9 30 2006 7 24...

Page 59: ... on the Sonar main menu 2 Use the LEFT or RIGHT 4 WAY Cursor Control keys to change the Noise Filter setting Off Low Medium High1 High2 High3 Default Low Max Depth Advanced Max Depth adjusts the maximum depth of operation The performance of your Fishing System can be tuned to the maximum depth you will be fishing in by setting the Max Depth When a maximum depth is set your Fishing System will not ...

Page 60: ...set to Advanced see Setup Menu Tab User Mode NOTE In salt water what would be considered a large fish might be 2 to 10 times bigger than a large fish in fresh water depending on the type of fish you are seeking The salt water setting allows for a greater range in fish size adjustment to account for this Also make sure that the Water Type is set accurately especially in salt water as this affects t...

Page 61: ...supports the optional purchase QuadraBeam PLUS and WideSide transducers To change the selected Transducer 1 Highlight Transducer Select on the Sonar Main menu 2 Use the LEFT or RIGHT 4 WAY Cursor Control keys to change the transducer selected DualBeam QuadBeam WideSide Universal Sonar 2 Default DualBeam 531524 1_A 717 727 Man_Eng qxp 9 30 2006 7 24 PM Page 61 ...

Page 62: ...rms tab will be the default selection NOTE When an alarm is triggered you can silence it by pressing any key The alarm will be silenced and will not be triggered again until a new instance of the alarm condition is detected Alarms Menu 57 531524 1_A 717 727 Man_Eng qxp 9 30 2006 7 24 PM Page 62 ...

Page 63: ...arm sounds when the Fishing System detects fish that correspond to the alarm setting Fish ID Alarm will only sound if Fish ID is on To change the Fish ID Alarm setting 1 Highlight Fish ID Alarm on the Alarms main menu 2 Use the LEFT or RIGHT 4 WAY Cursor Control keys to change the Fish ID Alarm setting Off All Large Medium Large Default Off All Large Medium Large Off For example if you ve set the ...

Page 64: ...Battery Alarm setting Off 8 5V 13 5V Default Off Aux Temp Alarm with optional purchase temp probe or Temp Speed only Aux Temp Alarm sounds when the water temperature from an optional purchase temperature probe or Temp Speed accessory detected by the Fishing System reaches the Aux Temp Alarm setting which is either set in degrees Fahrenheit or Celsius International Models only For example if the Au...

Page 65: ...8 degrees the Temp Alarm will also sound To change the Temp Alarm setting 1 Highlight Temp Alarm on the Alarms main menu 2 Use the LEFT or RIGHT 4 Way Cursor Control keys to change the Temp Alarm setting Off 33 120 Fahrenheit 0 50 Celsius Default Off Alarm Tone Alarm Tone selects the pitch of the alarm sound A brief tone will be produced as you adjust the Alarm Tone so that you can select the tone...

Page 66: ...rsor key until the Setup tab is selected NOTE Menu choices will vary depending on system settings such as whether the unit is set for Advanced User mode whether it is an International model or whether a Temp Speed or GPS Receiver is currently connected Setup Menu 531524 1_A 717 727 Man_Eng qxp 9 30 2006 7 24 PM Page 66 ...

Page 67: ...r RIGHT 4 WAY Cursor Control keys to change the Units Temp setting Celsius Fahrenheit Default Celsius Units Distance with Temp Speed or GPS receiver Units Distance selects the units of measure for all distance related readouts and will appear in the menu if a Temp Speed Accessory is connected and the paddlewheel has moved at least once or if a GPS Receiver is connected To change the Units Distance...

Page 68: ...odels User Mode User Mode sets the menu system to either Normal or Advanced When set to Normal default setting only the basic menu options are shown When set to Advanced additional menu choices are available To change the User Mode setting 1 Highlight User Mode on the Setup menu 2 Use the LEFT or RIGHT 4 WAY Cursor Control keys to change the User Mode setting Normal Advanced Default Normal Languag...

Page 69: ...t Triplog on the Setup menu 2 Use the RIGHT 4 WAY Cursor Control key to initiate Triplog Reset 3 The Confirm dialog box will appear To reset the Triplog press the RIGHT Cursor key once more To cancel Reset Triplog press the LEFT Cursor key Restore Defaults Restore Defaults resets ALL menu settings to their factory defaults Use this menu choice with caution To Restore Defaults 1 Highlight Restore D...

Page 70: ...r be empty or contain one of the following Speed will be displayed if a Temp Speed Accessory is attached and the paddlewheel has moved at least once or if a GPS Receiver is connected Temperature will display temperature from the temperature probe that is built in to the transducer Triplog will be displayed if a Temp Speed Accessory is attached and the paddlewheel has moved at least once or if a GP...

Page 71: ... 3 The Select Readouts submenu will appear showing a list of all Readouts Use the UP or DOWN Cursor keys to select a particular Readout position then use the RIGHT or LEFT Cursor keys to change what will be displayed at that position Speed Temperature Triplog Voltage Aux Temp Water Speed Default Sonar View Customized Sonar View 531524 1_A 717 727 Man_Eng qxp 9 30 2006 7 24 PM Page 71 ...

Page 72: ...ControlkeystochangetheDepthOffset setting 10 0 to 10 0 feet or 3 to 3 meters International Models only Default 0 Aux Temp Offset Advanced with optional purchase temp probe or Temp Speed only Aux Temp Offset will adjust the temperature readout from the optional purchase temp probe or Temp Speed accessory by the amount entered This menu choice is available only when in Advanced User Mode see Setup M...

Page 73: ...s Default 0 Speed Calibration Advanced with Temp Speed only Speed Calibration will adjust the speed readout by the percentage entered and will appear in the menu if a Temp Speed Accessory is connected and the paddlewheel has moved at least once when the unit is in Advanced User Mode see Setup Menu Tab User Mode To change the Speed Calibration setting 1 Make sure you are in Advanced User Mode then ...

Page 74: ...de see Setup Menu Tab User Mode To change the Digits Format setting 1 Make sure you are in Advanced User Mode then highlight Digits Format on the Setup menu 2 Use the LEFT or RIGHT 4 WAY Cursor Control keys to change the Digits Format setting Small tenths Large tenths No tenths Default Small tenths NOTE Choosing No tenths will cause the display to present numbers rounded to whole digits only 53152...

Page 75: ... turned On DPT Depth MTW Water Temperature GLL Lat Lon Position GGA GPS Fix Data RMC Recommended Minimum Specific GNSS Data VTG Course Over Ground and Ground Speed ZDA Time and Date When navigating the following NMEA sentences are also output when NMEA Output is turned On APB Autopilot Sentence B BWR Bearing and Distance to Waypoint RMB Recommended Minimum Navigation Info To turn NMEA Output on or...

Page 76: ...ew rotation if it is set to Visible The following views are available WideSide View with optional purchase WideSide transducer SideBeam with optional purchase QuadraBeam PLUS transducer Sonar Sonar Zoom Split Sonar Big Digits Circular Flasher Self Test Accessory Test To change the view status of any view 1 Highlight the View main menu tab 2 Use the UP or DOWN 4 WAY Cursor Control keys to select a ...

Page 77: ... that support the accessory will be added automatically See the Operations Manual that comes with your accessory for detailed information NOTE Accessories to enable WeatherSense GPS Functionality and the SmartCast Wireless Sonar Link require separate purchases You can visit our website at www humminbird com or contact our Customer Resource Center at 1 800 633 1468 for additional details Accessorie...

Page 78: ...s or wiring or actually replacing the battery if necessary 700 Series Defaults to Simulator with a Transducer Attached A connected and functioning transducer will cause the newly started Fishing System to go into Normal operating mode automatically If when you power up the Fishing System it goes into Simulator mode automatically even though a transducer is already connected this means that the con...

Page 79: ...g around the transducer cavitation may be interfering with the interpretation of sonar data See your Installation Guide for suggestions on adjusting the transducer position Electrical noise from the boat s engine may be interfering with sonar reception See Finding the Cause of Noise for more information Sonar readings may be affected if the transducer is not positioned correctly i e mounted at an ...

Page 80: ...r the boat s engine is the source of the noise increase the RPMs while the boat is in neutral and stationary to see if the noise increases proportionately if noise appears when you rev the engine the problem could be the spark plugs alternator or tachometer wiring Replace the spark plugs with resistor plugs install an alternator filter or route the control head power and transducer cables away fro...

Page 81: ...wice your depth for a continuous 90 of uninterrupted side to side coverage to 160 feet Temperature Speed purchase and plug in the Temperature Speed accessory to your 700 Series control head to get real time speed and temperature readouts as well as a valuable Triplog function NOTE If an external Temperature Speed TS W or Temperature TG W accessory is connected AND a transducer with temperature bui...

Page 82: ...ties or exposed wires Universal Sonar 2 features new temperature sensing and the performance of DualBeam PLUS technology available with all Humminbird DualBeam PLUS models An expanded view and greater bottom detail gives you a totally new perspective of the water below along with optimal sonar performance to help you find fish Downriggers are the key to catching fish you otherwise couldn t even to...

Page 83: ...ital data around the boat It s a simply clearly better networking solution Be sure to check out our website www humminbird com for additional new and exciting accessories to grow your 700 Series Fishing System NOTE Each accessory requires a separate purchase You can visit our website at www humminbird com or contact our Customer Resource Center at 1 800 633 1468 for additional details 531524 1_A 7...

Page 84: ...m Power Requirement 10 20 VDC LCD Matrix 320V x 320H 717 640 V x 320 H 727 Transducer XHS 9 20 T or XNT 9 20 T Transducer Cable Length 20 ft 6 m Current Draw 250 mA 717 350 mA 727 NOTE Humminbird verifies maximum stated depth in saltwater conditions but actual depth performance may vary due to transducer installation water type thermal layers bottom composition and slope NOTE Product specification...

Page 85: ...ope of Directive 2002 95 EC of the European Parliament and of the Council of 27 January 2003 on the restriction of the use of certain hazardous substances in electrical and electronic equipment WEEE STATEMENT Product designed and intended as a fixed installation or part of a system in a vessel may be considered beyond the scope of Directive 2002 96 EC of the European Parliament and of the Council ...

Page 86: ... the Big Digits View also shows the TripLog See TripLog Bottom Black Bottom Black is a Humminbird feature that fills in the area of the display below the bottom contour Bottom Black is preferred by some anglers because of its high contrast and easy readability even though it can obscure bottom hardness information Bottom Contour Bottom Contour is the profile of the bottom graphed to the display as...

Page 87: ...t fall within the dead zone will probably not be visible in the sonar beam Precision sonar beams such as the Humminbird 20 beam have a smaller dead zone than wider sonar beams Decibel A Decibel is the measurement for sound pressure level or intensity of the sonar return See dB Down Point dB Down Point The dB Down Point is the standard decibel level at which the sonar cone angle is measured and is ...

Page 88: ... are shown as hollow symbols Fish Symbol A Fish Symbol is the graphic that is displayed on the screen when Fish ID determines that a sonar return is likely to be a fish See Fish ID Freeze Frame Freeze Frame is a Humminbird feature that pauses the sonar scrolling so that the image on screen can be studied with greater detail See Instant Image Update Frequency Frequency is a measure of the number of...

Page 89: ...h Menu The Maximum Depth Menu is a Humminbird feature that optimizes performance based on the maximum operational depth set by the user Many Humminbird units can operate across a very broad depth range up to 2500 feet which causes the unit to look up to that full depth under some circumstances Due to the speed of sound in water this can result in less responsiveness because the unit has to wait fo...

Page 90: ...pending on boat speed and the Chart Speed setting A greater number of horizontal pixels show more sonar history that the boat has passed through On many models Humminbird provides the most vertical pixels to provide a better display resolution See Chart Speed and Pixels Power Output Power output is the amount of sound energy emitted into the water by the sonar transmitter Power output is measured ...

Page 91: ...led instantaneous view of what is under the boat The Real Time Sonar window is a vertical band at the right side of the display that shows the instantaneous sonar return from the transducer at a particular instant The RTS Window menu option permits the user to adjust the window to show the full sonar signal return or just a narrower band that indicates intensity using grayscale Real Time Sonar rel...

Page 92: ...it fish game fish thermoclines weed beds subtle structure and more Sonar Update Rate Sonar Update Rate is the number of times per second that the transmitter receiver sends and receives sonar signals A very fast sonar update rate collects more information and provides a more detailed image of the bottom fish and structure Many Humminbird units operate at up to 40 times per second when in single fr...

Page 93: ...s two distinct targets i e two fish hanging very close or a fish hanging very close to structure Humminbird fishfinders provide a very good 2 1 2 inches of target separation in shallower than 100 feet of depth Target separation decreases as depth increases due to the need for longer Pulse Width to achieve greater depth See Pulse Width Thermoclines Thermoclines are water layer s of distinctly diffe...

Page 94: ...junction with the transducer Humminbird transmitters have an extremely fast cycling design that can send signals up to 60 times per second as well as produce the varying levels of power output needed for different depths and conditions Additionally the transmitter has the capability to create very precise sonar pulses needed for a high degree of target separation Humminbird receivers are extremely...

Page 95: ...on the X Press Menu are related to the current view and present the most logical choices for that view Sonar View X Press menus will differ from Chart View X Press menus etc X Press menus are one of the principal reasons that Humminbird products are easier to use Zoom Zoom is a feature that focuses in on a smaller area of the bottom to provide enhanced resolution With enhanced resolution the angle...

Page 96: ...8 00 a m to 4 30 p m Central Standard Time 1 800 633 1468 By e mail typically we respond to your e mail within three business days custserv johnsonoutdoors com For direct shipping our address is Humminbird Service Department 678 Humminbird Lane Eufaula AL 36027 USA 91 531524 1_A 717 727 Man_Eng qxp 9 30 2006 7 24 PM Page 96 ...

Reviews: