background image

Please read and save these instructions. Read carefully before attempting to assemble, install, operate or maintain the product described.
Protect yourself and others by observing all safety information. Failure to comply with instructions could result in personal injury and/or prop-
erty damage! Retain instructions for future reference.

Description

Air operated spray guns are designed
to perform a variety of painting, coat-
ing, and finishing applications using
the power of compressed air.

Safety Guidelines

This manual contains information that is
very important to know and understand.
This information is provided for SAFETY
and to PREVENT EQUIPMENT PROB-
LEMS. To help recognize this informa-
tion, observe the following symbols. 
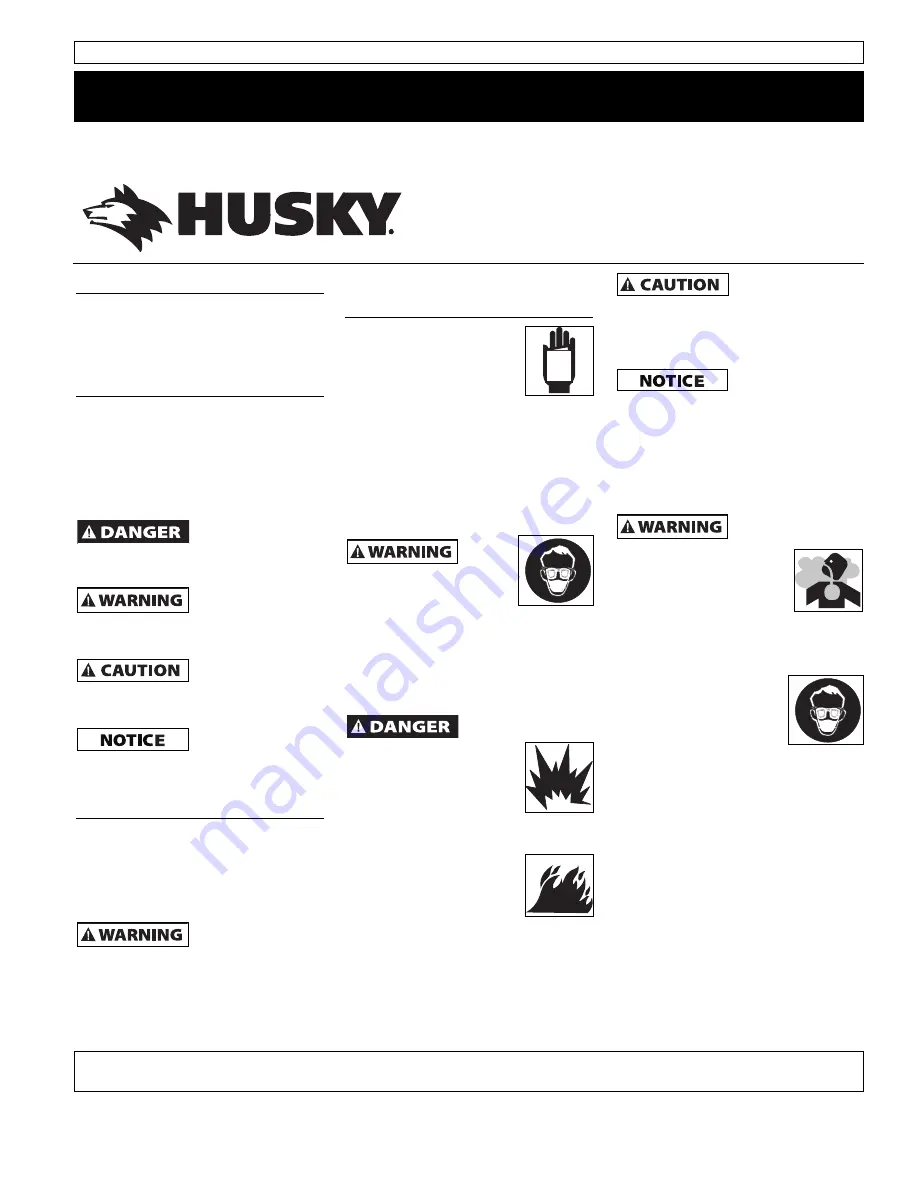
Danger indicates 
an imminently haz-

ardous situation which, if not avoided,
WILL result in death or serious injury.

Warning indicates 
a potentially haz-

ardous situation which, if not avoided,
COULD result in death or serious injury.

Caution indicates a 
potentially haz-

ardous situation which, if not avoided,
MAY result in minor or moderate injury.

Notice indicates 
important informa-

tion, that if not followed, may cause
damage to equipment.

Unpacking

After unpacking the product, inspect
carefully for any damage that may
have occurred during transit. Make
sure to tighten fittings, bolts, etc.,
before putting unit into service.

Do not operate 
tool if damaged

during shipping, handling or use.
Damage could result in bursting and
cause injury or property damage.

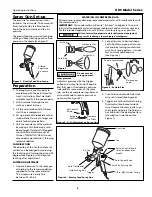
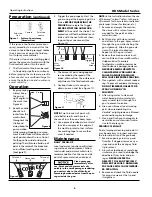
Operating Instructions

HDS Model Series

General Safety
Information

1. Read all manuals included

with this product careful-
ly. Be thoroughly familiar
with the controls and the
proper use of the equipment.

2. Follow all local electrical and safety

codes as well as the United States
National Electrical Codes 
(NEC) and Occupational Safety and
Health Act (OSHA).

CALIFORNIA PROPOSITION 65

You can

create dust when you cut,
sand, drill or grind materi-
als such as wood, paint,
metal, concrete, cement, or other
masonry. This dust often contains
chemicals known to cause cancer, birth
defects, or other reproductive harm.
Wear protective gear.
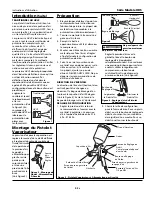
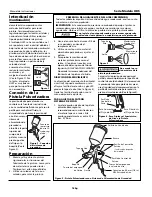
WORK AREA

Never spray closer than
25 feet to the compres-
sor! If possible, locate
compressor in separate
room. Never spray into
the compressor, compressor controls
or the motor.

Do not spray flammable
materials in vicinity of
open flame or near ignition
sources. Motors, electrical
equipment and controls
can cause electrical arcs that will ignite
a flammable gas or vapor. Never store
flammable liquids or gases in the vicini-
ty of the compressor.

Do not smoke or eat when spraying
paint, insecticides, or other flamma-
ble substances.

Keep hose away from sharp objects.
Bursting air hoses may cause injury.
Examine air hoses regularly and
replace if damaged. 

Always work in a clean environment.
To avoid injury and damage to the
workpiece, do not aim the spray gun
at any dust or debris.

Keep visitors away and NEVER allow
children or pets in the work area.
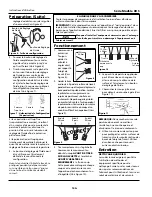
PERSONAL SAFETY

Use a face mask/respira-
tor and protective cloth-
ing when spraying.
Always spray in a well
ventilated area to pre-
vent health and fire hazards. Refer
to Material Safety Data Sheets
(MSDS) of spray material for details.

Always wear eye 
protection

Never use oxygen, corbon dioxide,
combustible gases or any bottled gas
as an air source for the spray gun.
Such gases are capable of explosion
and serious injury to persons.

Do not misuse this product. Excessive
exposure to vibration, work in awk-
ward positions, and repetitive work
motions can cause injury to hands and
arms. Stop using any tool if discom-
fort, numbness, tingling or pain occur,
and consult a physician.

Never aim or spray at yourself or any-
one else or serious injury could occur.

Do not spray acids, corrosive materi-
als, toxic chemicals, fertilizers or pes-
ticides. Using these materials could
result in death or serious injury.

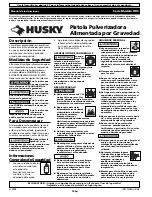
Gravity Feed Spray Gun

IN710100AV 6/08

© 2008

REMINDER: Keep your dated proof of purchase for warranty purposes! Attach it to this manual or file it for safekeeping.

See Warranty on page 6 for important information about commercial use of this product.

MANUAL

Summary of Contents for HDS Series

Page 1: ...oncrete cement or other masonry This dust often contains chemicals known to cause cancer birth defects or other reproductive harm Wear protective gear WORK AREA Never spray closer than 25 feet to the compres sor If possible locate compressor in separate room Never spray into the compressor compressor controls or the motor Do not spray flammable materials in vicinity of open flame or near ignition ...

Page 2: ...rocess where the air and paint are mixed just after leaving the nozzle This type of mix should be used for fast drying paints and when a high quality finish is needed Feed Method used to bring paint into the gun for spraying Fluid Control Knob Used to control the amount of paint being mixed with air Gravity Feed Method of paint feed similar to the siphon feed method However the cup is inverted to ...

Page 3: ...en If reduced air pressure is desired for some areas of the spray job use the air compressor regulator or air control knob to reduce pressure as necessary See Figure 4 2 Set pattern size to desired shape For full pattern open pattern con trol knob by turning counterclock wise For a round pattern turn pat tern control knob clockwise See Figure 6 3 Turn fluid control knob fully clock wise until clos...

Page 4: ...tely after use Paint and other materials dry quickly in the small passages rendering gun useless due to the difficulty of removing hardened paint from the pas sages inside the gun NOTE In the instructions below the use of the word solvent refers to the spe cific solvent for the material used exam ple lacquer thinner for lacquer etc 1 Remove and empty the canister then rinse with a solvent recom me...

Page 5: ...material at top or bottom of fluid tip 2 Loose air cap or dirty seat 3 Air cap plugged 1 Fan pattern open too far 2 Fluid turned in too far 3 Atomization air too high 1 Fan adjustment partially closed 2 Material too thick 3 Atomization pressure too low 1 Material level too low 2 Container tipped too far 3 Loose fluid inlet connection 4 Loose or damaged fluid tip seat 5 Dry or loose fluid needle pa...

Page 6: ...se neglect or failure to operate products in accordance with instructions shall also include the removal or alteration of any safety devices If such safety devices are removed or altered this warranty is void D Normal adjustments which are explained in the owner s manual s provided with the product E Items or service that are normally required to maintain the product i e o rings springs bumpers de...

Page 7: ...mètres du compresseur Si possible placer le compresseur dans un endroit séparé Ne jamais pulvériser vers le compresseur sur les commandes ou son moteur Ne pas pulvériser des matériaux inflammables près d une flamme ou autres sources d ignition Les moteurs l équipement électrique et commandes peuvent causer des arcs électriques qui peuvent allumer un gaz ou une vapeur inflammable Ne pas entreposer ...

Page 8: ...on Méthode pour amener la peinture au pistolet pour la vaporisation Alimentation Sous Pression Méthode d alimentation utilisant un godet ou un réservoir à peinture pour forcer la peinture à travers le pistolet Les capuchons d air de mélange interne ou externe peuvent être utilisés avec cette méthode La méthode à alimentation sous pression est généralement utilisée pour la pulvérisation de peinture...

Page 9: ...compresseur 4 Monter une cible en carton ou autre matériel pour faire l essai et régler afin d atteindre la configuration de pulvérisation désirée 5 Faire l essai de la consistance du matériel avec quelques passes sur la cible en carton Si le matérial est trop épais ajouter un peu de diluant DILUER AVEC SOIN Ne pas dépasser les recommandations de dilution du fabricant DIRECTION DE L ÉVENTAIL La di...

Page 10: ...et la relâcher AVANT D ARRêTER LE MOUVEMENT à la fin du coup Cette procédure mélangera chaque coup avec le prochain sans avoir l apparition de chevauchement ou d inégalités Voir Figure 10 4 La quantité de peinture appliquée peut être variée en changeant la vitesse du coup la distance de la surface et l ajustement du bouton de réglage de fluide 5 Chevaucher les coups juste assez pour obtenir une co...

Page 11: ...vers le pistolet tout en secouant vigoureusement le pistolet Essuyer l extérieur avec un chiffon imbibé de solvant Répéter cette opération jusqu à ce que le pistolet soit propre 3 Enlever le capuchon d air et le tremper dans un solvant jusqu à ce qu il soit propre au besoin utiliser un petit pinceau pour enlever les taches rebelles Des cure dents ou des petits pinceaux peuvent être utilisés pour n...

Page 12: ...ge 3 Soupape d air ou siège usé ou endom magé 4 Ressort de soupape d air cassé 5 Tige de soupape courbée 1 Écrou de presse étoupe trop serré 2 Buse de fluide usée ou endommagée 3 Matière étrange sur la buse 4 Ressort de l aiguille de fluide cassée 1 Pression de vaporisation trop élevée 2 Trop loin de la surface de travail 3 Coups incorrects arcs mouvement du pistolet trop rapide 1 Pas de pression ...

Page 13: ...e manque de faire fonctionner les produits selon les instructions comprend aussi l enle vage ou la modification de n importe quel appareil de sûreté Si ces appareils de sûreté sont enlevés ou modifiés la garantie sera annulée D Réglages normaux qui sont expliqués dans le s manuel s d utilisation accompagnant le produit E Articles ou services qui sont exigés pour l entretien du produit Joints toriq...

Page 14: ... aflilados Si éstas explotan le podrían ocasionar heridas Revise las mangueras con regularidad y reemplácelas si están dañadas Siempre trabaje en un área limpia Para evitar heridas o daños en la pieza de trabajo nunca apunte la pistola pulverizadora hacia áreas polvorientas o basuras Mantenga a los visitantes alejados del área de trabajo y NUNCA permita la presencia de niños o animales domésticos ...

Page 15: ...stra un compresor de aire de uso continuo sin tanque Con Purgador Sin Purgador Le indica si el flujo de aire a través de la pistola es continuo o sólo cuando se oprime el gatillo Mezcla Es la mezcla de pintura y aire para rociar Mezcla Externa Es el proceso de mezclar la pintura con aire fuera de la tapa de aire Este método se debe usar con pinturas que se secan rápidamente y cuando necesite un ac...

Page 16: ...o horizontal o vertical se puede cambiar con solo aflojar el anillo de retención y girar 90 grados la tapa de aire Vea la Figura 3 Apriete el anillo de retención con la mano después de ajustarlo PARA AJUSTAR EL PATRON SISTEMAS DE SIFON 1 Ajuste la presión de aire de la pistola pulverizadora según las recomendaciones suministradas con el material que va a rociar Esta presión generalmente es entre 2...

Page 17: ...er la pistola ANTES DE OPRIMIR EL GATILLO y deje de opri mirlo ANTES DE PARAR DE MOVERLA Este procedimiento le permitirá que el acabado sea parejo sin dejar rastros de donde se unen las diferentes manos de pintura Vea la Figura 10 4 La cantidad de pintura aplicada puede variar según la velocidad del movimiento la distancia entre la pistola y la superficie y los ajustes de la perilla de control de ...

Page 18: ... los orificios de la tapa de aire y la boquilla Si están obstruídos quítele los anillos en O y sumerja la tapa de aire o la boquilla en solvente 2 Puede utilizar un cepillo palillo u otro objeto similar para sacar la pintura seca de los orificios o ductos NUNCA USE OBJETOS DE METAL PARA LIMPIAR DUCTOS TALADRADOS A PRESICION SI ESTOS SE DAÑAN PODRIA AFECTAR EL ROCIO 3 Desconecte y revise la aguja d...

Page 19: ...co 1 El vástago de la válvula se atasca 2 La válvula de aire o el asiento están conta minados 3 La válvula de aire o el asiento están des gastados o dañados 4 El resorte de la válvula de aire está roto 5 El vástago de la válvula está torcido 1 La tuerca que sostiene el empaque está muy apretada 2 La boquilla está desgastada o dañada 3 La boquilla está sucia 4 El resorte de la aguja está roto 1 La ...

Page 20: ...ién debe incluir la desconexión o modificación de los instrumentos de seguridad Si dichos instrumentos de seguridad son desconectados la garantía quedaría cancelada D Los ajustes normales explicados en el los manual es suministrado s con el producto E Artículos o servicios normalmente requeridos para el mantenimiento del producto tales como anillos en O resortes amortiguadores defensas hojas de im...

Reviews: