background image

1

  Assembly

  Operation

  Customer Responsibilities

  Service and Adjustments

  Repair Parts

532175732     10.12.00  rad

PRINTED IN U.S.A.

954 12 00-93

WA

RN

IN

G

Do

 no

t o

pe

rat

e m

ow

er 

un

les

s c

on

tai

ne

r is

 pr

op

erl

yis

ns

tal

led

.C

on

tai

ne

r is

su

bje

ct 

to 

we

ar 

an

d d

eti

eri

ora

tio

n. 

Ch

ec

k b

ag

 fre

qu

en

tly.

 R

ep

lac

e w

he

n

cra

cke

d o

r d

am

ag

ed

. U

se

 on

ly 

a r

ec

om

me

nd

ed

 re

pla

ce

me

nt 

co

nta

ine

r.

OWNER’S MANUAL

Model No. CL36A

36 Inch Mower

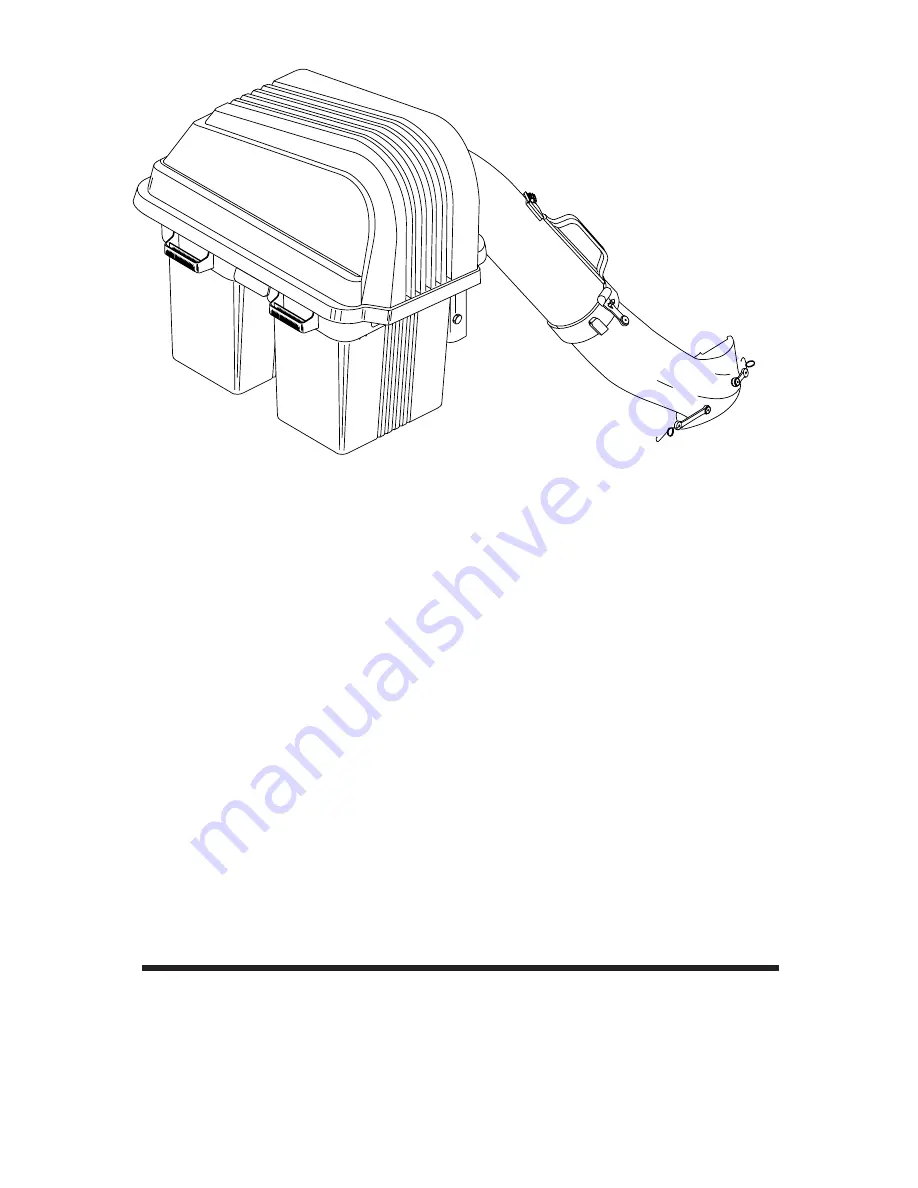
Grass Catcher

Summary of Contents for CL36A

Page 1: ...d de tierio ration Ch eck ba g fre qu en tly Re place wh en cracked or da mag ed Us e on ly a recommen de d replacem en t containe r WARNING Do no t op erate mow er un less containe r is prop erlyis nstalled Co ntaine r is subject to we ar an d de tierio ration Ch eck ba g fre qu en tly Re place wh en cracked or da mag ed Us e on ly a recommen de d replacem en t containe r OW N E R S M A N U A L M...

Page 2: ...es for Ride On Mowers IMPORTANT THIS CUTTING MACHINE IS CAPABLE OF AMPUTATING HANDS AND FEET AND THROWING OBJECTS FAILURE TO OBSERVE THE FOLLOWING SAFETY INSTRUCTIONS COULD RESULT IN SERIOUS INJURY OR DEATH SAFETY RULES DO NOT Do not turn on slopes unless necessary and then turn slowly and gradually downhill if possible Do not mow near drop offs ditches or embankments The mower could suddenly turn...

Page 3: ... children Mow up and down slopes 15 Max not across Remove obstacles such as rocks tree limbs etc Watch for holes ruts or bumps Uneven terrain could overturn the machine Tall grass can hide obstacles Use slow speed Choose a low gear so that you will not have to stop or shift while on the slope Avoid starting or stopping on a slope If tires lose traction disengage the blades and proceed slowly strai...

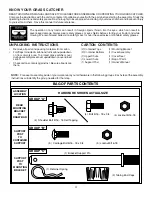
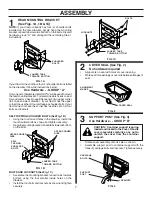
Page 4: ...packing materials from carton Foldflapstoinsideofcartonandturncartonupsidedown on floor of work area To protect grass catcher cover duringassemblyplacecoverupsidedownonoverturned carton Checkcartoncontentsagainstlist Besureallpartsare there CARTON CONTENTS 2 ContainerTops 2 ContainerBottoms 1 UpperChute 1 LowerChute 1 Support Post 1 Mounting Bracket 1 Cover Assembly 1 Cover Seal 1 Bag of Parts 1 O...

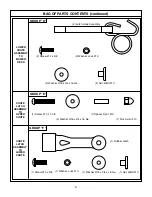
Page 5: ...16 x 3 4 x 16 Ga 1 Nut Acorn 10 1 Spacer Split 10 1 Rubber Latch LOWER CHUTE ASSEMBLY TO MOWER DECK GROUP F CHUTE LATCH ASSEMBLY TO LOWER CHUTE 2 Nut Weld 10 2 Washer Lock 10 2 Washer 3 16 x 3 4 x 16 Ga 2 Screw 10 x 5 8 2 Latch Hook Assembly 1 Nut Weld 10 1 Washer Lock 10 1 Washer 3 16 x 3 4 x 16 Ga 1 Screw 10 x 5 8 ...

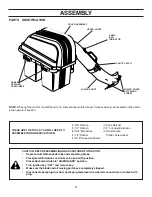
Page 6: ...e Place gearshift motion control lever in neutral N position Place attachment clutch in DISENGAGED position Turn ignition key OFF and remove key Make sure the blade and all moving parts have completely stopped Disconnect spark plug wire from spark plug and place wire where it cannot come in contact with plug PARTS IDENTIFICATION NOTE Whenrighthand R H andlefthand L H arementionedinthismanual itmea...

Page 7: ... on the drawbar follow the instructions below Use Hardware GROUP A OnlyonesetofhardwareinGROUP A willbeusedtomount therearmountingbracket Todeterminewhichsetiscorrect foryourtractor checktoseeifthereare 2 twouppercorner ribs on each side of drawbar If your tractor has the upper cornerribs usethe 4 fourselftappingshoulderbolts Ifyour tractor does not have the corner ribs use the set of 4 four bolts...

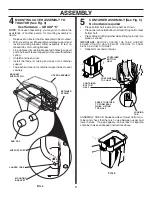
Page 8: ...e bottom half inside of top half as shown Placeonefootinsidebottomhalfandlifttophalftomeet bottom half Press halves tightly together while lifting top to lock into place as shown IMPORTANT BEFORE LOCKING THE TABS HOOKED EDGES ON BOTH HALVES MUST OVERLAP TO FORM SEAL AS SHOWN IN INSET Repeat for second container 5 PRESS TOGETHER TO FORM SEAL WHILE LIFTING TOP HALF CONTAINER BOTTOM HALF CONTAINER BO...

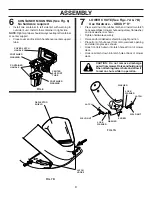
Page 9: ... e p l a c e m e n t c o n t a i n e r c r a c k e d o r d a m a g e d U s e o n l y a r e c o m m e n d e d r e p l a c e m e n t c o n t a i n e r ASSEMBLY CONTAINER MOUNTING See Fig 6 No hardware required Install one container to left side first with warning to outside of unit Install other container to right side NOTE Rightcontainershouldalwaysoverlapleftcontainer at center support Close cover...

Page 10: ...ower deck to its lowest cutting position Assembleupperchutebyinsertingcurvedendintohole in back of cover NOTE Handle carefully so as not to damage dump bag indicator Push in and turn upper chute until it is in line with lower chute Align the bosses on lower chute with alignment slots on upper chute and slide together Secure with rubber latch by hooking hole in latch over latch pin 9 HANDLE DUMP BA...

Page 11: ...ENT PARTS g Repeat for other container h Reinstall containers making sure right container overlaps left container at center support j Close cover and secure latch over center support tube Avoid cutting wet grass or in the morning while the dew is still heavy Grass clippings collected under these conditions tend to be sticky and adhere to the walls of the flow path causing clogging Your bagger is e...

Page 12: ...owerbladesmustbekeptsharp Replace bent or damaged blades See BLADE CARE instructions in your tractor owner s manual CAUTION BEFORE PERFORMING ANY MAINTENANCE SERVICE OR ADJUST MENTS Depress clutch brake pedal fully and set parkingbrake Placegearshift motioncontrolleverinneu tral N position Placeclutchcontrolin DISENGAGED po sition Turn ignition key to OFF position Makesurebladesandallmovingpartsha...

Page 13: ...13 SERVICE NOTES ...
Page 14: ... e q u e n t l y R e p l a c e w h e n c r a c k e d o r d a m a g e d U s e o n l y a r e c o m m e n d e d r e p l a c e m e n t c o n t a i n e r WAR NING Do no t op era te mo we r un les s conta ine r is pro pe rlyis nstalled Co nta ine r is subje ct to we ar an d de tierio rat ion Ch eck ba g fre qu en tly Re pla ce wh en cra cke d or da ma ge d Us e on ly a rec om me nd ed rep lac em en t co...

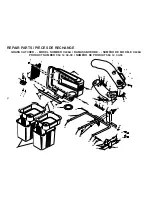
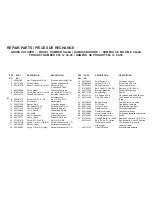
Page 15: ... KEY PART DESCRIPTION DESCRIPTION NO NO 2 53269180 Nut Crownlock 10 24 Écrouauto serrant 10 24 3 532127533 Screen Cover Grillage de couvercle 4 532161314 Cover Asm Incl 3 38 39 Couvercle Ens Y combris 3 38 39 5 532128598 Chute Upper Glissièresupérieure 6 818021008 Screw Special 10 14x1 2 Vis spéciale 10 14x1 2 7 532140572 Dump Bag Indicator Indicateur de sac de déchargement 8 532087175 Screw 10 24...

Reviews: