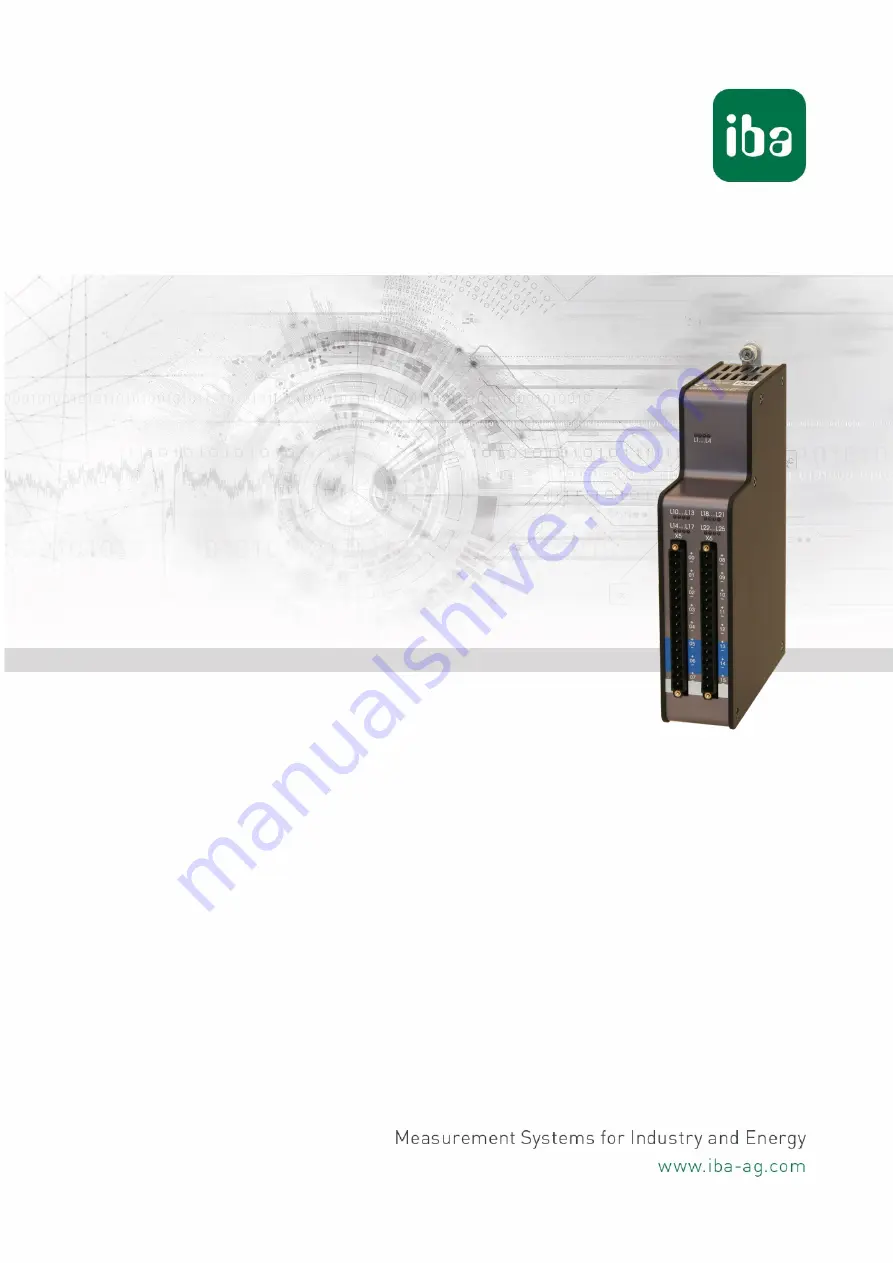
background image


ibaMS16xDI-24V/-220V 

Input module for digital signals 


Manual 

Issue 1.4 

Summary of Contents for ibaMS16-DI-220V Series

Page 1: ...ibaMS16xDI 24V 220V Input module for digital signals Manual Issue 1 4 ...

Page 2: ...d registered trademark of the Microsoft Corporation Other product and company names mentioned in this manual can be labels or registered trademarks of the corresponding owners Certification The product is certified according to the European standards and directives This product meets the general safety and health requirements Further international customary standards and directives have been obser...

Page 3: ...necting 11 6 3 Dismounting 11 7 Device description 12 7 1 Views 12 7 2 Indicator elements 13 7 2 1 Operating status 13 7 2 2 Status of digital inputs 13 7 3 Digital inputs X5 X6 14 7 3 1 Connection diagram Pin assignment 14 7 3 2 Debounce filters 16 8 Start up Update 18 8 1 Auto Update 18 8 2 Overall Release Version 18 8 3 Update 18 8 3 1 Update via Web Interface 19 8 3 2 Update via ibaPDA 19 8 4 ...

Page 4: ...V 4 Issue 1 4 9 2 Configuration in ibaLogic V5 25 9 2 1 Configuring signals 25 9 2 2 Configuring the debounce filter 27 10 Technical Data 29 10 1 Main data 29 10 2 Digital inputs 30 10 3 Dimensions 31 11 Support and contact 32 ...

Page 5: ... iba Software Manuals The documentation of the iba modular system comprises the following manuals Central units The manuals of the ibaPADU S IT 2x16 central units and ibaPADU S CM contain the following information Scope of delivery System requirements Description of the device Mounting Demounting Start up Configuration Technical data Accessories Modules The manuals for the single modules contain s...

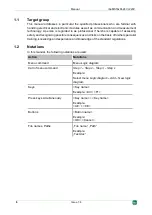
Page 6: ...possible consequences and risks on the basis of his her specialist training knowledge and experience and knowledge of the standard regulations 1 2 Notations In this manual the following notations are used Action Notations Menu command Menu Logic diagram Call of menu command Step 1 Step 2 Step 3 Step x Example Select menu Logic diagram Add New logic diagram Keys Key name Example Alt F1 Press keys s...

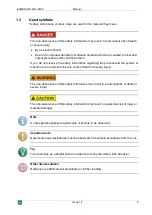
Page 7: ...process and the system or machine to be controlled there is a risk of death or severe injury The non observance of this safety information may result in a potential risk of death or severe injury The non observance of this safety information may result in a potential risk of injury or material damage Note A note specifies special requirements or actions to be observed Important note Note if some s...

Page 8: ...is backplane not only the CPU but also up to 4 input output modules The power supply of the I O modules is provided by the backplane bus The modules offer 16 digital inputs In brief I O module for the iba modular system 16 digital inputs galvanically isolated Input level 24 V or 220 V nominal voltage Sampling rate up to 40 kHz freely adjustable Debounce filter Rugged design easy mounting Certifica...

Page 9: ...apturing of measuring data Automation of industrial plants Applications with iba products ibaPDA ibaLogic etc The device is only to be applied as shown in the Technical Data 4 2 Special safety instructions Strictly observe the operating voltage range see Technical Data Never use damaged measuring cables Measuring cables must NOT be attached or detached to from the device under voltage Modules must...

Page 10: ... ibaPADU S CM version 02 10 001 or later Backplane unit e g ibaPADU B4S 5 2 Software ibaPDA version 6 34 0 or later ibaLogic V5 version 5 0 2 or later Note The use of ibaLogic V5 requires the central unit ibaPADU S IT 2x16 If the module is used with the predecessor ibaPADU S IT 16 only ibaLogic V4 can be used ...

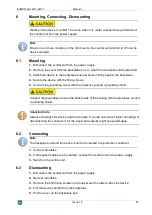
Page 11: ... the protective ground grounding shield Connect the grounding screw on the bottom side of the housing with the protective ground grounding shield Important note Always screw tight the device and the modules If you do not screw it tight connecting or disconnecting the connectors for the inputs and outputs might cause damages 6 2 Connecting Note The backplane unit and the device must be connected to...

Page 12: ...3 4 5 Fixing screws Operating status indicators L1 to L4 Status LEDs L10 to L25 of the digital inputs 00 to 15 Connector X5 for digital inputs 00 to 07 Connector X6 for digital inputs 08 to 15 Figure 1 Front view 6 Grounding screw only with ibaMS16xDI 220V Figure 2 Bottom view ...

Page 13: ...scription L1 green Flashing On Off Device is working Device is not working switched off L2 yellow On Access to the backplane bus L3 white L4 red Off Flashing Normal status no faults Device failure Important note When the LED L4 indicates a failure please contact the iba Support 7 2 2 Status of digital inputs LED per channel Status Description L10 L25 green Off No signal logical 0 On Signal ok logi...

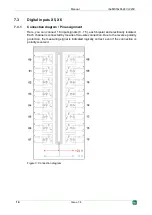
Page 14: ...t Here you can connect 16 input signals 0 15 each bipolar and electrically isolated Each channel is connected by means of two wire connection Due to the reverse polarity protection the measuring signal is indicated logically correct even if the connection is polarity reversed Figure 3 Connection diagram ...

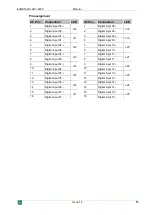
Page 15: ... Digital input 10 L20 6 Digital input 02 6 Digital input 10 7 Digital input 03 L13 7 Digital input 11 L21 8 Digital input 03 8 Digital input 11 9 Digital input 04 L14 9 Digital input 12 L22 10 Digital input 04 10 Digital input 12 11 Digital input 05 L15 11 Digital input 13 L23 12 Digital input 05 12 Digital input 13 13 Digital input 06 L16 13 Digital input 14 L24 14 Digital input 06 14 Digital inp...

Page 16: ... value between 1µs 65535µs Off The measured input signal is transferred without filtering Stretch rising edge With the first rising edge the input signal red switches to logical 1 and keeps this value for the defined debounce time Thereafter the channel is transparent again and waits for the next rising edge Figure 4 Debounce filter Stretch rising edge Stretch falling edge With the first falling e...

Page 17: ...waits for the next edge be it rising or falling Figure 6 Debounce filter Stretch both edges Delay both edges Beginning with the first edge the output signal purple blocks the input and keeps the logical value of the edge for the duration of the defined debounce time Thereafter the channel is transparent again directly assumes the logical level of the input signal and waits for the next edge be it ...

Page 18: ...dules developed up to the date of release of this firmware and the corresponding software versions If a module cannot be detected yet i e it is more recent than the firmware version of the CPU this module is ignored and outlined in red on the Web interface In this case a new update file has to be installed for the overall release version If you want to get the current update file please contact th...

Page 19: ...date Figure 8 Update via Web interface 8 3 2 Update via ibaPDA Open the ibaPDA I O Manager and choose your iba modular system in the tree structure On the Diagnostics tab click on the Write firmware button and choose the padusit2x16_v xx yy zzz iba or paduscm_v xx yy zzz iba update file You start the update by clicking on OK Figure 9 Update via ibaPDA Important note When updating the iba modular s...

Page 20: ...also the figure above 8 4 2 Webinterface On the module Website general information about the module is only displayed You cannot change the values Important note The Web interface is only available with the central unit ibaPADU S IT 2x16 8 4 2 1 info tab The info tab displays general information and technical specifications of the I O module Figure 10 info tab 8 4 2 2 notes tab On the notes tab yo...

Page 21: ...ibaMS16xDI 24V 220V Manual Issue 1 4 21 Figure 11 notes tab ...

Page 22: ...tic detection of the module Note The automatic detection requires a bidirectional FO connection from the ibaPDA computer to the central unit Other documentation If you want to install the iba modular system at first refer to the manual of the central unit chapter Configuration with ibaPDA If the module is detected click on the module in the signal tree and the General tab appears Note The menu int...

Page 23: ...16 e g ibaLogic then ibaPDA cannot modify the configuration of the modules and signals In this case the configuration is set by the embedded application The following entries can be displayed ibaPDA When ibaPDA is displayed an embedded application has not been started and the configuration can be set by ibaPDA Embedded application When embedded application is displayed the configuration of the mod...

Page 24: ...onal comments click on the icon in the Name field Debounce filter In the dropdown menu you can choose the operating mode for the debounce filter You have got the following settings at your disposal Off stretch rising edge stretch falling edge stretch both edges delay both edges See chapter 7 3 2 Debounce time µs Here you can define the debounce time in µs Active Enabling disabling the signal ...

Page 25: ...ations You find the basic way of proceeding description in the separate ibaPADU S IT 2x16 manual This manual describes only the signals belonging to this module 9 2 1 Configuring signals The signals can be configured in the I O Configurator of ibaLogic V5 Open the I O Configurator in the Tools I O Configurator menu When you click on the Update hardware button then ibaLogic detects the module Figur...

Page 26: ...ed as output or input resources Signal Description Inputs DI_24V_Ch 00 15 Digital input signals StatusIn Status information about the plugged input module for output module without function 0 Module not initialized 1 Module running 1 Mistake e g module cannot be initialized StatusOut Status information about the plugged module for input module without function 0 Module not initialized 1 Module run...

Page 27: ...nals DebounceTimeUsx debounce time for the single digital signal First drag the output signals defined in the I O configurator to the margin of the programming surface in this example X1_DebType_Ch00 and X1_DebTime_Ch00 for the digital input 0 Figure 17 Output signal on the margin of the programming surface Create a new Off task connector in the programming window assign a meaningful name to the c...

Page 28: ...amming surface Create a new OTC assign a meaningful name e g debounce time and choose Input as type Enter the debounce time in µs in the Default value field The value can be 65535 at max Now connect the OTC and the signal on the margin of the programming surface Figure 19 Connecting Off task connector ...

Page 29: ...on Storage transport 2 F to 122 F 0 C to 50 C 13 F to 158 F 25 C to 70 C Installation position Vertical plugged into backplane bus Installation height Up to 6562 ft 2000 m Cooling Passive Humidity class F no condensation Protection class IP20 Certification Standards EMC IEC 61326 1 FCC part 15 class A EMC IEC 61326 1 FCC part 15 class A Safety EN 61010 1 MTBF1 2 460 501 hours 280 years Dimensions ...

Page 30: ... Channel housing power supply AC 2 5 kV AC 2 5 kV Connector type 2 x 16 pin multi pin connector clamp type terminal 0 2 mm2 to 2 5 mm2 screw connection included in delivery 2 Hardware version A5 or higher Supplier s Declaration of Conformity 47 CFR 2 1077 Compliance Information Unique Identifier 10 124200 ibaMS16xDI 220V 10 124201 ibaMS16xDI 24V Responsible Party U S Contact Information iba Americ...

Page 31: ...ibaMS16xDI 24V 220V Manual Issue 1 4 31 10 3 Dimensions Figure 20 Module dimensions ibaMS16xDI 24V dimensions in mm Figure 21 Module dimensions ibaMS16xDI 220V with groundig screw dimensions in mm ...

Page 32: ...the product Contact Headquarters iba AG Koenigswarterstrasse 44 D 90762 Fuerth Germany Phone 49 911 97282 0 Fax 49 911 97282 33 E mail iba iba ag com Mailing address iba AG Postbox 1828 D 90708 Fuerth Germany Delivery address iba AG Gebhardtstrasse 10 DE 90762 Fuerth Germany Regional and Worldwide For contact data of your regional iba office or representative please refer to our web site www iba a...

Reviews: