background image

򔻐򗗠򙳰

IBM

®

Flex System Enterprise Chassis Airborne Contaminant

Filter

The airborne contaminant filter is designed to filter out contaminants that can affect the operation of a
chassis. The option includes the parts that are required to install the filter on your chassis in either a
low-profile or extended-profile configuration.

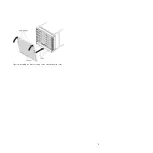
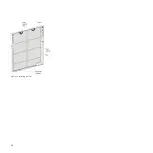
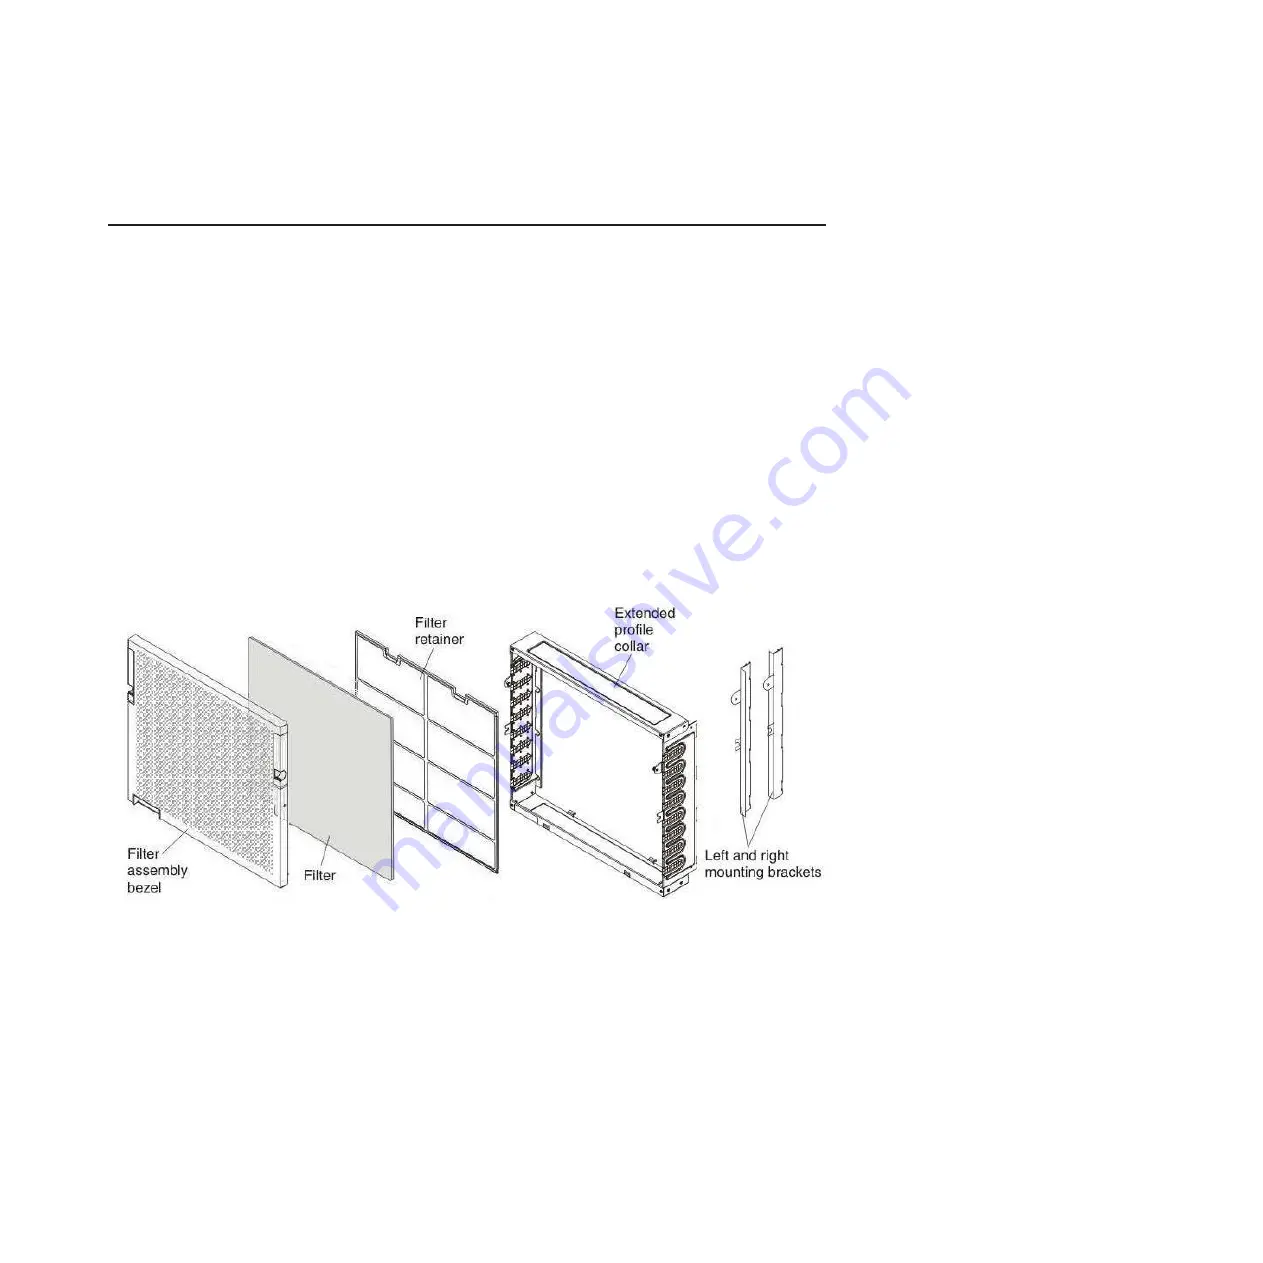
The following parts are included in the airborne contaminant filter option:

v

Filter assembly that is used for the low-profile and the extended-profile configurations. It consists of
the following parts:
– Filter assembly bezel
– Filter
– Filter retainer

v

Extended-profile collar that is used for the extended-profile configuration

v

Low-profile mounting brackets that are used for the low-profile configuration

Note:

In addition to the listed parts, a size P2 crosshead (Phillips) screwdriver is required for the
installation.

Figure 1. Airborne contaminant filter option parts

Summary of Contents for Flex System Enterprise Chassis Airborne Contaminant...

Page 1: ...are included in the airborne contaminant filter option v Filter assembly that is used for the low profile and the extended profile configurations It consists of the following parts Filter assembly bezel Filter Filter retainer v Extended profile collar that is used for the extended profile configuration v Low profile mounting brackets that are used for the low profile configuration Note In addition...

Page 2: ...profile filter The low profile filter configuration does not allow cables to be routed through it however it does allow a rack door to be closed Complete the following steps to install the low profile filter configuration 1 Remove the left and right screw cover bezels from the front of the chassis and store them for future use 2 Remove the eight screws that secure the chassis to the rack 3 Align t...

Page 3: ...on the front of the filter assembly until the slide latches click into place Check the hooks on the bottom of the filter assembly to make sure that they are still in the slots on the bottom of the chassis Figure 3 Installing the left and right mounting brackets for the low profile filter configuration Figure 4 Installing the filter assembly for the low profile filter 3 ...

Page 4: ... on the bottom of the chassis 4 Tighten the eight captive screws to secure the extended profile collar to the rack 5 Route cables through the openings in the side of the extended profile collar as needed Use the following guidelines when you route cables v Do not bend fiber optic cable beyond its limited specifications v Do not run cables in front of other components v Label all cables so that the...

Page 5: ...Figure 6 Installing the filter assembly on the extended profile collar 5 ...

Page 6: ...inant filter assembly 2 Rotate the airborne contaminant filter assembly down and remove the hooks from the slots on the chassis or extended profile collar Store the filter assembly for future use 3 Loosen the four captive screws on the left mounting bracket and slide the left mounting bracket out of the chassis and store it for future use 4 Loosen the four captive screws on the right mounting brac...

Page 7: ...inant filter assembly 2 Rotate the chassis airborne contaminant filter assembly down and remove the hooks from the slots on the chassis or extended profile collar Store the filter assembly for future use 3 Loosen the four captive screws on the left side of the extended profile collar 4 Loosen the four captive screws on the right side of the extended profile collar Figure 8 Removing the low profile...

Page 8: ...he bottom of the extended profile collar from the slots on the bottom of the chassis Store the extended profile collar for future use 6 Install the left and right screw cover bezels that you previously removed and stored Figure 10 Removing the extended profile collar 8 ...

Page 9: ...ace the airborne contaminant filter media in the low profile or extended profile configuration 1 Push down on the slide latches on both sides of the filter assembly 2 Rotate the filter assembly down and remove the hooks from the slots 3 Turn the blue filter retainer clips to the open position and remove the filter retainer and filter 4 Discard the old filter and place a new filter on the filter as...

Page 10: ...Figure 12 Installing the filter 10 ...

Page 11: ...harged for the service v Field replaceable unit FRU FRUs must be replaced only by a trained service technician unless they are classified as customer replaceable units CRUs Tier 1 customer replaceable unit CRU Replacement of Tier 1 CRUs is your responsibility If IBM installs a Tier 1 CRU at your request without a service contract you will be charged for the installation Tier 2 customer replaceable...

Page 12: ...the International Business Machines Corp registered in many jurisdictions worldwide Printed in USA Copyright IBM Corporation 2012 US Government Users Restricted Rights Use duplication or disclosure restricted by GSA ADP Schedule Contract with IBM Corp 1P P N 88Y7583 ...

Reviews: