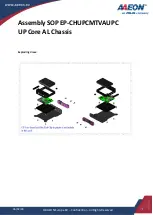
background image


RACK-360 CHASSIS 

USER’S MANUAL  

Ver  1.x 


Summary of Contents for RACK-360

Page 1: ...RACK 360 CHASSIS USER S MANUAL Ver 1 x ...

Page 2: ...nual may be reproduced copied or translated without prior notice to ICP Electronics Inc The information provided in this document is for reference only We do not assume any responsibility arising out of the application of the products This manual is subject to change without any notice Rack 360 ICP are trademark of ICP Electronics Inc ...

Page 3: ...1 2 Product Specifications 1 3 Dimensions Chapter 2 System Setup 2 1 The Front Panel of Rack 360 2 2 Removing the chassis cover 2 3 Disk Drives Installation 2 4 The Card Clamp Installation 2 5 Replacing the Filter 2 6 The Power Supply Installation Appendix A Passive Backplane ...

Page 4: ...ibration dust and wide range of temperature in Industrial environments A lockable door protects drives and switches from unauthorized misuse and particle One cooling fan in the front for optimum cooling system 1 2 Product Specifications General specification Construction Heavy duty steel Disk Driver Two 5 25 drive and three 3 5 drive spaces Cooling Fan 12 cm Ball bearing fan Indicator Three LEDs t...

Page 5: ...emperature 0 50 C Relative Humidity 5 95 Relative Vibration 5 17Hz 0 1 double amplitude displacement 17 640Hz 1 5G acceleration peak to peak Shock 10G acceleration peak to peak EMI Meets CE FCC Cooling Fan One 12 cm Front Ball Bearing Cooling Fan Drive Capacity Two 5 25 drive and three 3 5 drive spaces ...

Page 6: ...5 1 3 Dimensions The dimensions of Rack 360 481mm W x 177mm H x 453mm D 481 177 101 5 414 5 33 5 33 5 426 5 450 3 50 438 88 5 ...

Page 7: ...w the status of Power HDD and Keyboard lock 2 2 Removing the chassis cover The cover is mounted by four screws at each side of the chassis Please remove the screws first and then slide the cover to the rear of the chassis 2 3 Disk Drives installation To install the disk drives please follow the below steps 1 Open the front lockable door in the front panel 2 Remove the disk drive bay 3 Attach the F...

Page 8: ...you are finished put the screw on the other side of the Card Clamp and fasten them 2 5 Replacing the Filter The filter of the Rack 360 is located at the front end of the chassis The filter should be removed and cleaned at least once a month to achieve optimum performance The filter can be removed simply by opening the front lockable door and pulling out the filter bracket 2 6 The Power Supply Inst...

Page 9: ...White Black Brown Blue Black White 1 7 P9 MODEL PX 14S VER E 3 3 3 1 3 2 3 4 P8 P9 311 43 246 33 211 91 140 64 95 10 0 00 18 03 0 00 264 39 255 58 175 39 165 33 0 00 299 64 249 71 178 14 140 64 Optional Backplane PCI 14S PCI 14S2 PCI 14S3 BP 14S BP 14SD BP 14S2 PX 14S PX 14S2 and IP 14S ...

Reviews: