background image

Betriebsanleitung

KÜHLVITRINEN

Original

21A

Summary of Contents for AKV Series

Page 1: ...Betriebsanleitung K HLVITRINEN Original 21A...

Page 2: ...Technische nderungen vorbehalten G ltig ab Juli 2021 2...

Page 3: ...gt durch Sonderbau sind noch viele andere Ausf hrungen unserer Produkte m glich Betriebsanleitung Einbauanleitung Copyright 2021 AKE Ausseer K lte und Edelstahltechnik GmbH Alle Rechte vorbehalten Bei...

Page 4: ...ATIONEN 28 2 3 SICHERHEITSHINWEISE AM GER T 29 2 3 1 ELEKTRISCHE HINWEISE 30 2 3 2 K LTETECHNISCHE HINWEISE 31 2 4 MONTAGE UND EINBAUANLEITUNG 32 2 4 1 ERSTE SCHRITTE 32 2 4 2 MONTAGE DES GER TS BER 2...

Page 5: ...HLUNTERBAUS 70 4 1 8 REINIGUNG DER LADE TORTENAUSZUG INKL VERDAMPFEREINHEIT 71 4 1 9 REINIGUNG DES SCHNEIDBRETTS 72 4 1 10 REINIGUNG DES BOTTLE SLIDER FLEXROLLER 73 4 1 11 REINIGUNG ABKLAPPBARE HEISS...

Page 6: ...Inbetriebnahme Bedienung und Pflege Die Nichteinhaltung der vorher genannten Punkte kann zu Garantie Gew hrleistungs und Produkthaftungsausschl ssen aber auch zu Sch den und Sicherheitsm ngeln f hren...

Page 7: ...f r geschlossene Vitrinen GN GASTRO NORM EN BACKNORM EURONORM Gastronorm 2 bis 5 Schalen bis max 150 mm Euronorm 1 bis 4 Bleche DIE GR SSEN IM EINSATZ rund eckig schr g PRO eckig PRO rund bei Isolier...

Page 8: ...te mit Fu gestellen in der H he variabler Stellf e bauseitig vollst ndig verkleidet werden HINWEIS 530 mm 370 mm 700 mm 370 mm 870 mm 370 mm optional flache Innenwannen mit 195 mm m glich DIE H HEN G...

Page 9: ...leer oder HC high capacity b G kundenseitig geschlossen oder O offen oder A Auftisch c E eckig oder S schr g 10 oder R rund ddd Nummer zwischen 50 und 400 Ger tebreite ee leer oder Nummer zwischen 45...

Page 10: ...ng bez glich der richtigen Installation In betriebnahme Betrieb Wartung und Montage des Ger tes nicht autorisierte mechanische oder technische nderungen am Ger t unzureichende Wartung der Nutz und Ver...

Page 11: ...eile E Mail webshop ake at Webshop Ersatzteile Onlinekatalog https shop ideal ake at ersatzteilshop Verf gbarkeit der Ersatzteile 8 Jahre nach Inverkehrbringung des letzten St ckes der Modellgruppe Ga...

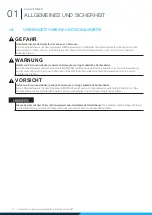
Page 12: ...dem Signalwort WARNUNG weist auf eine gef hrliche Situation hin die eine Auswirkung auf die Gesundheit von Personen haben kann Das Nichtbeachten dieser Sicherheitshinweise kann zu schweren Verletzung...

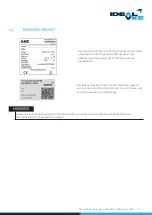
Page 13: ...n der Abdeckung der Steuerung oder im Unterbau nahe des Steuerkastens Das Ger t ist zus tzlich durch das AKE Pr fzeichen gekenn zeichnet Das AKE Pr fzeichen befindet sich am Unterbau oder an der Steue...

Page 14: ...n oder explosiven Produkte im Ger t oder in deren N he Das Ger t muss bei der Montage bzw beim Einbau ausreichend verkleidet werden damit kein Kontakt mit spannungsf hrenden Teilen m glich ist Die Ein...

Page 15: ...an der Vorder und R ckseite der Ger te sind frei zu halten Die Mindestabst nde zu anderen Ger ten m ssen eingehalten werden Es ist Sorge zu leisten dass die Luftzirkulation ungehindert erfolgt Bei ein...

Page 16: ...ingend einzuhalten Diese Spezifikationen sind unter anderem Umgebungs temperatur Beschaffenheit der Einbauumgebung sowie zu verwendende Anschl sse HINWEIS Die Ger te sind speziell f r den Einbau in Le...

Page 17: ...lten Nur unterwiesenes Personal darf das Ger t bedienen und reinigen Nur vom Hersteller autorisiertes fachkundiges Personal darf Wartungs und Reparaturarbeiten durchf hren Beachten Sie unbedingt die b...

Page 18: ...t oder zugedeckt werden Lebensmittel d rfen die W nde des Ger tes nicht ber hren oder den Luftstrom blockieren Das Ger t darf nicht au erhalb von Geb uden betrieben werden Sch tzen Sie das Ger t vor d...

Page 19: ...ng k nnen zum Verderben der eingebrachten Ware f hren c Nichtzutreffend d Nichtzutreffend e Siehe Kapitel 2 4 Siehe Kapitel 4 f Wird die Verfl ssigerspirale nicht 1x pro Jahr gereinigt f hrt dies zu e...

Page 20: ...r cken der Ger te ist nicht zul ssig Ziehen Sie gegebenenfalls eine weitere Person zur Einweisung hinzu Tragen Sie bei Montage und Verladet tigkeiten Schutzhandschuhe und Sicherheitsschuhe WARNUNG Que...

Page 21: ...ie mit Glas hantieren WARNUNG Diverse Gefahren beim Entsorgen diverser K ltemittel Tragen Sie beim Entsorgen von K ltemittel Propan R404A R134A etc Schutzhandschuhe und Schutzbrille Beim Entsorgen des...

Page 22: ...n und Sicherheitsschuhe Tragen Sie bei Montage und Verladet tigkeiten und bei T tigkeiten mit K ltemittel laut EN 378 3 Sicherheitshandschuhe Tragen Sie beim Entsorgen des K ltemittels und von be sch...

Page 23: ...teilen W nde andere Maschinen bei Positionierung der Ger te sowie Quetschgefahr zwischen Palette und Untergrund beim Absetzen Halten Sie sich und andere Personen von der Gefahrenstelle fern Ziehen Sie...

Page 24: ...ze sind zu beachten WARNUNG Diverse Gefahren beim Entsorgen von besch digten Bauteilen Komponenten Tragen Sie beim Entsorgen von besch digten Bauteilen Komponenten Schutzhandschuhe Entsorgen Sie besch...

Page 25: ...Technische nderungen vorbehalten G ltig ab Juli 2021 25 NOTIZEN...

Page 26: ...Frontglas mit Griffleiste modellabh ngig mit Gasdruckd mpfer unterschiedliche Ausf hrungen m glich Easy Change Funktion wahlweise offener oder geschlossener Betrieb Entnahmeklappe SoftClose Entnahmek...

Page 27: ...E R S E I T E 2 Zentralgek hlt nicht vorhanden Waterloop unterschiedliche Ausf hrung NR Benennung 1 Schiebet ren mit Griff und Verriegelung 2 Beleuchtungstr ger inkl Leuchtmittel 3 Seitenglas rechts...

Page 28: ...reiber Empfohlen IEC 61770 2008 NORMEN 1717 2008 04 01 Kondensat ber Siphon direkt in das bauseitige Abwassersystem DN32 ber die Hei gasverdunstung ber die Tauwasserschale manuelle Entleerung elektris...

Page 29: ...glich durch neue Aufkleber zu ersetzen Die Lesbarkeit und die Vollst ndigkeit m ssen in regelm igen Abst nden kontrolliert werden 2 3 SICHERHEITSHINWEISE AM GER T Piktogramme Beschreibungen Piktogram...

Page 30: ...Ger te werden standardm ig mit einem 1 5 Meter langen Anschlusskabel mit Schutzkontaktstecker geliefert Der Anschluss erfolgt an ein Wechselstromnetz mit einer Nennwechselspannung und Frequenz von 230...

Page 31: ...K lte kreislauf mit K ltemittel gef llt Vitrinen mit Expansionsventil und solche ab einer be stimmten Gr e ver f gen ber ein Schauglas mit Feuchteindikator zur Kontrolle im Servicefall dieses befindet...

Page 32: ...nten ist ratsam Zum Entfernen der Transportverpackung ben tigen Sie Folgendes mindestens zwei Personen Werkzeug Akkuschrauber oder Kreuzschraubendreher Schneidewerkzeug Schere oder Messer Kippgefahr d...

Page 33: ...rch autorisierte K ltefachbetriebe und Fachpersonal ausge f hrt werden Elektrische Installationen d rfen nur von einem autorisiertem Fachpersonal durchgef hrt werden Sie m ssen sicher gehen dass geeig...

Page 34: ...gselektronik verbunden Das Bedienteil ist abnehmbar und kann in der M belfront montiert werden M gliche Ausf hrungen ST501 Das Bedienteil ist standardm ig mit einem 1 5 m langen Datenkabel mit der Lei...

Page 35: ...uchsverschl ssen Siphon ausgestattet sodass lediglich die Abwasserverbindungen oder externe Tauwasserschalen entsprechend den rtlichen Gegebenheiten installiert werden m ssen Es muss sichergestellt we...

Page 36: ...tionieren und Luftzirkulation zu vermeiden Begriffserkl rung Luftleitblech Zuluft Abluft 2 7 BE UND ENTL FTUNG Standardm ig werden die Ger te mit Bel ftung an der Bedienseite und Abluft an der Kundens...

Page 37: ...e Vermeiden Sie dass die warme Abluft vom Aggregat wieder angesaugt wird Die Luft ffnung der Verkleidung muss weniger als 5 mm vom Kondensator entfernt sein HINWEIS Schmaler Spalt zwischen Kondensator...

Page 38: ...k f r das jeweilige Modell eingestellt W hrend dieser Zeit leuchtet auf dem Display links die mittlere LED Anzeige Abtauung Nach erfolgter Abtauung startet der K hlmodus automatisch Abtauautomatik 2 8...

Page 39: ...Technische nderungen vorbehalten G ltig ab Juli 2021 39 NOTIZEN...

Page 40: ...che l welches sich beim Transport verlagert haben k nnte wieder zum Verdichter zur cklaufen kann gilt f r steckerfertige Ger te Das Ger t wird vor Auslieferung vorgereinigt Es wird jedoch empfohlen da...

Page 41: ...Bevor Sie das Ger t mit Ware best cken warten Sie bis die gew nschte eingestellte Temperatur erreicht ist HINWEIS TASTE BEZEICHNUNG FUNKTION 1 K hlung Anzeige rot aktiv 2 Abtauung Anzeige rot aktiv 3...

Page 42: ...ausgang Licht 5 RTC Uhr Anzeige 6 Alarm 7 Ziffern TASTE BEZEICHNUNG FUNKTION 1 EIN AUS Taste Einschalten des Ger tes 2 Programmiertaste Anzeige Einstellung von Parametern etc 3 Lichttaste Abtautaste E...

Page 43: ...arm quittieren Sollwerteinstellung ca 2 Sekunden halten 4 MEN EXIT Ger teeinstellungen Men punkt schlie en 5 LICHT Licht an aktiv Licht aus inaktiv je nach Modell dimmbar ca 4 Sekunden halten 6 STAND...

Page 44: ...n durch den Lieferanten oder Fachh ndler erfolgen Achten Sie bei der Wahl der Innentemperatur auf die Umgebungsbedingungen Eine gro e Temperaturdifferenz zwischen Innen und Au entemperatur in Verbindu...

Page 45: ...Erreichen der Sollwert Temperatur m glich Dies wird einige Zeit erfordern Der K hlstellenregler ist korrekt eingestellt und betriebsbereit Kontrollieren Sie nach erfolgter Installation den Parameter H...

Page 46: ...maximale Tragkraft der Einlegeb den und Borde Beladung Borde siehe Stapelgrenze Umrissskizze der dazugeh rigen Modellgruppe Beladung Einlegeboden siehe Stapelgrenze Umrissskizze der dazugeh rigen Mode...

Page 47: ...dieser Aufkleber beim Hersteller nachzuordern und am Ger t wieder anzubringen 3 3 1 STAPELGRENZEN UMRISSSKIZZEN Die angef hrten Umrissskizzen mit festgelegten Stapelgrenzen Beladungsgrenzen beziehen...

Page 48: ...70 Gastro G 70 KL BAK G 70 KGW G 70 KGU G 70 30 300 115 115 85 30 300 115 115 85 30 300 115 115 85 30 300 115 115 85 30 300 115 115 85 30 300 115 115 85 30 300 115 115 85 30 300 115 115 85 EK014324 ma...

Page 49: ...SL EK014339 max 30 kg max 50 kg max 80 kg EK015027 max 30 kg max 30 kg max 120 kg AKV S 147 Kl EK015028 max 30 kg max 120 kg AKV U KL AKV S 96 116 146 KL Quetschgefahr beim Hantieren Justieren Positio...

Page 50: ...e Kapitel 2 1 bestens f r die Pr sentation gro er Torten oder hnlicher Produkte geeignet S mtliche Inhalte wie unter Kapitel 3 3 sind auch hier zutreffend und Folge zu leisten Tortenauszug BAK GREEN T...

Page 51: ...em Kontakt sind Besch digungen der Edelstahloberfl chen durch Korrosion nicht auszuschlie en Eine h herwertige Edelstahlg te V4A oder AISI 316 ist in diesem Fall mindestens erforderlich Achten Sie bes...

Page 52: ...her dass die Sicherheitslaschen beim Wiedereinsetzen der Gl ser wieder angebracht werden HINWEIS Bevor Sie die Tr ger verstellen k nnen entfernen Sie die Glasborde siehe Kapitel 2 1 Heben Sie dazu das...

Page 53: ...sgeliefert Backnorm Bleche mit 600 x 400 mm Achten Sie bei der Verstellung der Einlegeb den auf festgelegte Stapelgrenzen des jeweiligen K hlm bels Alle Stapelgrenzen sind unter Kapitel 3 3 1 zu finde...

Page 54: ...stellen Falls notwendig einen autorisierte Servicefachkraft Support kontaktieren Temperatur am Display weicht von gemessener Temperatur ab Autorisierte Servicefachkraft Support kontaktieren F hlerabgl...

Page 55: ...Taste an der Steuerung f r zir ka eine Sekunde siehe Kapitel 3 2 Falls keine Abhilfe autorisierte Servicefachkraft Support kontaktieren Gesamte Beleuchtung eine LED ist ausgefallen Autorisierte Servic...

Page 56: ...rs F1 R ckluft F2L Fehler am F hler F2 Kurzschluss Kontrolle des F hlers F2 Abtau Verdampferf hler F2H Fehler am F hler F2 Bruch Kontrolle des F hlers F2 Abtau Verdampferf hler Interner Fehler Steuert...

Page 57: ...Technische nderungen vorbehalten G ltig ab Juli 2021 57 NOTIZEN...

Page 58: ...ngsf hrenden Komponenten Vor allen Reinigungs und Servicearbeiten ist die Stromzufuhr zu unterbrechen Dazu das K hlger t ausstecken oder allpolig vom Netz trennen Sto gefahr am K hlger t bei Montage R...

Page 59: ...stahlteile des Ger tes in einwandfreiem Zustand zu halten sind folgende Punkte wichtig Halten Sie die Edelstahloberfl chen stets sauber Gew hrleisten Sie ausreichend Luftzirkulation an den Oberfl chen...

Page 60: ...glich ist Einlegeb den und GN Beh lter Geschirrsp lmittel und B rste Einlegeb den und GN Beh lter sind leicht herausnehmbar siehe Kapitel 2 1 Verwenden Sie nur B rsten mit Kunststoff oder Naturborsten...

Page 61: ...WARNUNG Tragen Sie beim Reinigen des Ger tes die entsprechende Schutzausr stung welche vom Hersteller des verwendeten Reinigungsmittels siehe Kapitel 4 1 2 vorgeschrieben wird Pr fen Sie vor der Rein...

Page 62: ...rstopfen Zur Reinigung des Verdampfers gehen Sie wie folgt vor 1 Entfernen der Einlegeb den bzw GN Schalen 2 Entfernen der Einh ngeleisten sowie der Luftleitbleche nach oben aus dem Ger t Achtung Die...

Page 63: ...ie Verdampferabdeckung schlie en 5 Die Einlegetasse wieder korrekt einsetzen 6 Seitliche Luftleitbleche mit den Einh ngeleisten positionieren 7 Einlegeb den bzw GN Beh lter wieder einsetzen Die Au en...

Page 64: ...r Unterseite der Winkelleiste und der Oberkante der Schiebet r Achten Sie darauf dass die Winkelleiste ordnungsgem angebracht und verschraubt ist Das hier Erw hnte gilt auch f r Fl gelt ren Achten Sie...

Page 65: ...r links 5 Laufschiene nicht sichtbar 6 T r rechts 7 F hrungsschiene 5 6 7 Bei Ger ten ab Gr en von 4 1 m ssen die Schiebet ren von mindestens 2 Personen manipuliert und gereinigt werden Das Gewicht de...

Page 66: ...e diese leicht nach oben und dr cken diese nach hinten 8 Kippen Sie die T r vorne hoch und heben diese aus dem Ger t 9 Lagern Sie die T r auf einer sauberen und weichen Unterlage Achten Sie darauf das...

Page 67: ...hrleistet werden HINWEIS Einige Ger te sind mit Luftf hrungen an den Fl gelt ren oder R ckw nden ausgestattet Diese k nnen zur leichteren Reinigung ausgeh ngt werden Heben Sie die Luftf hrungen nach...

Page 68: ...ls Staubsauger Achten Sie darauf dass die Lamellen nicht verbogen werden 3 Anbringen des L ftungsgitters Anleitung zur Reinigung des Kondensators Die Zu und Abluft ffnungen des Kondensators d rfen nic...

Page 69: ...inigungsmittel zul ssig Je nach Modell ist die Ausf hrung eines mechanischen oder elektrischen Nachtrollos siehe Kapitel 2 1 m glich Zur Bedienung bei Ger ten mit K hlunterbau siehe Kapitel 3 2 1 Tech...

Page 70: ...Anschlag herausziehen Verriegelung an den F hrungsschienen l sen Lade zirka 5 cm anheben damit diese ausgeh ngt werden kann Reinigung der Bodenwanne Auffangtasse unterhalb des Verdampfers 1 3 2 4 1 La...

Page 71: ...4 1 8 REINIGUNG DER LADE TORTENAUSZUG INKL VERDAMPFEREINHEIT Zur Reinigung der K hlwanne inkl der Verdampfereinheit entfernen Sie den Tortenauszug aus dem Ger t Gehen Sie wie folgt vor 3 4 2 1 1 Den V...

Page 72: ...g heben Das Schneidbrett besteht aus einer abnehmbaren CNS Tasse mit einer oder mehreren Polyhygien Einlagen Die Polyhygien Einlagen k nnen zum Reinigen aus der CNS Tasse genommen werden Bei ausgeh ng...

Page 73: ...Dritte Verwenden Sie wenn m glich beide H nde wenn Sie mit Gegenst nden hantieren Beim Hantieren Justieren Positionieren mit schweren Einzelkomponenten sind Schutzhandschuhe und Sicherheitsschuhe zu...

Page 74: ...AS TAUWASSER VERDUNSTUNG Vorsicht beim ffnen der Tauwasser Verdunstung vor hei en Oberfl chen Schalten Sie das Ger t vor Reinigungsarbeiten aus Bei Ber hrung der Hei gas Leitung im eingeschalteten Zus...

Page 75: ...ziehen den Netzstecker ordnungsgem aus der Steckdose bzw trennen Sie das Ger t allpolig vom Netz 2 Verriegelung Nr 1 mit einer Hand nach oben dr cken Mit einer Hand am F hrungsgriff nach vorne herausz...

Page 76: ...HT 4 1 12 REINIGUNG ELEKTRISCHE TAUWASSERSCHALE OPTIONALES ZUBEH R Weitere Reinigungshinweise sind in der beiliegenden Betriebsanleitung der Tauwasserschale angef hrt und m ssen auch eingehalten werde...

Page 77: ...unstung Hei gas oder elektrisch verf gen entfernen Sie die Ablaufleitung von der Tauwasserschale und sp len diese mit hei em Wasser durch Leiten Sie das Reinigungswasser in ein geeignetes Gef um Ablau...

Page 78: ...und Reparatur abgeschlossen ist Ein unbeabsichtigtes Einschalten muss verhindert werden Die Durchf hrung der Wartungst tigkeiten durch das Bedienpersonal oder Betreiber gilt ausschlie lich f r die im...

Page 79: ...he Tauwasserschale modellabh ngig x Gasdruckfedern modellabh ngig Deckglas und Verdampfer x Kondensator Verfl ssiger Verunreinigungen Sch den x Laden bzw Tortenauszug modellabh ngig x K hlunterbau mod...

Page 80: ...rekten Ersatzteile f r Ihr Ger t geben Sie die angef hrten Ger tedaten Ihrem Lieferanten Fachh ndler bekannt oder ordern Sie ben tigte Ersatzteile direkt ber den Online Produktkatalog des Herstellers...

Page 81: ...Technische nderungen vorbehalten G ltig ab Juli 2021 81 NOTIZEN...

Page 82: ...usgebrauch und hnliche Zwecke Teil1 Allgemeine Anforderungen EN 60335 1 2012 AC 2014 A11 2014 A13 2017 IEC 60335 1 2010 modifiziert EN 60335 2 89 2010 Sicherheit elektrischer Ger te f r den Hausgebrau...

Page 83: ......

Page 84: ...tetechnik GmbH In der Sch rihub 28 4810 Gmunden AT 43 7612 660 61 office ideal ake at AKE Ausseer K lte und Edelstahltechnik GmbH Pichl 66 8984 Bad Mitterndorf AT 43 3624 211 00 office ake at www idea...

Page 85: ...Operating Manual REFRIGERATED DISPLAY CASES Translation of the original 21A...

Page 86: ...Subject to technical changes Valid from July 2021 2...

Page 87: ...ting Manual show the majority of configurations Due to custom designs many other configura tions of our products are also possible Operating Manual and installation instructions Copyright 2021 AKE Aus...

Page 88: ...UNIT 29 2 3 1 ELECTRICAL INFORMATION 30 2 3 2 REFRIGERATION RELATED INFORMATION 31 2 4 ASSEMBLY AND INSTALLATION GUIDE 32 2 4 1 FIRST STEPS 32 2 4 2 INSTALLATION OF THE UNIT ABOVE 2000 M ABOVE SEA LEV...

Page 89: ...ANING THE EXTENDABLE DRAWER CAKE DRAWER INCLUDING EVAPORATOR UNIT 71 4 1 9 CLEANING THE CUTTING BOARD 72 4 1 10 CLEANING THE BOTTLE SLIDER FLEXROLLER 73 4 1 11 CLEANING HINGED HOT GAS CONDENSATE EVAPO...

Page 90: ...correct installation start up operation and care Non compliance with the points mentioned above can lead to warranty guarantee and product liability exclusions but also to damage and safety hazards A...

Page 91: ...ACKNORM EURONORM Gastronorm 2 to 5 trays up to a maximum of 150 mm Euronorm 1 to 4 baking trays SIZES IN USE Curved Square Inclined PRO square PRO curved for insulated glass display cases on request C...

Page 92: ...units with pedestals height adjustable feet must be fully covered by the customer NOTE 530 mm 370 mm 700 mm 370 mm 870 mm 370 mm optional flat 195 mm inner well possible HEIGHTS appliance photos as ex...

Page 93: ...ddd f Abbreviations aa Empty or HC high capacity b G closed on customer side or O open or A countertop c E square or S 10 inclined or R curved ddd Number between 50 and 400 unit width ee Empty or numb...

Page 94: ...ructions IN this Operating Manual with regard to the correct installation start up operation maintenance and assembly of the unit Unauthorised mechanical or technical changes to the unit Inadequate ma...

Page 95: ...bshop spare parts online catalogue https shop ideal ake at en spare parts shop Availability of spare parts 8 years after the last piece of the particular model group was placed on the market Minimum w...

Page 96: ...information with the WARNING signal word indicates a dangerous situation that can have an impact on the health of persons Failure to observe these safety instructions can lead to serious injuries DAN...

Page 97: ...cover of the controller or on the base close to the control box The unit is also identified by the AKE mark of conformity The AKE mark of conformity is located on the base or control unit depending on...

Page 98: ...oducts in the unit or close to it During the assembly and or installation the unit must be covered adequately so that no contact with live parts is possible The installation environment must be robust...

Page 99: ...pt free The minimum distances to other units must be complied with Ensure that the air circulation is unobstructed In the event of a leak in the refrigera tion system a blockage of the air circulation...

Page 100: ...e complied with Among others these specifications are the ambient temperature the quality of the installation environment and the connections that must be used NOTE The units are specifically designed...

Page 101: ...ional safety and accident prevention must be complied with Only instructed personnel may operate and clean the appliance Only qualified personnel who have been authorised by the manufacturer may perfo...

Page 102: ...e No ventilation slits may be blocked or covered Food must not touch the walls of the appliance or block the air flow The unit must not be operated outside of buildings Protect the unit against direct...

Page 103: ...oilage of the products placed in the unit c Not applicable d Not applicable e See Chapter 2 4 See Chapter 4 f If the condenser coil is not cleaned once a year this will lead to a considerable reductio...

Page 104: ...s These persons must be strong enough to be able to carry the units Pushing or mo ving the units is not permitted Call in another person for spotting if necessary Wear protective gloves and safety sho...

Page 105: ...g glass WARNING Various dangers during the disposal of various refrigerants When disposing of refrigerants propane R404A R134A etc wear protective gloves and safety glasses Working with open flames is...

Page 106: ...work Wear safety shoes for installation and loading work Wear safety gloves in accordance with EN 378 3 during assembly loading and activities involving refrigerant Wear safety glasses when disposing...

Page 107: ...ls other machines when positioning the units as well as danger of crushing between the pallet and ground when putting the unit down Keep yourself and other persons away from the hazardous area Call in...

Page 108: ...patible way The laws of the specific country must be observed WARNING Various dangers during the disposal of damaged parts components When disposing of damaged parts components wear protective gloves...

Page 109: ...Subject to technical changes Valid from July 2021 25 NOTES...

Page 110: ...shelf level 1 6 Front glass with handle strip depending on the model with gas pres sure damper different configurations possible Easy change function choice of open or closed operation Removal flap s...

Page 111: ...densing unit 13 Evaporator including evaporator plate can be folded up and rinsed Einlegeboden UKW 323 531 535 GN GASTRO NORM Einlegeboden UKW 323 531 980 GN 1 2 GN 1 2 GN 1 1 535 EN BACKNORM EURONORM...

Page 112: ...IEC 61770 2008 NORMEN 1717 2008 04 01 Condensate via siphon directly into the onsite wastewater system DN32 via the hot gas evaporation via the condensate tray manual emptying electric condensate hea...

Page 113: ...be replaced with new stickers The legibility and completeness must be checked at regular intervals 2 3 SAFETY INSTRUCTIONS ON THE UNIT Pictograms Descriptions Pictograms Descriptions Warning of inflam...

Page 114: ...R Self contained units are delivered with a 1 5 meter long power cord with an earthing contact plug as a standard feature They must connected to an AC power grid with a nominal AC voltage and frequenc...

Page 115: ...geration unit and the refrigeration circuit is filled with refrigerant Display cases with expansion valves and those above a specific size have an inspection glass with a moisture indicator for checki...

Page 116: ...ve the transport packaging you require At least two persons Tools cordless screwdriver or Philips screwdriver cutting tool scissors or knife Danger of the unit tipping over on an uneven and unstable s...

Page 117: ...iveries and services may only be carried out by authorised refrigeration companies and qualified specialists Electrical installations may only be carried out by an authorised specialist You must ensur...

Page 118: ...cted to the power electronics internally by a cable The control panel is removable and can be mounted on the front of the appliance Possible configurations ST501 The control panel is by default connec...

Page 119: ...uipped at the factory with odour traps siphon so that only the wastewater connections or external condensate trays have to be installed in accordance with the local conditions It must be ensured that...

Page 120: ...and preventing air circulation Definition of Terms Air baffle Supply air Exhaust air 2 7 VENTILATION AND DISCHARGE By default the units are delivered with incoming air on the operator side and exhaus...

Page 121: ...the compressor compartment The air opening of the covering must be less than 5 mm away from the condenser NOTE Narrow gap between condenser housing and covering approx 5 mm Seal the gap with sealing t...

Page 122: ...at the factory for the respective model During this time the centre LED display defrosting is illuminated on the left of the display Cooling mode starts automatically when defrosting is completed Aut...

Page 123: ...Subject to technical changes Valid from July 2021 39 NOTES...

Page 124: ...sor capsule which might have become displaced during transport can drain back to the compressor applies to self cont ained cooling appliances The unit is pre cleaned before delivery Nevertheless we st...

Page 125: ...desired set temperature is reached before stocking the unit with products NOTE BUTTON DESIGNATION FUNCTION 1 Cooling Display red active 2 Defrosting Display red active 3 Fan Evaporator fan display red...

Page 126: ...Auxiliary output light 5 RTC clock display 6 Alarm 7 Numbers BUTTON DESIGNATION FUNCTION 1 ON OFF button Switches on the device 2 Programming button Display setting parameters etc 3 Light button defr...

Page 127: ...lues acknowledge alarm To set desired value hold for approx 2 seconds 4 MENU EXIT Unit settings close menu item 5 LIGHT Light on active Light off inactive dimmable depending on model hold for approx 4...

Page 128: ...be set by the supplier or specialist dealer du ring the installation When selecting the inside temperature take account of the ambient conditions A large temperature difference between the inside and...

Page 129: ...the target value temperature has been reached This will take some time The cooling controller is set correctly and ready for operation After completion of the installation check parameter H11 calibrat...

Page 130: ...maximum carrying capacity of the base decks and shelves Loading shelves see stacking limit outline drawing of the corresponding model group Loading the base deck see stacking limit outline drawing of...

Page 131: ...r is illegible a new sticker must be ordered from the manufacturer and attached to the appliance 3 3 1 STACKING LIMITS OUTLINE DRAWINGS The outline drawings shown with defined stacking loading limits...

Page 132: ...tro G 70 Gastro G 70 KL BAK G 70 KGW G 70 KGU G 70 30 300 115 115 85 30 300 115 115 85 30 300 115 115 85 30 300 115 115 85 30 300 115 115 85 30 300 115 115 85 30 300 115 115 85 30 300 115 115 85 EK014...

Page 133: ...L G 68 KSL Green L G 52 L G 69 KSL EK014339 max 30 kg max 50 kg max 80 kg EK015027 max 30 kg max 30 kg max 120 kg AKV S 147 Kl EK015028 max 30 kg max 120 kg AKV U KL AKV S 96 116 146 KL Danger of crus...

Page 134: ...are easy to stock by means of the extendable drawers and cake drawers see Chapter 2 1 All the content found in Chapter 3 3 is also applicable here and must be followed Cake Drawer BAK GREEN Cake Draw...

Page 135: ...the stainless steel surfaces due to corrosion cannot be ruled out A higher grade of stainless steel V4A or AISI 316 is required as a minimum in this case Ensure in particular that the products placed...

Page 136: ...y tabs must be unhooked for this Ensure that the safety tabs are reattached when the glass is reinserted NOTE Before you can adjust the supports remove the glass shelves see Chapter 2 1 To do this lif...

Page 137: ...g sheets 600 x 400 mm When adjusting the base decks observe the stacking limits specified for the respective refrigeration appliance All sta cking limits can be found in Chapter 3 3 1 If the stacking...

Page 138: ...ntact an authorised service specialist support Temperature on the display differs from the measured temperature Contact authorised service specialist sup port sensor calibration necessary chapter 3 2...

Page 139: ...witched on Press the LIGHT button on the controller for around one second see Chapter 3 2 If this does not help contact an authorised service specialist support The entire lighting one LED has failed...

Page 140: ...ck sensor F1 return air F2L Error on sensor F2 short circuit Check sensor F2 defrost evaporator sensor F2H Error on sensor F2 break Check sensor F2 defrost evaporator sensor Internal error control uni...

Page 141: ...Subject to technical changes Valid from July 2021 57 NOTES...

Page 142: ...power supply must be disconnected before all cleaning and service work To do this unplug the cooling appliance or disconnect all poles from the power mains Danger of collision with the cooling applian...

Page 143: ...s of the unit in perfect condition the following points are important Always keep stainless steel surfaces clean Ensure adequate air circulation on the surfaces Never touch components of the unit with...

Page 144: ...s steel cleaner you use is food safe Base decks and GN containers Washing up liquid and brush Base decks and GN containers are easy to remove see Chapter 2 1 Only use brushes with plastic or natural b...

Page 145: ...rmly or in position before unlocking WARNING When cleaning the unit wear the respective protective equipment stipulated by the manufacturer of the cleaning agent being used see Chapter 4 1 2 Before cl...

Page 146: ...e dirt so that the drain does not become clogged To clean the evaporator proceed as follows Attention The hook in strips might fall off the air baffle plate Damage to the evaporator is possible 1 Remo...

Page 147: ...t it fall depending on the model 4 Close the evaporator cover 5 Replace the insertion tray correctly 6 Position the side air baffle with the support strips 7 Replace the base decks or GN containers Th...

Page 148: ...the area between the underside of the angle trim and the top edge of the sliding door Ensure that the angle trim is attached and screwed together properly The same thing applies to hinged doors Be ve...

Page 149: ...cking lever 4 Left door 5 Running rail not visible 6 Right door 7 Guide rail 5 6 7 On units of size 4 1 or more the sliding doors must be manipulated and cleaned by at least 2 people Do not unde resti...

Page 150: ...n the running rail for the rollers To remove the door from the guide rail lift it up slightly and push it backwards 8 Tip the door up at the front and lift it out of the unit 9 Store the door on a cle...

Page 151: ...um cooling of the food cannot be guaranteed NOTE Some units are equipped with air ducts on the hinged doors or back walls These can be unhooked for easier cleaning Lift the air ducts upwards out of th...

Page 152: ...enser protector 2 Remove dirt using a vacuum cleaner Ensure that the fins do not become bent 3 Install the air grille Guide to cleaning the condenser The ingoing and outgoing air openings of the conde...

Page 153: ...re permissible for cleaning the unit Depending on the model it is possible to have a mechani cal or electric night roller blind see Chapter 2 1 For operation on units with a refrigerated base see Chap...

Page 154: ...s far as it goes Release the lock on the guide tracks Lift the drawer up by around 5 cm so that it can be unhooked Clean the bottom tray collecting tray below the evaporator 1 3 2 4 1 Hook the drawer...

Page 155: ...4 1 8 CLEANING THE EXTENDABLE DRAWER CAKE DRAWER INCLUDING EVAPORATOR UNIT To clean the refrigerated well including the evaporator unit remove the cake drawer from the unit Proceed as follows 3 4 2 1...

Page 156: ...of the anchoring The cutting board consists of a removable CNS tray with one or more Poly Hygiene inserts The Poly Hygiene inserts can be removed from the CNS holder for cleaning When the hinged door...

Page 157: ...ble crushing dangers including for third parties If possible use both hands when handling objects When handling aligning positioning heavy individual components protective gloves and safety shoes must...

Page 158: ...ANING HINGED HOT GAS CONDENSATE EVAPORATION Beware of hot surfaces when opening the condensate evaporation Switch the unit off before any cleaning work Touching the hot gas line when it is switched on...

Page 159: ...oller and pull the mains plug properly out of the socket or disconnect the unit from the mains at all poles 2 Push the lock no 1 upwards with one hand Pull it out forwards with one hand by means of th...

Page 160: ...poles from the power mains CAUTION 4 1 12 CLEANING THE ELECTRIC CONDENSATE TRAY OPTIONAL ACCESSORY Further cleaning instructions are provided in the operating manual accompanying the condensate tray a...

Page 161: ...ate evaporation hot gas or electric remove the drain pipe from the condensate tray and flush it with hot water Transfer the cleaning water into a suitable container Attaching the drain hose to the con...

Page 162: ...in switch or all pole disconnection until the maintenance in spection and repair are completed Unintentional switching on must be prevented The execution of the maintenance activities by the operating...

Page 163: ...the model x Gas damper depending on the model glass cover and evaporator x Condenser dirtying damage x Extendable drawer or cake dra wer depending on the model x Refrigerated base depending on the mo...

Page 164: ...t spare parts for your unit provide the unit data lis ted on the rating plate to your supplier or specialist dealer or order the required spare parts directly from the manufacturer s online product ca...

Page 165: ...Subject to technical changes Valid from July 2021 81 NOTES...

Page 166: ...Household and similar electrical appliances Safety Part 1 General Requirements EN 60335 1 2012 AC 2014 A11 2014 A13 2017 IEC 60335 1 2010 modified EN 60335 2 89 2010 Household and similar electrical a...

Page 167: ......

Page 168: ...tetechnik GmbH In der Sch rihub 28 4810 Gmunden AT 43 7612 660 61 office ideal ake at AKE Ausseer K lte und Edelstahltechnik GmbH Pichl 66 8984 Bad Mitterndorf AT 43 3624 211 00 office ake at www idea...

Reviews: