background image

Benutzerhandbuch

KÜHLVITRINEN

steckerfertig oder externer Kälteanschluss

User manual

COLD DISPLAYS

self-contained or remote refrigerated

Summary of Contents for Gastro O-53

Page 1: ...Benutzerhandbuch K HLVITRINEN steckerfertig oder externer K lteanschluss User manual COLD DISPLAYS self contained or remote refrigerated...

Page 2: ...nen m glichen Ausf hrungen betreffend Art und H he des Glasaufbaus Verkaufs oder Selbstbedienungsvitrine Einbau Auftisch oder Standvitrine Gastronorm oder Backnorm Abmessungen Die hier abgebildeten M...

Page 3: ...en offen DIE M GLICHKEITEN DER KUNDENSEITE 530 mm 370 mm 700 mm 370 mm 870 mm 370 mm optional flache Innenwannen mit 195 mm m glich DIE H HEN Ger tefotos als Beispiel f r geschlossene Vitrinen Drop in...

Page 4: ...l dieser Publikation darf in irgendeiner Weise reproduziert gespeichert oder in irgendeiner Form oder mit irgendwelchen Mitteln versendet und ver ffentlicht werden ohne die vorherige schriftliche Erla...

Page 5: ...le Anmerkung f r die Reinigung 16 9 3 1 Reinigung des Innenraumes und des Verdampfers 16 9 3 2 Reinigung der Gl ser 17 9 3 3 Reinigung des Nachtrollos 17 10 St rungen und Ursachen 18 11 Gefahren 20 11...

Page 6: ...ungs und Einbauanleitung sorgf ltig aufbewahren 1 2 Garantie und Haftung Im Grunde gelten unsere Generellen Zahlungs und Lieferbedingungen Anspruch auf Garantie und Haftung f r Personen und Besitzsch...

Page 7: ...roinstallation und Mechanik Jede nderung muss durch den Hersteller autorisiert werden Mit Warnhinweisen versehene Abdeckungen d rfen nur durch Fachleute ge ffnet werden Die M bel Unter und R ckseite d...

Page 8: ...isoliert K hlvitrine Gastro KSV kundenseitig Panoramascheibe mit Unterbauk hlung zur Bevorratung K hlvitrine Green G und Green O kundenseitig Panoramascheibe isoliert oder offen Seitenscheiben isolie...

Page 9: ...eits und gefahren bewusst unter Beachtung der Betriebsanleitung benutzt werden Eine andere oder dar ber hinausgehende Benutzung gilt als nichtbestimmungsgem F r hieraus resultierende Sch den haftet de...

Page 10: ...und etwaige Fehlermeldungen angezeigt Bevor Sie die K hlvitrine mit K hlgut beschicken warten Sie bis die gew nschte Temperatur erreicht ist Taste 1 AUF Durch Dr cken der AUF Taste f r 3 Sekunden kann...

Page 11: ...r drei Sekunden kann jederzeit eine Abtauung eingeleitet werden W hrend einer Abtauung leuchtet die entsprechende LED Die LED blinkt wenn eine Abtauung angefordert ist aber durch Sperrbedingungen noc...

Page 12: ...d eine sehr gleichm ige Luftverteilung erzielt Maximale Beladung Zwischenborde je 50 kg B den gesamt 150 kg Die Verkaufsk hl und Isolierglasmodelle werden mit h henver stellbaren Einlegeb den ausgelie...

Page 13: ...ent ren bei Nichtbenutzung geschlossen zu halten Bei nicht vollst ndig geschlossenen T ren ist es nicht m glich eine gleichbleibende Innentemperatur zu bewahren H henverstellung der Zwischenborde Ihre...

Page 14: ...tallation durch den Fachh ndler erfolgen Die Standk hlvitrinen der Modelle BAK KSL und Gastro KSV sowie GREEN KSL und GREEN KSV verf gen ber einen gek hlten Unterbau mit Umluftk hlung f r die Vorratsh...

Page 15: ...ende Dinge zu achten damit dieses Edelstahlprodukt lange und einwandfrei arbeitet Halten Sie die Edelstahl Oberfl che stets sauber Achten Sie darauf dass immer genug Frischluft auf die Oberfl che komm...

Page 16: ...Abflusses stellen Der Verdampfer und die Wanneninnenseite sind mit lauwarmem Seifenwasser zu reinigen Innenraum immer trocken wischen Nach erfolgter Reinigung den Verdampferkasten leicht anheben seitl...

Page 17: ...n bewegbar Bild 2 und erleichtern so die Reinigung der Innenseite ACHTUNG Halten Sie die Gl ser w hrend des Reinigen fest und lassen Sie die Frontgl ser nicht nach vorne fallen Frontgl ser aus Isolier...

Page 18: ...oll Temperatur ist zu hoch eingestellt Stellen Sie die gew nschte Temperatur ein Die Umgebungstemperatur im Raum ist zu hoch ber 25 C Justieren Sie die Raumklimatisierung ver meiden Sie W rmequellen u...

Page 19: ...t berschritten wer den falls m glich Klimaanlage einschalten zu hohe L fterdrehzahl Verst ndigen Sie einen Techniker Statusanzeigen und Fehlermeldungen am Display MELDUNG URSACHE MASSNAHME bertemperat...

Page 20: ...nnungsfrei geschaltet werden Die freigeschalteten Teile zuerst auf Spannungsfreiheit pr fen dann erden und kurzschlie en Benachbarte unter Spannung stehende Teile isolieren ACHTUNG VERLETZUNGSGEFAHR B...

Page 21: ...nausschnitt Slide in F r schwere Ger te empfiehlt sich der Einschub mit dem optional erh ltlichen Fu gestell F e h henverstellbar EINFACHE REINIGUNG Hebeverdampfer f r leichte Reinigung des Verdampfer...

Page 22: ...nen Wenn eine Direktverkabelung verwendet wird muss eine M glichkeit geschaffen werden um das Ger t bei Bedarf vom Stromnetz zu trennen bernahme Kontrollieren Sie das Ger t auf Transportsch den und no...

Page 23: ...hmann durchgef hrt werden Anschluss des K hlm bels Ein steckerfertiges Ger t kann vom Betreiber selbst angeschlossen werden Es wird mit einem standardm ig 1 5 Meter langen Anschlusskabel mit Schutzkon...

Page 24: ...tallierte K lteanlage ist in Betrieb zu nehmen und es ist eine Funktions und Sicherheitspr fung durchzu f hren Das Protokoll ist dem Betreiber zu bergeben Die Tauwasserentsorgung kann auf verschiedene...

Page 25: ...pressor und das hei e Gas im Kondensator C Kondensator W rmetauscher in welchem die entzogene W rme des K hlbereiches wieder an die Umluft abgegeben wird Gasf rmiges K ltemittel wird durch die W rmeab...

Page 26: ...n den L ftungs ffnungen so gro als m glich sein um ein Ansaugen der warmen Abluft zu verhindern Achten Sie darauf dass die Ansaug ffnung und die Luftauslass ffnung gro genug sind Der Luftstrom darf ni...

Page 27: ...mperaturen mit der Anzeige am Display F hren Sie einen F hlerabgleich laut beiliegender Programmierungsanleitung durch Parameter H12 Kalibrierung F hler F1 Beispiel Die durchschnittliche Temperatur in...

Page 28: ...ie Vitrine wieder am Stromnetz an und berpr fen Sie die Beleuchtung auf ihre Funktion Wechseln von Schiebet ren Positionieren Sie die linke Schiebet re mittig und heben Sie diese leicht an bis durch l...

Page 29: ...latoren Pr fung der Warentemperatur Pr fung und Reinigung der Abflussleitung bzw Tauwasserverdunstung Reinigung des Kondensators an der K hlmaschine nur f r steckerfertige Ger te Der Kondensator der K...

Page 30: ...ratur an Mit der Bet tigung der Taste SET schaltet die Anzeige auf die vom Anwender erw nschte K hlraumtemperatur Sollwert Temperatur um Eine Ver nderung der Sollwert Temperatur ist nur mit der gleich...

Page 31: ...t dem gleichzeitigen Dr cken der Tasten AUF und AB Nach zirka drei Sekunden erscheint in der Anzeige das Codewort Durch Bet tigung der AUF bzw AB Taste kann zwischen dem Codewort und J gewechselt werd...

Page 32: ...r die Parameter und festge legt werden ob vor dem Abtauen der K hlraum heruntergek hlt werden soll Abtautemperatur Ein Abtauvorgang wird beendet wenn am Verdampfer die hier eingestellte Temperatur err...

Page 33: ...ische Information Technische Informationen B Teil 5 Schaltpl ne E Schaltschema K hlvitrine steckerfertig ohne Nachlaufrelais Gastro Gastro HCG BAK und Green Modelle E Schaltschema K hlvitrine steckerf...

Page 34: ...n Technische nderungen vorbehalten G ltig ab Oktober 2014 34 E Schaltschema K hlvitrine zentralgek hlt Gastro Gastro HCG BAK und Green Modelle E Schaltschema K hlvitrine HCO KR steckerfertig ohne Nach...

Page 35: ...tober 2014 Technische nderungen vorbehalten Technische Information Technische Informationen B Teil E Schaltschema K hlvitrine HCO KR steckerfertig mit Nachlaufrelais E Schaltschema K hlvitrine HCO KR...

Page 36: ...erheits undGesundheitsanforderungen der EG Richtlinie 2006 95 EG Niederspannungsrichtlinie den Anforderungen der EG Richtlinie 2004 108 EG elektromagnetische Vertr glichkeit sowie den Anforderungen de...

Page 37: ...Pers nliche Notizen Personal notes...

Page 38: ......

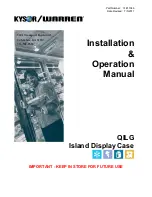
Page 39: ...User manual COLD DISPLAY CASES self contained or remote refrigerated...

Page 40: ...ities of glass styles and heights assisted or self serve displays drop in slide in or free standing style interiour for Gastronorm or Euronorm size Below pictured possibilities are showing most of the...

Page 41: ...THE POSSIBILITIES ON CUSTOMER SIDE 530 mm 370 mm 700 mm 370 mm 870 mm 370 mm flat internal well optionally available 195 mm THE HEIGHTS samples shown on closed displays Drop in Slide in Counter top PR...

Page 42: ...trieval system or transmitted in any form or by any means electronic mechanical photocopying recording or otherwise without the prior written permission of AKE Document BH_Verkaufsk hl Isolierglasvitr...

Page 43: ...r 54 9 3 2 Glass cleaning instructions 55 9 3 3 Night blind cleaning instructions 55 10 Trouble shooting 56 11 Dangers 58 11 1 Electrical energy 58 11 2 Risk of injury Part B Technical Information 1 I...

Page 44: ...g equipment you have decided on a product that combines the highest technical demands with practical service comfort 1 2 Warranty and liabilities Fundamentally our General terms of sale and delivery a...

Page 45: ...work on the cooling technology electrical installa tion water connection and mechanical work Any adaptation is to be authorized by the manufacturer Those covers bearing a warning may only be opened by...

Page 46: ...ted base BRILLANT KR Customer side open side glas panes insulated K hlvitrine Gastro KSV Customer side closed stand alone unit with refrigerated base K hlvitrine Green G Green O Customer side closed a...

Page 47: ...regulations safety regulations and with conscious regard of the operating instructions Any other uses beyond those intended are to be considered as not being in compliance with the regulations The man...

Page 48: ...ature and any errors Before filling the display cases with food please wait until the desired temperature has been reached Button 1 UP Defrosting can be started any time by pressing the UP button for...

Page 49: ...ED is illuminated The LED flashes if defrosting is requested but may not be started yet due to interlock conditions 6 6 Lighting Lighting of the Display case is connected to the control unit and is th...

Page 50: ...f chilled air in the whole display case to guarantee constant temperature Maximum Load Shelves each 50 kg base decks 150 kg in total The Brillant GASTRO and Smaragd display cases are equipped with adj...

Page 51: ...to clean the interior well and the evaporator coil It is important to keep all display doors closed If the doors are not fully closed an even temperature will not be maintained within the display case...

Page 52: ...erature setup should be made by a specialist during installation The freestanding combination displays BAK KSL and Gastro KSV and also GREEN KLS and GREEN KSV come with a refrigerated base with fan bl...

Page 53: ...rts It is absolutely necessary to bear some fundamental things in mind to keep this stainless steel unit working and to maintain its long life Always keep the stainless steel surface clean Make certai...

Page 54: ...ain to collect the wastewater The evaporator and the interior have to be cleaned with lukewarm soap water Always dry the interior after cleaning After cleaning lift the evaporator remove the lock and...

Page 55: ...d outside Attention Hold glass during opening and cleaning Front glasses made of insulated double glass Picture 3 are secured via a tight safety cord in end position please support glass during openin...

Page 56: ...ad the unit Set point too high Set to desired temperature Ambient temperature above 25 C Adjust store air conditioning avoid heat sources nearby the cold unit and direct sunlight Too much air movement...

Page 57: ...dity should not be exceeded If it is possible turn on the air conditioning Too high fan speed Call authorized service personnel Status display and error notification MESSAGE CAUSE REMEDY Refrigerating...

Page 58: ...st check whether the activated parts have indeed been disconnected and are volt free then ground and short them out Insulate any adjacent parts that are also energized CAUTION RISK OF INJURY Be sure t...

Page 59: ...rop in from above into the cut out of the counter top Slide in Install heavy cabinets by using optional base unit to slide into the counter Feet adjustable in height EASY TO CLEAN Lift up evaporator a...

Page 60: ...o the mains supply without using a plug and socket a means of isolation must be provided Control of delivery Checkingfortransportdamageatthetimeofdeliveryisrecommended Anydamagesaretoberecordedandconf...

Page 61: ...ply The refrigerated unit is provided with a 2 m long 3 wire power cord with plug and it may only be connected to a power socket with a nominal voltage 230 V single phase 50 cycles The metal construct...

Page 62: ...o operation and a function and safety test must be performed A written report of these tests must be given to the owner There are different ways to dispose condensate Closed cabinets for assisted serv...

Page 63: ...from the room and passes it through the compressor expels the hot air out of the condenser C Condenser The condenser coil is referred to as heat exchanger and cools the returning hot refrigerant Don t...

Page 64: ...ischarge openings Variation 2 should be as wide as possible to avoid re circulation of hot discharge air Pleasetakecarethattheinlet outletopeningsfortheair inandair dischargearewideenoughandareNEVERbl...

Page 65: ...ue shown on the digital display and adjust the Parameter H12 see programming instruction Sample Average temperature measured inside the cabinet is 7 C the digital display shows 4 C increase actual val...

Page 66: ...sliding doors first start with the right door and slide it into the guiding rail On the picture you can see the opening in the gui ding rail for the roller of the doors Repeat this process also with...

Page 67: ...erated well checking the ventilator for functionality checking the temperature of the cabinet and of the goods checking and cleaning the drainage lines and drip water evaporation cleaning the condense...

Page 68: ...the key can be set with parameter Button T5 SET While SET key is pressed the setpoint is indicated The function of the key can be set with parameter unchangeable in this case Button T6 STANDBY The fu...

Page 69: ...ilepressingthebuttons the changing setpointtemperature is displayed After changing the setpoint temperature and releasing thebuttons the actual temperature is dis played again This is the standard set...

Page 70: ...ine via parameters and if the cold store temperature is to be lowered before defrosting Defrosting temperature A defrosting operation is complete as soon as the temperature set here is reached at the...

Page 71: ...on Technical inforamtion B Part 5 Schematic circuit diagram Wiring diagram Display cases self contained without time delay relay Gastro Gastro HCG BAK and Green models Wiring diagram Display cases sel...

Page 72: ...echnical changes reserved Valid from October 2014 72 Wiring diagram Display case HCO and KR self contained without time delay relay Wiring diagram Display cases remote refrigerated Gastro Gastro HCG B...

Page 73: ...r 2014 Technical changes reserved Technical information Technical inforamtion B Part Wiring diagram Display case HCO and KR remote refrigerated Wiring diagram Display case HCO and KR self contained wi...

Page 74: ...hiscoveredbythisdeclaration meetsallsafetyandhealthyprovisionoftheECdirectives2006 95 EG Low voltage directive and 2004 108 EG Electromagnetic compatibility EMC directive These directives represent le...

Page 75: ...Personal notes...

Reviews: