background image

InfoPrint


Color


1824


MT(4985)

User’s


Guide


G510-7276-00


Summary of Contents for Color 1824

Page 1: ...InfoPrint Color 1824 MT 4985 User s Guide G510 7276 00 ...

Page 2: ......

Page 3: ...InfoPrint Color 1824 MT 4985 User s Guide G510 7276 00 ...

Page 4: ...up page 25 Setting up the printer software 25 Installing printer software 25 Updating available options in the printer driver 26 Setting up wireless printing 27 Information you will need to set up the printer on a wireless network 27 Installing the printer on a wireless network Windows 27 Installing the printer on a wireless network Macintosh 29 Installing the printer on a wired network 31 Loading...

Page 5: ...ting 50 Printing a document 50 Printing specialty documents 51 Tips on using letterhead 51 Tips on using transparencies 52 Tips on using envelopes 52 Tips on using paper labels 53 Tips on using card stock 54 Printing from a flash drive 55 Printing information pages 56 Printing a font sample list 56 Printing a directory list 56 Printing the print quality test pages 56 Canceling a print job from the...

Page 6: ...twork Setup Page menu 77 Profile List menu 77 Print Fonts menu 77 Print Directory menu 77 Print Defects menu 77 Print Demo menu 78 Asset Report menu 78 Network Ports 78 Active NIC menu 78 Network menu 78 Wireless menu 79 USB menu 80 Settings 82 General Settings menu 82 Setup menu 84 Finishing menu 85 Quality menu 87 Utilities menu 90 PDF menu 90 PostScript menu 91 PCL Emul menu 91 Image menu 94 Pi...

Page 7: ...e printer 129 Moving the printer 130 Before moving the printer 130 Moving the printer to another location 130 Shipping the printer 130 Administrative support 131 Restoring the factory default settings 131 Adjusting Power Saver 131 Using the Embedded Web Server 132 Setting up e mail alerts 132 Configuring supply notifications 132 Copying printer settings to other printers 133 Troubleshooting 134 So...

Page 8: ...pages 140 Characters have jagged or uneven edges 140 Clipped images 141 Dark lines 141 Gray background 141 Incorrect margins 142 Light colored line white line or incorrectly colored line 142 Paper curl 143 Print irregularities 143 Print is too dark 144 Print is too light 145 Repeating defects 146 Skewed print 147 Solid color pages 147 Toner fog or background shading appears on the page 147 Toner r...

Page 9: ...Power consumption 159 Index 161 Contents 7 ...

Page 10: ...8 ...

Page 11: ...th sides of the printer to lift it off the optional drawer Use only the power cord provided with this product or the manufacturer s authorized replacement Use only the telecommunications RJ 11 cord provided with this product or a 26 AWG or larger replacement when connecting this product to the public switched telephone network CAUTION SHOCK HAZARD If you are accessing the system board or installin...

Page 12: ...torm Do not set up this product or make any electrical or cabling connections such as the power supply cord or telephone during a lightning storm CAUTION SHOCKHAZARD Toavoidtheriskofelectricshockwhencleaningtheexterioroftheprinter unplug the power cord from the wall outlet and disconnect all cables from the printer before proceeding SAVE THESE INSTRUCTIONS Safety information 10 ...

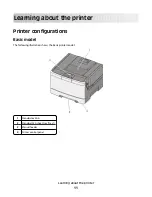
Page 13: ...rinter Printer configurations Basic model The following illustration shows the basic printer model 1 Standard exit bin 2 Standard 250 sheet tray Tray 1 3 Manual feeder 4 Printer control panel Learning about the printer 11 ...

Page 14: ...doors If you plan to install any options leave enough room for them also It is important to Make sure airflow in the room meets the latest revision of the ASHRAE 62 standard Provide a flat sturdy and stable surface Keep the printer Away from the direct airflow of air conditioners heaters or ventilators Free from direct sunlight humidity extremes or temperature fluctuations Clean dry and free of du...

Page 15: ...1 304 8 mm 12 0 in 2 508 mm 20 0 in 3 304 8 mm 12 0 in 4 304 8 mm 12 0 in 5 508 mm 20 0 in When the printer is set up allow clearance around it as shown Learning about the printer 13 ...

Page 16: ...rinter is warming up processing data or printing Solid green The printer is on but idle Blinking red Operator intervention is needed 4 Stop Cancel Stops all printer activity A list of options is offered once Stopped appears on the display 5 Navigation buttons Press or to scroll through menu lists 6 Back Returns the display to the previous screen 7 Menu Opens the menu index Note The menus are avail...

Page 17: ...ched to the printer then turn them off as well and unplug any cables going into the printer You can customize your printer connectivity and memory capacity by adding optional cards The instructions in this section explain how to install the available cards you can also use them to locate a card for removal Note Options are available only for some printer models Available options Note Certain optio...

Page 18: ...f and unplug the power cord from the wall outlet before continuing If you have any other devices attached to the printer then turn them off as well and unplug any cables going into the printer Note This operation requires a 2 Phillips screwdriver 1 Remove the cover a Turn the screws on the cover counterclockwise and then remove them b Gently pull the cover away from the printer and then remove it ...

Page 19: ...tential Damage System board electrical components are easily damaged by static electricity Touch something metal on the printer before touching any system board electronic componentsorconnectors 1 Flash memory card connector 2 Memory card connector Additional printer setup 17 ...

Page 20: ...stalling optional hardware or memory devices sometime after setting up the printer then turn the printer off and unplug the power cord from the wall outlet before continuing If you have any other devices attached to the printer then turn them off as well and unplug any cables going into the printer 1 Access the system board Additional printer setup 18 ...

Page 21: ...points along the edge of the card 4 Align the notches on the memory card with the ridges on the connector 5 Push the memory card straight into the connector until it snaps into place Make sure each latch fits over the notch located on either side of the memory card 1 Notch 2 Latch Additional printer setup 19 ...

Page 22: ...after setting up the printer then turn the printer off and unplug the power cord from the wall outlet before continuing If you have any other devices attached to the printer then turn them off as well and unplug any cables going into the printer 1 Access the system board 2 Unpack the memory card Note Avoid touching the connection points along the edge of the card Additional printer setup 20 ...

Page 23: ...em board This ensures the metal pins line up correctly as well 1 Plastic pins 2 Metal pins 4 Push the card firmly into place Notes The entire length of the connector on the card must touch and be flush against the system board Be careful not to damage the connectors Additional printer setup 21 ...

Page 24: ...urn the printer off and unplug the power cord from the wall outlet before continuing If you have any other devices attached to the printer then turn them off as well and unplug any cables going into the printer 1 Unpack the 650 sheet duo drawer and remove any packing material and the dust cover 2 Place the drawer in the location chosen for the printer 3 Align the printer with the 650 sheet duo dra...

Page 25: ... as the power cord during a lightning storm Connect the printer to the computer using a USB cable or an Ethernet cable A USB port requires a USB cable Be sure to match the USB symbol on the cable with the USB symbol on the printer Match the appropriate Ethernet cable to the Ethernet port Additional printer setup 23 ...

Page 26: ...twork connection This page also provides important information that aids network printing configuration Printing menu settings pages Print menu settings pages to review the current menu settings and to verify printer options are installed correctly Note If you have not made any menu item settings changes yet then the menu settings pages list all the factory default settings Once you select and sav...

Page 27: ... is Connected IfStatusis NotConnected theLANdrop maynotbeactive orthenetworkcablemaybemalfunctioning Consult a system support person for a solution and then print another network setup page Setting up the printer software Installing printer software A printer driver is software that lets the computer communicate with the printer The printer software is typically installed during the initial printe...

Page 28: ...inter 3 Right click the printer and then select Properties 4 Click the Install Options tab 5 Under Available Options add any installed hardware options 6 Click Apply For Macintosh users In Mac OS X version 10 5 1 From the Apple menu choose System Preferences 2 Click Print Fax 3 Select the printer and then click Options Supplies 4 Click Driver and then add any installed hardware options 5 Click OK ...

Page 29: ...ng the Default WEP Transmit Key or WPA or WPA2 passphrase WPA includes encryption as an additional layer of security The choices are AES or TKIP Encryption must be set for the same type on the router and on the printer or the printer will not be able to communicate on the network No security If your wireless network does not use any type of security then you will not have any security information ...

Page 30: ...l 4 Click Agree 5 Click Suggested 6 Click Wireless Network Attach 7 Connect the cables in the following order a Temporarily connect a USB cable between the computer on the wireless network and the printer Note After the printer is configured the software will instruct you to disconnect the temporary USB cable so you can print wirelessly b If your printer has faxing capabilities then connect the te...

Page 31: ... the power on Enter the printer information 1 Access the AirPort options In Mac OS X version 10 5 a From the Apple menu choose System Preferences b Click Network c Click AirPort In Mac OS X version 10 4 and earlier a From the Go menu choose Applications b Double click Internet Connect c From the toolbar click AirPort 2 From the Network pop up menu select print server xxxxxx where the x s are the l...

Page 32: ...he printer wirelessly To print to a network printer each Macintosh user must install a custom PostScript Printer Description PPD file and create a printer in the Print Center or Printer Setup Utility 1 Install a PPD file on the computer a Insert the Software and Documentation CD in the CD or DVD drive b Double click the installer package for the printer c From the Welcome screen click Continue d C...

Page 33: ...Utility 4 From the Printer List choose Add 5 Choose the Default Browser tab 6 Click More Printers 7 From the first pop up menu choose AppleTalk 8 From the second pop up menu select Local AppleTalk zone 9 Select the printer from the list 10 Click Add Installing the printer on a wired network Use the following instructions to install the printer on a wired network These instructions apply to Etherne...

Page 34: ...structions to complete the installation For Macintosh users 1 Allow the network DHCP server to assign an IP address to the printer 2 Print the network setup page from the printer For information on printing a network setup page see Printing a network setup page on page 25 3 Locate the printer IP address in the TCP IP section of the network setup page You will need the IP address if you are configu...

Page 35: ...nu choose System Preferences 2 Click Print Fax 3 Click 4 Click AppleTalk 5 Select the printer from the list 6 Click Add In Mac OS X version 10 4 and earlier 1 From the Go menu choose Applications 2 Double click Utilities 3 Double click Print Center or Printer Setup Utility 4 From the Printer List click Add 5 Choose the Default Browser tab 6 Click More Printers 7 From the first pop up menu choose A...

Page 36: ...the paper characteristics If the name that best describes your paper is used by linked trays assign a different Paper Type name to the tray such asCustom Type x or define your owncustom name Paper Size for example letter A4 statement Load a different paper size to change the Paper Size setting for a tray Paper Size settings are not automatic they must be set manually from the Paper Size menu Warni...

Page 37: ...Size 8 Press the arrow buttons until Type appears and then press 9 Press the arrow buttons until the correct type appears and then press Submitting changes appears followed by Type 10 Press and then press to return to the Ready state Configuring Universal paper settings The Universal Paper Size is a user defined setting that lets you print on paper sizes that are not preset in the printer menus Se...

Page 38: ...up menu press the arrow buttons until Portrait Width or Portrait Height appears and then press Note Select Portrait Height to adjust the paper height setting or Paper Width to adjust the paper width setting 2 Press the arrow buttons to decrease or to increase the setting and then press Submitting changes appears followed by the Universal Setup menu Loading the standard 250 sheet tray The printer h...

Page 39: ...ndicators on the bottom of the tray to help position the guide 3 If the paper is longer than letter size paper push the green tab at the back of the tray to elongate it 4 Flex the sheets back and forth to loosen them and then fan them Do not fold or crease the paper Straighten the edges on a level surface Loading paper and specialty media 37 ...

Page 40: ...viously loaded in the tray change the Paper Type or Paper Size setting for the tray from the printer control panel Note Mixing paper sizes or types in a paper tray may lead to jams Loading the optional 650 sheet duo drawer The 650 sheet duo drawer consists of a 550 sheet tray and a 100 sheet multipurpose feeder This drawer is loaded in the same way that the standard tray is loaded The only differe...

Page 41: ... Length guide tabs 2 Size indicators 3 Width guide tabs Using the multipurpose feeder 1 Push the multipurpose feeder latch to the left 2 Open the multipurpose feeder Loading paper and specialty media 39 ...

Page 42: ...es by the edges and fan them Straighten the edges on a level surface Note Avoid touching the print side of transparencies Be careful not to scratch them Flex a stack of envelopes back and forth to loosen them and then fan them Straighten the edges on a level surface 5 Locate the stack height limiter and tab Note Do not exceed the maximum stack height by forcing paper under the stack height limiter...

Page 43: ...e size and type of paper at a time 7 Make sure the paper is as far into the multipurpose feeder as it will go with very gentle pushing Paper should lie flat in the multipurpose feeder Make sure the paper fits loosely in the multipurpose feeder and is not bent or wrinkled 8 From the printer control panel set the Paper Size and Paper Type Using the manual feeder 1 Send a manual print job For Windows...

Page 44: ... manual feeder To achieve the best possible print quality use only high quality paper designed for laser printers 3 Move the width guide until it lightly touches the sheet Do notforce the width guide againstthe paper oritcould be damaged 4 Push the paper in until it stops The printer pulls it in farther 5 From the printer control panel set the Paper Size and Paper Type Loading paper and specialty ...

Page 45: ...ffield points however smoothness between 150 and 200 Sheffield points produces the best print quality Moisture content The amount of moisture in paper affects both print quality and the ability of the printer to feed the paper correctly Leave paper in its original wrapper until it is time to use it This limits the exposure of paper to moisture changes that can degrade its performance Condition pap...

Page 46: ...y Always use new undamaged paper Before loading paper know the recommended print side of the paper This information is usually indicated on the paper package Do not use paper that has been cut or trimmed by hand Do not mix paper sizes types or weights in the same source mixing results in jams Do not use coated papers unless they are specifically designed for electrophotographic printing Selecting ...

Page 47: ...ndoptionalpapersourcesandthetypesofpapertheysupport Note For an unlisted paper size select the closest larger listed size Paper sizes supported by the printer Paper size Dimensions 250 sheet tray standard 550 sheet tray optional Optional multipurpose feeder Manual feeder Duplex Standard exit tray A4 210 x 297 mm 8 3 x 11 7 in A5 148 x 210 mm 5 83 x 8 3 in X JIS B5 182 x 257 mm 7 2 x 10 1 in X A6 1...

Page 48: ...1 mm 4 1 x 9 5 in X X X DL Envelope 110 x 220 mm 4 3 x 8 7 in X X X B5 Envelope 176 x 250 mm 6 9 x 9 8 in X X X C5 Envelope 162 x 229 mm 6 4 x 9 in X X X Monarch 105 x 241 mm 4 1 x 9 5 in X X X Other Envelope 98 x 162 mm 3 9x6 3in upto 176 x 250 mm 6 9 x 9 8 in X X X WhenUniversalis selected thepageis formattedfor 216x 356mm 8 5x 14in unlessthesizeis specifiedbythesoftware program Paper types supp...

Page 49: ...o 176 g m2 grain long 27 8 to 47 lb bond Glossy papers Book 88 to 176 g m2 grain long 60 to 120 lb book Cover 162 to 176 g m2 grain long 60 to 65 lb cover Book 88 to 176 g m2 grain long 60 to 120 lb book Cover 162 to 176 g m2 grain long 60 to 65 lb cover Book 88 to 176 g m2 grain long 60 to 120 lb book Cover 162 to 176 g m2 grain long 60 to 65 lb cover Book 88 to 176 g m2 grain long 60 to 120 lb b...

Page 50: ...60 105 g m2 16 28 lb grain long bond The duplex does not support card stock transparencies envelopes and labels 3 For 60 to 176 g m2 16 to 47 lb bond paper we recommend grain long fibers 5 The pressure sensitive area must enter the printer first 6 100 percent cotton content maximum weight is 90 g m2 24 lb bond 7 105 g m2 28 lb bond envelopes are limited to 25 percent cotton content Paper capacitie...

Page 51: ...inters despite surface texture Before using these types of paper consult your paper supplier Suitable sheet to sheet coefficient of friction 0 4 0 6 Sufficient bending resistance in the direction of feed Recycled paper paper of lower weight 60 g m2 16 lb bond and or lower caliper 3 8 mils 0 1 mm and paper that is cut grain short for portrait or short edge fed printers may have lower bending resist...

Page 52: ...gs to match the loaded paper or select the appropriate tray or feeder c Click OK and then click Print For Macintosh users a Customize the settings as needed in the Page Setup dialog 1 With a document open choose File Page Setup 2 Choose a paper size or create a custom size to match the loaded paper 3 Click OK b Customize the settings as needed in the Print dialog 1 With a document open choose File...

Page 53: ...al 550 sheet tray Simplex one sided printing from trays Printed letterhead design is placed faceup The top edge of the sheet with the logo is placed at the front of the tray Duplex two sided printing from trays Printed letterhead design is placed facedown The top edge of the sheet with the logo is placed at the back of the tray Note Check with the manufacturer or vendor to determine whether the ch...

Page 54: ...Print samples on the transparencies being considered for use before buying large quantities When printing on transparencies Feed transparencies from the 250 sheet tray manual feeder or optional multipurpose feeder Use transparencies designed specifically for laser printers Check with the manufacturer or vendor to ensure transparencies are able to withstand temperatures up to 200 C 392 F without me...

Page 55: ...ure may wrinkle or seal envelopes Tips on using paper labels Print samples on the labels being considered for use before buying large quantities Note Use only paper label sheets When printing on labels From MarkVision Professional the printer software or the printer control panel set the Paper Type to Labels Use only letter A4 or legal size label sheets Use labels designed specifically for laser p...

Page 56: ... MarkVision Professional the printer software or the printer control panel 1 Set the Paper Type to Card Stock 2 Set the Paper Weight to Card Stock Weight 3 Set the Card Stock Weight to Normal or Heavy Be aware that preprinting perforation and creasing may significantly affect the print quality and cause jams or other paper handling problems Check with the manufacturer or vendor to ensure the card ...

Page 57: ...ntrol panel You cannot print files for which you do not have printing permissions To print from a flash drive 1 Make sure the printer is on and Ready or Busy appears 2 Insert a flash drive into the USB port Notes If you insert the flash drive when the printer requires attention such as when a jam has occurred the printer ignores the memory device If you insert the flash drive while the printer is ...

Page 58: ...ure the printer is on and Ready appears 2 From the printer control panel press 3 Press the arrow buttons until Reports appears and then press After the directory list prints Ready appears Printing the print quality test pages Print the print quality test pages to isolate print quality problems 1 Turn the printer off 2 Hold down and the right arrow button while turning the printer on 3 Release the ...

Page 59: ...rint a small printer icon appears in the right corner of the taskbar 1 Double click the printer icon A list of print jobs appears in the printer window 2 Select a job to cancel 3 From the keyboard press Delete For Macintosh users In Mac OS X version 10 5 1 From the Apple menu choose System Preferences 2 Click Print Fax and then double click the printer icon 3 From the printer window select the job...

Page 60: ...4 From the printer window select the job to cancel 5 From the icon bar at the top of the window click the Delete icon Printing 58 ...

Page 61: ...ia Formore information see Papertypesand weights supported by the printer on page 47 Do not load wrinkled creased damp bent or curled paper Flex fan and straighten paper before loading it Do not use paper that has been cut or trimmed by hand Do not mix paper sizes weights or types in the same stack Make sure all sizes and types are set correctly in the printer control panel menus Store paper per t...

Page 62: ...e any jams 2 Open the fuser cover Inspect the area under the cover and then remove any jams 3 Close the front door 4 Pull Tray 1 out Inspect the tray area and then remove any jams 5 Verify that the paper is loaded correctly 6 Reinsert Tray 1 2 201 Under the fuser 3 202 In the fuser 4 230 In the duplex 5 235 In the duplex Note This jam number indicates that the paper being used for a duplex print j...

Page 63: ...sure all paper fragments are removed 3 Insert the tray 4 Press 201 paper jam 1 Grasp the front door at the side handholds and then pull it toward you to open it CAUTION HOT SURFACE The inside of the printer might be hot To reduce the risk of injury from a hot component allow the surface to cool before touching Clearing jams 61 ...

Page 64: ... side handholds and then pull it toward you to open it CAUTION HOT SURFACE The inside of the printer might be hot To reduce the risk of injury from a hot component allow the surface to cool before touching 2 Grasp the green lever and then pull the fuser cover toward you 3 Hold the fuser cover down and then remove the jammed paper Clearing jams 62 ...

Page 65: ...The fuser cover closes when released Note Make sure all paper fragments are removed 4 Close the front door 5 Press Clearing jams 63 ...

Page 66: ...n pull it toward you to open it 2 Remove the jam 3 Load the tray with the correct paper size 4 Insert the tray 5 Close the front door 6 Press 242 paper jam 1 Grasp the handle and pull the optional 650 sheet duo drawer out 2 If a paper jam is in the multipurpose feeder push the lever 3 Remove the jam Note Make sure all paper fragments are removed 4 Insert the tray 5 Press Clearing jams 64 ...

Page 67: ...250 paper jam 1 Push the lever in the multipurpose feeder to access the paper jammed 2 Remove the jam Note Make sure all paper fragments are removed 3 Insert the tray 4 Press Clearing jams 65 ...

Page 68: ...artridge Black Cartridge Imaging Kit Waste Toner Bottle Default Source Size Type Paper Texture Paper Weight Paper Loading Custom Type Universal Setup Menu Settings Page Device Statistics Network Setup Page Profiles List Print Fonts Print Directory Print Defects Print Demo Asset Report General Settings Setup Menu Finishing Menu Quality Menu Utilities Menu PDF Menu PostScript Menu PCL Emul Menu Imag...

Page 69: ...ault Source menu Menu item Description Default Source Tray x MP Feeder Manual Paper Manual Env Sets a default paper source for all print jobs Notes The 650 sheet duo drawer must be installed in order for MP Feeder or Tray 2 to appear as a menu setting in the Paper Menu Tray 1 standard tray is the factory default setting Only an installed paper source will appear as a menu setting A paper source se...

Page 70: ...ay is empty the job prints using the linked tray Tray x Type Plain Paper Glossy Paper Card Stock Transparency Recycled Letterhead Colored Paper Labels Bond Preprinted Light Paper Heavy Paper Rough Cotton Custom Type x Specifies the type of paper loaded in each tray Notes Plain Paper is the factory default setting for Tray 1 Custom Type x is the factory default setting for all other trays Ifavailab...

Page 71: ...ternational factory default setting The multipurpose feeder does not automatically sense paper size The paper size value must be set MP Feeder Type Plain Paper Glossy Paper Card Stock Transparency Recycled Letterhead Colored Paper Labels Bond Envelope Preprinted Light Paper Heavy Paper Rough Cotton Custom Type x Specifies the type of paper loaded in the multipurpose feeder Notes The 650 sheet duo ...

Page 72: ...Custom Type x Specifies the type of paper being manually loaded Note Plain Paper is the factory default setting Manual Envelope Size 7 3 4 Envelope 9 Envelope 10 Envelope DL Envelope B5 Envelope C5 Envelope Other Envelope Specifies the size of the envelope being manually loaded Note 10 Envelope is the US factory default setting DL Envelope is the international factory default setting Manual Envelo...

Page 73: ...ture Smooth Normal Rough Specifies the relative texture of the Glossy paper loaded in a specific tray Note Normal is the factory default setting Labels Texture Smooth Normal Rough Specifies the relative texture of the labels loaded in a specific tray Note Normal is the factory default setting Bond Texture Smooth Normal Rough Specifies the relative texture of the paper loaded in a specific tray Not...

Page 74: ...h is the factory default setting Settings appear only if the custom type is supported Custom x Paper Smooth Normal Rough Specifies the relative texture of the custom paper loaded in a specific tray Notes Normal is the factory default setting Settings appear only if the custom type is supported Paper Weight menu Menu items Definition Plain Weight Glossy Weight Bond Weight Letterhead Weight Preprint...

Page 75: ...c tray Notes Light is the factory default setting Settings appear only if light paper is supported Heavy Paper Weight Heavy Identifies the relative weight of the heavy paper loaded in a specific tray Notes Heavy is the factory default setting Settings appear only if heavy paper is supported Rough Cotton Paper Weight Normal Identifies the relative weight of the rough cotton paper loaded in a specif...

Page 76: ...whether 2 sided printing occurs for all jobs that specify Colored as the paper type Note Off is the factory default setting Light Paper Loading Duplex Off Determines whether 2 sided printing occurs for all jobs that specify Light Paper as the paper type Note Off is the factory default setting Heavy Paper Loading Duplex Off Determines whether 2 sided printing occurs for all jobs that specify Heavy ...

Page 77: ... tray or feeder in order for you to print from that source Universal Setup menu These menu items are used to specify the height width and feed direction of the Universal Paper Size The Universal PaperSizeisauser definedpapersizesetting Itislistedwiththeotherpapersizesettingsandincludessimilaroptions such as support for duplex printing and printing multiple pages on one sheet Menu item Description ...

Page 78: ...f the longest edge is shorter than the maximum length supported in the tray Reports Menu Settings Page menu Menu item Description Menu Settings Page Prints a report containing information about paper loaded into trays installed memory the total page count alarms timeouts the printer control panel language the TCP IP address the status of supplies the status of the network connection and other info...

Page 79: ...ts PostScript Fonts PPDS Fonts Prints a sample of all the fonts available for the printer language currently set in the printer Note A separate list is available for PCL PostScript and PPDS emulations Print Directory menu Menu item Description Print Directory Prints a list of all the resources stored on an optional flash memory card Notes The optional flash memory or printer hard disk must be inst...

Page 80: ...ess of the default printer language Notes On is the factory default setting When the Off setting is used the printer does not examine incoming data When the Off setting is used the printer uses PostScript emulation if PS SmartSwitch is set to On It uses the default printer language specified in the Setup menu if PS SmartSwitch is set to Off PS SmartSwitch On Off Sets the printer to automatically s...

Page 81: ...inter to process Macintosh binary PostScript print jobs Notes Auto is the factory default setting The Off setting filters print jobs using the standard protocol The On setting processes raw binary PostScript print jobs Network Setup Reports Menu Network Card menu TCIP Menu IPv6 Menu Wireless menu AppleTalk menu SE Menu List all the network setup menus regardless of the active printer network Note ...

Page 82: ...data WhentheOffsettingisused theprinterusesPCLemulationifPCLSmartSwitch is set to On It uses the default printer language specified in the Setup menu if PCL SmartSwitch is set to Off NPA Mode Off Auto Sets the printer to perform the special processing required for bidirectional communication following the conventions defined by the NPA protocol Notes Auto is the factory default setting Changing th...

Page 83: ...ble Note Thismenuitemisavailableonlyiftheprinterisattachedtoanexternalprinter server through the USB port ENA Netmask Sets the netmask information for an external print server that is attached to the printer using a USB cable Note This menu item is available only if the printer is attached to an external print server through the USB port ENA Gateway Sets the gateway information for an external pri...

Page 84: ...display and entering one minute power saver Notes Off is the factory default setting Off resets the printer to its factory default settings The Energy setting minimizes the power used by the printer Performance may be affected but print quality is not Energy Paper minimizes the use of power and of paper and specialty media Paper minimizes the amount of paper and specialty media needed for a print ...

Page 85: ... Auto is the factory default setting The printer reprints jammedpagesunlessthememoryrequiredtoholdthepages is needed for other printer tasks On sets the printer to always reprint jammed pages Off sets the printer to never reprint jammed pages Print Recovery Page Protect Off On Lets the printer successfully print a page that may not have printed otherwise Notes Offisthefactorydefaultsetting Offprin...

Page 86: ...ffect on PCL or PPDS emulation print jobs Factory Defaults Do Not Restore Restore Returns the printer settings to the factory default settings Notes Do Not Restore is the factory default setting Do Not Restore keeps the user defined settings Restore returns all printer settings to the factory default settings except Network Ports menu settings Alldownloads storedinRAMaredeleted Downloadsstoredinfl...

Page 87: ...e left edge of portrait pages and the top edge of landscape pages Short Edge specifies that binding be placed on the top edge of portrait pages and the left edge of landscape pages Copies 1 999 Specifies a default number of copies for each print job Notes 1 is the factory default setting To specify the number of copies for a specific print job from the software program click File Print and then cl...

Page 88: ...nt for notes Separator Source Tray x MP Feeder Specifies the paper source for separator sheets Notes Tray 1 standard tray is the factory default setting From the Paper menu Configure MP must be set to Cassette in order for MP Feeder to appear as a menu setting N Up Off 2 Up 3 Up 4 Up 6 Up 9 Up 12 Up 16 Up Specifies that multiple page images be printed on one side of a sheet of paper Note The numbe...

Page 89: ...ngof5increasestonerdensityanddarkness to all print jobs If Print Mode is set to Color a setting of 5 is the same as a setting of 4 Enhance Fine Lines On Off Enables a print mode preferable for files such as architectural drawings maps electrical circuit diagrams and flow charts Note To set Enhance Fine Lines from the software program for Windows users click File Print andthenclickProperties Prefer...

Page 90: ...y default setting Color Balance Reset Defaults Restores the Color Balance factory default settings Color Samples sRGB Display sRGB Vivid Display True Black Vivid Off RGB US CMYK Euro CMYK Vivid CMYK Off CMYK Prints sample pages for each of the RGBand CMYKcolor conversion tables used in the printer Notes Selecting any setting prints the sample Color samples consist of a series of colored boxes alon...

Page 91: ...righter more saturated colors Display True Black applies a color conversion table that uses only black toner for neutral gray colors Off turns off color conversion Manual Color CMYK Image US CMYK Euro CMYK Vivid CMYK Off CMYK Text US CMYK Euro CMYK Vivid CMYK Off CMYK Graphics US CMYK Euro CMYK Vivid CMYK Off Customizes the CMYK color conversions Notes US CMYK is the US factory default setting US ...

Page 92: ...Write or Write protected No cancels the defragment request Yes reformats the flash memory after transferring all downloads to regular printermemory When formatting iscomplete the downloads are loaded back into flash memory Hex Trace Activate Assists in isolating the source of a print job problem Notes When Activate is selected all data sent to the printer is printed in hexadecimal and character re...

Page 93: ...y default setting Image Smoothing has no effect on images that are 300 dpi or higher in resolution PCL Emul menu Menu item Description Font Source Resident Download Flash All Specifies the set of fonts used by the Font Name menu item Notes Resident is the factory default setting It shows the factory default set of fonts downloaded into RAM Flash settings show all fonts resident in that option Flas...

Page 94: ...space characters per inch cpi Pitch can be increased or decreased in 0 01 cpi increments For nonscalable monospaced fonts the pitch appears on the display but cannot be changed PCL Emulation Settings Orientation Portrait Landscape Specifies the orientation of text and graphics on the page Notes Portrait is the factory default setting Portrait prints text and graphics parallel to the short edge of ...

Page 95: ...gn MP Feeder Off None 0 199 Assign Tray x Off None 0 199 Assign Manual Paper Off None 0 199 Assign Man Env Off None 0 199 Configures the printer to work with printer software or programs that use different source assignments for trays drawers and feeders Notes Off is the factory default setting None is not an available selection It is displayed only when it is selected by the PCL 5 interpreter Non...

Page 96: ...ted paper size Notes Best Fit is the factory default setting When Auto Fit is set to On Scaling is automatically set to Best Fit Orientation Portrait Landscape Rev Portrait Rev Landscape Sets the image orientation Note Portrait is the factory default setting PictBridge menu Note Certain options are not available on selected printer models Menu item Description Photo Size Auto is the default L 2L H...

Page 97: ...e printer value Paper Source MP Feeder Tray x Manual Paper Identifies the printer default input source when printing photos from a PictBridge enabled device Note A photo size larger than the size of the PictBridge default source s installed media cannot be selected Flash drive menu Note The USB Direct Interface is not available on selected printer models Menu item Description Enable Drive Enable D...

Page 98: ...rial Num Set a valid serial number color Low Replace the toner cartridge and then wait for the message to clear Defragmenting Flash The printer is performing the defragmentation operation on flash memory Wait for the message to clear Warning Potential Damage Do not turn the printer off while this message appears on the display Flushing buffer Wait for the message to clear Formatting Flash Wait for...

Page 99: ...more of the following Load the paper tray or other source with the correct paper type and size Press and then press to cancel printing Load single sheet feeder with custom type name Try one or more of the following Load the manual feeder with the correct paper type and size If no paper is in the manual feeder load a sheet and then press to clear the message and continue printing Press to clear the...

Page 100: ...cancel printing Load single sheet feeder with type size Try one or more of the following Load the manual feeder with the correct paper type and size If no paper is in the feeder load a sheet and then select to clear the message and continue printing Press to clear the message and continue printing The printer manually overrides the manual request and then paper prints from an automatic source Pres...

Page 101: ...r the message and continue printing Press to clear the message and continue printing Remove packaging material Check for and remove any packaging materials from the toner cartridges Replace color cartridge Replace the toner cartridge and then press to clear the message and continue printing Tray x Empty Try one or more of the following Load the paper tray or other source with the correct paper typ...

Page 102: ...ting 30 color Toner Cart Missing Insert the missing toner cartridge to clear the message and continue printing If the message appears again remove the cartridge and then insert it until it clicks into place 31 yy Defective color Cartridge Try one or more of the following Open and close the top cover Remove the specified toner cartridge and then insert it until it clicks into place Turn the printer...

Page 103: ...t memory for Flash memory Defragment operation The printer cannot defragment flash memory because the memory used to store undeleted flash resources is full To perform the defragment operation delete fonts macros and other data in the memory or install additional printer memory and then press to continue printing Press and then press to cancel printing 38 Memory Full The printer does not have enou...

Page 104: ...following Press to clear the message and continue printing Format the flash memory If the message remains the flash memory may be defective and require replacing 54 Standard x software error The printer detects that a network port is installed but cannot communicate with it The printer disables all communication to the associated network interface Try one or more of the following Press to clear th...

Page 105: ...t the power cord to a properly grounded outlet 5 Turn the printer back on 58 Too many trays attached 1 Turn the printer off 2 Unplug the power cord from the wall outlet 3 Remove the additional trays 4 Connect the power cord to a properly grounded outlet 5 Turn the printer back on 59 Incompatible tray x Remove the specified tray 82 Replace waste toner box Replace the waste toner bottle For more inf...

Page 106: ...m area name 1 Clear the paper path 2 Open the front door and then remove the jammed paper 3 Close the front door 4 Press to clear the message and continue printing Note When there is more than one jam the message displays the number of pages jammed 235 yy Paper jam area name 1 Clear the paper path 2 Open the front door and then remove the jammed paper 3 Close the front door 4 Load the tray with th...

Page 107: ...t10seconds and then turn the printer back on 941 01 Press down on the magenta toner cartridge to make sure it is installed properly Turn the printer off wait about 10 seconds and then turn the printer back on 942 01 Press down on the yellow toner cartridge to make sure it is installed properly Turn the printer off wait about 10 seconds and then turn the printer back on 943 01 Press down on the bla...

Page 108: ...943 02 The black toner cartridge needs maintenance Call for service Understanding printer messages 106 ...

Page 109: ... to print several copies you can conserve supplies by printing the first copy and checking it for accuracy before printing the remaining copies Checking the status of supplies A message appears on the display when a replacement supply item is needed or when maintenance is required Checking the status of supplies from the printer control panel You can check the status of printer supplies by printin...

Page 110: ...ridge 88 Replace Yellow Cartridge or 88 Replace Black Cartridge appears you must replace the specified toner cartridge To order toner cartridges contact the place where you purchased the printer Ordering imaging kits When Replace black and color imaging kit or Replace black imaging kit appears order a replacement imaging kit To order an image kit contact the place where you purchased the printer O...

Page 111: ...placement waste toner bottle 2 Grasp the front door at the side handholds and then pull it toward you CAUTION HOT SURFACE The inside of the printer might be hot To reduce the risk of injury from a hot component allow the surface to cool before touching Maintaining the printer 109 ...

Page 112: ...he top door 4 Remove the right side cover 5 Press the green levers on each side of the waste toner bottle and then remove it 6 Place the waste toner bottle in the enclosed packaging Maintaining the printer 110 ...

Page 113: ...7 Insert the new waste toner bottle 8 Replace the right side cover 9 Close the top door Maintaining the printer 111 ...

Page 114: ...Imaging Kit appears 1 Grasp the front door at the side handholds and then pull it toward you CAUTION HOT SURFACE The inside of the printer might be hot To reduce the risk of injury from a hot component allow the surface to cool before touching 2 Open the top door Maintaining the printer 112 ...

Page 115: ...rtridges by lifting the handles and then gently pulling away from the imaging kit 4 Remove the right side cover 5 Press the green levers on each side of the waste toner bottle and then remove it Maintaining the printer 113 ...

Page 116: ...ng Potential Damage Do not touch the underside of the imaging kit This could damage the imaging kit 8 Remove the yellow cyan and magenta developer units 9 Unpack the replacement black imaging kit Leave the packaging on the black developer unit 10 Gently shake the black developer unit side to side 11 Remove the packaging from the black developer unit Maintaining the printer 114 ...

Page 117: ...ce the yellow cyan and magenta developer units Note Make sure each developer unit is inserted into a matching color slot 14 Place the used black imaging kit in the enclosed package 15 Align and insert the imaging kit Maintaining the printer 115 ...

Page 118: ...16 Rotate the blue levers down until the imaging kit drops into place 17 Replace the waste toner bottle 18 Replace the right side cover Maintaining the printer 116 ...

Page 119: ...ace the black and color imaging kit when Imaging Kit appears 1 Grasp the front door at the side handholds and then pull it toward you to open it CAUTION HOT SURFACE The inside of the printer might be hot To reduce the risk of injury from a hot component allow the surface to cool before touching Maintaining the printer 117 ...

Page 120: ...2 Open the top door 3 Remove the toner cartridges by lifting the handles and then gently pulling away from the imaging kit 4 Remove the right side cover Maintaining the printer 118 ...

Page 121: ...s grasp the green handles on the sides and then pull the imaging kit out Warning Potential Damage Do not touch the underside of the imaging kit This could damage the imaging kit 8 Unpack the replacement black and color imaging kit Leave the packaging on the developer units 9 Gently shake the yellow cyan magenta and black developer units side to side Maintaining the printer 119 ...

Page 122: ...llow cyan magenta and black developer units 11 Insert the yellow cyan magenta and black developer units 12 Place the used black and color imaging kit in the enclosed package 13 Align and insert the imaging kit Maintaining the printer 120 ...

Page 123: ...14 Replace the waste toner bottle 15 Replace the right side cover 16 Replace the toner cartridges Maintaining the printer 121 ...

Page 124: ...yan magenta or black when 88 Replace color Cartridge appears The printer will not continue printing until the specified cartridge is replaced 1 Make sure the printer is on and Ready or 88 Replace color Cartridge appears 2 Unpack the new cartridge and set it near the printer 3 Open the top door Maintaining the printer 122 ...

Page 125: ... the toner cartridge by lifting the handle and then gently pulling away from the imaging kit 5 Align the new toner cartridge and then press down until it is all the way into the slot Maintaining the printer 123 ...

Page 126: ...ed you must manually calibrate the color For more information see Color misregistration on page 149 1 Grasp the front door at the side handholds and then pull it toward you to open it CAUTION HOT SURFACE The inside of the printer might be hot To reduce the risk of injury from a hot component allow the surface to cool before touching 2 Open the top door Maintaining the printer 124 ...

Page 127: ...rtridges by lifting the handles and then gently pulling away from the imaging kit 4 Remove the right side cover 5 Press the green levers on each side of the waste toner bottle and then remove it Maintaining the printer 125 ...

Page 128: ...ng kit out Warning Potential Damage Do not touch the underside of the imaging kit This could damage the imaging kit 8 Remove the used developer unit 9 Place the used developer in the enclosed package 10 Unpack the replacement developer unit Leave the packaging on the developer unit 11 Gently shake the developer unit side to side Maintaining the printer 126 ...

Page 129: ...12 Remove the red shipping cover from the developer unit 13 Insert the developer unit 14 Align and insert the imaging kit Maintaining the printer 127 ...

Page 130: ...15 Replace the waste toner bottle 16 Replace the right side cover Maintaining the printer 128 ...

Page 131: ...RD To avoid the risk of electric shock when cleaning the exterior of the printer unplug the power cord from the wall outlet and disconnect all cables from the printer before proceeding 2 Remove paper from the standard exit tray 3 Dampen a clean lint free cloth with water Warning Potential Damage Do not use household cleaners or detergents as they may damage the finish of the printer Maintaining th...

Page 132: ...e moving it Lift the printer off of the optional drawer and set it aside instead of trying to lift the drawer and printer at the same time Note Use the handholds located on both sides of the printer to lift it off the optional drawer Warning Potential Damage Damage to the printer caused by improper moving is not covered by the printer warranty Moving the printer to another location The printer and...

Page 133: ...gs are restored All downloaded resources in the printer memory are deleted This includes fonts macros and symbol sets All settings return to the factory default settings except Printer Language in the Setup menu and custom settings in the Network and USB menus Adjusting Power Saver 1 Make sure the printer is on and Ready appears 2 From the printer control panel press 3 Press the arrow buttons unti...

Page 134: ...onnected to a computer by a USB or parallel cable then open the Local Printer Settings Utility for Windows or Printer Settings for Macintosh to access printer menus Setting up e mail alerts You can have the printer send you an e mail when the supplies are getting low or when the paper needs to be changed added or unjammed To set up e mail alerts 1 Type the printer IP address into the address field...

Page 135: ...rinter settings to other printers Using the Embedded Web Server you can copy printer settings to up to 15 other network printers To copy printer settings 1 Type the printer IP address into the address field of your Web browser Note If you do not know the IP address of the printer then print a network setup page and locate the IP address in the TCP IP section 2 Click Copy Printer Settings 3 To chan...

Page 136: ... printer off wait for about 10 seconds and then turn the printer back on This often fixes the problem Solving printing problems Printer control panel display is blank or displays only diamonds The printer self test failed Turn the printer off wait about 10 seconds and then turn the printer back on If Ready does not appear turn the printer off and contact Customer Support Error message about readin...

Page 137: ...CE THE COMPLEXITY OF THE PRINT JOB Eliminate the number and size of fonts the number and complexity of images and the number of pages in the job CHANGE THE PAGE PROTECT SETTING TO OFF 1 From the printer control panel press 2 Press the arrow buttons until Settings appears and then press 3 Press the arrow buttons until Setup Menu appears and then press 4 Press the arrow buttons until Print Recovery ...

Page 138: ...m the printer control panel Finishing menu Print Properties or the Print dialog set Collate to On Note Setting Collate to Off in the software overrides the setting in the Finishing menu REDUCE THE COMPLEXITY OF THE PRINT JOB Reduce the complexity of the print job by eliminating the number and size of fonts the number and complexity of images and the number of pages in the job MAKE SURE THE PRINTER...

Page 139: ... list If the option is not listed then reinstall it For more information see the hardware setup documentation that came with the option MAKE SURE THE OPTION IS SELECTED Fromthecomputeryou are printingfrom selectthe option Formoreinformation see Updatingavailableoptions in the printer driver on page 26 Drawers MAKE SURE THE PAPER IS LOADED CORRECTLY 1 Open the paper tray 2 Check for paper jams or m...

Page 140: ...ition for the size loaded CHECK FOR SERVICE MESSAGES If a service message appears turn the printer off wait about 10 seconds and then turn the printer back on If the error recurs call for service Memory card Make sure the memory card is securely connected to the printer system board Solving paper feed problems Paper frequently jams These are possible solutions Try one or more of the following CHEC...

Page 141: ... the arrow buttons until General settings appears and then press 4 Press the arrow buttons until Print Recovery appears and then press 5 Press the arrow buttons until Jam Recovery appears and then press 6 Press the arrow buttons until On or Auto appears and then press Solving print quality problems Theinformationinthe following topicsmayhelp you solveprintqualityproblems Ifthese suggestionsdo notc...

Page 142: ...il Exit Config Menu appears and then press Blank pages The printer may need to be serviced For more information contact Customer Support Characters have jagged or uneven edges These are possible solutions Try one or more of the following CHECK THE PRINT QUALITY SETTINGS Change the Print Resolution setting in the Quality menu to 600 dpi 1200 Image Q 1200 dpi or 2400 Image Q Enable Enhance Fine Line...

Page 143: ...specify the correct size setting For Windows users specify the size from Print Properties For Macintosh users specify the size from the Page Setup dialog Dark lines The imaging kit may be defective If Black and color imaging kit life warning orBlack imaging kit life warning appears replace the imaging kit Gray background CHECK THE TONER DARKNESS SETTING Select a lighter Toner Darkness setting From...

Page 144: ... the size from the Page Setup dialog CHECK THE PAGE SIZE SETTING Before sending the job to print specify the correct page size in the Print dialog or the software program Light colored line white line or incorrectly colored line These are possible solutions Try one or more of the following A TONER CARTRIDGE MAY BE DEFECTIVE Replace the defective toner cartridge THE IMAGING KIT MAY BE DEFECTIVE Rep...

Page 145: ...ntil you use it Print irregularities These are possible solutions Try one or more of the following THE PAPER MAY HAVE ABSORBED MOISTURE DUE TO HIGH HUMIDITY Load paper from a fresh package Store paper in its original wrapper until you use it CHECK THE PAPER TYPE SETTING Make sure the Paper Type setting matches the paper loaded in the tray CHECK THE PAPER Avoid textured paper with rough finishes TH...

Page 146: ...etting is too dark the RGB Brightness setting is too dark or the RGB Contrast setting is too high For Windows users from Print Properties select Print Quality and then select More Print Quality Options to change these settings From the printer control panel Quality menu change these settings For Macintosh users 1 Choose File Print 2 Locate the drop down box under the Orientation pictures and then ...

Page 147: ...D CONTRAST SETTINGS The Toner Darkness setting is too light the RGB Brightness setting is too light or the RGB Contrast setting is too low For Windows users from Print Properties select Print Quality and then select More Print Quality Options to change these settings For Macintosh users 1 Choose File Print 2 Locate the drop down box under the Orientation pictures and then click the down button 3 C...

Page 148: ...maging kit contains cyan magenta yellow and black The black imaging kit contains black only Repeating defects REPEATING MARKS OCCUR REPEATEDLY ONLY IN ONE COLOR AND MULTIPLE TIMES ON A PAGE Replace the developer unit if the defects occur every 43 9 mm 1 7 in Replace the imaging kit if the defects occur every 34 6 mm 1 4 in 94 2 mm 3 71 in Notes The printer has two types of imaging kits a black and...

Page 149: ... shading appears on the page These are possible solutions Try one or more of the following THE IMAGING KIT MAY BE WORN OR DEFECTIVE Replace the imaging kit Note The printer has two types of imaging kits a black and color imaging kit and a black imaging kit The black and color imaging kit contains cyan magenta yellow and black The black imaging kit contains black only IS THERE TONER IN THE PAPER PA...

Page 150: ... menu make sure the Paper Texture setting matches the paper loaded in the tray Toner specks These are possible solutions Try one or more of the following THE IMAGING KIT MAY BE WORN OR DEFECTIVE Replace the imaging kit Note The printer has two types of imaging kits a black and color imaging kit and a black imaging kit The black and color imaging kit contains cyan magenta yellow and black The black...

Page 151: ...int density Replace the black and color imaging kit Solving color quality problems This section helps answer some basic color related questions and describes how some of the features provided in the printer control panel Quality menu can be used to solve typical color problems Color misregistration Color has shifted outside of the appropriate area or has been superimposed over another color area T...

Page 152: ... RGB or CMYK color combinations Additionally they allow users to modify the color of each object in a document For more information see the software program Help topics How does the printer know what color to print When a user prints a document information describing the type and color of each object is sent to the printer The color information is passed through color conversion tables that transl...

Page 153: ...lor Correction must be set to Manual or no user defined color conversion will be implemented Manual color correction settings are specific to the type of object being printed text graphics or images and how the color of the object is specified in the software program RGB or CMYK combinations Notes Manual color correction is not useful if the software program does not specify colors with RGB or CMY...

Page 154: ...olor matching problem depends onthe ColorCorrection setting being used Auto Off or Manual the type of object being printed text graphics or images and how the color of the object is specified in the software program RGB or CMYK combinations When the printer Color Correction setting is set to Off the color is based on the print job information and no color conversion is implemented Note The Color S...

Page 155: ...t describe the problem you are experiencing the message on the display and the troubleshooting steps you have already taken to find a solution You need to know your printer model type and serial number For more information see the label on the inside top front cover of the printer The serial number is also listed on the menu settings page For customer support contact the place where you purchased ...

Page 156: ...d documentation developed exclusively at private expense Federal Communications Commission FCC compliance information statement This product has been tested and found to comply with the limits for a Class B digital device pursuant to Part 15 of theFCCRules Operationissubjecttothefollowingtwoconditions 1 thisdevicemaynotcauseharmfulinterference and 2 thisdevicemustacceptanyinterference received inc...

Page 157: ...o frequency radiation The following notice is applicable if your printer has a wireless network card installed Theradiated outputpowerof this device isfar belowtheFCCradiofrequencyexposure limits A minimum separation of20cm 8inches mustbemaintainedbetweentheantennaandanypersonsforthisdevicetosatisfytheRFexposure requirements of the FCC Industry Canada notices Industry Canada compliance statement T...

Page 158: ...ir une protection optimale Si le matériel ou son antenne d émission est installé à l extérieur il doit faire l objet d une licence L installateurde cet équipementradio doit veiller à ce que l antenne soitimplantée etdirigée de manière à n émettre aucun champ HF dépassant les limites fixées pour l ensemble de la population par Santé Canada Reportez vous au Code de sécurité 6 que vous pouvez consult...

Page 159: ... CE Magyar Alulírott Lexmark International Inc nyilatkozom hogy a termék megfelel a vonatkozó alapvetõ követelményeknek és az 1999 5 EC irányelv egyéb elõírásainak Íslenska Hér með lýsir Lexmark International Inc yfir því að þessi vara er í samræmi við grunnkröfur og aðrar kröfur sem gerðar eru í tilskipun 1999 5 EC Italiano Con la presente Lexmark International Inc dichiara che questo questo prod...

Page 160: ...ising out of requirement of permissions from any local authority regulatory bodies or any organization required by the end user to install and operate this product at his premises Static sensitivity notice This symbol identifies static sensitive parts Do not touch in the areas near these symbols without first touching the metal frame of the printer Noise emission levels The following measurements ...

Page 161: ... I level during normal operation user maintenance or prescribed service condition Laser advisory label A laser notice label may be affixed to this printer as shown Power consumption Product power consumption The following table documents the power consumption characteristics of the product Note Some modes may not apply to your product Mode Description Power consumption Watts Printing The product i...

Page 162: ...E PATENT LICENSE IMPORTANT PLEASE READ BEFORE OPENING Opening this package installing the printing device software or using the products inside confirms your acceptance of the following licenses agreements DEVICE LICENSE AGREEMENT The patented printer is licensed for and designed to work with only genuine toner cartridges and developer components made by the manufacturer of this printer for the li...

Page 163: ...rtridge is low 103 88 yy Replace color Cartridge 104 940 01 105 940 02 105 941 01 105 941 02 105 942 01 105 942 02 105 943 01 105 943 02 106 A Active NIC menu 78 Asset Report menu 78 attaching cables 23 B Black Low 96 Busy 96 C cables attaching Ethernet 23 USB 23 Calibrating 96 calling Customer Support 153 canceling a job from Macintosh 57 from the printer control panel 56 from Windows 57 card sto...

Page 164: ...ype name 97 Load single sheet feeder with custom string 98 Load single sheet feeder with custom type name 97 Load single sheet feeder with size 98 Load single sheet feeder with type size 98 loading 250 sheet tray standard 36 650 sheet duo drawer optional 38 card stock 39 envelopes 39 41 letterhead in manual feeder 51 letterhead in trays 51 manual feeder 41 multipurpose feeder 39 transparencies 39 ...

Page 165: ...uality 148 print irregularities 143 print is too dark 144 print is too light 145 print quality test pages 139 repeating defects 146 skewed print 147 solid color pages 147 toner fog or background shading 147 toner rubs off 147 toner specks 148 uneven print density 149 print troubleshooting error reading USB drive 134 incorrect characters print 135 incorrect margins 142 jammed page does not reprint ...

Page 166: ...Cartridge 101 Tray x Empty 99 Tray x Low 99 Tray x Missing 99 Unplug and change mode 100 Unsupported USB device please remove 99 Unsupported USB hub please remove 100 Waiting 100 Waiting too many events 100 Waste Toner Box 100 Yellow Low 96 printer options troubleshooting drawers 137 flash memory card 137 memory card 138 multipurpose feeder 138 option not working 137 printer problems solving basic...

Page 167: ...40 clipped images 141 color misregistration 149 dark lines 141 gray background 141 light colored line white line or incorrectly colored line 142 poor transparency quality 148 print irregularities 143 print is too dark 144 print is too light 145 print quality test pages 139 repeating defects 146 skewed print 147 solid color pages 147 toner fog or background shading 147 toner rubs off 147 toner spec...

Page 168: ......

Page 169: ......

Page 170: ...Printed in USA G510 7276 00 ...

Reviews: