background image


IDpunch 7 Finger Reader User Guide  

for  

Attendance on Demand 


(Latest update: 

http://www.attendanceondemand.com/IDpunch7_fingerreader_userguide.pdf

 ) 

Summary of Contents for IDpunch 7

Page 1: ...IDpunch 7 Finger Reader User Guide for Attendance on Demand Latest update http www attendanceondemand com IDpunch7_fingerreader_userguide pdf ...

Page 2: ...Attendance on Demand is a registered trademark of Attendance on Demand Inc All other company and product names are registered trademarks or trademarks of their respective holders Information in this document is subject to change without notice ...

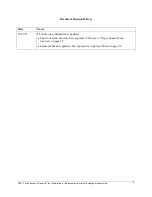
Page 3: ...ect to change without notice 3 Document Revision History Date Notes 10 27 11 The following information is updated The clock menu structure See Appendix A IDpunch 7 Finger Reader Menu Structure on page 18 Employee Menu is updated See Appendix D Employee Menu on page 32 ...

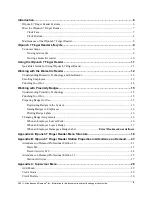
Page 4: ...13 Punching In or Out 14 Working with Proximity Badges 15 Understanding Proximity Technology 15 Punching In or Out 15 Preparing Badges for Use 15 Registering Badges in the System 15 Issuing Badges to Employees 16 Printing Badge Labels 16 Changing Badge Assignments 16 When an Employee Leaves Work 16 When an Employee Loses a Badge 17 When an Employee Damages a Badge Label Error Bookmark not defined ...

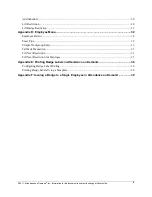
Page 5: ...mployee Menu 32 Employee Review 32 Enter Tips 32 Simple Workgroup Entry 32 Callback Transaction 33 Lift Next Restriction 33 Lift Next Restriction for Employee 33 Appendix E Printing Badge Labels in Attendance on Demand 36 Configuring Badge Label Printing 36 Printing Badge Labels Using a Template 38 Appendix F Issuing a Badge to a Single Employee in Attendance on Demand 39 ...

Page 6: ... card reader are supported Ease of use Once the IDpunch 7 Finger Reader is installed plugged into the power outlet and Ethernet port and configured it can communicate with the hosted system immediately Comprehensive function key operations Employees can review worked hours check benefits enter tips and so on See Appendix A IDpunch 7 Finger Reader Menu Structure on page 18 for details The superviso...

Page 7: ...ce halt a process or go back a menu Up Down arrows They are used to browse configuration menus in the time recorder switch between Yes and No in the menus and scroll down to view long messages on the screen OK It is used to indicate acceptance or move processes forward F1 to F4 function keys They are used to perform comprehensive employee functions or supervisor functions MENU Press MENU to access...

Page 8: ...thernet cord RS232 half duplex RS485 port It is not used Maintenance of the IDpunch 7 Finger Reader The IDpunch 7 Finger Reader works well in any temperature controlled environment The keypad and LCD screen should maintain their new appearance with proper use We recommend using a small amount of hexane or 90 alcohol on a piece of cotton to clean the LCD or keypad if necessary ...

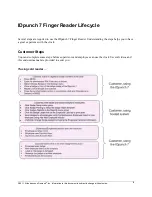
Page 9: ...ecycle Several steps are required to use the IDpunch 7 Finger Reader Understanding the steps helps you to have a great experience with the clock Customer Steps You must complete some steps before supervisors and employees can use the clock Several videos and this end user manual are provided to assist you If using card reader ...

Page 10: ...Press MENU Enter the administrator PIN if the menu is locked Select Employee Enrollment in the Enrollment Menu Place the finger firmly on the platen twice Press the synchronization button to synchronize the clock and the hosted system Supervisors Employees perform their own functions Employee punches In Out Employee uses Function Keys Supervisor uses Function Keys ...

Page 11: ...age 16 4 Employees punch In and Out as usual See Punching In or Out on page 15 to use badges to punch See Punching In or Out on page 14 to use fingers 5 Supervisors and employees use their own function keys to perform transactions For supervisor function keys see Appendix C Supervisor Menu on page 28 For employee function keys see Appendix D Employee Menu on page 32 6 Optional If the card reader i...

Page 12: ...t store or read finger prints It uses the physical characteristics of the finger to create a unique template to store and compare when an employee punches To ensure a smooth finger enrollment process consider the factors influencing finger enrollment and follow the rules listed here Finger selection Use index middle or ring fingers with good core points Avoid using thumb and little fingers since t...

Page 13: ...be enrolled at a time recorder those employees must have badge numbers and belong to a clock group that is assigned to the time clock Then employee finger enrollment can be performed at the time clock To enroll an employee you can use the time clock configuration menu or set up a function key for enrolling employees To enroll an employee using the time clock configuration menu 1 Press MENU on the ...

Page 14: ...o Identify is displayed with the score number 9 Once the enrollment is successful the employee badge number is displayed with the score number on the screen The score reflects how accurately your hand is placed on the platen and should average above 80 To enroll employee use the designated function key 1 Press the function key to access the Enrollment Menu Enroll Employee is highlighted 2 Press OK...

Page 15: ...er Reader screen If the badge read is not successful error messages are displayed such as Access Denied Customized messages can be displayed for different situations such as Double Punch or Not a member of this unit Make sure the employee is enrolled using the correct badge Preparing Badges for Use Before proximity badges are ready to use some preparation is required Scan the badges at the clock t...

Page 16: ...Use the Comprehensive Employee Import or the Simple Employee Import to import employees with their badge numbers in Attendance on Demand Issuing Badges to One Employee Use Add New Employee Wizard to issue a badge to a new employee when he she is added in Attendance on Demand Printing Badge Labels To print labels from Attendance on Demand see Appendix E Printing Badge Labels on page 36 Changing Bad...

Page 17: ...e software by clicking Release next to the Badge field on the Basic tab When an Employee Loses a Badge When an employee loses a badge a new badge number must be assigned in the employee Personal Information in Attendance on Demand See Appendix F Issuing a Badge to an Employee on page 39 When a Badge Label Becomes Damaged If a badge label becomes damaged see Appendix E Printing Badge Labels on page...

Page 18: ... Message Timeout o Editor Timeout o Communication Timeout o HTTP Timeout o Firmware o Application o By Badge o By Name o Number of Employees o Number of Transactions o AOD Locator o Query Round Trip o Full Sync o Communications o Timeouts o Biometric Type o Software Update o Revert to Factory Defaults o Device Info o View Employees o o o View Statistics o o o o Operations o Firmware Version o Appl...

Page 19: ...l Minute Tick Specify whether or not play the sound of a clock ticking every minute Press OK to confirm Press ESC to cancel Restrict Employees Displays the message Restrict employees not assigned to this clock Press the Up or Down arrows to choose from the following options Yes Employees not assigned to this clock cannot punch using this clock No Employees not assigned to this clock can punch usin...

Page 20: ... IP Gateway of the clock if static IP is used Each of four numbers separated by periods must be entered as 3 digit format For example the number 010 is entered to represent 10 Press OK to confirm Press ESC to cancel IP DNS Address Enter the DNS IP address of the clock if static IP is used Each of four numbers separated by periods must be entered as 3 digit format For example the number 010 is ente...

Page 21: ...ication version is selected the clock is updated and reboots The latest Application version is 1 38 Revert to Factory Defaults Returns the clock to original factory settings Device Type Displays the clock type for example zem500 S200 IP Configuration Displays the clock IP address Mask Gateway DNS and Mac address MCU Version Displays the Micro Controller Unit MCU version The latest MCU version is 2...

Page 22: ...adge Once a badge is enrolled the badge can be immediately used for punching After all badges are registered in the clock press ESC to exit the menu The clock performs synchronization automatically to upload badges to the system AoD Locator Displays the Attendance on Demand database URL Query Round Trip Displays the MSS2 database URL Full Sync Perform full synchronization operation to share employ...

Page 23: ...ance on Demand Professional Edition 1 0 on page 23 If you use Attendance on Demand Professional Edition 1 1 see Attendance on Demand Professional Edition 1 1 on page 25 Attendance on Demand Professional Edition 1 0 If you use Attendance on Demand Professional Edition 1 0 1 Click System Maintenance in the left hand menu 2 Click Time Clock Stations 3 Click the IDpunch 7 Finger Reader station See the...

Page 24: ... Offset is 21 the first synchronization is initiated at 21 minutes past the hour The Sync Offset balances the hosted system load preventing all synchronizations from occurring simultaneously Log Transactions When enabled each transaction is logged in the Station Activity Log Log Incorrect Value Rejections When enabled records when the time recorder rejects an attempt to assign an employee to an ID...

Page 25: ...o modify the following properties in the table Property Description Station Name A friendly name given to this station Station Type The type of station L Application v1 0 is selected for the IDpunch 7 Finger Reader Synchronization Interval The number of minutes between clock initiated synchronization operations The default value is 60 Synchronization Offset Determines when the synchronization oper...

Page 26: ...rds when the time recorder rejects an attempt to assign an employee to an IDpunch 7 Finger Reader station The Supervisor area This area presents a list of employees that have the authority to access the MENU items or function keys Using higher authority level helps control the access to MENU items or function keys There are five authority levels for the IDpunch 7 Finger Reader Authority Level Desc...

Page 27: ...tion Activities To view the communication activities between the IDpunch 7 Finger Reader and the hosted system 1 Click Station Logs in the left hand menu 2 Select IDpunch 7 Finger Reader station name from the Station drop down menu 3 Select options from the Activity drop down menu and Periods drop menu ...

Page 28: ...operation allows the supervisor to add a punch for an employee See Add Punch on page 29 for detailed process Credit Hours The Credit Hours operation allows the supervisor to credit hours for an employee See Credit Hours on page 29 for detailed process Credit Dollars The Credit Dollars operation allows the supervisor to credit dollars for an employee See Credit Dollars on page 30 for detailed proce...

Page 29: ...mployees who are punched IN are displayed Displays employee names badge numbers and the date and time of each employee s last punch Add Punch The following process describes how to add a punch for an employee Use the MENU key to navigate between OK Cancel and the edit field 1 Press OK to select the Add Punch operation 2 In the Badge Number prompt enter the badge number of the employee to which to ...

Page 30: ...ount that you can enter is 999 99 To correct the amount type numbers to represent the dollars and cents in order Press the synchronization button to erase the number and re enter it 6 In the Please Enter prompt enter the pay designation number Use pay designations with Dollars type Add Schedule The following process describes how to add a standard schedule for an employee Use the MENU key to navig...

Page 31: ...mes When an employee attempts to punch during a restricted period the transaction is denied The restriction can be lifted to allow the specified employee to punch in the following cases Employees who are not assigned to this clock Double punch The restriction class based restrictions The Lift Next Restriction for Employee operation removes any restriction for the specified badge The badge number m...

Page 32: ... time for the current week Pay Designations Displays pay designation summaries hours that defined on the Employee Review tab Benefit balances Displays benefit balances that defined on the Employee Review tab Enter Tips Supervisors can enter tips for an employee employees can also enter tips for themselves See the following process to enter tips 1 Press the function key to enter tips 2 In the Enter...

Page 33: ... assigned to this clock Double punch The restriction class based restrictions The Lift Next Restriction operation removes any restriction for the next badge or template initiated transaction See the following process to lift the next punch restriction 1 Press the function key to perform the Lift Next Restriction operation 2 The message The Specified restriction has been lifted followed by Complete...

Page 34: ...ction 6 The message Completed Thank You is displayed Several Days Leave Request Supervisors can perform a several days leave request for an employee employees can also request to take several days off 1 Press the function key to request several days off 2 At the Enter Badge ID prompt you can wave the employee s badge in front of the reader place the enrolled finger on the platen or type the employ...

Page 35: ...nization button to erase the number and re enter it Use the MENU key to navigate among OK Cancel and the edit field 3 A set of prompts are customized based on the configuration Read the prompt text and enter the information 4 The message The Specified restriction has been lifted followed by Completed Thank You is displayed Pass Through Operation Supervisors or employees can use the function key fo...

Page 36: ...mplate link to add a new badge report template or click Revert to Defaults link to use modify existing badge report template 3 See the following table to set up badge report templates The Option area defines global properties used to print badge labels Property Description Badge Numbering Format Determines how badge numbers are rendered on the badge label Standard up to 9 digits Badge number is re...

Page 37: ...s to adjust the position of the print on the Badge Label report In most cases use default values Property Description Badge Width inches The width in inches of an individual label Badge Height The height in inches of an individual label Left Offset The distance horizontally from the left margin of the page to the beginning of an individual label Top Offset The distance vertically from the top marg...

Page 38: ...loyee badge labels using the preferred Badge Label Template Printing Badge Labels Using a Template 1 Click System Reports in the Reports menu group 2 Click the Employee Lists tab 3 Click the Badge Labels link 4 Choose Employees 5 Type the number of labels to skip This allows you to skip previously printed labels starting from the top of the page It applies only for the first page if the report is ...

Page 39: ...registered badge to an employee in Attendance on Demand Note When new employees are added to the system using the Add New Employee wizard a registered badge is recommended for you if badges are allocated using the procedure on page 15 1 In the employee s Personal Information click the Basic tab The Badge and Clock Group fields affect the employee s ability to punch at the clock ...

Page 40: ...ssigned to the IDpunch 7 Finger Reader Click System Setup in the Operations menu group Click Time Clock Stations Click the name of the IDpunch 7 Finger Reader where the employee should punch Click the Clock Groups tab Make sure the employee s clock group is listed If not change the employee s clock group or add the employee s clock group to the Clock Groups tab 4 Force a synchronization operation ...

Reviews: