background image

Summary of Contents for GS445LEMS0

Page 1: ...Table of Contents 2 QQ Q IMPORTANT Save installation instructions for local electrical inspector s use 9760030 9760030 ...

Page 2: ...f others are very important We have provided many important safety messages in this manual and on your appliance Always read and obey all safety messages This is the safety alert symbol This symbol alerts you to potential hazards that can kill or hurt you and others Al safety messages will follow the safety alert symbol and either the word DANGER or WARNING These words mean You can be killed or se...

Page 3: ...ns ff you cannot reach your gas supplier call the fire department _nstaHation and service must be performed by a qualified installer service agency or the gas supplier In the State of Massachusetts the following installation instructions apply Installations and repairs must be performed by a qualified or licensed contractor plumber or gasfitter qualified or licensed by the State of Massachusetts I...

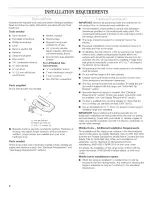
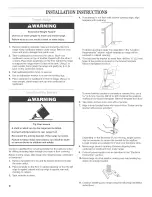
Page 4: ... surface units should be avoided If cabinet storage is to be provided the risk can be reduced by lnstaUlng a range hood that projects horizontally a minimum of 5 12 7 cm beyond the bottom of the cabinets All openings in the wall or floor where range is to be installed must be sealed Do not seal the range to the side cabinets Cabinet opening dimensions that are shown must be used Given dimensions a...

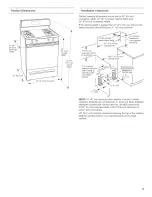
Page 5: ... beyond cabinet fronts by 1 2 13 mm minimum 18 45 7cm upper side cabinet For minimum 13 33 cm clearance to upper cabinet depth top of cooktop 30 76 2 cm min see NOTE _ opening width NOTE 24 61 cm minimum when bottom of wood or metal cabinet is protected by not Iess than 1 4 0 64 cm flame retardant millboard covered with not less than No 28 MSG sheet steel 0 015 0 4 mm stainless steel 0 024 0 6mm a...

Page 6: ... in doubt as to whether the metal chassis of the range is grounded Explosion Hazard Use a new AGA or CSA approved gas supply line Securely tighten aH gas connections If connected to LP have a qualified person make sure gas pressure does not exceed 14 36 cm water column Examples of a qualified person include licensed heating personnel authorized gas company personnel and authorized service personne...

Page 7: ...psi gauge 14 WCP The range and its individual manual shutoff valve must be disconnected from the gas supply piping system during any pressure testing of that system at test pressures greater than 1Apsi 3 5 kPa Line pressure testing at 1 2psi gauge 14 WCP or _ower The range must be isolated from the gas supply piping system by dosing its individual manual shutoff valve during any pressure testing o...

Page 8: ...ket if the range is moved ISaHure to follow these instructions can result in death or serious burns to children and adults Contact a qualified floor covering installer for the best procedure for drilling mounting holes through your type of floor covering Before moving range slide range onto shipping base cardboard or hardboard 1 Remove template from the anti tip bracket kit found inside the oven c...

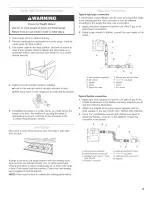
Page 9: ... anti tip bracket NOTE Oven must be level for satisfactory baking performance Typical rigid pipe connection A combination of pipe fittings must be used to connect the range to the existing gas line Your connections may be different according to the supply line type size and location 1 Apply pipe joint compound made for use with LP gas to all pipe thread connections 2 Using a pipe wrench to tighten...

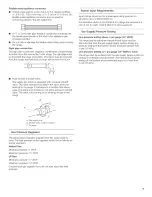
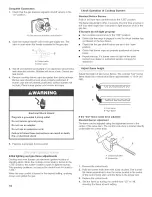
Page 10: ...ntact your dealer or authorized service company for assistance Adjust flame height Adiust the height of top burner flames The cooktop low burner flame should be a steady blue flame approximately 1 4 0 64 cm high E_ectrica_ Shock Hazard P_ug into a grounded 3 prong out_et Do not remove ground prong Do not use an adapter Do not use an extension cord Failure to follow these instructions can result in...

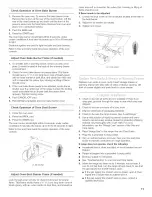
Page 11: ...ds under certain conditions it may take the burner up to 50 to 60 seconds to light Refer to Use and Care Guide for proper operation of the oven controls A Air shutter Adjust Oven Broil Burner Flame if needed Look through oven window to check broil burner for proper flame This flame should have a 1 2 1 3 cm Iong inner cone of bluish green with an outer mantle of dark blue and shouId be A Lock screw...

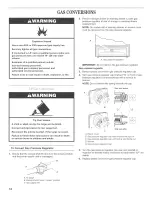
Page 12: ...gged Remove storage drawer or warming drawer Locate gas pressure regulator at rear of storage or warming drawer compartment NOTE On models with a warming drawer an access cover must be removed from the gas pressure regulator A A Gas pressure regulator IMPORTANT Do not remove the gas pressure regulatoK Gas pressure regulator 3 Remove plastic cover from gas pressure regulator cap 4 Turn gas pressure...

Page 13: ...spuds for each burner location 5 Place Natural gas orifice spuds in plastic parts bag for future use and keep with literature package 6 Replace the burner base using both screws 7 Replace burner cap 8 Repeat steps 1 7 for the remaining burners To Convert Oven Bake Burner 1 Remove oven racks 2 Use a 1 2 combination wrench to turn the orifice hood down snug onto pin about 2 to 21 2turns IMPORTANT Do...

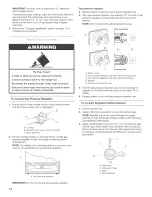
Page 14: ...e removed from the gas pressure regulator A Gas pressure regulator 3 Remove plastic cover from gas pressure regulator cap 4 Turn gas pressure regulator cap marked LP on front of gas pressure regulator counterclockwise with a wrench to remove NOTE Do not remove the spring beneath the cap Side view before E C Side view after A Plastic cover B Gas pressure regulator cap with hollow end facing out C G...

Page 15: ...e orifice hood away from the pin about 2 to 21Aturns The oven bake burner flame cannot be properly adjusted if this conversion is not made See Adiust Oven Bake Burner Flame section A Orifice hood B Pin C Natural gas increase gas increase flame size preset at factory for Natural gas D LP gas decrease gas decrease flame size To Convert Oven Broil Burner Use a 1 2 combination wrench to loosen the ori...

Page 16: ...9760030 2004 AH rights reserved 6 04 Printed in U SA ...

Reviews: