background image

Summary of Contents for IEP315RQ0

Page 1: ...Installation steps Check operation if range does not operate if you need assistance service Moving the range children and aduJts ww w wh M pool corn Read and save these IMPORTANT Installer Leave Installation hstructions with the homeowner Homeowner Keep installation instructions for future reference Read and save these instructions for local electrical inspector s use Write down the model and seri...

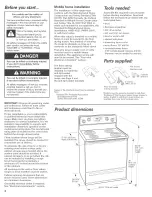
Page 2: ...st be used Given dimensions are minimum clearances Grounded electrical outlet is required See Electrical requirements section Mobile home installation The installation of this range must conform with the Manufactured Home Construction and Safety Standard Title 24 CFR Part 3280 formerly the Federal Standard for Mobile Home Construction and Safety Title 24 HUD Part 280 or when such standard is not a...

Page 3: ...s of range to side wall or other combustible material above the countertop NOTE 24 61 cm min t when bottom of wood or I metal cabinet is protected by not less than I 4 I 6 4 mm flame retardant millboard covered with not I less than No 28 MSG sheet I steel 0 015 0 4 ram stainless steel 0 024 I 0 6 mm aluminum or _ 0 020 0 6 ram copper _ 30 76 2 cm rain clearance _ between the top of the cooking pla...

Page 4: ...JectricaJ connection Remove the terminal block cover screws located on the back of range Puii cover down and towards you to remove cover from range Pull cover down and towards you to remove terminal block cover _2 mounting tabs each side hex head screws Remove storage drawer Use a 3 8 drive ratchet to lower rear leveling legs one half turn Use channel lock pliers to lower front leveling legs one h...

Page 5: ... nut driver and remove the hex washer head screws from the terminal blocks 10 Connect the neutral center wire to the center terminal connector using one of the hex washer head screws Securely tighten screw for proper electrical connection See Figure 2 11 Connect the other two wires lines 1 and 2 to the outer aluminum terminal blocks Securely tighten screws for proper electrical connection See Figu...

Page 6: ..._ Use this method only if local codes permit connecting ground conductor to neutral supply wire 7 Loosen do not remove the hex washer head screw and insert the neutral white wire under the screw damp at the bottom of the center position terminal connector insert the other two wires dines 1 and 2 under the other two screw clamps Securely tighten the hex washer head screws to 90 in Ibs minimum torqu...

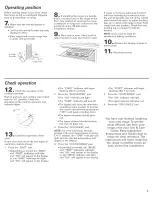
Page 7: ...of the two types of electronic controls shown Press the BAKE pad Depending on model the BAKE and TEMP indicators will light and 350 will appear in the display or the BAKE indicator will light and 350 will appear in the display 2_ _The START indicator will begin flashing after 5 seconds Press the START ENTER pa _The ON indicator will light _The TEMP indicator will turn off The display wiii show the...

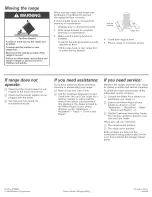
Page 8: ...r troubHeshooting Hist ff you need assistance If you have questions about operating cHeaning or maintaining your range _ Refer to Use and Care Guide _ Call the Customer nteraction Center Check your Use and Care Guide for a toHFfree number to call or call the deaHer from whom you purchased this appHiance The deaHer is isted in theYeHHow Pages of your phone directory under AppHiances HousehoHd Major...

Reviews: